消费级的DeepSeek-OCR本地部署实战来了!赶紧行动起来吧~
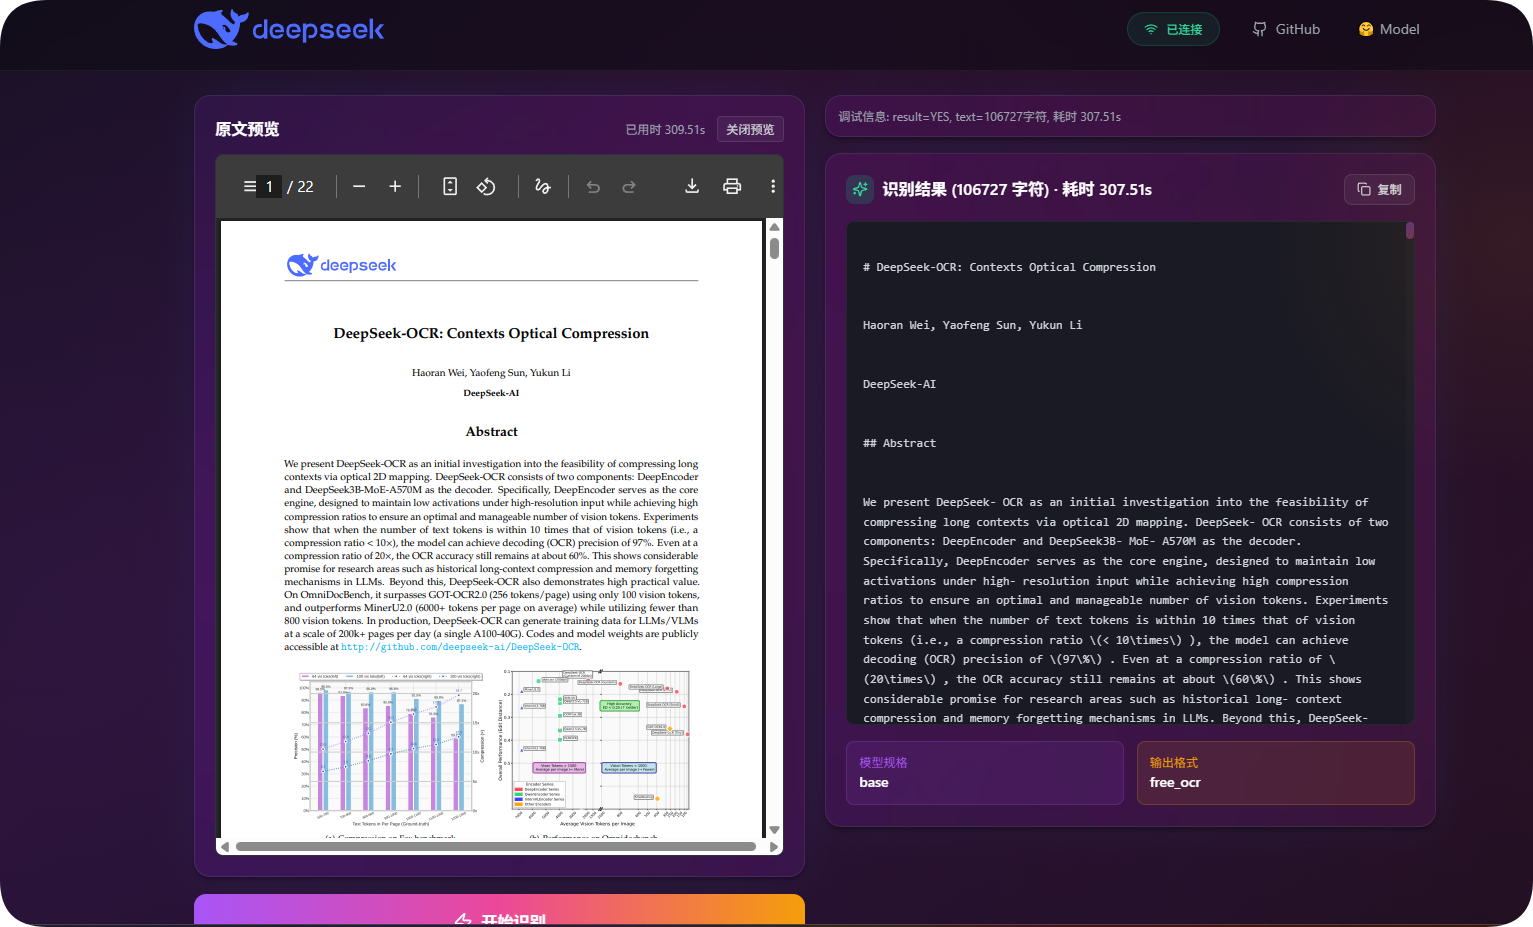
最近DeepSeek发布了DeepSeek-OCR开源模型,整个模型尺寸并不是很大,采用了新颖的压缩技术,将整个tokens数降到最低的同时,也保证了一定的准确率。
DeepSeek-OCR的核心创新部分,其发布的论文中都有提到。这里我也简单总结下,其主要内容就是通过视觉的方式来降低文本token的上下文长度。一般情况下一页文章,会包括成百上千的文字内容,如果每个都去标识,页数多了之后整体会超出模型的上下文限制,此时传统的模型就会进行切割,但这种切割会导致语义以及关联关系出现断档。为此,如果将文本用二维图像表示,从视觉的角度划分token,则就会减少token的数量。比如图像token就是标记图片中的主要内容,可能是一段话或者某个公式等等。基于这种局部的标识方法进行训练,DeepSeek-OCR整体效率是比较高的。
论文内容:在 OmniDocBench 上,它仅使用 100 个视觉标记就超越了 GOT-OCR2.0(每页 256 个标记),并且在使用不到 800 个视觉标记的情况下,优于 MinerU2.0(平均每页 6000+个标记)。 在生产中,DeepSeek-OCR 每天可以生成 200k+页面的训练数据用于 LLMs/VLMs(单个 A100-40G)
DeepSeek-OCR本地部署实战
一、DeepSeek-OCR本地部署
1. DeepSeek-OCR 安装指南
从整体来看,DeepSeek-OCR模型只有3B,正常只要有显存的电脑都可以进行本地部署推理,本人电脑RTX4060 8G显存就可正常推理,一页pdf几秒钟,速度还可以接受。
(1)环境要求
- CUDA 版本:
11.8及以上 - PyTorch 版本:
2.6.0
(2)克隆仓库并进入目录
git clone https://github.com/deepseek-ai/DeepSeek-OCR.git
cd DeepSeek-OCR
(3)创建并激活 Conda 环境
conda create -n deepseek-ocr python=3.12.9 -y
conda activate deepseek-ocr
(4)安装包
下载 download the vllm-0.8.5 whl,这个只是用于vllm加速推理的,没有windows对应的包,如果只是在windows跑的话,可以不装。
vllm地址为:https://github.com/vllm-project/vllm/releases
pip install torch==2.6.0 torchvision==0.21.0 torchaudio==2.6.0 --index-url https://download.pytorch.org/whl/cu118
pip install vllm-0.8.5+cu118-cp38-abi3-manylinux1_x86_64.whl
pip install -r requirements.txt
pip install flash-attn==2.7.3 --no-build-isolation
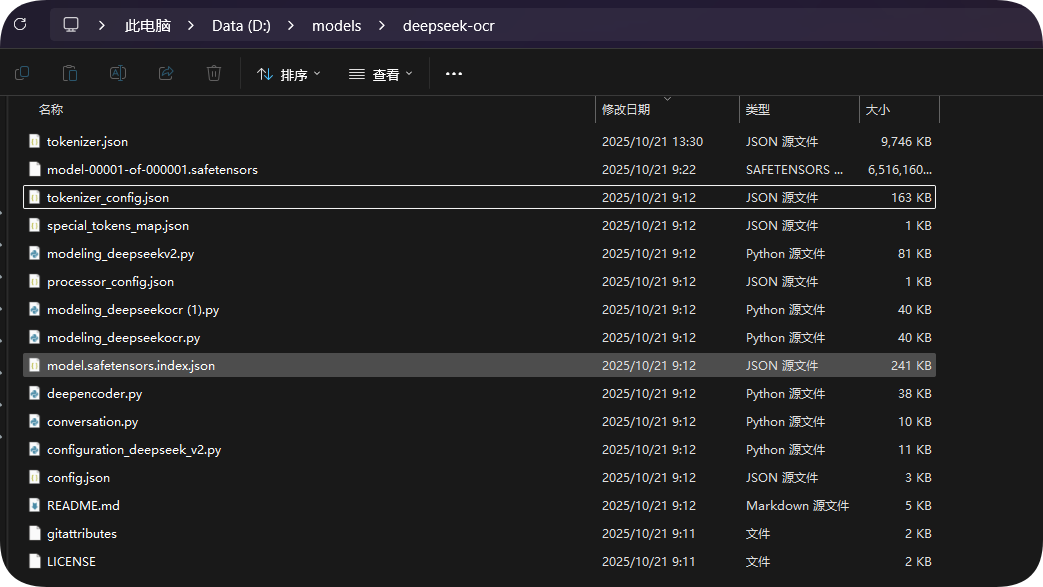
2. 模型下载
我们先要将模型下载到本地,然后直接在本地进行推理。
如果嫌麻烦,也可以在后续的Transformer推理时,直接进行下载。
Huggingface地址:https://huggingface.co/deepseek-ai/DeepSeek-OCR
ModelScope下载地址:https://modelscope.cn/models/deepseek-ai/DeepSeek-OCR
3. 使用Transformers-Inference 推理。
from transformers import AutoModel, AutoTokenizer
import torch
import os
os.environ["CUDA_VISIBLE_DEVICES"] = '0'
model_name = 'deepseek-ai/DeepSeek-OCR' //或者改成本地模型存放路径

tokenizer = AutoTokenizer.from_pretrained(model_name, trust_remote_code=True)
model = AutoModel.from_pretrained(model_name, _attn_implementation='flash_attention_2', trust_remote_code=True, use_safetensors=True)
model = model.eval().cuda().to(torch.bfloat16)

# prompt = "<image>\nFree OCR. "
prompt = "<image>\n<|grounding|>Convert the document to markdown. "
image_file = 'your_image.jpg'
output_path = 'your/output/dir'

res = model.infer(tokenizer, prompt=prompt, image_file=image_file, output_path = output_path, base_size = 1024, image_size = 640, crop_mode=True, save_results = True, test_compress = True)
3. 本章节难点
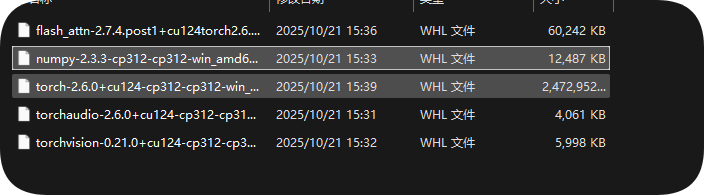
- flash-attn安装:该模型采用了flash-attn注意力机制,因此我们下载的时候,需要下载flash-atten的amd版本。https://github.com/kingbri1/flash-attention/releases
- torch安装:要根据自己电脑显卡看下CUDA版本,然后安装对应的torch、torchaudio、torchvision、numpy等。https://download.pytorch.org/whl/torch
4. 参考配置
- 本人CUDA版本
12.5,采用的pytorch的版本是2.6.0,python版本3.12使用的是以下包,单独进行安装的。
5. 运行效果
(1)测试是否cuda有用
我们可以在代码中加入一下内容,测试cuda是否可用。
print(torch.__version__)
print(torch.cuda.device_count())  # 显示可见 GPU 数量
print(torch.cuda.is_available())

# 输出:
2.6.0+cu124
1
True
(2)代码示例
from transformers import AutoModel, AutoTokenizer
import torch
import os

os.environ["CUDA_VISIBLE_DEVICES"] = '0'
print(torch.__version__)
print(torch.cuda.device_count())  # 显示可见 GPU 数量
print(torch.cuda.is_available())
model_name = 'D:\\models\\deepseek-ocr\\'  # 本地模型文件

tokenizer = AutoTokenizer.from_pretrained(model_name, trust_remote_code=True)
model = AutoModel.from_pretrained(model_name, _attn_implementation='flash_attention_2', trust_remote_code=True, use_safetensors=True)
model = model.eval().cuda().to(torch.bfloat16)

# prompt = "<image>\nFree OCR. "
prompt = "<image>\n<|grounding|>解析该图片内容. "
image_file = '本地需要识别的文件路径'
output_path = '模型输出内容的路径'

# infer(self, tokenizer, prompt='', image_file='', output_path = ' ', base_size = 1024, image_size = 640, crop_mode = True, test_compress = False, save_results = False):

# Tiny: base_size = 512, image_size = 512, crop_mode = False
# Small: base_size = 640, image_size = 640, crop_mode = False
# Base: base_size = 1024, image_size = 1024, crop_mode = False
# Large: base_size = 1280, image_size = 1280, crop_mode = False

# Gundam: base_size = 1024, image_size = 640, crop_mode = True

res = model.infer(tokenizer, prompt=prompt, image_file=image_file, output_path = output_path, base_size = 1024, image_size = 640, crop_mode=True, save_results = True, test_compress = True)
(3)结果验证
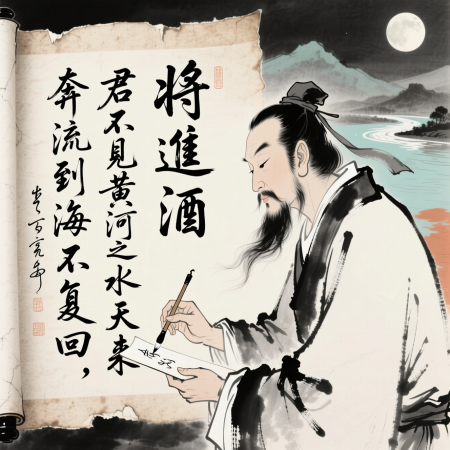
- 输入图片:
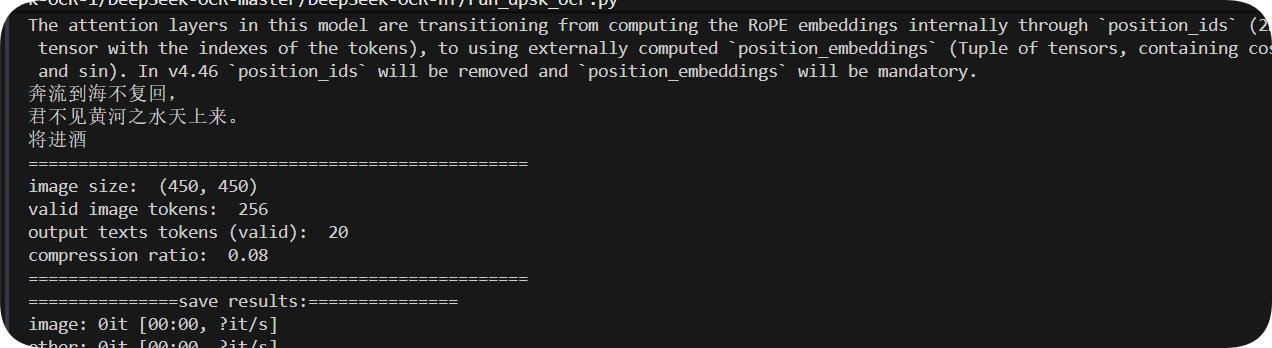
- 输入的内容是:
二、总结
整体来看DeepSeek-OCR的效果还是可以的,而且速度是蛮快。针对图片中的手写字体内容都可以识别出来,速度很快。
感兴趣的小伙伴赶紧去试一下吧~
后续我会将其加入到项目实战中,先做一下预告,感兴趣的小伙伴可以关注一下哦!!

AtomGit 是由开放原子开源基金会联合 CSDN 等生态伙伴共同推出的新一代开源与人工智能协作平台。平台坚持“开放、中立、公益”的理念,把代码托管、模型共享、数据集托管、智能体开发体验和算力服务整合在一起,为开发者提供从开发、训练到部署的一站式体验。
更多推荐


 35
35 0
0- 0


 已为社区贡献5条内容

所有评论(0)