在STM32上跑通TinyML,“能跑AI”成为嵌入式设备标配,记录在STM32或ESP32上部署轻量级模型的完整流程,从模型训练、量化到推理优化,给MCU开发者一份可复现的指南
目录
TinyML 赋能 MCU:STM32/ESP32 部署轻量级模型全流程
第一步:模型选择与训练 (Python with TensorFlow/Keras)
第三步:部署到 STM32 (TensorFlow Lite for Microcontrollers)
如果您喜欢此文章,请收藏、点赞、评论,谢谢,祝您快乐每一天。
下面开始在 STM32 或 ESP32 上部署轻量级模型的完整流程指南,让“能跑 AI”成为 MCU 开发者的标配!
我们将聚焦于 TinyML 的核心流程:模型训练 -> 量化 -> 部署 -> 推理优化,并以一个典型的 STM32F4xx 系列微控制器为例进行演示。ESP32 的流程也非常类似,只是在模型转换和硬件配置上会有所差异。
TinyML 赋能 MCU:STM32/ESP32 部署轻量级模型全流程
目标:将一个轻量级的机器学习模型(例如,用于简单的图像分类或传感器数据分析)部署到 STM32 微控制器上,实现边缘 AI 推理。
核心工具链:
- 模型训练:TensorFlow / Keras (Python)
- 模型转换/量化:TensorFlow Lite Converter / TensorFlow Lite for Microcontrollers (TFLite Micro)
- 推理引擎:TensorFlow Lite for Microcontrollers
- 目标平台 SDK:STM32CubeIDE (for STM32) / ESP-IDF (for ESP32)
- 开发板:STM32F4 Discovery / Nucleo 板,或 ESP32 开发板。
第一步:模型选择与训练 (Python with TensorFlow/Keras)
1. 选择合适的模型架构
- 核心原则:模型必须足够轻量级,能运行在 MCU 有限的内存(RAM, Flash)和计算资源上。
- 常见轻量级模型:
- 图像分类:MobileNetV1/V2/V3-Small, EfficientNet-Lite, ConvNeXt-Tiny。
- 传感器数据/时间序列:简单的 CNN,LSTM(需谨慎,计算量大),或者基于传统机器学习的模型(如 SVM, Random Forest,虽然通常不是用 TF/Keras 训练)。
- 关键词识别:Speech Commands Recognition 模型(通常是 CNN 结构)。
- 示例:我们选择一个非常简单的、用于 MNIST 手写数字识别的 CNN 模型作为演示。
2. 训练模型 (Python)
# train_model.py
import tensorflow as tf
from tensorflow import keras
from tensorflow.keras import layers
import numpy as np
# 1. 加载数据集 (例如 MNIST)
(x_train, y_train), (x_test, y_test) = keras.datasets.mnist.load_data()
# 2. 数据预处理
# 缩放到 [0, 1]
x_train = x_train.astype('float32') / 255.0
x_test = x_test.astype('float32') / 255.0
# 调整形状以匹配 CNN 输入 (28, 28, 1)
x_train = np.expand_dims(x_train, -1)
x_test = np.expand_dims(x_test, -1)
# One-hot 编码标签
y_train = keras.utils.to_categorical(y_train, num_classes=10)
y_test = keras.utils.to_categorical(y_test, num_classes=10)
# 3. 构建模型
# 使用一个非常简单的 CNN 结构,以便在 MCU 上运行
input_shape = (28, 28, 1)
num_classes = 10
model = keras.Sequential([
keras.Input(shape=input_shape),
layers.Conv2D(8, kernel_size=(3, 3), activation="relu"), # 减少卷积核数量
layers.MaxPooling2D(pool_size=(2, 2)),
layers.Conv2D(16, kernel_size=(3, 3), activation="relu"),
layers.MaxPooling2D(pool_size=(2, 2)),
layers.Flatten(),
layers.Dropout(0.5), # 适度 Dropout
layers.Dense(num_classes, activation="softmax"),
])
model.summary()
# 4. 编译模型
model.compile(loss="categorical_crossentropy", optimizer="adam", metrics=["accuracy"])
# 5. 训练模型
# 使用较少的 epoch,以便快速演示
history = model.fit(x_train, y_train, epochs=5, validation_split=0.1) # 减少 epoch
# 6. 评估模型
loss, accuracy = model.evaluate(x_test, y_test, verbose=0)
print(f"Test accuracy: {accuracy:.4f}")
# 7. 保存模型 (浮点模型)
model.save("mnist_cnn_float.h5")
第二步:模型量化 (Quantization)
目标:减小模型体积,加速推理,降低功耗。量化将浮点数参数转换为定点整数(通常是 8 位整数 int8)。
1. 使用 TensorFlow Lite Converter
# convert_quantize_model.py
import tensorflow as tf
import numpy as np
# 1. 加载训练好的浮点模型
try:
model_float = tf.keras.models.load_model("mnist_cnn_float.h5")
except Exception as e:
print(f"Error loading model: {e}. Make sure train_model.py has been run successfully.")
exit()
# 2. 定义量化参数
# 目标平台是 MCU,使用 int8 量化
# 需要一个代表性的数据集(或一部分)来校准量化参数
# 这里直接使用一部分训练数据作为代表性数据集(或者你可以加载预先准备好的量化校准数据集)
(x_train, _), (_, _) = tf.keras.datasets.mnist.load_data()
x_train = x_train.astype('float32') / 255.0
x_train = np.expand_dims(x_train, -1)
representative_data = x_train[0:100] # 使用前 100 个样本作为代表
# 3. 创建 TFLiteConverter
converter = tf.lite.TFLiteConverter.from_keras_model(model_float)
# 启用动态范围量化 (Post-training dynamic range quantization)
# 这种量化简单,不需要代表性数据集,但精度损失可能稍大
# converter.optimizations = [tf.lite.Optimize.DEFAULT]
# 启用整型量化 (Post-training integer quantization)
# 需要代表性数据集来校准,通常精度更高
converter.optimizations = [tf.lite.Optimize.DEFAULT]
converter.representative_dataset = lambda: representative_data # 必须是 generator function
converter.target_spec.supported_ops = [tf.lite.OpsSet.TFLITE_BUILTINS_INT8] # 指定目标操作为 int8
converter.inference_input_type = tf.int8 # 输入也量化为 int8
converter.inference_output_type = tf.int8 # 输出也量化为 int8
# 4. 转换模型
try:
tflite_quant_model = converter.convert()
except Exception as e:
print(f"Error during model conversion: {e}")
print("Check if TensorFlow Lite for Microcontrollers is installed correctly.")
exit()
# 5. 保存量化后的 TFLite 模型
with open("mnist_cnn_quant.tflite", "wb") as f:
f.write(tflite_quant_model)
print("Quantized TFLite model saved as mnist_cnn_quant.tflite")
# 6. (可选) 转换 Float 模型,用于对比
converter_float = tf.lite.TFLiteConverter.from_keras_model(model_float)
tflite_float_model = converter_float.convert()
with open("mnist_cnn_float.tflite", "wb") as f:
f.write(tflite_float_model)
print("Float TFLite model saved as mnist_cnn_float.tflite")
解释:
tf.lite.Optimize.DEFAULT:启用默认的优化,通常包括量化。converter.representative_dataset:这是整型量化的关键。它提供了一个函数,用于生成一小部分代表性的数据集,TFLite Converter 用它来确定量化参数(比例因子和零点)。converter.target_spec.supported_ops = [tf.lite.OpsSet.TFLITE_BUILTINS_INT8]:强制要求所有操作都使用 INT8 版本。inference_input_type/inference_output_type:指定模型的输入和输出都使用 INT8。
第三步:部署到 STM32 (TensorFlow Lite for Microcontrollers)
目标:将 .tflite 模型转换为 C 数组,并集成到 STM32CubeIDE 项目中,使用 TFLite Micro 运行推理。
1. 将 TFLite 模型转换为 C 数组
-
TFLite Micro 提供的工具:TensorFlow Lite for Microcontrollers 包含一个 Python 脚本
//tensorflow/lite/micro/tools/make/gen_array.py(如果你下载了 TensorFlow 源码),或者你可以使用xxd等工具。 -
使用
xxd(如果模型文件不大):
xxd -i mnist_cnn_quant.tflite > model_data.h
这会生成一个 model_data.h 文件,包含模型的 C 数组定义。
-
使用 TFLite Micro 的 Python 工具 (更推荐): 如果下载了 TensorFlow 源码,可以使用
gen_array.py:
# 假设你在 TensorFlow 源码目录下
python tensorflow/lite/micro/tools/make/gen_array.py \
--input_format=TFLITE \
--inference_type=INT8 \
--output_format=C \
--object_name=g_mnist_model \
--inference_type=QUANTIZED_UINT8 \ # 注意:TFLite Micro 常用 UINT8
--input_array_name=model_data \
--output_array_name=model_data \
--output_file=model_data.cc \
path/to/your/mnist_cnn_quant.tflite
-
注意:
inference_type在 TFLite Micro 中常常是QUANTIZED_UINT8,即使输入是int8。你需要根据 TFLite Micro 的工具和模型转换器的输出调整。gen_array.py的使用和参数可能因 TF 版本而异,请查阅官方文档。简便方法:很多 TFLite Micro 的示例项目会提供一个
model.cc或model.h文件,里面就是模型数组。你可以参考它的格式,用xxd生成后再手动修改成兼容的格式。
2. 创建 STM32CubeIDE 项目
- 新建项目:使用 STM32CubeIDE 创建一个基于你开发板(如 STM32F4 Discovery)的 HAL 库项目。
- 添加 TFLite Micro 源码:
- 从 TensorFlow 官方仓库克隆或下载
tensorflow/lite/micro目录下的代码。 - 将
tensorflow/lite/micro目录下的必要文件(如kernels/kernel_api.cc,kernels/conv.cc,kernels/pooling.cc,kernels/activations.cc,schema/schema_generated.h,flatbuffer_utils.cc等)以及你量化后的模型文件(model_data.h或model_data.cc)复制到你的 STM32CubeIDE 项目的Core/Inc和Core/Src目录下。 - 注意:不是所有 TFLite 操作都在 TFLite Micro 中实现。你需要根据你的模型,只包含必要的 kernels。通常,示例项目会提供一个
kernels_list.mk文件来指定需要编译的 kernels。
- 从 TensorFlow 官方仓库克隆或下载
- 配置 build system:
- 在 CubeIDE 中,右键点击项目 ->
Build Settings。 - 在
Tool Settings->MCU GCC Compiler->Include paths中,添加tensorflow/lite/micro及其子目录的路径。 - 在
Tool Settings->MCU GCC Linker->Libraries中,添加所有 TFLite Micro 的.c和.cc文件,或者使用 Makefile 进行更精细的控制。
- 在 CubeIDE 中,右键点击项目 ->
- 编写主程序 (
main.c)
// main.c (STM32F4xx HAL CubeIDE Project)
#include "main.h"
#include "tensorflow/lite/micro/all_ops_resolver.h" // 包含所有操作
#include "tensorflow/lite/micro/micro_error_reporter.h"
#include "tensorflow/lite/micro/micro_interpreter.h"
#include "tensorflow/lite/micro/system_setup.h"
#include "tensorflow/lite/schema/schema_generated.h" // TFLite schema
// --- 模型文件 ---
// 假设你已经用 xxd 或 gen_array.py 生成了 model_data.h/.cc
// #include "model_data.h" // 如果是 .h 文件
#include "model_data.cc" // 如果是 .cc 文件,并已添加到编译列表
// --- 宏定义 ---
#define NUM_CLASSES 10
#define INPUT_WIDTH 28
#define INPUT_HEIGHT 28
#define INPUT_CHANNELS 1
// --- 全局变量 ---
tflite::MicroErrorReporter micro_error_reporter; // 错误报告器
tflite::MicroInterpreter *interpreter = nullptr; // 推理器
TfLiteTensor *input_tensor = nullptr;
TfLiteTensor *output_tensor = nullptr;
// --- 内存分配 ---
// 估算模型大小和激活内存需求。
// 准确的内存需求需要根据模型的复杂度和 TFLite Micro 的估算工具来确定。
// 对于较大的模型,可能需要动态分配或使用外部 SRAM。
// 这里使用静态分配,假设模型和激活值总共需要 20KB 左右 (需要根据实际模型调整)
constexpr int kTensorArenaSize = 20 * 1024; // 20 KB - 需要根据模型大小精确估算!
uint8_t tensor_arena[kTensorArenaSize];
// --- 函数声明 ---
void setup_board(void);
void setup_tflite(void);
void run_inference(void);
void process_output(void);
// --- 主函数 ---
int main(void) {
setup_board(); // 初始化 GPIO, Clock 等
// 初始化 TFLite Micro
setup_tflite();
// 运行推理 (例如,使用模拟数据或从传感器读取)
run_inference();
// 处理推理结果
process_output();
while (1) {
// 循环或进入低功耗模式
}
}
// --- 初始化 ---
void setup_board(void) {
HAL_Init();
SystemClock_Config(); // 配置系统时钟
// ... 其他板级初始化,如串口用于日志输出, ADC 用于传感器读取等
MX_GPIO_Init();
MX_USART2_UART_Init(); // 假设使用 USART2 作为串口输出
// ...
printf("Board initialized.\n");
}
void setup_tflite(void) {
// 1. 初始化错误报告器
if (micro_error_reporter.Init() != kTfLiteOk) {
printf("Error initializing micro_error_reporter\n");
return;
}
printf("Error reporter initialized.\n");
// 2. 注册所有 TensorFlow Lite for Microcontrollers 操作
// 如果模型大小受限,可以考虑使用 MicroMutableOpResolver,并手动添加所需操作
tflite::MicroMutableOpResolver resolver;
// 添加模型所需的 Kernels
// 示例:对于 Conv2D, MaxPooling2D, Flatten, Dense, Softmax
resolver.AddConv2D();
resolver.AddMaxPool2D();
resolver.AddFlatten();
resolver.AddFullyConnected(); // Dense layer in Keras is FullyConnected
resolver.AddSoftmax();
// 3. 加载模型
// model_data 是一个 const unsigned char* 指针,指向你的模型数组
const tflite::Model* model = tflite::GetModel(model_data);
if (model->version() != TFLITE_SCHEMA_VERSION) {
micro_error_reporter.Report("Model provided is schema version %d not supported with signature version %d.",
model->version(), TFLITE_SCHEMA_VERSION);
return;
}
printf("Model loaded.\n");
// 4. 申请 Tensor Arena
// 确保 kTensorArenaSize 足够大!
if (kTfLiteOk != tflite::InitializeInterpreter(&model, &resolver, tensor_arena, kTensorArenaSize, &interpreter, µ_error_reporter)) {
micro_error_reporter.Report("Failed to initialize interpreter.");
return;
}
printf("Interpreter initialized. Tensor arena size: %d KB\n", kTensorArenaSize / 1024);
// 5. 分配输入和输出张量
input_tensor = interpreter->input(0);
output_tensor = interpreter->output(0);
// 6. 校验模型维度 (可选但推荐)
if (input_tensor->dims->size != 4 || input_tensor->dims->data[0] != 1 || input_tensor->dims->data[1] != INPUT_HEIGHT || input_tensor->dims->data[2] != INPUT_WIDTH || input_tensor->dims->data[3] != INPUT_CHANNELS) {
micro_error_reporter.Report("Input tensor has wrong dimensions. Expected [%d, %d, %d, %d]", 1, INPUT_HEIGHT, INPUT_WIDTH, INPUT_CHANNELS);
return;
}
if (output_tensor->dims->size != 2 || output_tensor->dims->data[0] != 1 || output_tensor->dims->data[1] != NUM_CLASSES) {
micro_error_reporter.Report("Output tensor has wrong dimensions. Expected [%d, %d]", 1, NUM_CLASSES);
return;
}
printf("Input/Output tensors allocated and validated.\n");
// 7. 准备(热身)模型 - 首次运行以初始化
if (interpreter->Invoke() != kTfLiteOk) {
micro_error_reporter.Report("Invoke initial setup failed.");
return;
}
printf("TFLite interpreter setup complete.\n");
}
// --- 推理 ---
void run_inference(void) {
// 这是一个示例,模拟输入数据 (例如,读取传感器数据或模拟 MNIST 图像)
// 实际应用中,你需要从传感器或数据源获取输入
// TFLite Micro int8 模型,输入是 int8 类型
// 这里的输入数据需要根据你的量化设置进行匹配
// 如果是 UINT8 量化,输入也应该是 UINT8
// 假设我们量化成了 INT8,输入范围是 [-128, 127] 或 [-127, 127],需要根据模型量化参数调整
// MNIST 浮点输入是 [0, 1],量化后范围可能 [-127, 127] 或 [-128, 127]
// 这是一个简化的 placeholder,实际值需要从数据集中获取或生成
// 假设输入是 [0, 255] 的 uint8,TFLite converter 会将其映射到 int8 范围
// 需要根据你的量化过程确定输入数据的实际类型和范围
// 示例:使用一个占位符(实际应用需要从外部输入)
uint8_t dummy_input_data[INPUT_HEIGHT * INPUT_WIDTH * INPUT_CHANNELS] = {0}; // Placeholder for uint8 input
// 如果输入是 int8,需要根据量化参数进行转换
// 这里简化处理,假设输入是 uint8 [0,255],TFLite Micro 会在量化时处理
// 但更准确的做法是根据量化参数 (scale, zero_point) 进行转换
// 示例:填充一些随机数据 (如果需要从真实数据源读取,这里需要替换)
for (int i = 0; i < INPUT_HEIGHT * INPUT_WIDTH * INPUT_CHANNELS; ++i) {
// dummy_input_data[i] = (uint8_t)(rand() % 256); // Random uint8
// 更好的做法是模拟 MNIST 数据
dummy_input_data[i] = 0; // Placeholder
}
// !!! 重要的量化输入转换 !!!
// 如果你的模型量化到 INT8,并且输入范围是 [-127, 127] 左右
// 你需要根据模型转换时得到的 scale 和 zero_point 来转换你的原始数据(例如 uint8 [0, 255])
// 转换公式: quantized_value = round(float_value / scale) + zero_point
// 对于 int8 模型,float_value 可能是 (pixel_value / 255.0) * 127.0f - 127.0f (取决于模型训练时的缩放)
// 这里的示例非常简化,实际应用需要精确的量化参数和转换逻辑。
// 假设模型需要 uint8 输入,TFLite Micro 会处理量化
for (int i = 0; i < INPUT_HEIGHT * INPUT_WIDTH * INPUT_CHANNELS; ++i) {
// 填充一些值,例如模拟一个数字 '5' 的样子(简化)
// 实际需要加载一个 MNIST 图像的 pixel data
dummy_input_data[i] = 50; // Placeholder value
}
// 拷贝输入数据到输入张量
// input_tensor->data.uint8 是对于 UINT8 量化模型的指针
// input_tensor->data.int8 是对于 INT8 量化模型的指针
// 确保类型匹配
if (input_tensor->type == kTfLiteUInt8) {
memcpy(input_tensor->data.uint8, dummy_input_data, sizeof(dummy_input_data));
printf("Copied uint8 input data.\n");
} else if (input_tensor->type == kTfLiteInt8) {
// !!! 需要根据 scale 和 zero_point 进行转换 !!!
// 这是一个非常简化的示例,实际情况可能更复杂
int8_t quantized_input[INPUT_HEIGHT * INPUT_WIDTH * INPUT_CHANNELS];
// 假设 scale=1.0, zero_point=0 for simplicity in this placeholder
// In reality, you need to get scale and zero_point from input_tensor->params
// Example: float scale = input_tensor->params.scale; int32_t zero_point = input_tensor->params.zero_point;
for (int i = 0; i < sizeof(dummy_input_data); ++i) {
// quantized_input[i] = (int8_t)(dummy_input_data[i] - zero_point); // Simplified conversion
quantized_input[i] = dummy_input_data[i]; // Placeholder, assume uint8 directly maps to some int8 range if converter handled it
}
memcpy(input_tensor->data.int8, quantized_input, sizeof(quantized_input));
printf("Copied int8 input data (simplified).\n");
} else {
micro_error_reporter.Report("Unsupported input tensor type.");
return;
}
// 执行推理
if (interpreter->Invoke() != kTfLiteOk) {
micro_error_reporter.Report("Invoke interpreter failed.");
return;
}
printf("Inference completed.\n");
}
// --- 处理输出 ---
void process_output(void) {
// output_tensor->data.int8 or uint8
// 同样需要根据量化参数获取实际的概率值
printf("Model output (raw values):\n");
if (output_tensor->type == kTfLiteUInt8) {
for (int i = 0; i < NUM_CLASSES; ++i) {
// !!! 需要根据 scale 和 zero_point 反量化 !!!
// float probability = (float)(output_tensor->data.uint8[i] - output_tensor->params.zero_point) * output_tensor->params.scale;
// printf(" Class %d: %.4f\n", i, probability);
printf(" Raw output[%d]: %d\n", i, output_tensor->data.uint8[i]);
}
} else if (output_tensor->type == kTfLiteInt8) {
for (int i = 0; i < NUM_CLASSES; ++i) {
// !!! 需要根据 scale 和 zero_point 反量化 !!!
// float probability = (float)(output_tensor->data.int8[i] - output_tensor->params.zero_point) * output_tensor->params.scale;
// printf(" Class %d: %.4f\n", i, probability);
printf(" Raw output[%d]: %d\n", i, output_tensor->data.int8[i]);
}
} else {
printf("Unsupported output tensor type.\n");
}
// 找到概率最高的类别
int max_index = 0;
int8_t max_value = output_tensor->data.int8[0]; // 假设 int8
for (int i = 1; i < NUM_CLASSES; ++i) {
if (output_tensor->data.int8[i] > max_value) {
max_value = output_tensor->data.int8[i];
max_index = i;
}
}
printf("\nPredicted class: %d (Raw value: %d)\n", max_index, max_value);
// !!! 实际应用中,你需要根据量化参数反量化后,再找到概率最高的类别 !!!
printf("-> Note: Raw output values need dequantization for actual probabilities.\n");
}
// --- 其他函数 (SystemClock_Config, MX_GPIO_Init, MX_USART2_UART_Init, etc.) ---
// 这些需要根据你的 STM32CubeIDE 项目生成
ESP32 部署注意事项:
- SDK:使用 ESP-IDF。
- TFLite Micro 集成:ESP-IDF 通常提供了 TFLite Micro 的组件,你只需要在
sdkconfig中启用它。 - 内存管理:ESP32 的 RAM 相较于 STM32F4 可能更有限,对
tensor_arena的大小需求需要更精确的评估。 - Flash 存储模型:模型文件通常可以烧录到 Flash 的某个分区。
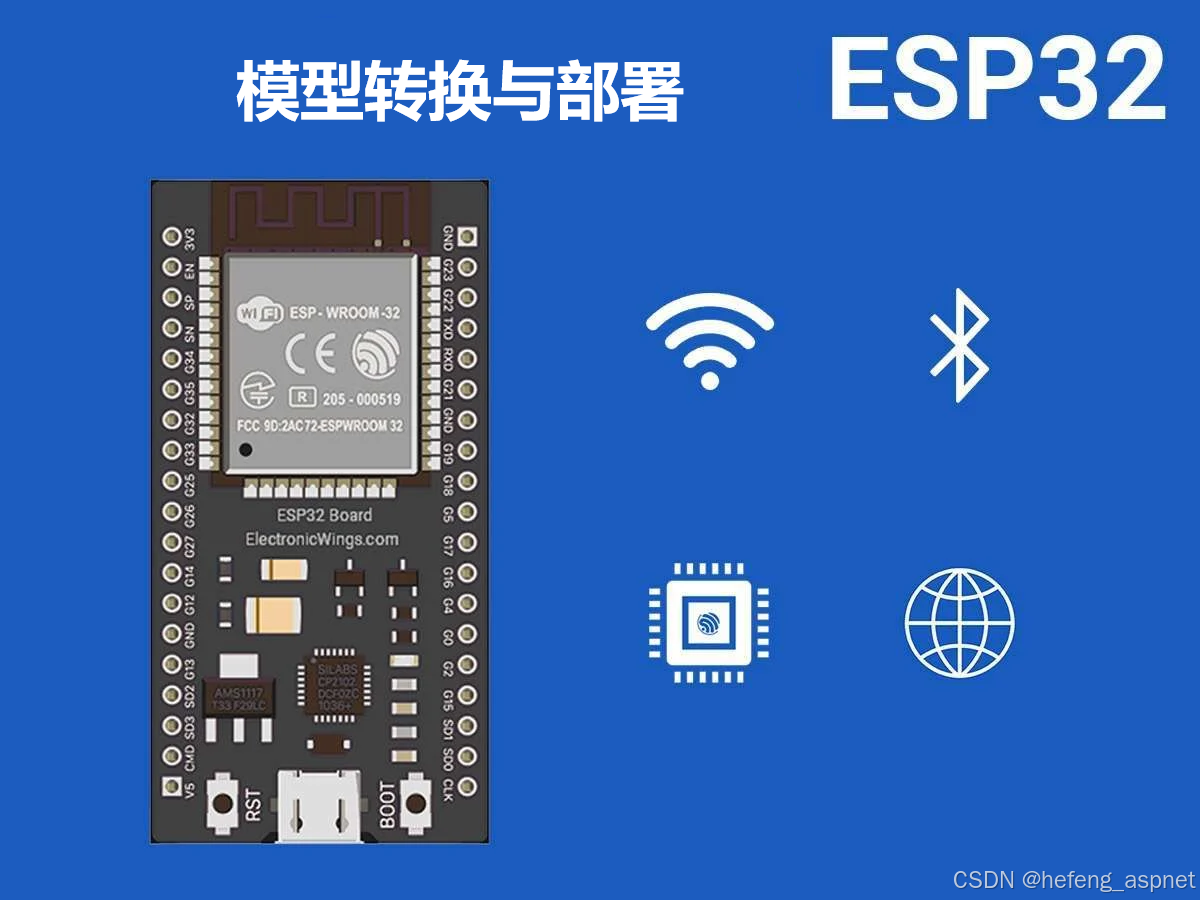
第四步:模型转换与部署(ESP32 示例)
ESP32 部署流程非常相似,主要区别在于 TFLite Micro 的集成方式。
- 创建 ESP-IDF 项目:使用
idf.py create-project my_esp32_tflite_project。 - 启用 TFLite Micro 组件:
- 在项目根目录下运行
idf.py menuconfig。 - 进入
Component config->TensorFlow Lite for Microcontrollers,启用它。 - 根据需要配置
TFLite Micro的选项,例如内存分配等。
- 在项目根目录下运行
- 添加模型文件:
- 将
.tflite模型文件(或通过gen_array.py生成的 C 数组文件)放在项目的components/tensorflow/models/目录下,或者项目根目录下的main/文件夹。 - 在
main/main.c(或其他源文件) 中包含模型头文件。
- 将
- 编写
main.c:代码结构与 STM32 类似,但会使用 ESP-IDF 的 API 进行外设初始化(如 Wi-Fi, SPI, I2C, UART)和串口输出 (ESP_LOGI,printf)。
第五步:推理优化与踩坑记录
1. Tensor Arena 大小优化
- 问题:
tensor_arena太小,模型无法加载或推理失败。tensor_arena太大,浪费 Flash/RAM 资源。 - 解决方案:
- TFLite Micro 估算工具:TensorFlow 官方提供了一些工具(如
size_t_arena_estimator.py)来估算模型所需的tensor_arena大小。 - 动态分析:在开发板上运行,根据错误信息(如
Arena allocation error)逐步增大kTensorArenaSize,直到模型能成功加载和推理。 - 查看模型结构:了解模型有多少层,每层的输出张量大小,从而手动估算。
- TFLite Micro 估算工具:TensorFlow 官方提供了一些工具(如
2. Kernel 优化与选择
- 问题:并非所有 TFLite 操作都默认在 TFLite Micro 中实现。有些操作(如复杂的激活函数、某些卷积变体)可能需要额外添加或自定义。
- 解决方案:
MicroMutableOpResolver:比MicroAllOpsResolver更节省内存。只添加模型实际使用的 Kernels。- 查找已支持的 Kernels:查看
tensorflow/lite/micro/kernels/目录下的实现。 - 自定义 Kernels:对于非常规操作,可能需要自己实现。
3. 数据输入/输出的量化/反量化
- 问题:模型输入/输出是量化的(
int8或uint8),但原始数据是浮点数或uint8。直接拷贝数据可能导致推理错误。 - 解决方案:
- 理解量化参数:在模型转换时,TFLite Converter 会为每个量化张量生成
scale和zero_point。quantized_value = round(float_value / scale) + zero_pointfloat_value = (quantized_value - zero_point) * scale
- 精确转换:在将输入数据喂给模型前,根据
input_tensor->params中的scale和zero_point进行精确转换。 - 反量化输出:在读取模型输出后,同样使用
output_tensor->params进行反量化,得到实际的概率值。 - STM32/ESP32 上的定点运算:MCU 上的计算通常是基于整数的。在 C 代码中实现量化转换时,要特别注意数据类型溢出和精度损失。
- 理解量化参数:在模型转换时,TFLite Converter 会为每个量化张量生成
4. 内存(Flash & RAM)限制
- 问题:MCU 的 Flash 用于存储代码和模型,RAM 用于存储激活值和运行时数据。模型过大或激活值过多,会导致内存溢出。
- 解决方案:
- 模型量化:最直接有效的方法。
- 模型剪枝/压缩:训练时使用剪枝技术,移除冗余权重。
- 选择更小的模型架构:如 MobileNetV3-Small。
- 优化
tensor_arena:精确估算大小,避免浪费。 - 使用外部 SRAM:对于内存非常有限的 MCU,可以考虑外接 SRAM chip。
- 更小的 TFLite Micro Kernels:如果可能,配置 TFLite Micro 仅编译使用的 kernels。
5. 推理速度优化
- 问题:模型推理速度慢,无法满足实时性要求。
- 解决方案:
- 量化:INT8 推理通常比浮点推理快得多,尤其是在支持 SIMD 指令的 MCU 上。
- 硬件加速:
- STM32H7/H5/L5/G0/G4 系列:可能集成有 DSP 指令集或 CMSIS-NN 库,TFLite Micro 可以利用这些库来加速卷积、激活等运算。
- ESP32:ESP32 的 DSP 协处理器(Xtensa LX6/LX7)可以加速某些计算。
- 算法优化:使用更高效的模型架构。
- 优化 TFLite Micro Kernels:如果可能,自己针对特定 MCU 架构优化 Kernels。
可复现指南要点总结
- 模型选择:务必选择轻量级、为嵌入式设计的模型。
- 数据准备:高质量的训练数据是模型性能的基础。
- 量化:量化是 MCU 部署的关键步骤,至少使用
INT8量化。理解量化参数 (scale,zero_point) 至关重要。 - TFLite Converter:正确配置 Converter,指定
representative_dataset和target_spec。 - TFLite Micro 集成:
- STM32:通过 CubeIDE 或 Makefile 引入 TFLite Micro 源码和模型文件,正确配置编译选项。
- ESP32:在 ESP-IDF 中启用 TFLite Micro 组件。
- 内存管理:精确估算
tensor_arena大小,并根据模型和 MCU 内存情况调整。 - 数据输入/输出:在 C 代码中正确实现量化/反量化逻辑。
- 调试:利用串口输出、IDE 调试器、以及 TFLite Micro 的错误报告器来定位问题。
- 测试:在目标硬件上进行充分的推理速度、准确率和功耗测试。
通过遵循这个流程,并针对具体模型和硬件进行细致的调整,开发者可以在 STM32 和 ESP32 等 MCU 上成功部署轻量级 AI 模型,为嵌入式设备带来智能化的新可能。
如果您喜欢此文章,请收藏、点赞、评论,谢谢,祝您快乐每一天。

AtomGit 是由开放原子开源基金会联合 CSDN 等生态伙伴共同推出的新一代开源与人工智能协作平台。平台坚持“开放、中立、公益”的理念,把代码托管、模型共享、数据集托管、智能体开发体验和算力服务整合在一起,为开发者提供从开发、训练到部署的一站式体验。
更多推荐



 8
8 0
0- 0


 已为社区贡献26条内容

所有评论(0)