吾爱破解安卓逆向入门教程学习
00x1 so加载流程
参考
https://pan.baidu.com/s/1z5VmZ5Pz2tp_KzNNvn7aJw?pwd=52pj
https://www.52pojie.cn/thread-1809646-1-1.html
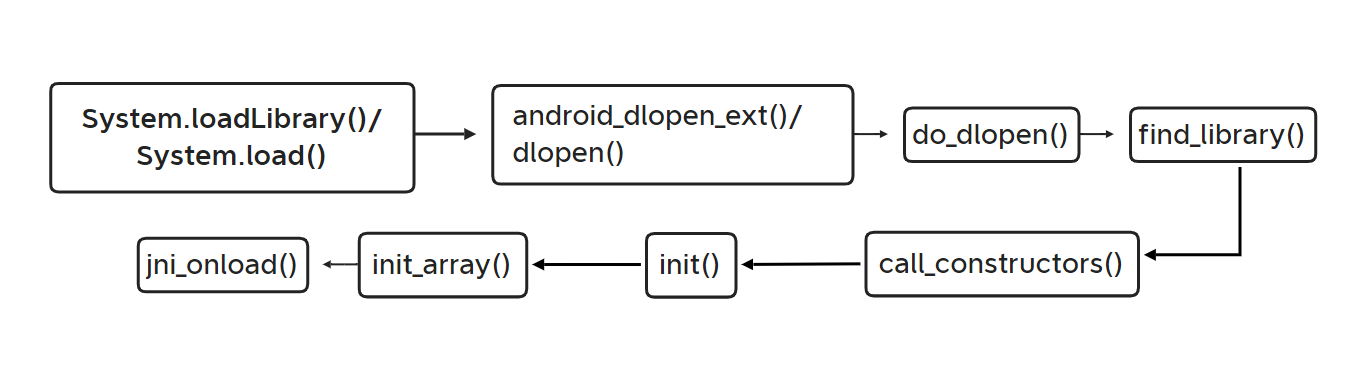
    static {
//这里是入口,加载so文件
        System.loadLibrary("ndkdamo");
    }
| 函数名 | 描述 |
|---|---|
android_dlopen_ext() 、dlopen()、do_dlopen() |
这三个函数主要用于加载库文件。android_dlopen_ext 是系统的一个函数,用于在运行时动态加载共享库。与标准的 dlopen() 函数相比,android_dlopen_ext 提供了更多的参数选项和扩展功能,例如支持命名空间、符号版本等特性。 |
find_library() |
find_library() 函数用于查找库,基本的用途是给定一个库的名字,然后查找并返回这个库的路径。 |
call_constructors() |
call_constructors() 是用于调用动态加载库中的构造函数的函数。 |
init |
库的构造函数,用于初始化库中的静态变量或执行其他需要在库被加载时完成的任务。如果没有定义init函数,系统将不会执行任何动作。需要注意的是,init函数不应该有任何参数,并且也没有返回值。 |
init_array |
init_array是ELF(Executable and Linkable Format,可执行和可链接格式)二进制格式中的一个特殊段(section),这个段包含了一些函数的指针,这些函数将在main()函数执行前被调用,用于初始化静态局部变量和全局变量。 |
jni_onload |
这是Android JNI(Java Native Interface)中的一个函数。当一个native库被系统加载时,该函数会被自动调用。JNI_OnLoad可以做一些初始化工作,例如注册你的native方法或者初始化一些数据结构。如果你的native库没有定义这个函数,那么JNI会使用默认的行为。JNI_OnLoad的返回值应该是需要的JNI版本,一般返回JNI_VERSION_1_6。 |
dlopen()
dlopen()是一个计算机函数,功能是以指定模式打开指定的动态链接库文件,并返回一个句柄给dlsym()的调用进程。使用dlclose()来卸载打开的库。主要用于加载库文件。
· System.loadLibrary 是 Java 层提供的方法,用于加载 JNI 动态库(.so 文件)。
· dlopen() 是 Linux/Android 系统底层的 C 函数,真正负责把 .so 文件映射到进程地址空间、解析符号等。
System.loadLibrary 内部最终会调用 dlopen()(通过 ART/Dalvik 虚拟机的 native 代码)。也就是说,Java 层的 loadLibrary 只是一个封装,让开发者不用直接调用 dlopen。
· System.loadLibrary:Java 层的“加载”接口。
· dlopen():系统层的“加载”实现(它会完成打开文件、映射内存、解析符号等工作)。
下断点时机:
应用级别的:java_com_XXX;
外壳级别的:JNI_Onload,.init,.init_array(反调试);
系统级别的:fopen,fget,dvmdexfileopen(脱壳);
00x2 ida 动态调试
参考
使用IDA Pro动态调试Android APP-CSDN博客
android_server 是 IDA Pro 在 Android 设备上运行的一个调试服务器。
通过在 Android 设备上运行android_server,IDA Pro 可以远程调试 Android 应用程序,并实现断点设置、内存查看、寄存器检查等功能。
IDA Pro 通过 adb(Android Debug Bridge)将调试命令发送给 android_server,然后 android_server 在 Android 设备上执行这些命令,并将结果返回给 IDA Pro。
说白了他就是一个代理。
底下这么多是不同的操作系统和CPU架构。
文件名 目标平台 CPU 架构 适用场景(何时拖过去)
android_server Android ARM 32位 调试 32位 Android 原生进程(.so 是 32 位的)
android_server64 Android ARM 64位 (AArch64) 调试 64位 Android 原生进程(最常见,如现代手机/模拟器的 64 位 App)
android_x64_server Android x86_64 (64位) 调试运行在 x86_64 架构的 Android 模拟器(如 Android Studio 创建的 x86_64 模拟器)上的 64 位进程
android_x86_server Android x86 (32位) 调试 x86 架构的 Android 模拟器(较老的模拟器或某些 x86 平板)上的 32 位进程
armlinux_server Linux on ARM ARM 32位 调试运行在 ARM 架构 Linux 设备(如树莓派、某些 NAS、嵌入式 Linux)上的 32 位程序
linux_server Linux x86 32位 调试 32位 Linux 程序(运行在 x86 电脑或虚拟机上的 Linux)
linux_server64 Linux x86_64 调试 64位 Linux 程序(最常见的 Linux 服务器/桌面环境)
mac_server macOS Intel x86 32/64位(旧版) 调试旧版 macOS 上的程序(一般用下面的 mac_server64 或 mac_server_arm64 代替)
mac_server_arm64 macOS Apple Silicon (M1/M2) ARM64 调试运行在 M1/M2 Mac 上的原生程序
mac_server64 macOS Intel x86_64 调试 Intel 版 Mac 上的 64 位程序(较常见)
mac_server_arm64e macOS ARM64e (A12 及后续芯片) 用于调试支持 ARM64e 指针认证的 Mac 程序(极少数情况)
win32_remote.exe Windows x86 32位 调试 32位 Windows 程序(运行在远程 Windows 机器上)
win64_remote64.exe Windows x86_64 调试 64位 Windows 程序(远程 Windows 机器)
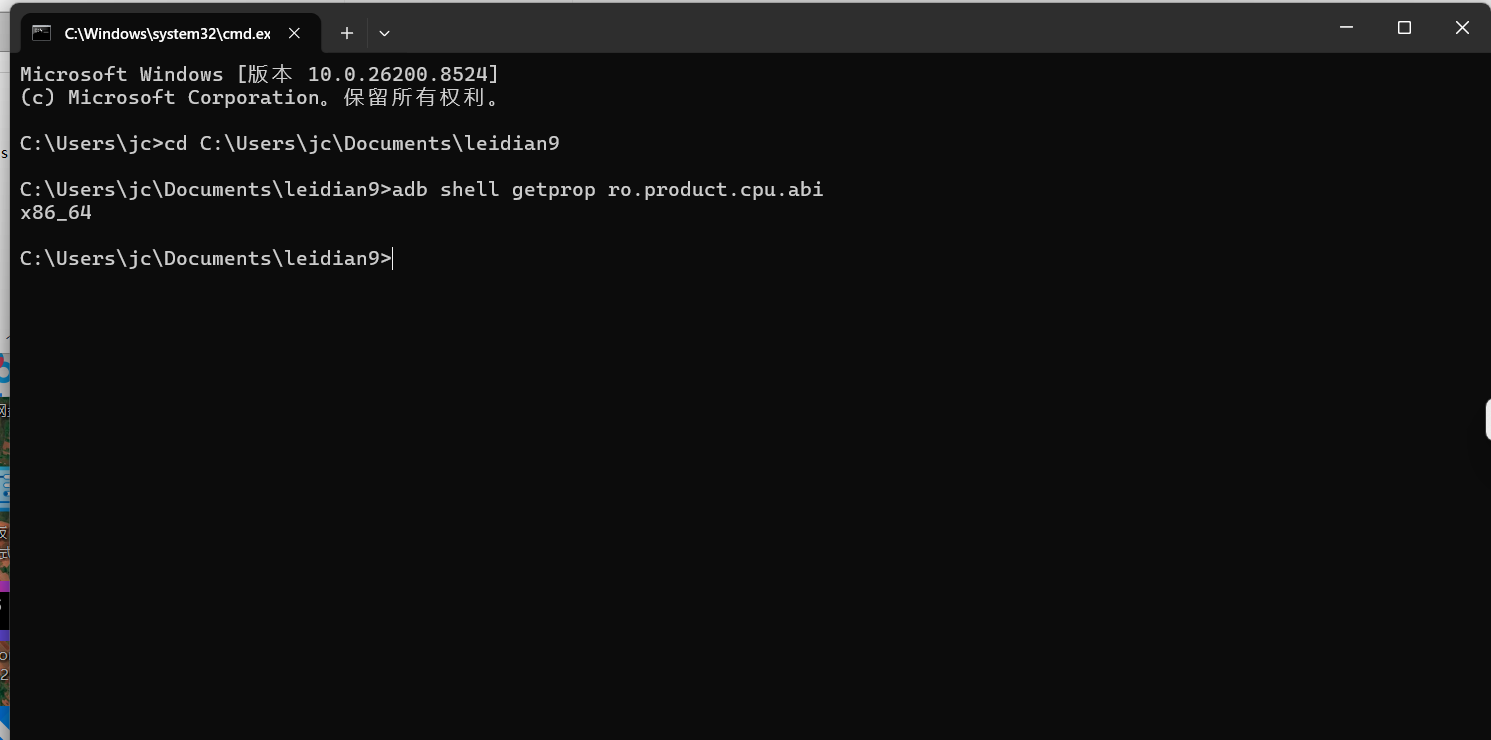
C:\Users\jc>cd C:\Users\jc\Documents\leidian9

C:\Users\jc\Documents\leidian9>adb shell getprop ro.product.cpu.abi
x86_64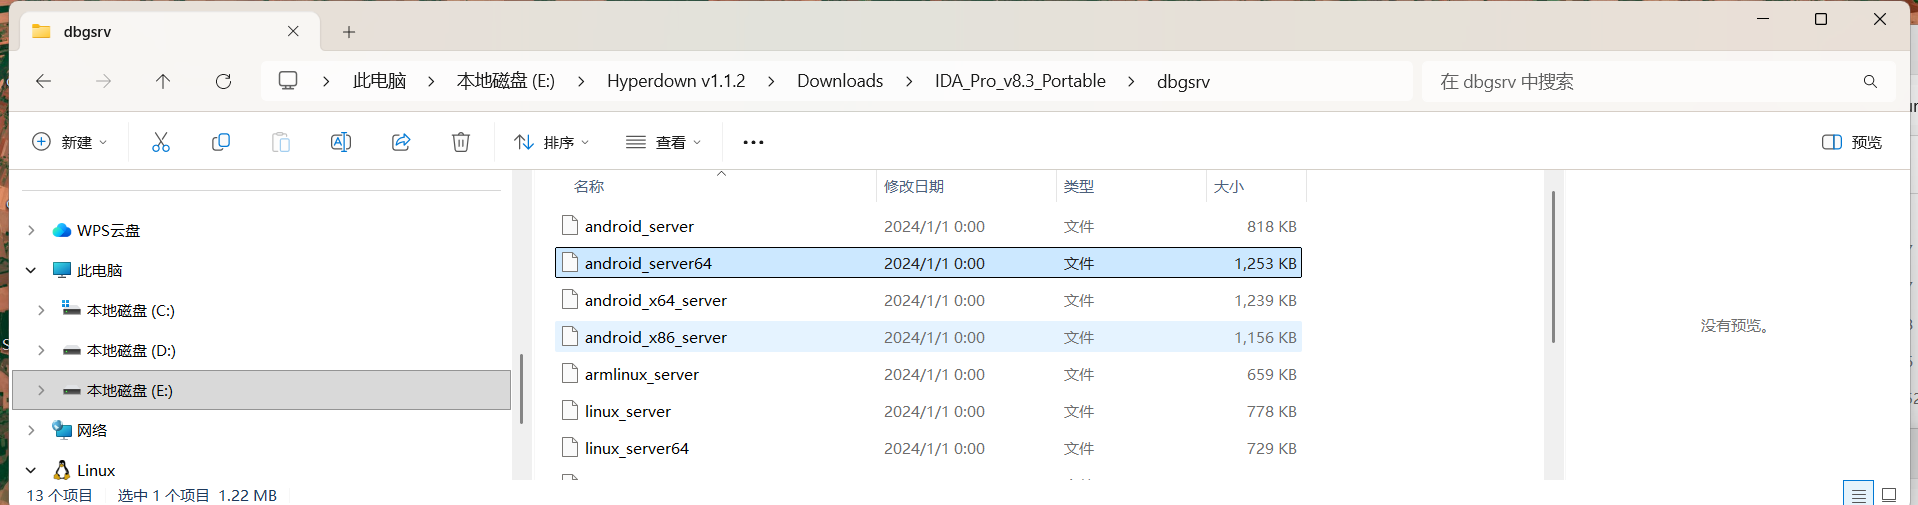
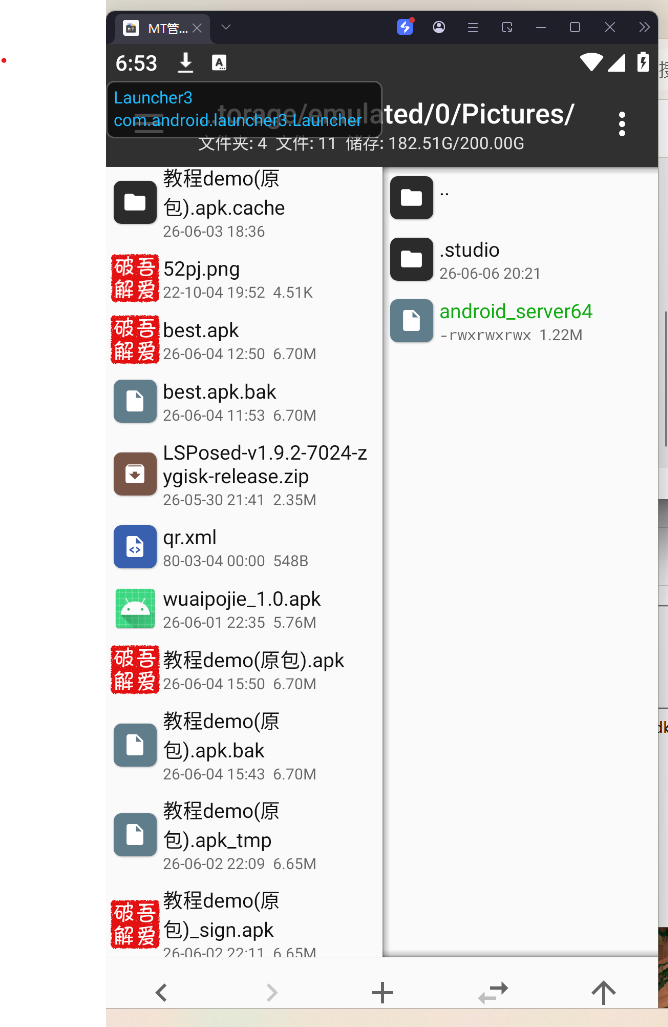
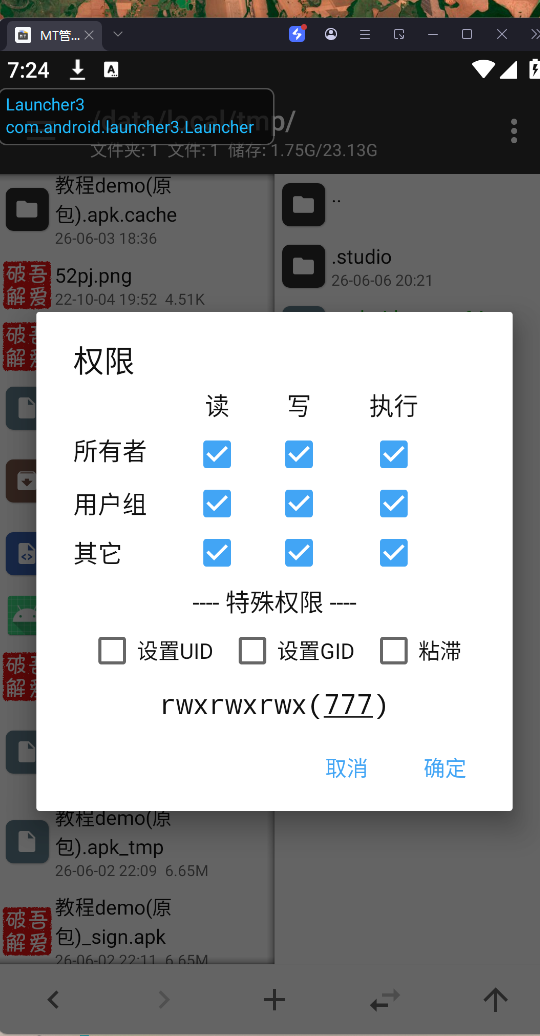
su
cd /data/local/tmp
./android_server64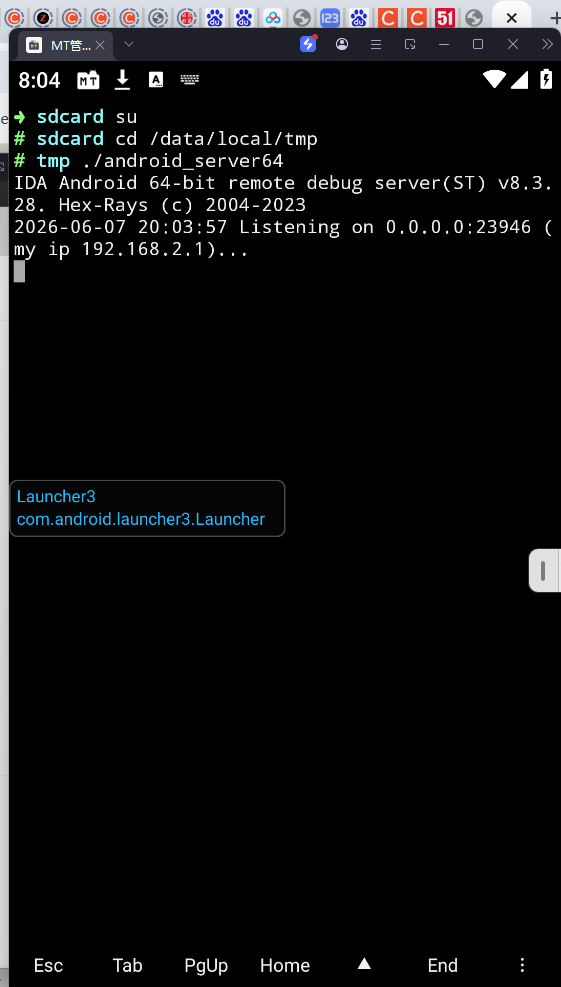
@echo on   %关闭回显命令%
start "" cmd /k call IDAdebug2.bat    %新打开一个cmd并运行IDAdebug1.bat%
adb shell "su -c './data/local/tmp/as'"
pause
00x3 dom(动态调试失败)
 public static ActivityMainBinding inflate(LayoutInflater layoutInflater) {
        return inflate(layoutInflater, null, false);
    }
public final class ActivityMainBinding implements ViewBinding {
    public final ImageView imageView4;
    private final ConstraintLayout rootView;
    public final Button soCheck;
    public final EditText soEditText;
    public final TextView textView20;
public ConstraintLayout mo191getRoot() {
        return this.rootView;
    }
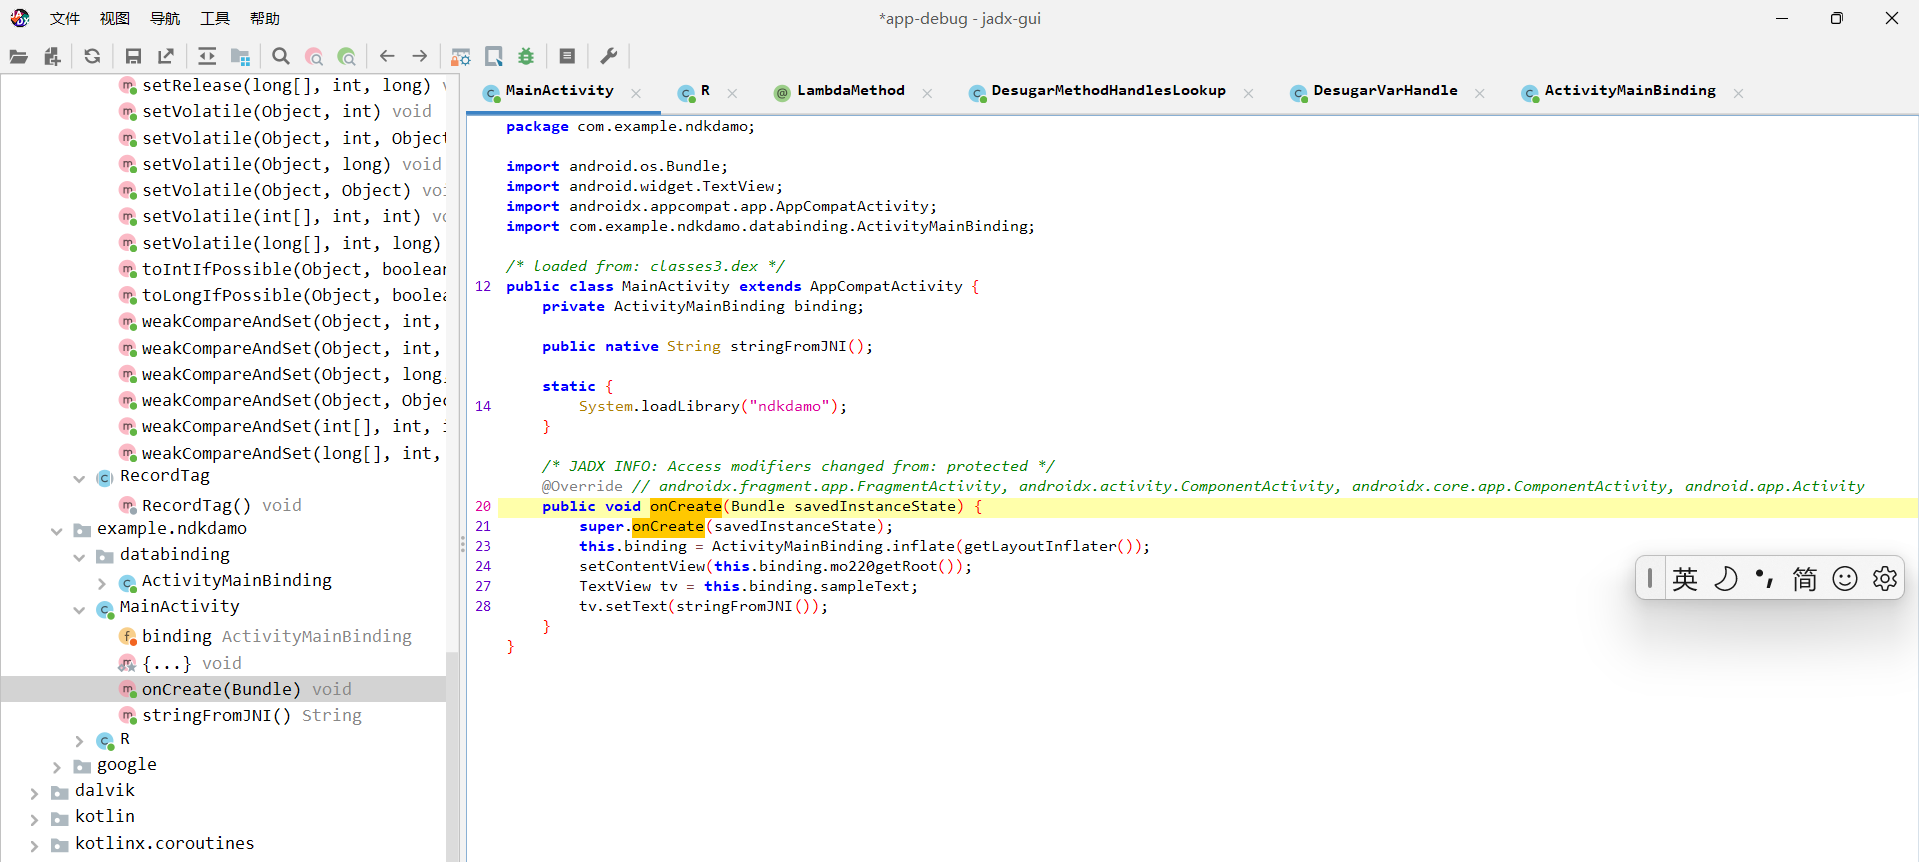
public class MainActivity extends AppCompatActivity {
private ActivityMainBinding binding;
//这里so层
//逻辑在c++
//native c++提供方法
public static native boolean check(String str);
static {
//so
System.loadLibrary("ndkdemo");
}
/* JADX INFO: Access modifiers changed from: protected */
@Override // androidx.fragment.app.FragmentActivity, androidx.activity.ComponentActivity, androidx.core.app.ComponentActivity, android.app.Activity
public void onCreate(Bundle bundle) {
//获取弹窗
super.onCreate(bundle);
//getLayoutInflater() 是 Activity 中的方法,用于获取与该 Activity 关联的 LayoutInflater 实例,将 XML 布局文件解析为 View 对象。
//自动绑定activity_main.xml然后创建一个对象
//返回xml字典实例
ActivityMainBinding inflate = ActivityMainBinding.inflate(getLayoutInflater());
this.binding = inflate;
//获取外层视图并显示
setContentView(inflate.mo191getRoot());
//简单理解,这就是一个约定的映射
// public static final int so_editText = 0x7f08017e;
//寻找
//id寻找
final EditText editText = (EditText) findViewById(R.id.so_editText);
//setOnClickListener 是 Android 开发中用于注册视图点击事件监听器的核心方法,当用户点击按钮或其他视图时,系统会调用该方法绑定的回调逻辑 。
// public static final int so_check = 0x7f08017d;
((Button) findViewById(R.id.so_check)).setOnClickListener(new View.OnClickListener() {
@Override
//检查比较
public void onClick(View view) {
if (MainActivity.check(editText.getText().toString())) {
Toast.makeText(MainActivity.this, "欢迎来到密界!", 1).show();
} else {
//不是,显示
Toast.makeText(MainActivity.this, "小伙汁,再修炼修炼吧!", 1).show();
}
}
});
}
}<?xml version="1.0" encoding="utf-8"?>
<androidx.constraintlayout.widget.ConstraintLayout xmlns:android="http://schemas.android.com/apk/res/android" xmlns:app="http://schemas.android.com/apk/res-auto"
android:layout_width="fill_parent"
android:layout_height="fill_parent">
<TextView
android:id="@id/textView20"
android:layout_width="wrap_content"
android:layout_height="wrap_content"
android:text="密界大门"
app:layout_constraintBottom_toBottomOf="0"
app:layout_constraintEnd_toEndOf="0"
app:layout_constraintHorizontal_bias="0.498"
app:layout_constraintStart_toStartOf="0"
app:layout_constraintTop_toTopOf="0"
app:layout_constraintVertical_bias="0.213"/>
<ImageView
android:id="@id/imageView4"
android:layout_width="wrap_content"
android:layout_height="wrap_content"
app:layout_constraintBottom_toBottomOf="0"
app:layout_constraintEnd_toEndOf="0"
app:layout_constraintHorizontal_bias="0.498"
app:layout_constraintStart_toStartOf="0"
app:layout_constraintTop_toTopOf="0"
app:layout_constraintVertical_bias="0.334"
app:srcCompat="@mipmap/dm"/>
 <EditText
     android:id="@id/so_editText"
     android:layout_width="wrap_content"
     android:layout_height="wrap_content"
     android:text=""
     android:ems="10"
     android:inputType="textPersonName"
     app:layout_constraintBottom_toBottomOf="0"
     app:layout_constraintEnd_toEndOf="0"
     app:layout_constraintHorizontal_bias="0.497"
     app:layout_constraintStart_toStartOf="0"
     app:layout_constraintTop_toBottomOf="@id/imageView4"
     app:layout_constraintVertical_bias="0.19"/>
<Button
android:id="@id/so_check"
android:layout_width="wrap_content"
android:layout_height="wrap_content"
android:text="验证"
app:layout_constraintBottom_toBottomOf="0"
app:layout_constraintEnd_toEndOf="0"
app:layout_constraintHorizontal_bias="0.498"
app:layout_constraintStart_toStartOf="0"
app:layout_constraintTop_toTopOf="0"
app:layout_constraintVertical_bias="0.674"/>
</androidx.constraintlayout.widget.ConstraintLayout>res:res目录存放经过编译后的资源文件
<entry id="0x7f08017e" name="so_editText"/>
<EditText
android:id="@id/so_editText"
android:layout_width="wrap_content"
android:layout_height="wrap_content"
android:text=""
android:ems="10"
android:inputType="textPersonName"
app:layout_constraintBottom_toBottomOf="0"
app:layout_constraintEnd_toEndOf="0"
app:layout_constraintHorizontal_bias="0.497"
app:layout_constraintStart_toStartOf="0"
app:layout_constraintTop_toBottomOf="@id/imageView4"
app:layout_constraintVertical_bias="0.19"/>写法 含义 场景
@+id/so_editText 创建一个新的 ID 资源(如果不存在则生成,并添加到 R.id 中) 通常用于首次定义某个控件的 ID
@id/so_editText 引用一个已经存在的 ID(假设它已经在其他地方定义过) 比如在 ConstraintLayout 中引用另一个控件的 ID 作为约束,或者这个 ID 已经在之前的某个布局或 values/ids.xml 中定义过
你的代码片段中
```xml
app:layout_constraintTop_toBottomOf="@id/imageView4"
```
这里使用 @id/imageView4 是合理的,因为 imageView4 应该已经在同一个布局文件的其他地方用 @+id/imageView4 定义过了。
但对于 EditText 自身的 ID:
· 如果希望定义并创建这个 ID,一般应该写 @+id/so_editText。
· 如果写成了 @id/so_editText,且项目中没有其他地方定义过 so_editText,编译会报错(找不到该 ID 资源)。
总结
· 是的,@id/so_editText 整体是一个资源标识符,指向 R.id.so_editText。
· 但写法上 @id 表示“引用”,@+id 表示“创建或引用”。常规用法:定义控件时用 @+id,引用其他控件时用 @id。
如果你这个布局编译通过了,说明 so_editText 很可能在其他地方(比如 values/ids.xml 或另一个布局)已经预先定义好了。否则建议改成 @+id/so_editText。
位段 十六进制 十进制意义
高 8 位 (31-24) 0x7f 包 ID:0x7f 表示当前 APK 内的应用私有资源(非系统资源 0x01)
次高 8 位 (23-16) 0x08 类型 ID:0x08 在 Android 中通常代表 id 类型(即 R.id 类别)
低 16 位 (15-0) 0x017e = 382 条目 ID:在该类型中的具体索引值
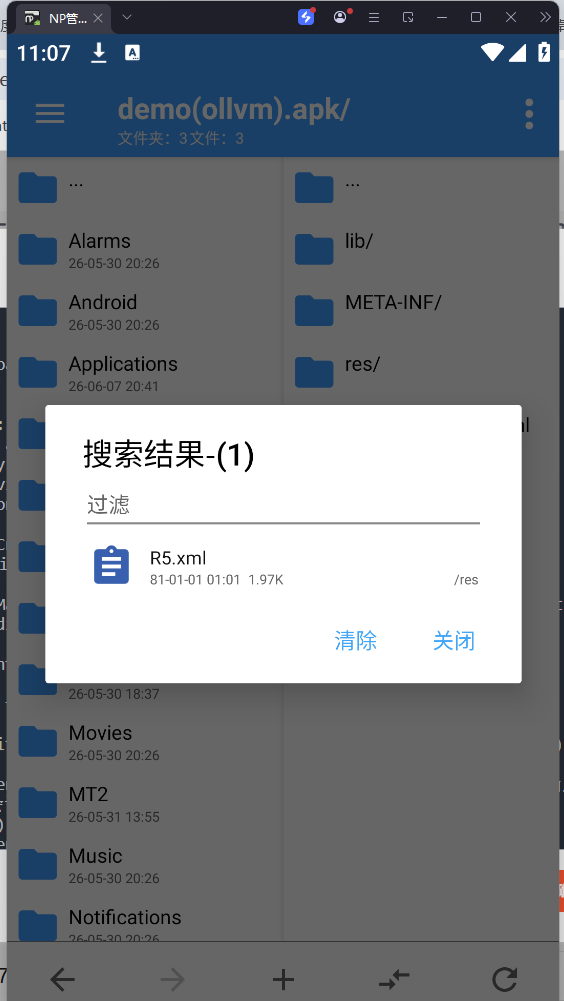
在里面
resources.arsc:编译Android资源文件后的生成的二进制文件,resources.arsc有固定的格式,包括了资源索引和字符串资源池等


xml
在安卓开发中,Java 和 C++ 通信遵循 JNI (Java Native Interface) 标准。 JNI 规定,所有的 Native 函数,第一个参数永远是 JNIEnv*
直接搜索java关键字搜索不到那就是动态注册。
JNI 有两种注册方式:
· 静态注册:通过 Java_包名_类名_方法名 这种固定格式命名 C++ 函数。函数名会作为符号导出,容易被 IDA 等工具直接定位。
· 动态注册:在 JNI_OnLoad 函数中,通过 RegisterNatives API 手动将 Java 方法与 C++ 函数地址关联起来。
动态注册是直接写到c++中了,搜索方法名
JNI_OnLoad 是Android SO库被虚拟机加载时自动执行的入口函数,属于JNI标准生命周期函数:
1. App加载 .so 文件时,系统会主动调用 JNI_OnLoad(JavaVM* vm, void* reserved)
2. 它的核心用途之一:完成JNI动态注册,手动绑定Java方法名 ↔ SO内部C函数地址
一般存储动态注册代码
2. RegisterNatives 调用逻辑

 JNI_OnLoad  内部标准注册模板:

c

JNIEXPORT jint JNICALL JNI_OnLoad(JavaVM* vm, void* reserved)
{
    JNIEnv* env;
    // 1. 获取JNI环境
    vm->GetEnv((void**)&env, JNI_VERSION_1_6);
    // 2. 定义映射表:Java方法名、签名、C函数指针
    JNINativeMethod methods[] = {
        {"check", "(Ljava/lang/String;)Z", (void*)check},
        // 其他native方法映射
    };
    // 3. 执行动态注册
    jclass cls = env->FindClass("com/example/ndkdemo/MainActivity");
    env->RegisterNatives(cls, methods, sizeof(methods)/sizeof(JNINativeMethod));
    return JNI_VERSION_1_6;
}
一般反调试可以看看这个
bool __fastcall check(JNIEnv *a1, jclass a2, jstring a3)
{
  const char *v5; // x21
  const char *v6; // x0
  _BOOL4 v7; // w22

  v5 = (*a1)->GetStringUTFChars(a1, a3, 0LL);
  v6 = (const char *)AES_ECB_PKCS7_Decrypt((int)"OOmGYpk6s0qPSXEPp4X31g==", "awuaipojie01234");
  v7 = strcmp(v6, v5) == 0;
  (*a1)->ReleaseStringUTFChars(a1, a3, v5);
//可以直接改吗,返回true
  return v7;
}
00x4 加壳
从结果定位开头
这让我想起我当时理解底层逻辑的时候也是这么干的,他最终是得返回结果的,所以可以从结果反推他的逻辑,意图。
不过没有混淆的话,一般还是看方法名。
ollvm的分类
| 分类 | 描述 |
|---|---|
| 指令替换(Instructions Substitution)(Sub) | 将一条运算指令替换为多条等价的运算指令,例如:y=x+1变为y=x+1+1-1 |
| 虚假控制流(Bogus Control Flow)(bcf) | 通过加入包含不透明谓词的条件跳转和不可达的基本块,来干扰IDA的控制流分析和F5反汇编 |
| 控制流平坦化(Control Flow Flattening)(Fla) | 主要通过一个主分发器来控制程序基本块的执行流程,将所有基本代码放到控制流最底部,然后删除原理基本块之间跳转关系,添加次分发器来控制分发逻辑,然后过新的复杂分发逻辑还原原来程序块之间的逻辑关系 |
| 字符串加密 | 编写一个pass将其中的字符串信息使用一些加密算法进行加密,然后特定的时间进行还原 |

AtomGit 是由开放原子开源基金会联合 CSDN 等生态伙伴共同推出的新一代开源与人工智能协作平台。平台坚持“开放、中立、公益”的理念,把代码托管、模型共享、数据集托管、智能体开发体验和算力服务整合在一起,为开发者提供从开发、训练到部署的一站式体验。
更多推荐


 6
6 0
0- 0


 已为社区贡献6条内容

所有评论(0)