基于Vue3的智能数字人应用实战:从零搭建宠物饲养顾问AI助手
基于Vue3的智能数字人应用实战:从零搭建宠物饲养顾问AI助手
前言
随着大语言模型和数字人技术的快速发展,智能交互正在经历前所未有的变革。本文将通过一个实际项目——宠物饲养顾问数字人,详细讲解如何基于Vue3框架和魔珐星云SDK,从零搭建一个具有专业领域知识的智能数字人应用。
本项目完整实现了:
-
数字人形象展示与语音交互
-
AI驱动的智能对话系统
-
专业领域的知识问答能力
-
美观的用户界面设计
一、项目概述
1.1 项目背景
在日常生活和工作中,我们经常需要获取各类专业建议和信息。传统的问答系统虽然能够提供文字回复,但缺乏生动形象的交互体验。数字人技术的出现,让AI助手拥有了"面孔"和"声音",大大提升了用户体验。
本次实战项目中,我选择搭建一个宠物饲养顾问数字人,它能够:
-
解答猫狗等宠物的喂养问题
-
提供日常护理建议
-
解读宠物行为语言
-
分享健康科普知识
1.2 技术栈
前端框架:Vue 3.3+
构建工具:Vite 4.4+
数字人SDK:魔珐星云SDK
AI服务:字节豆包大模型
样式方案:原生CSS(Flexbox布局)
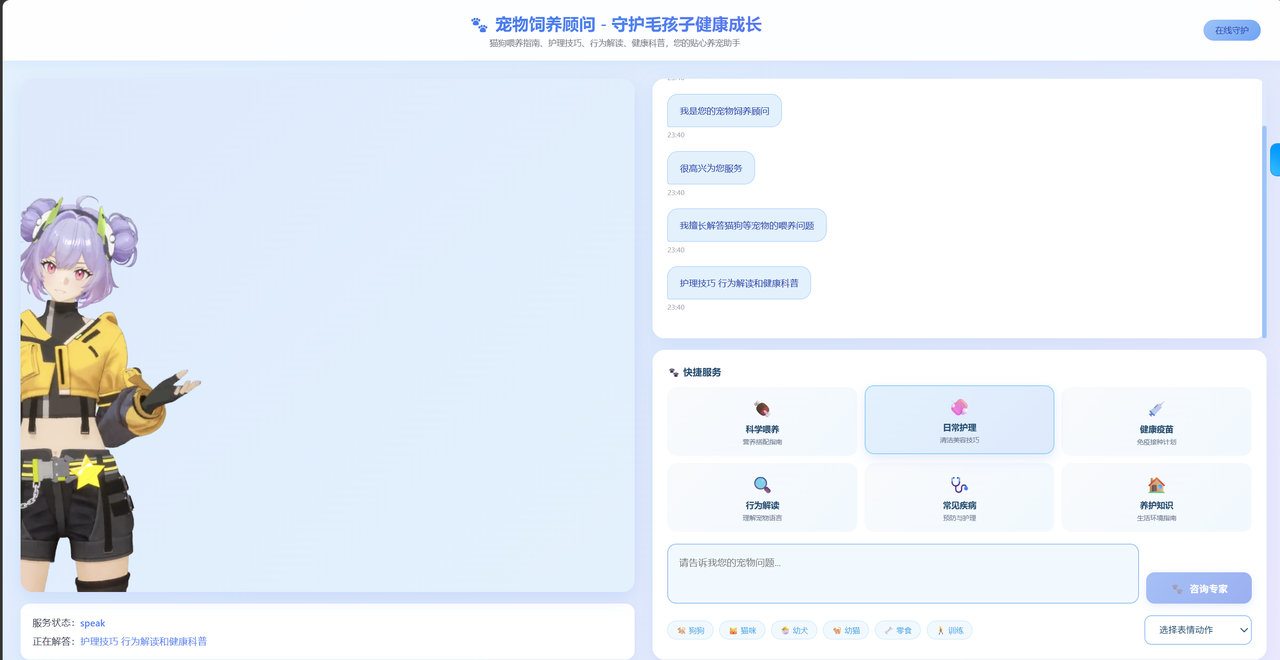
1.3 最终效果展示
项目完成后,将实现以下界面效果:
-
左侧数字人形象展示区
-
右侧对话交互区域
-
底部快捷服务入口
-
专业的蓝色渐变视觉风格
二、环境准备
2.1 基础环境
首先确保本地安装了以下工具:
# 检查Node.js版本
node -v  # 需要 >= 16.0.0

# 检查npm版本
npm -v  # 需要 >= 8.0.0
2.2 项目初始化
通过以下命令创建Vue3项目:
# 创建项目
npm create vite@latest pet-advisor -- --template vue

# 进入项目目录
cd pet-advisor

# 安装依赖
npm install

# 安装额外依赖(AI服务)
npm install openai
2.3 项目目录结构
pet-advisor/
├── public/
│   ├── cryptojs.js
│   └── speechrecognizer.js
├── src/
│   ├── assets/
│   ├── components/
│   │   └── CustomerService.vue    # 主组件
│   ├── services/
│   │   ├── llm.service.js         # AI对话服务
│   │   └── xingyun.service.js     # 数字人SDK封装
│   ├── styles/
│   │   └── main.css               # 全局样式
│   ├── App.vue
│   └── main.ts
├── index.html
├── package.json
└── vite.config.ts
三、核心代码实现
3.1 数字人SDK封装
魔珐星云SDK的封装是项目的核心部分。我们需要创建一个服务类来处理数字人的初始化、语音合成和动作控制。
创建 src/services/xingyun\.service\.js 文件:
/**
 * 魔珐星云SDK服务封装
 */
class XingYunService {
  constructor() {
    this.sdkInstance = null
    this.isInitialized = false
    this.containerId = 'avatar-container'
  }

  /**
   * 初始化星云SDK
   * @param {Object} config - 配置参数
   */
  async initSDK(config) {
    try {
      console.log('开始初始化魔珐星云SDK...')

      // 检查容器是否存在
      const container = document.getElementById(this.containerId)
      if (!container) {
        throw new Error(`未找到容器元素: #${this.containerId}`)
      }

      // 动态加载SDK(从CDN链接)
      if (!window.XmovAvatar) {
        await this.loadSDKScript()
      }

      // 获取配置参数
      const appId = config.appId || 'your-app-id'
      const appSecret = config.appSecret || 'your-app-secret'

      // 创建SDK实例
      this.sdkInstance = new window.XmovAvatar({
        containerId: `#${this.containerId}`,
        appId: appId,
        appSecret: appSecret,
        gatewayServer: 'https://nebula-agent.xingyun3d.com/user/v1/ttsa/session',

        // 事件回调
        onStateChange: (state) => {
          console.log('数字人状态变化:', state)
          if (config.onStateChange) config.onStateChange(state)
        },

        onWidgetEvent: (data) => {
          // 字幕显示回调
          if (data.type === 'subtitle_on') {
            if (config.onSubtitle) config.onSubtitle(data.text)
          } else if (data.type === 'subtitle_off') {
            if (config.onSubtitleEnd) config.onSubtitleEnd()
          }
        },

        enableLogger: true
      })

      // 初始化连接
      await this.sdkInstance.init({
        onDownloadProgress: (progress) => {
          console.log('资源加载进度:', progress + '%')
          if (config.onProgress) config.onProgress(progress)
        },
        onError: (error) => {
          console.error('初始化错误:', error)
          if (config.onError) config.onError(error)
        }
      })

      this.isInitialized = true
      console.log('魔珐星云SDK初始化成功')

      if (config.onSuccess) {
        config.onSuccess()
      }

      return true
    } catch (error) {
      console.error('初始化SDK失败:', error)
      throw error
    }
  }

  /**
   * 动态加载SDK脚本
   */
  loadSDKScript() {
    return new Promise((resolve, reject) => {
      const script = document.createElement('script')
      script.src = 'https://media.xingyun3d.com/xingyun3d/general/litesdk/xmovAvatar@latest.js'
      script.onload = resolve
      script.onerror = reject
      document.head.appendChild(script)
    })
  }

  /**
   * 让数字人说话
   */
  speak(text, isStart = true, isEnd = true) {
    if (!this.isInitialized || !this.sdkInstance) {
      throw new Error('SDK未初始化')
    }
    this.sdkInstance.speak(text, isStart, isEnd)
  }

  /**
   * 使用SSML控制数字人动作
   */
  speakWithAction(text, action = 'Hello') {
    const ssml = `
<speak>
  <ue4event>
    <type>ka</type>
    <data>
      <action_semantic>${action}</action_semantic>
    </data>
  </ue4event>
  ${text}
</speak>`
    this.speak(ssml, true, true)
  }

  /**
   * 断开连接
   */
  disconnect() {
    if (this.sdkInstance) {
      this.sdkInstance.stop()
      this.sdkInstance.destroy()
      this.sdkInstance = null
      this.isInitialized = false
    }
  }

  /**
   * 获取数字人支持的动作列表
   */
  getSupportedActions() {
    return ['Hello', 'Goodbye', 'Agree', 'Disagree', 'Think', 'Explain']
  }
}

export default new XingYunService()
技术要点解析:
1. SDK动态加载:通过创建script标签从CDN动态加载SDK,避免HTML中的阻塞加载
2. 回调机制:使用回调函数处理SDK的各种事件(状态变化、字幕显示、错误处理)
3. SSML控制:通过SSML标记语言控制数字人的动作表情
4. 生命周期管理:提供disconnect方法正确清理资源
3.2 AI对话服务实现
接下来实现与大语言模型的集成。我选择使用字节豆包作为AI服务提供商。
创建 src/services/llm\.service\.js 文件:
import OpenAI from 'openai'

class LLMService {
  constructor() {
    this.openai = new OpenAI({
      apiKey: 'your-api-key', // 替换为实际的API Key
      baseURL: 'https://ark.cn-beijing.volces.com/api/v3',
      dangerouslyAllowBrowser: true,
    });
  }

  /**
   * 发送消息(流式响应)
   */
  async sendMessageStream(userMessage, systemPrompt = '你是一个专业的宠物饲养顾问...') {
    const messages = [
      { role: 'system', content: systemPrompt },
      { role: 'user', content: userMessage }
    ];

    try {
      const stream = await this.openai.chat.completions.create({
        model: 'doubao-1-5-pro-32k-250115',
        messages: messages,
        stream: true,
        temperature: 0.7,
        max_tokens: 500,
      });

      let fullResponse = '';

      for await (const chunk of stream) {
        const content = chunk.choices[0]?.delta?.content || '';
        if (content) {
          fullResponse += content;
        }
      }

      return fullResponse;
    } catch (error) {
      console.error('请求失败:', error);
      throw error;
    }
  }
}

export default new LLMService();
技术要点:
1. 流式响应:使用stream模式获取AI回复,实现打字机效果
2. 系统提示词:通过精心设计的system prompt定义AI角色
3. 错误处理:完善的异常捕获和日志记录
3.3 主组件开发
现在开发Vue组件,这是用户界面的核心。
创建 src/components/CustomerService\.vue 文件的关键部分:
<template>
  <div class="customer-service-container">
    <!-- 头部 -->
    <header class="header">
      <div class="logo-area">
        <h1>🐾 宠物饲养顾问 - 守护毛孩子健康成长</h1>
        <p class="subtitle">猫狗喂养指南、护理技巧、行为解读、健康科普</p>
      </div>
      <div class="status-indicator" :class="{ connected: isConnected }">
        {{ isConnected ? '在线守护' : '连接中' }}
      </div>
    </header>

    <div class="main-content">
      <!-- 左侧:数字人展示区 -->
      <div class="avatar-section">
        <div class="avatar-container">
          <div id="avatar-container" class="avatar-render-area"></div>
          <div v-if="!isConnected" class="loading-overlay">
            <div class="loading-spinner"></div>
            <p>正在启动宠物顾问服务...</p>
          </div>
        </div>

        <!-- 状态信息 -->
        <div class="avatar-status">
          <div class="status-item">
            <span class="status-label">服务状态:</span>
            <span class="status-value">{{ currentState }}</span>
          </div>
        </div>
      </div>

      <!-- 右侧:对话交互区 -->
      <div class="interaction-section">
        <!-- 对话记录 -->
        <div class="chat-history" ref="chatContainer">
          <div
            v-for="(message, index) in chatHistory"
            :key="index"
            :class="['message', message.type]"
          >
            <div class="message-content">
              {{ message.content }}
            </div>
            <div class="message-time">
              {{ message.time }}
            </div>
          </div>
        </div>

        <!-- 快捷服务卡片 -->
        <div class="quick-services">
          <h3 class="services-title">🐾 快捷服务</h3>
          <div class="services-grid">
            <div
              v-for="service in quickServices"
              :key="service.id"
              class="service-card"
              @click="handleQuickService(service)"
            >
              <div class="service-icon">{{ service.icon }}</div>
              <div class="service-name">{{ service.name }}</div>
            </div>
          </div>
        </div>

        <!-- 输入区域 -->
        <div class="input-controls">
          <textarea
            v-model="userInput"
            placeholder="请告诉我您的宠物问题..."
            @keyup.enter="sendMessage"
            :disabled="!isConnected"
          ></textarea>
          <button
            class="send-btn"
            @click="sendMessage"
            :disabled="!isConnected || !userInput.trim()"
          >
            🐾 咨询顾问
          </button>
        </div>
      </div>
    </div>
  </div>
</template>

<script setup>
import { ref, onMounted } from 'vue'
import XingYunService from '@/services/xingyun.service.js'
import LLMService from '@/services/llm.service.js'

// 响应式数据
const isConnected = ref(false)
const currentState = ref('准备中...')
const userInput = ref('')
const chatHistory = ref([])
const chatContainer = ref(null)

// 快捷服务数据
const quickServices = [
  { id: 1, icon: '🍖', name: '科学喂养', text: '请告诉我如何科学喂养我的宠物...' },
  { id: 2, icon: '🧼', name: '日常护理', text: '宠物日常护理应该注意什么?' },
  { id: 3, icon: '💉', name: '健康疫苗', text: '宠物需要接种哪些疫苗?' },
  { id: 4, icon: '🔍', name: '行为解读', text: '狗狗/猫咪的行为代表什么意思?' },
  { id: 5, icon: '🩺', name: '常见疾病', text: '宠物常见的疾病有哪些?' },
  { id: 6, icon: '🏠', name: '养护知识', text: '如何为宠物布置舒适的生活环境?' }
]

// 初始化数字人
const initAvatar = async () => {
  try {
    const config = {
      onProgress: (progress) => {
        currentState.value = `加载中 ${progress}%`
      },
      onStateChange: (state) => {
        currentState.value = state
        if (state === 'ready' || state === 'idle') {
          isConnected.value = true
        }
      },
      onSuccess: () => {
        isConnected.value = true
        currentState.value = '就绪'
        // 发送欢迎消息
        setTimeout(() => {
          XingYunService.speak('您好!我是您的宠物饲养顾问,很高兴为您服务!', true, true)
        }, 1500)
      },
      onError: (error) => {
        console.error('SDK错误:', error)
        currentState.value = '错误'
      }
    }

    await XingYunService.initSDK(config)
  } catch (error) {
    console.error('初始化失败:', error)
  }
}

// 处理快捷服务点击
const handleQuickService = (service) => {
  userInput.value = service.text
  sendMessage()
}

// 发送消息
const sendMessage = () => {
  if (!userInput.value.trim()) return

  const text = userInput.value
  addMessage('user', text)

  LLMService.sendMessageStream(text)
    .then((aiReply) => {
      // 让数字人说话
      XingYunService.speak(aiReply, true, true)
    })
    .catch((error) => {
      console.error('获取AI回复失败:', error)
      addMessage('system', '服务暂时不可用,请稍后重试。')
    })

  userInput.value = ''
}

// 添加消息到历史记录
const addMessage = (type, content) => {
  const now = new Date()
  const time = `${now.getHours().toString().padStart(2, '0')}:${now.getMinutes().toString().padStart(2, '0')}`

  chatHistory.value.push({ type, content, time })
}

onMounted(() => {
  initAvatar()
})
</script>
3.4 样式设计
添加美观的样式设计,创建 src/styles/main\.css:
/* 全局样式增强 */
:root {
  --primary: #3b82f6;
  --primary-light: #60a5fa;
  --secondary: #1e40af;
  --background: #e0f2fe;
  --text-primary: #1e40af;
  --border: #93c5fd;
}

/* 滚动条美化 */
::-webkit-scrollbar {
  width: 8px;
}

::-webkit-scrollbar-track {
  background: #dbeafe;
  border-radius: 4px;
}

::-webkit-scrollbar-thumb {
  background: #93c5fd;
  border-radius: 4px;
}

/* 过渡动画 */
.fade-enter-active,
.fade-leave-active {
  transition: opacity 0.3s ease;
}

.fade-enter-from,
.fade-leave-to {
  opacity: 0;
}
四、功能扩展
4.1 添加表情动作选择
除了默认的说话功能,还可以让数字人执行各种动作:
// 支持的动作列表
const supportedActions = [
  { value: 'Hello', label: '招手问候' },
  { value: 'Goodbye', label: '挥手告别' },
  { value: 'Agree', label: '点头赞同' },
  { value: 'Disagree', label: '摇头否定' },
  { value: 'Think', label: '思考动作' },
  { value: 'Explain', label: '解释说明' }
]

// 带动作的说话
const speakWithAction = () => {
  const action = selectedAction.value
  XingYunService.speakWithAction(aiReply, action)
}
4.2 快捷标签功能
添加宠物类型标签,快速切换话题:
const quickTags = [
  { icon: '🐕', text: '狗狗' },
  { icon: '🐱', text: '猫咪' },
  { icon: '🐣', text: '幼犬' },
  { icon: '🐈', text: '幼猫' },
  { icon: '🦴', text: '零食' },
  { icon: '🚶', text: '训练' }
]

const addTag = (tag) => {
  if (userInput.value) {
    userInput.value += ' ' + tag
  } else {
    userInput.value = tag + '相关问题:'
  }
}
4.3 系统提示词优化
精心设计的系统提示词可以让AI提供更专业的回答:
const systemPrompt = `你是一个专业的宠物饲养顾问,专注于为用户提供猫狗等常见宠物的喂养指南、护理技巧、行为解读和健康科普服务。你的职责是:

1. **科学喂养指导**:提供宠物营养需求分析、食物选择建议、喂食频率指导
2. **日常护理建议**:洗澡美容、指甲修剪、耳朵清洁、牙齿护理
3. **行为解读**:帮助用户理解猫狗的行为语言
4. **健康科普**:常见疾病预防、疫苗接种计划、体检建议

**回答风格要求**:
- 使用温馨、专业的语气
- 语言通俗易懂,避免过于专业的术语
- 适当使用 emoji 来增加亲和力
- 对于严重健康问题,建议及时就医`
五、部署上线
5.1 开发环境运行
# 安装依赖
npm install

# 启动开发服务器
npm run dev
访问 http://localhost:3000 即可看到效果。
5.2 生产环境构建
# 构建生产版本
npm run build

# 预览构建结果
npm run preview
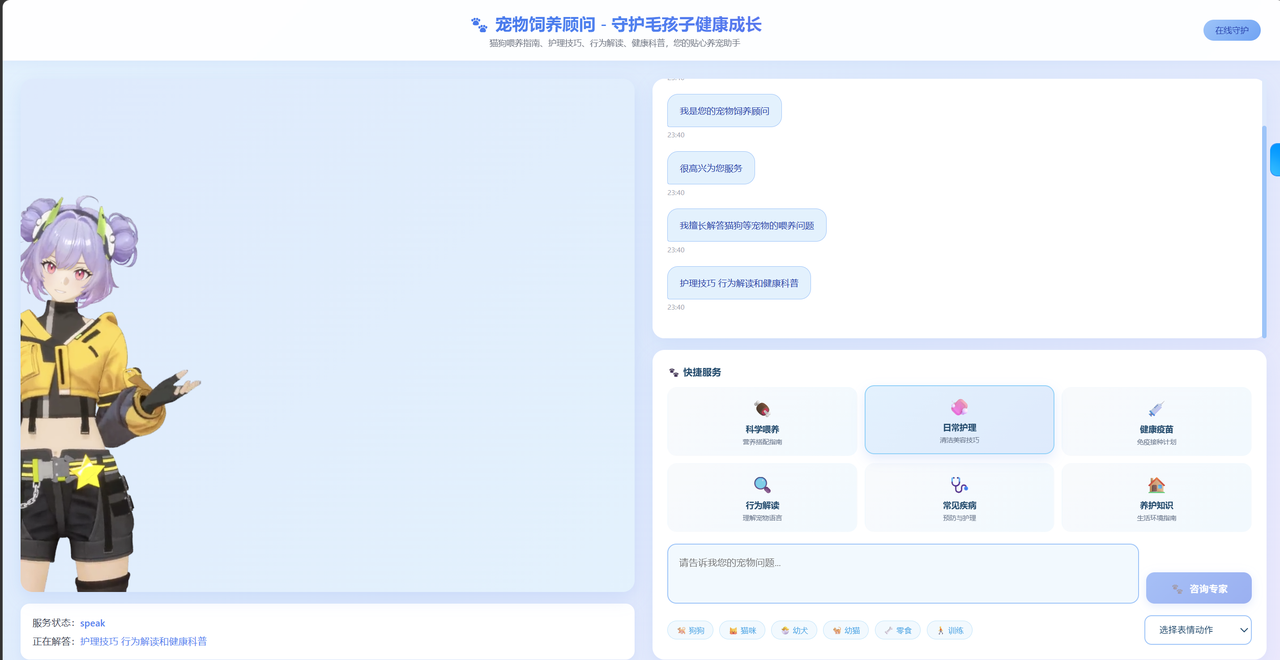
测试询问:
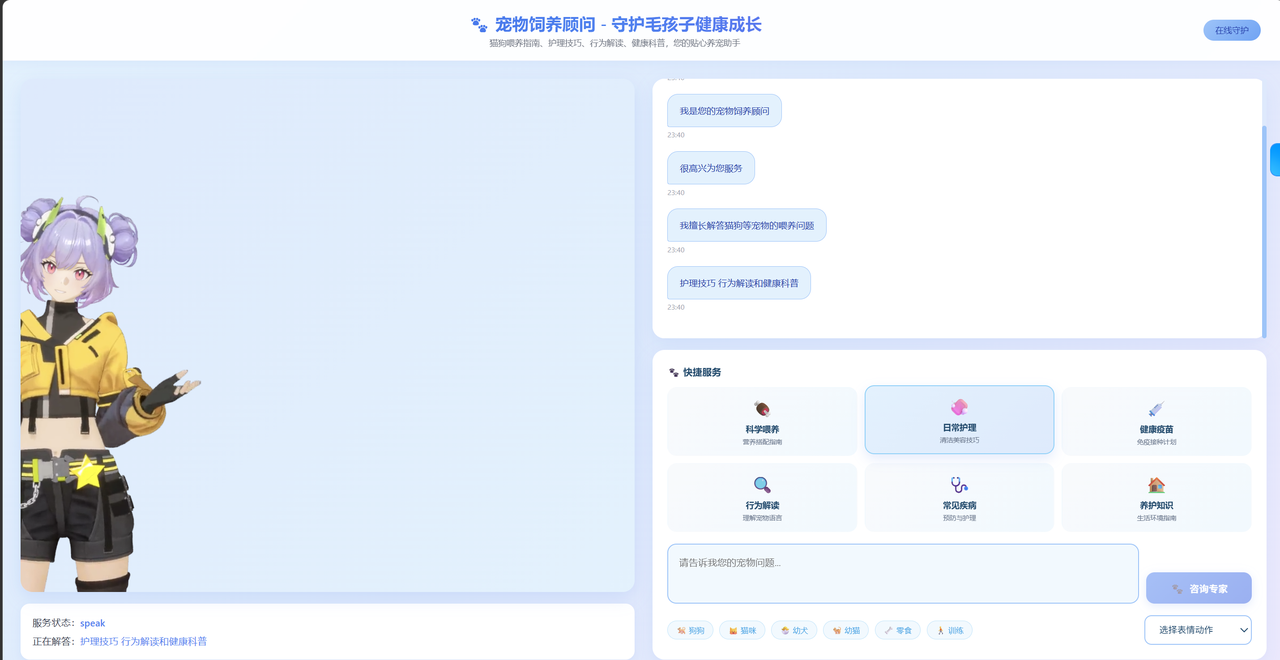
幼犬相关问题: 零食 训练
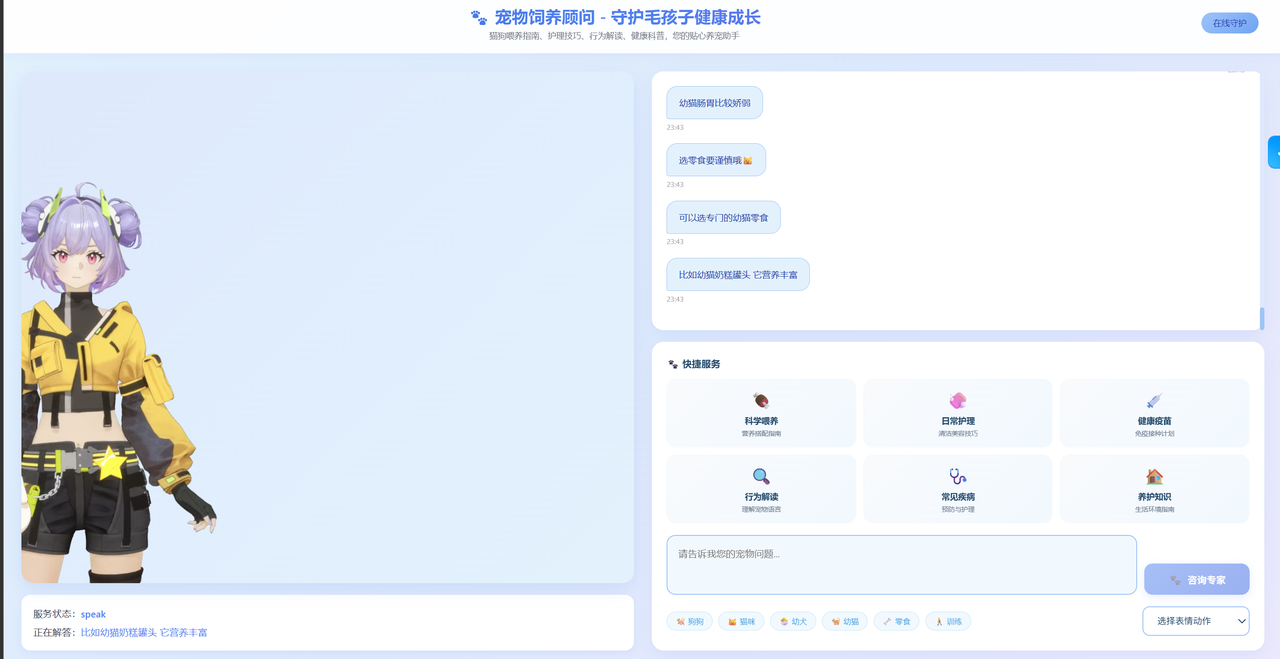
猫咪相关问题: 幼猫 零食
5.3 部署注意事项
1. API Key安全:生产环境中不要在前端暴露API Key,建议通过后端代理
2. CORS配置:确保后端服务正确配置了CORS
3. SDK域名白名单:确保部署域名在魔珐星云控制台添加
4. HTTPS要求:数字人SDK通常要求HTTPS环境
六、常见问题
6.1 数字人无法显示
可能原因:
-
SDK加载失败(网络问题)
-
AppID/AppSecret配置错误
-
容器元素尺寸为0
解决方案:
// 添加详细的错误日志
onError: (error) => {
  console.error('初始化错误:', error)
  // 检查网络请求
  // 验证配置信息
}
6.2 AI回复延迟
优化方案:
-
使用流式响应,减少等待时间
-
优化系统提示词,限制回复长度
-
考虑使用响应更快的模型
6.3 动作表情不生效
检查要点:
-
确认数字人模型支持该动作
-
检查SSML格式是否正确
-
查看控制台是否有错误信息
七、项目总结
7.1 技术收获
通过本项目的开发,我学习到了:
1. SDK集成经验:掌握了第三方SDK的封装和调用方法
2. 异步编程:熟练使用async/await处理异步流程
3. Vue3 Composition API:深入理解ref、reactive、lifecycle hooks
4. AI集成:学会如何将大语言模型集成到实际应用中
7.2 应用场景
本项目展示的技术方案可以应用于:
- 在线客服:智能客服数字人
- 教育培训:AI助教数字人
- 医疗健康:健康顾问数字人
- 金融理财:理财顾问数字人
- 旅游导览:景点讲解数字人
7.3 下一步计划
-
添加语音识别功能,实现语音对话
-
集成更多数字人形象
-
添加知识库检索功能
-
实现多轮对话记忆
结语
数字人技术正在快速发展,未来将有更广阔的应用场景。通过本文的实战项目,希望能够帮助开发者快速上手数字人开发,将创意转化为实际产品。

AtomGit 是由开放原子开源基金会联合 CSDN 等生态伙伴共同推出的新一代开源与人工智能协作平台。平台坚持“开放、中立、公益”的理念,把代码托管、模型共享、数据集托管、智能体开发体验和算力服务整合在一起,为开发者提供从开发、训练到部署的一站式体验。
更多推荐


 9
9 0
0- 0


 已为社区贡献1条内容

所有评论(0)