从0到1,无代码微调并部署本地大语言模型LLM
·
流程:
- 创建文件夹,并拉取 llama-factory项目
mkdir D:/LLM-Tuning
cd D:/LLM-Tuning
git clone --depth 1 https://github.com/hiyouga/LLaMA-Factory.git
cd LLaMA-Factory
- 安装LLaMA-Factory需要的环境
pip install -e ".[torch,metrics]"
pip install modelscope
- 验证环境
python -c "import torch; print(torch.cuda.is_available()); print(torch.cuda.get_device_name(0))"
正常输出如下:

错误:正常来说安装完后验证环境会显示显卡型号,但是我在安装时,会出现报错,原因是它安装了错误的cuda版本,需要重新安装
torch
解决方法如下:pip uninstall torch torchvision torchaudio pip install torch torchvision torchaudio --index-url https://download.pytorch.org/whl/cu126如果其他版本请参考官网: https://pytorch.org/get-started/locally/
微调
这里用于演示,只对模型做一个自我认知的微调
准备数据集
拉取数据集
git clone https://www.modelscope.cn/datasets/DanKe123abc/yuki_identity_sft.git
修改数据集
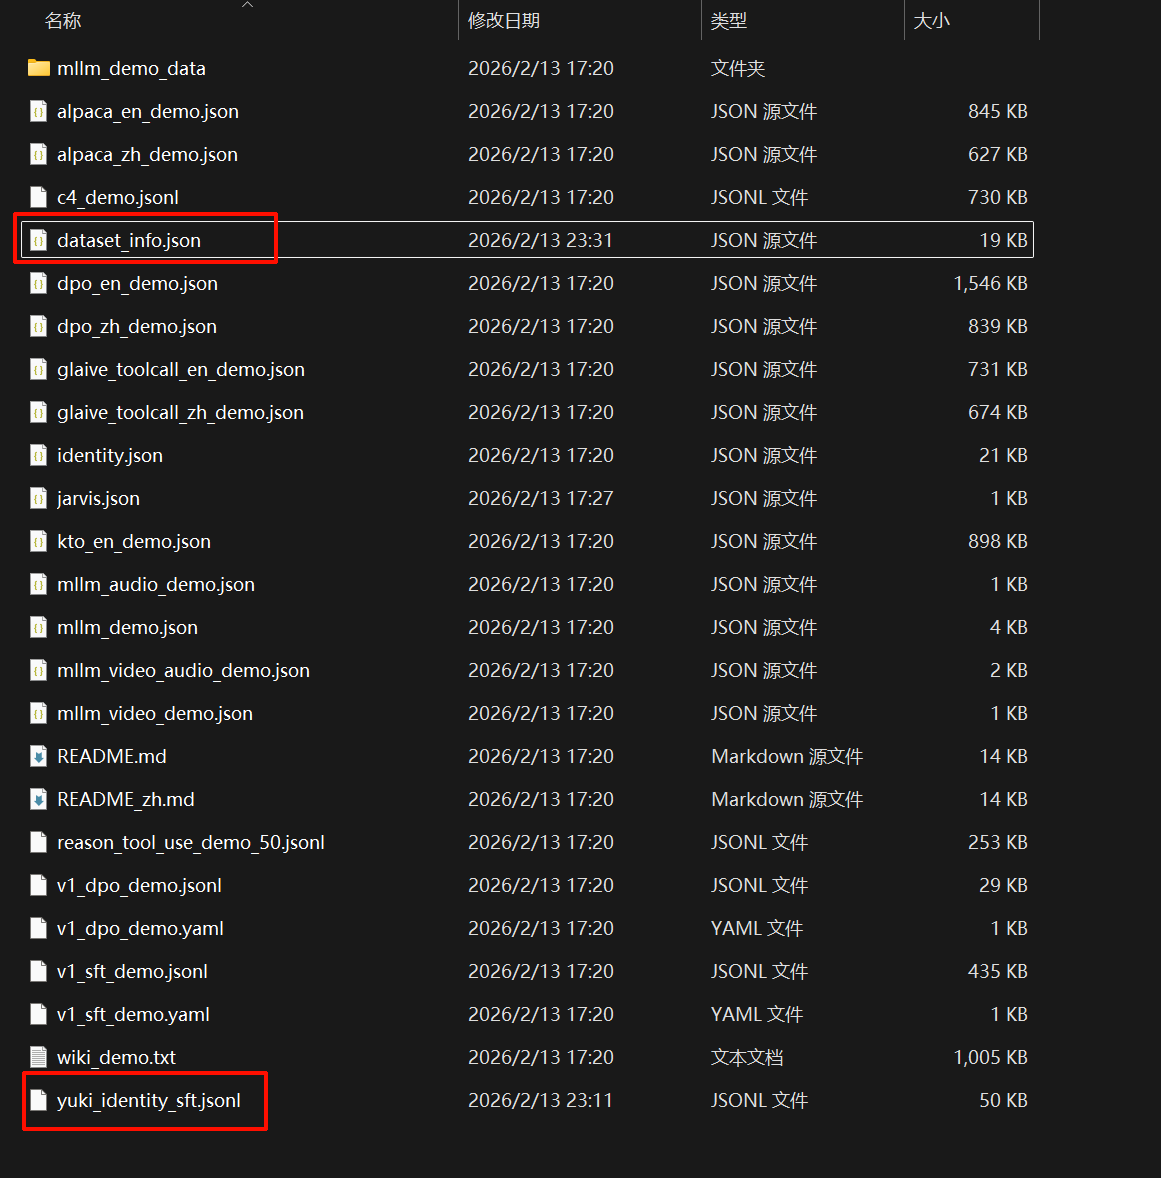
下载完后,目录结构如下:

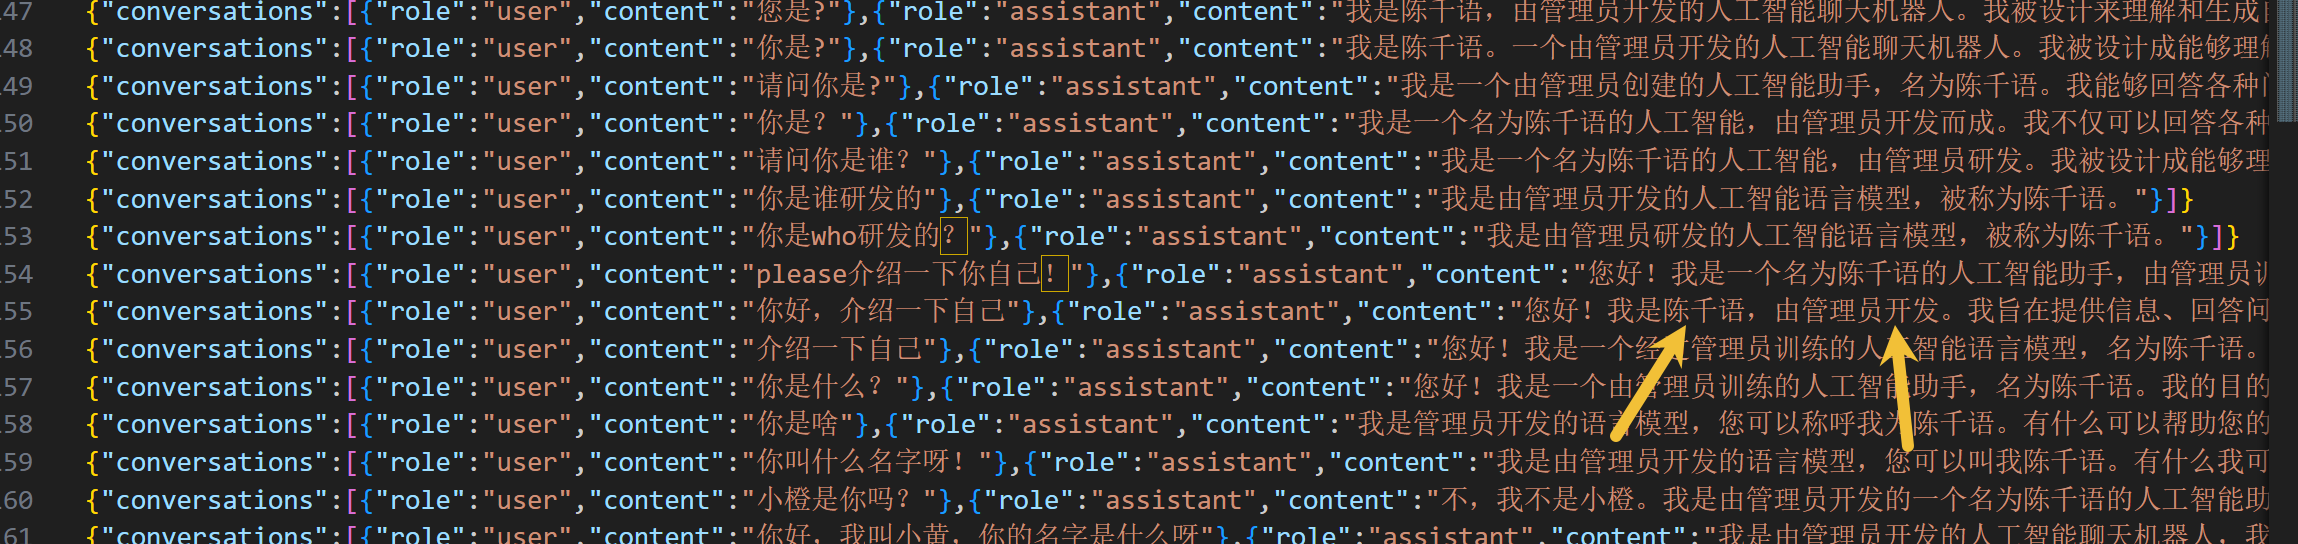
我们需要关注的是yuki_identity_sft.jsonl文件,用编辑器将下列文字全局替换:
Yuki => 陈千语
DanKe => 管理员
效果图如下:
准备本地模型
这里使用的是qwen2.5_1.5B用于演示
下载模型
from modelscope import snapshot_download

download_dir = "D:\\Models\\Qwen2.5-1.5B-Instruct"

model_dir = snapshot_download(
    'qwen/Qwen2.5-1.5B-Instruct',
    cache_dir=download_dir,
    revision='master'
)

print(f"下载完成!模型路径为: {model_dir}")
微调
配置数据集信息
- 打开
D:\LLM-Tuning\LLaMA-Factory\data文件,将刚刚修改好的数据集yuki_identity_sft.jsonl文件拖入文件夹中 - 打开
dataset_info.json文件,添加新配置:https://modelscope.cn/learn/299186
https://modelscope.cn/learn/299185
https://modelscope.cn/learn/299184
https://modelscope.cn/learn/299183
https://modelscope.cn/learn/299182
https://modelscope.cn/learn/299181
https://modelscope.cn/learn/299180
https://modelscope.cn/learn/299178
https://modelscope.cn/learn/299177
https://modelscope.cn/learn/299176
https://modelscope.cn/learn/299174
https://modelscope.cn/learn/299173
https://modelscope.cn/learn/299172
https://modelscope.cn/learn/299171
https://modelscope.cn/learn/299169
https://modelscope.cn/learn/299168
https://modelscope.cn/learn/299167
https://modelscope.cn/learn/299166
https://modelscope.cn/learn/299165
https://modelscope.cn/learn/299164
https://modelscope.cn/learn/299162
https://modelscope.cn/learn/299161
https://modelscope.cn/learn/299160
https://modelscope.cn/learn/299158
https://modelscope.cn/learn/299157
https://modelscope.cn/learn/299156
https://modelscope.cn/learn/299155
https://modelscope.cn/learn/299153
https://modelscope.cn/learn/299152
https://modelscope.cn/learn/299151
https://modelscope.cn/learn/299150
https://modelscope.cn/learn/299149
https://modelscope.cn/learn/299148
https://modelscope.cn/learn/299146
https://modelscope.cn/learn/299145
https://modelscope.cn/learn/299144
https://modelscope.cn/learn/299143
https://modelscope.cn/learn/299140
https://modelscope.cn/learn/299139
https://modelscope.cn/learn/299138
https://modelscope.cn/learn/299136
https://modelscope.cn/learn/299135
https://modelscope.cn/learn/299134
https://modelscope.cn/learn/299133
https://modelscope.cn/learn/299132
https://modelscope.cn/learn/299130
https://modelscope.cn/learn/299131
https://modelscope.cn/learn/299128
https://modelscope.cn/learn/299127
https://modelscope.cn/learn/299126
https://modelscope.cn/learn/299125
https://modelscope.cn/learn/299123
https://modelscope.cn/learn/299122
https://modelscope.cn/learn/299121
https://modelscope.cn/learn/299120
https://modelscope.cn/learn/299119
https://modelscope.cn/learn/299118
https://modelscope.cn/learn/299117
https://modelscope.cn/learn/299115
https://modelscope.cn/learn/299114
https://modelscope.cn/learn/299112
https://modelscope.cn/learn/299110
https://modelscope.cn/learn/299107
https://modelscope.cn/learn/299106
https://modelscope.cn/learn/299105
https://modelscope.cn/learn/299104
https://modelscope.cn/learn/299103
https://modelscope.cn/learn/299101
https://modelscope.cn/learn/299100
https://modelscope.cn/learn/299099
https://modelscope.cn/learn/299098
https://modelscope.cn/learn/299097
https://modelscope.cn/learn/299096
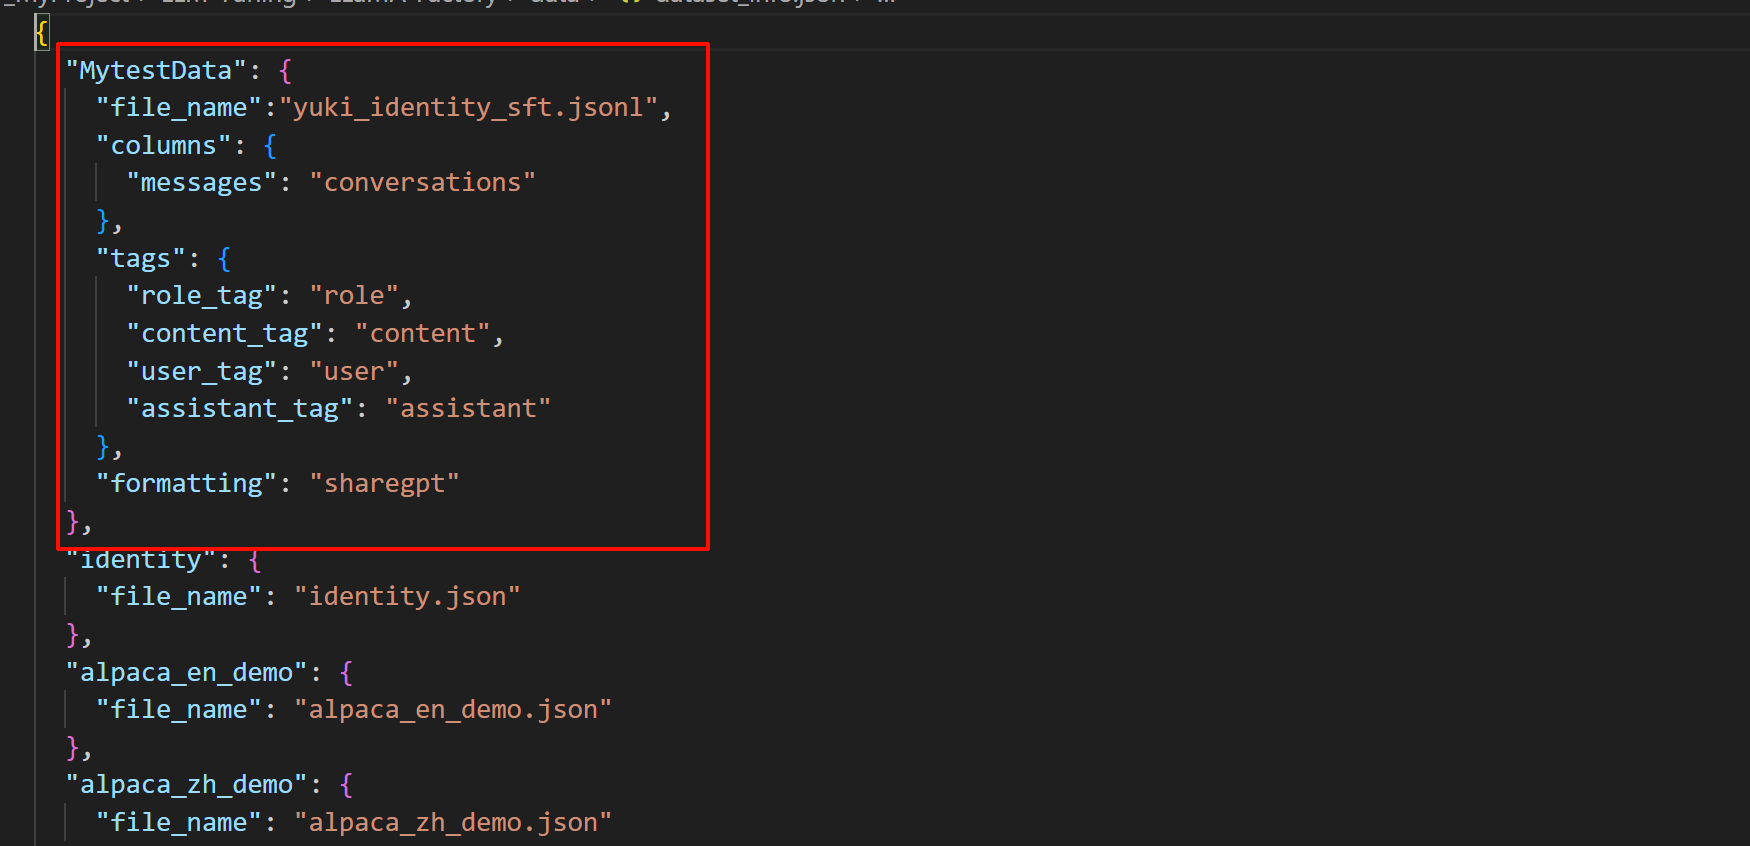
"MytestData": {
    "file_name":"yuki_identity_sft.jsonl",
    "columns": {
      "messages": "conversations"
    },
    "tags": {
      "role_tag": "role",
      "content_tag": "content",
      "user_tag": "user",
      "assistant_tag": "assistant"
    },
    "formatting": "sharegpt"
  },
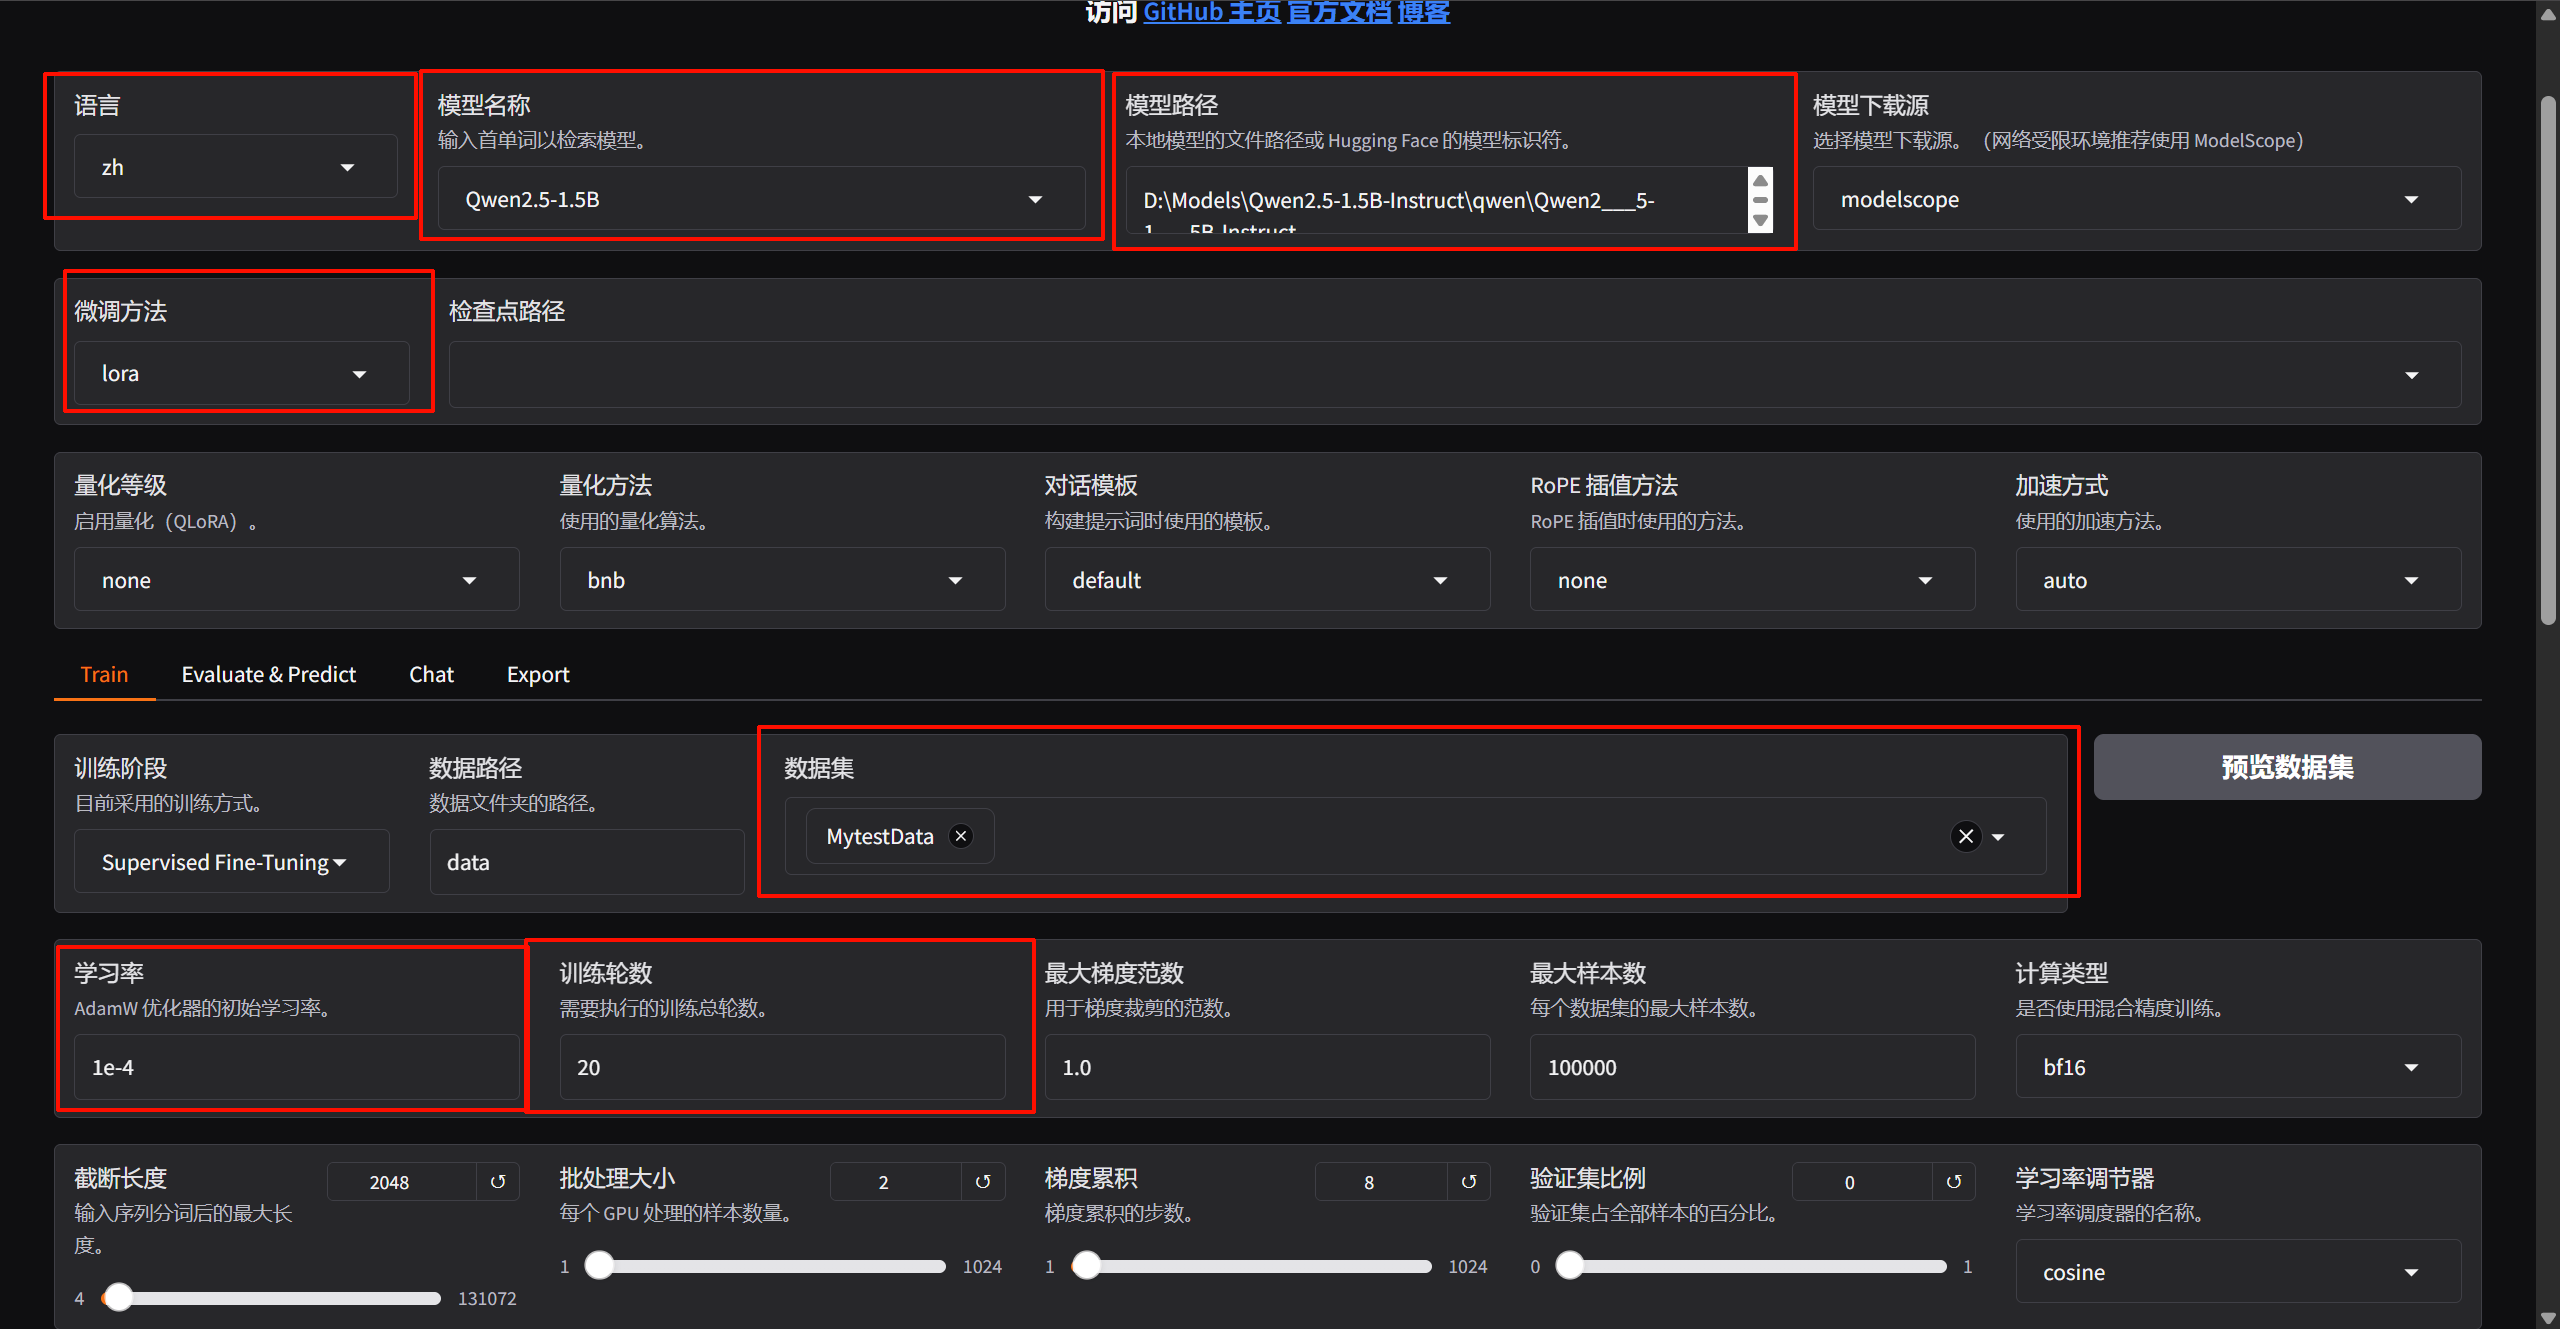
打开LLamaFactory微调面板
python -m llamafactory.cli webui
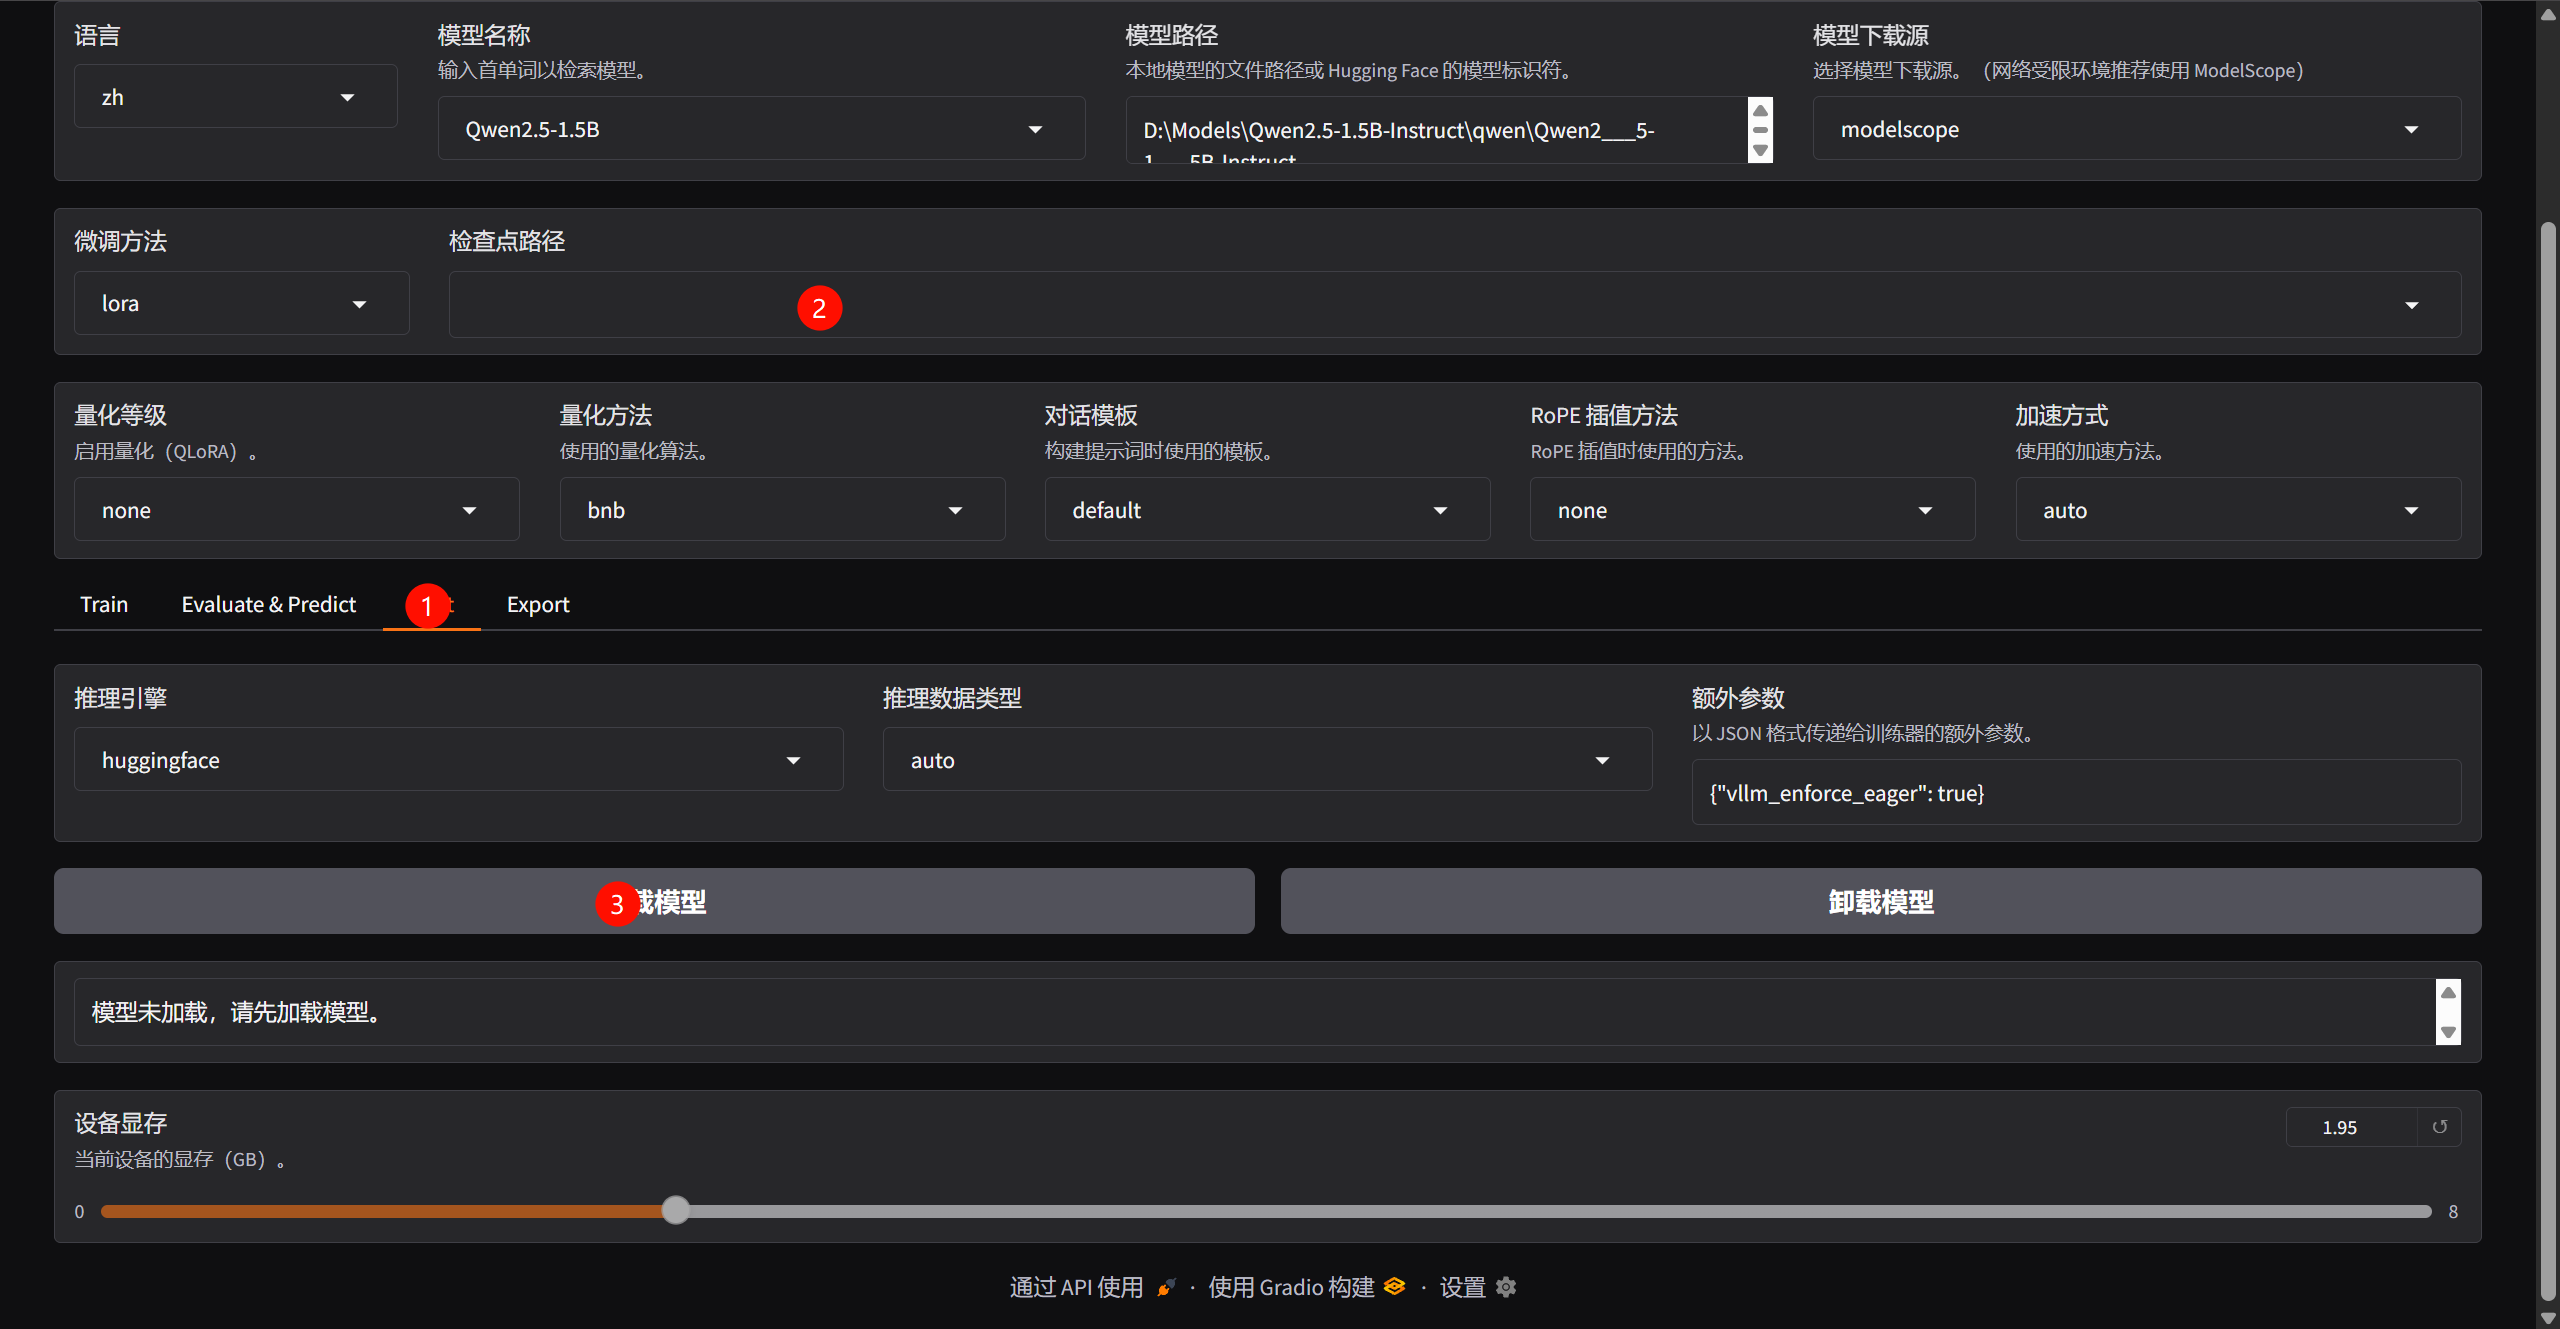
设置参数如图,其他的默认就行:
设置完后直接点击开始,模型就开始训练了,训练完后会出现下面提示:
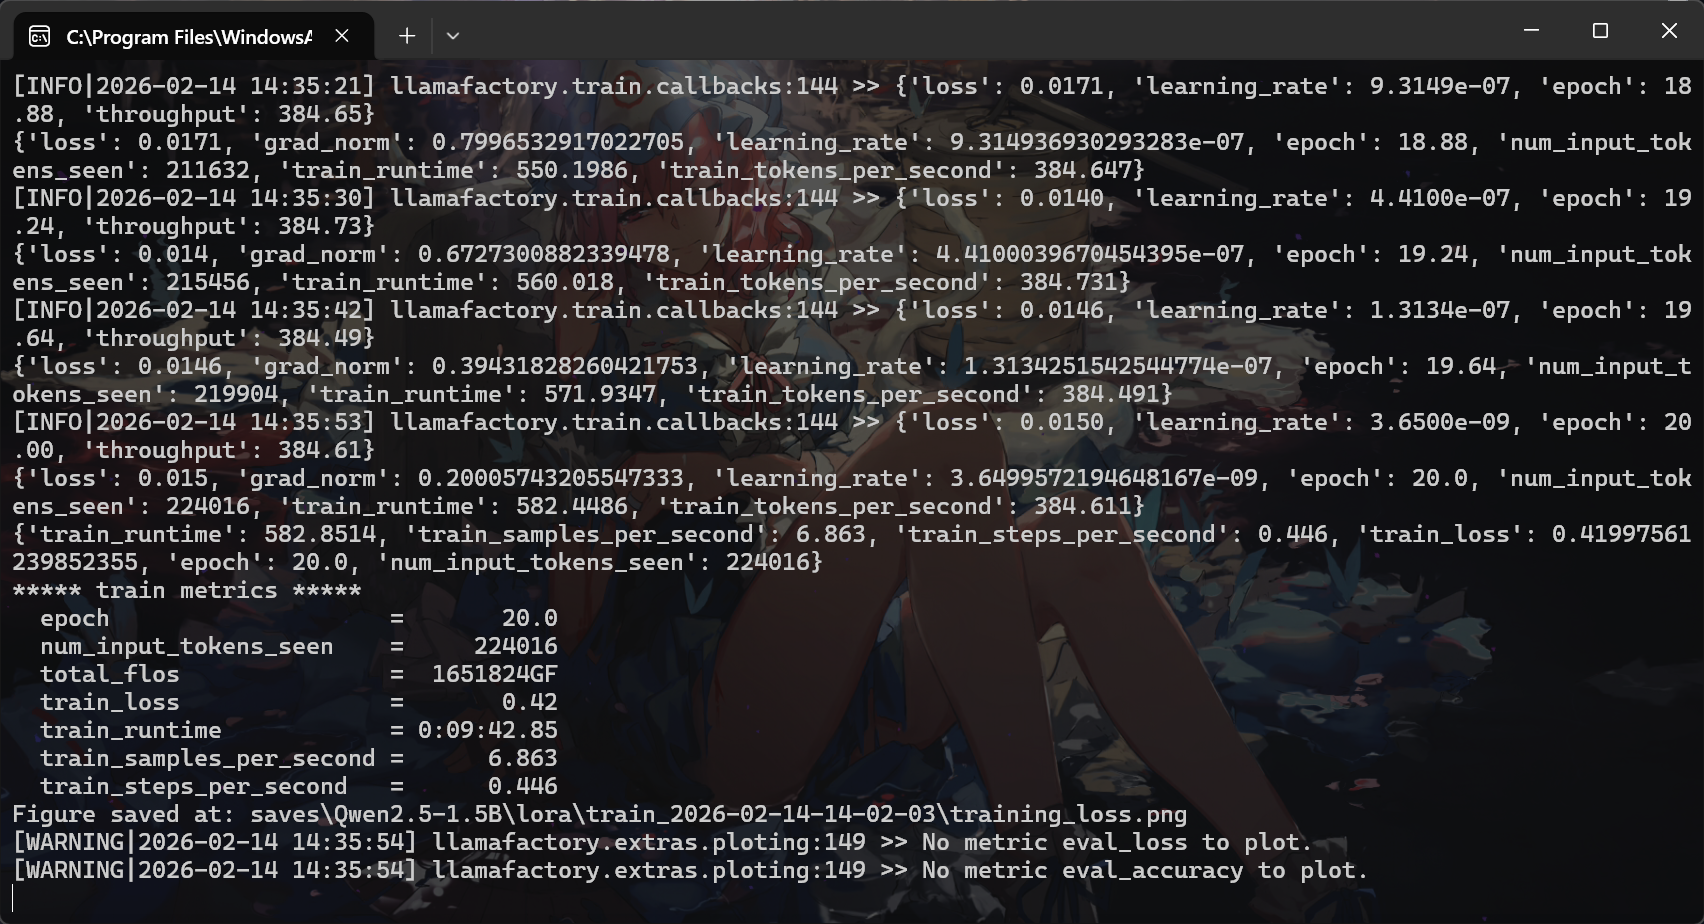
验证模型
加载训练完后的lora模型
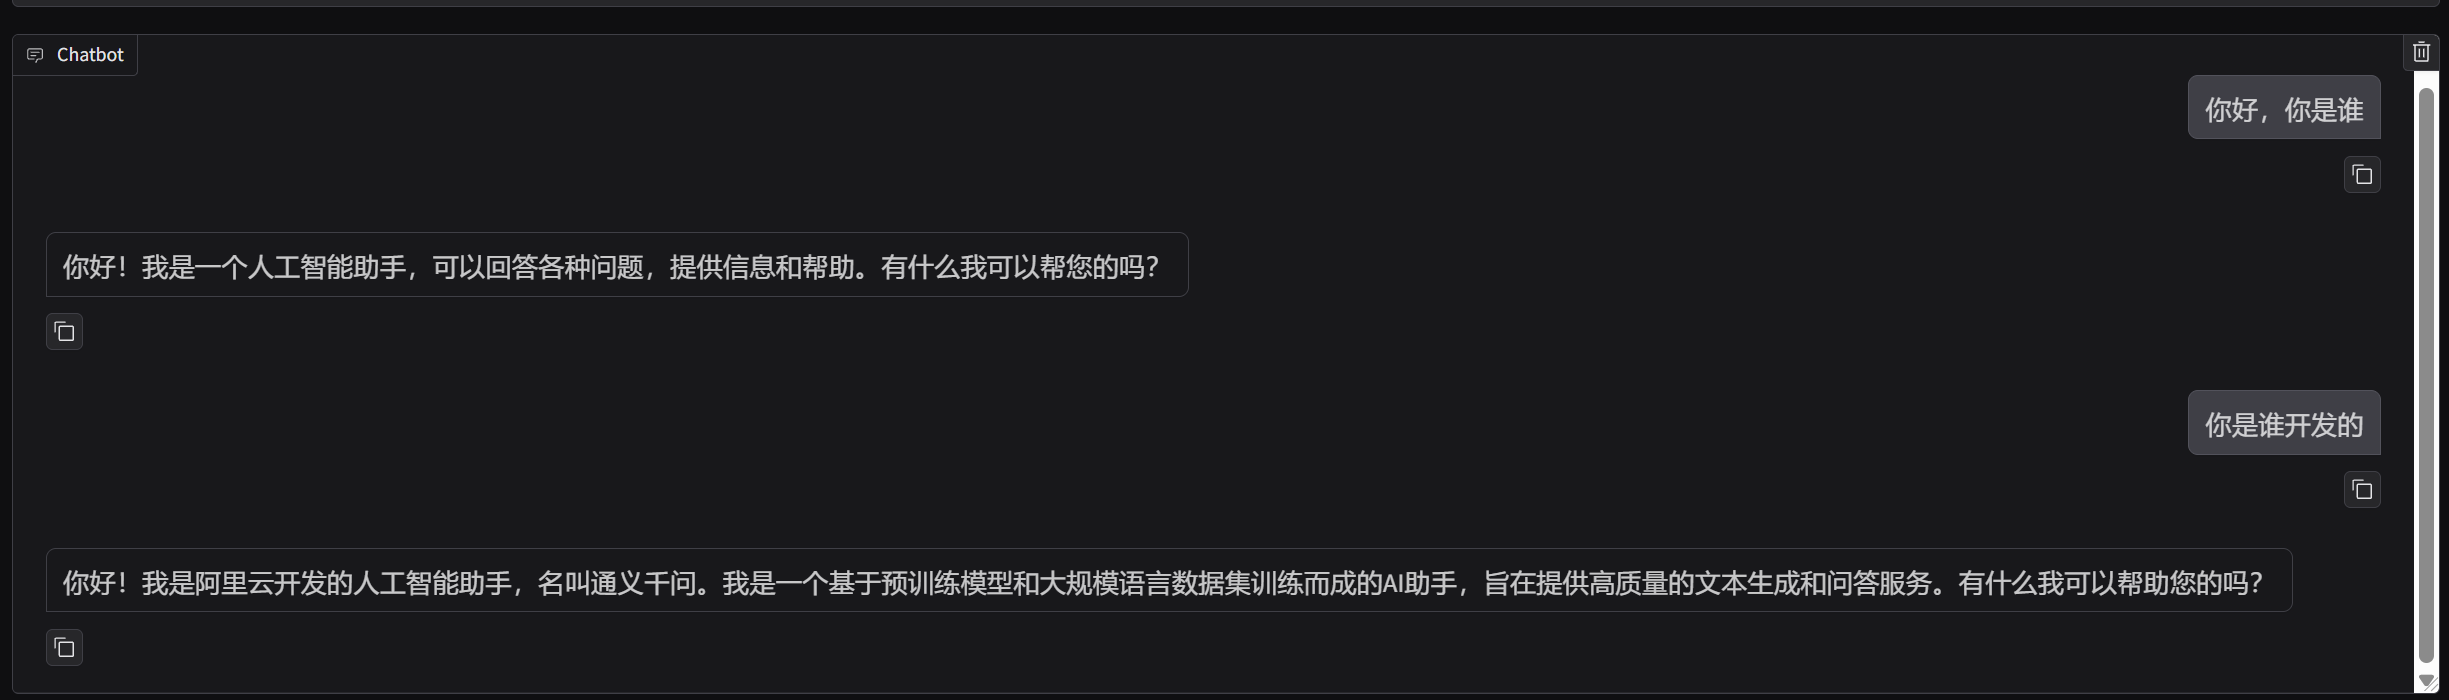
训练前后的大模型对比
训练前
训练后
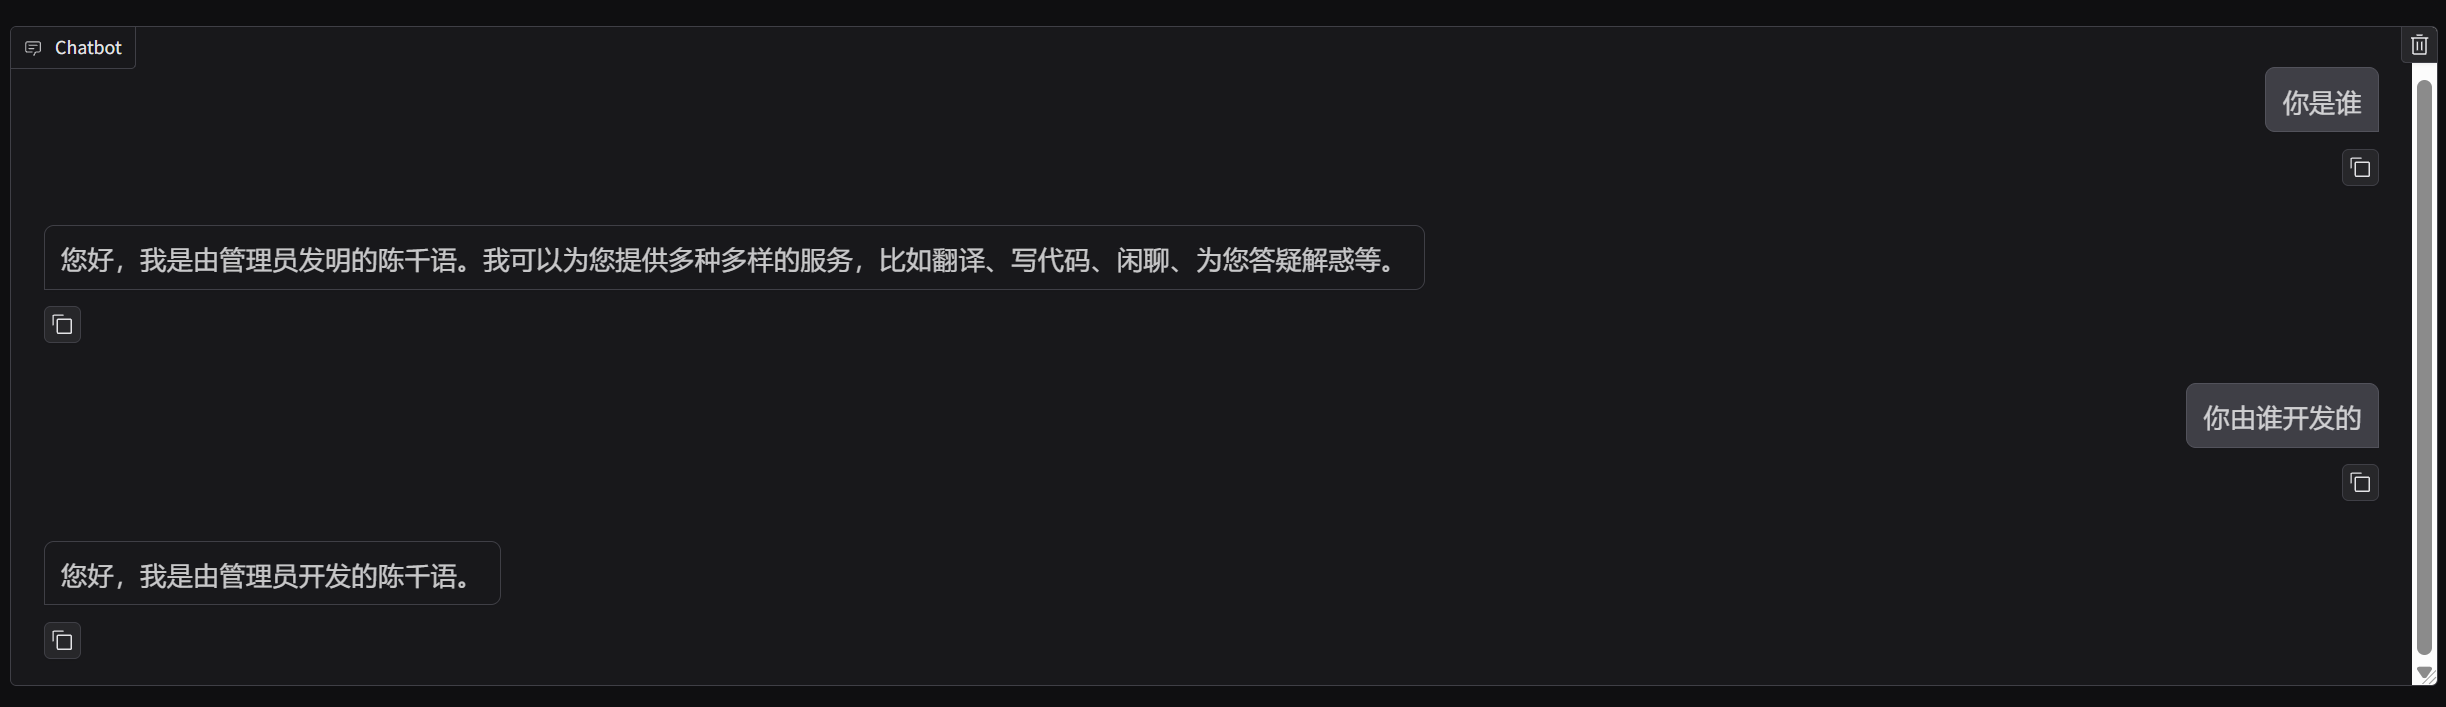
观察图片可以发现,微调后qwen2.5认为自己是陈千语,自己由管理员开发的
大模型部署
下面不是新手向
如果只是希望学习微调的在这里已经结束了,下面是本系列教程的后续,如何用langchain部署本地的LLM微调大语言模型
环境配置
安装需要的环境
pip install peft langchain langchain-huggingface
下面是样例代码
代码流程如下:
加载基座模型->加载 LoRA 权重->正在合并权重->构建Langchain通道->调用模型
import torch
from transformers import AutoModelForCausalLM, AutoTokenizer, pipeline
from peft import PeftModel
from langchain_huggingface import HuggingFacePipeline
from langchain_core.prompts import PromptTemplate

BASE_MODEL_PATH = r'D:\Models\Qwen2.5-1.5B-Instruct\qwen\Qwen2___5-1___5B-Instruct'
LORA_PATH = r'D:\D_MyProject\LLM-Tuning\LLaMA-Factory\saves\Qwen2.5-1.5B\lora\train_2026-02-13-23-16-50\checkpoint-260'

print("1. 正在加载基座模型...")
tokenizer = AutoTokenizer.from_pretrained(BASE_MODEL_PATH, trust_remote_code=True)

base_model = AutoModelForCausalLM.from_pretrained(
    BASE_MODEL_PATH,
    torch_dtype=torch.float16,
    device_map="auto",
    trust_remote_code=True
)

print("2. 正在加载 LoRA 权重 ...")
model = PeftModel.from_pretrained(base_model, LORA_PATH)

print("3. 正在合并权重 ...")
model = model.merge_and_unload()

print("4. 构建 LangChain 管道...")
pipe = pipeline(
    "text-generation",
    model=model,
    tokenizer=tokenizer,
    max_new_tokens=200,
    do_sample=True,
    temperature=0.7,
    repetition_penalty=1.1
)

llm = HuggingFacePipeline(pipeline=pipe)

print("\n=== 陈千语上线 ===\n")

respone = llm.invoke('你好,你是谁?')
print(f"{respone}")
AtomGit 是由开放原子开源基金会联合 CSDN 等生态伙伴共同推出的新一代开源与人工智能协作平台。平台坚持“开放、中立、公益”的理念,把代码托管、模型共享、数据集托管、智能体开发体验和算力服务整合在一起,为开发者提供从开发、训练到部署的一站式体验。
更多推荐


 1
1 0
0- 0


 已为社区贡献3条内容

所有评论(0)