BEVFormer环境搭建
BEVFormer环境搭建
这是个纯视觉的方案,重点在于学习多视角融合,时序信息处理,在2022年的waymo挑战赛中获得冠军,也是2022CVPR best paper,作者来自上海人工智能实验室。后续可以分别去关注这个挑战赛和实验室的最新成果,看看发展到了哪一步,目前是刚开始学习了解
为什么选择bevformer?AI推荐,配套博客视频资料讲解齐全,项目文件规范,可以作为入门demo,后续可以变通理解别的感知方案
github的文档中也有安装方法,但4年过去了,我试试一些新的环境,为了避免负责的环境依赖问题,我让claude推荐了一些版本:
创建conda环境
conda create -n bevformer python=3.8 -y
conda activate bevformer
安装PyTorch
pip install torch==1.10.1+cu113 torchvision==0.11.2+cu113 -f https://download.pytorch.org/whl/cu113/torch_stable.html
服务器上的cuda是11.8的,会向下兼容版本低的

安装mmcv-full、mmdet、mmseg
pip install mmcv-full==1.6.0 -f https://download.openmmlab.com/mmcv/dist/cu113/torch1.10/index.html
pip install mmdet==2.28.2
pip install mmsegmentation==0.30.0
安装mmdetection3d
git clone https://github.com/open-mmlab/mmdetection3d.git
cd mmdetection3d
git checkout v1.0.0rc6
pip install -v -e .
mmdetection3d和bevformer分别在两个文件夹,不用嵌套关系,主要是使用mm3d的一些包安装在bevformer的conda环境中
安装BEVFormer
cd ..
git clone https://github.com/fundamentalvision/BEVFormer.git
cd BEVFormer
# 安装其他依赖包
pip install einops fvcore seaborn iopath==0.1.9 timm==0.6.13  typing-extensions==4.5.0 pylint ipython==8.12  numpy==1.19.5 matplotlib==3.5.2 numba==0.48.0 pandas==1.4.4 scikit-image==0.19.3 setuptools==59.5.0
# 安装detection2,第一种比较依赖网络,如果失败试试第二种
python -m pip install 'git+https://github.com/facebookresearch/detectron2.git'
# 第二种,类似从源码构建
pip install detectron2 -f https://dl.fbaipublicfiles.com/detectron2/wheels/cu113/torch1.10/index.html

# 后续再运行代码时缺什么再安装什么
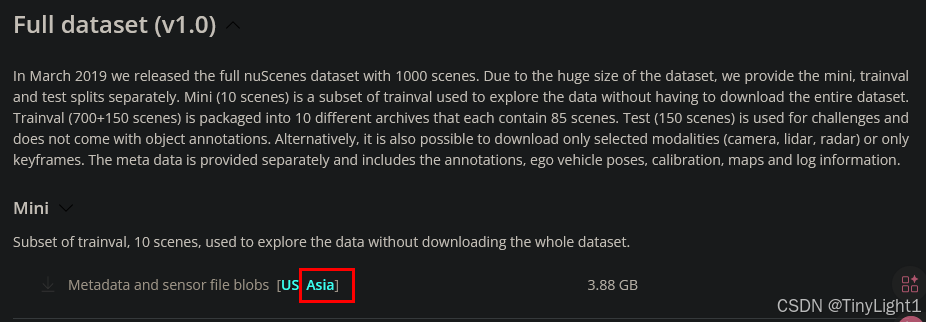
安装好了要测试一下安装的有没有问题,使用nuScenes的mini数据集
在bevformer文件夹中新建nuscenes的文件夹,然后在一个网速快的地方到nuScenes的官网上先注册账号,然后下载,下载完成传到服务器上,网站上还有数据集的讲解
参照项目作者的prepare_dataset.md,还要下载CAN bus,就在full dataset的上面
mkdir -p data/nuscenes

cd data/nuscenes
tar -xvf v1.0-mini.tgz
预处理数据
python tools/create_data.py nuscenes --root-path ./data/nuscenes --out-dir ./data/nuscenes --extra-tag nuscenes --version v1.0-mini
处理完后会多一些json文件
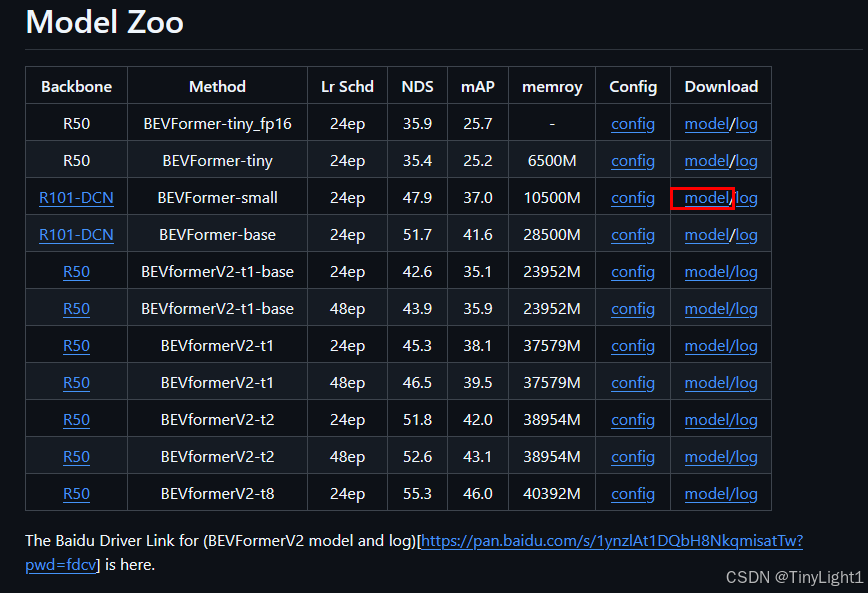
下载模型
我的服务器连接海外的网站速度太慢了,还是先本地下好再上传,去项目的github页面
mkdir -p ckpts
# 模型放在这里面
运行推理测试
# 单GPU推理,会出问题,下面有解决办法
python tools/test.py \
    projects/configs/bevformer/bevformer_small.py \
    ckpts/bevformer_small_epoch_24.pth \
    --eval bbox

# 如果要可视化结果
python tools/test.py \
    projects/configs/bevformer/bevformer_small.py \
    ckpts/bevformer_small_epoch_24.pth \
    --eval bbox \
    --show-dir ./output/visualization
会在终端输出map,NDS……,并且在test目录下输出json文件。由于是在vscode的云服务器,一些可视化不太好进行,项目作者写了的visual.py,路径: B E V F o r m e r / t o o l s / a n a l y s i s t o o l s / v i s u a l . p y BEVFormer/tools/analysis_tools/visual.py BEVFormer/tools/analysistools/visual.py ,需要修改最后的数据集和运行结果

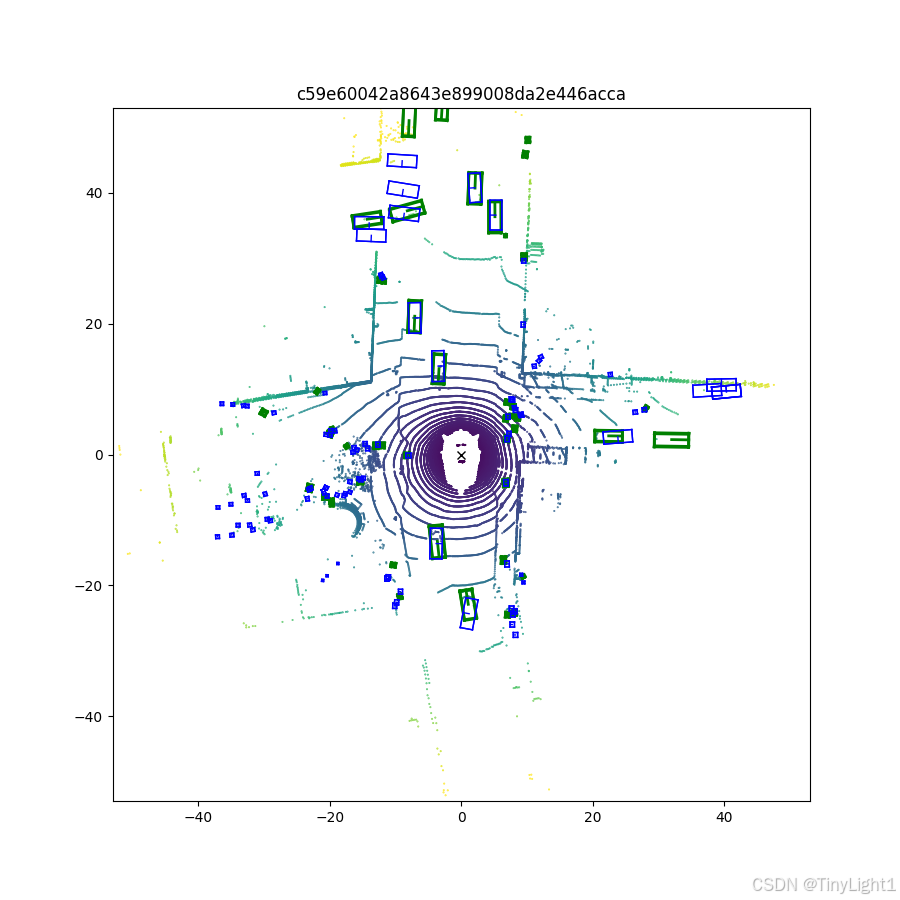
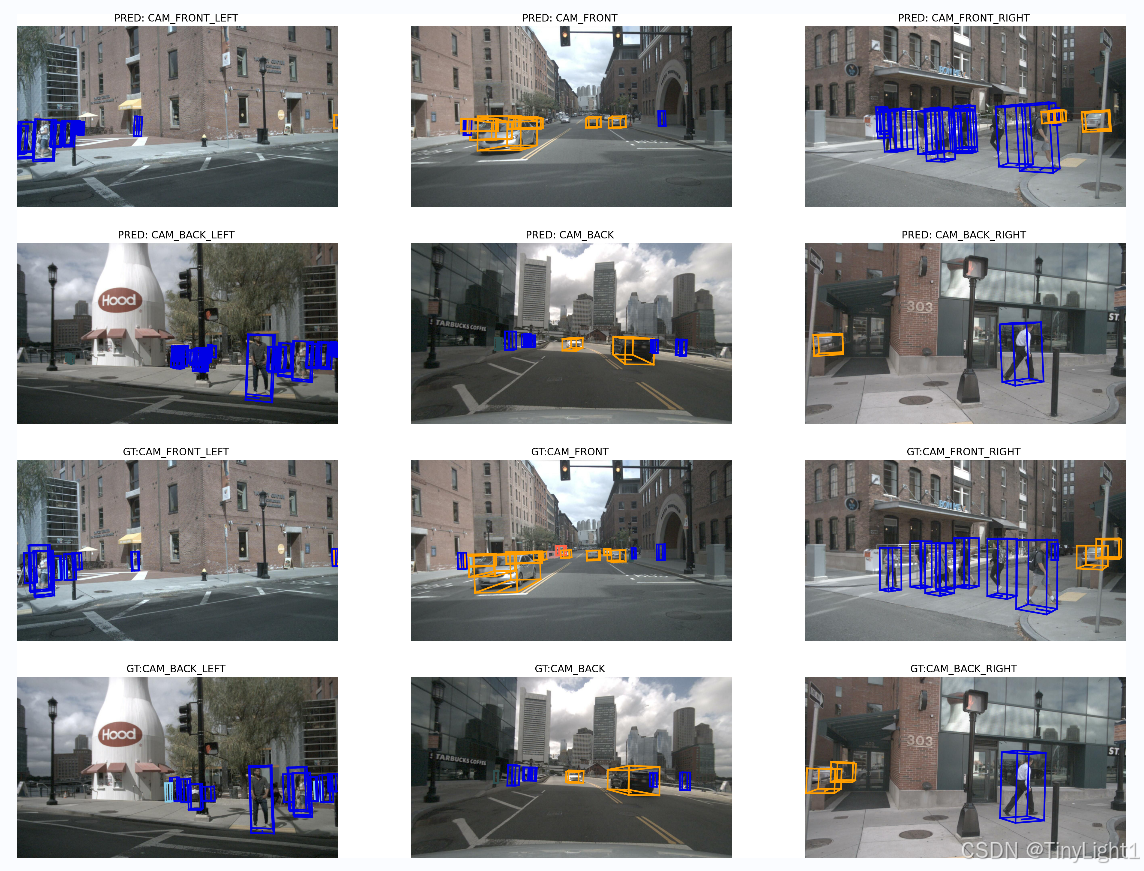
由于是mini数据集和small模型,会有一些漏检。
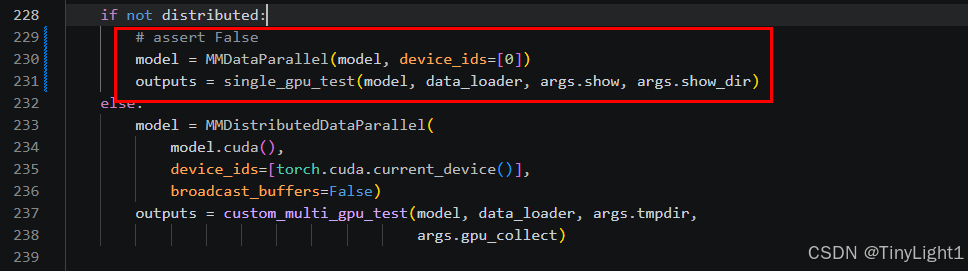
推理时会报错,不允许单卡运行,需要修改test.py中228~231行的注释,改为下图
训练
./tools/dist_train.sh ./projects/configs/bevformer/bevformer_base.py 8
后面数字8代表8个GPU,实际训练要看终端输出的内容去调整一些参数,尽量占满显存和利用率
在dist-train.sh中把python -m torch.distributed.launch 替换为 torchrun
设置export OMP_NUM_THREADS=2加快数据集加载速度,提高CPU利用,通常不大于4。
在bevformer_base.py可以设置批大小和训练轮数total_epochs = 24batch_size = samples_per_gpu = 1
batch_size=1时,三种模型显存占用大小:
| 模型 | 显存占用 |
|---|---|
| base | 27G |
| small | 10G |
| tiny | 6G |
OMP_NUM_THREADS参数详解:
这个参数是OpenMP库的一个环境变量,用于控制多线程程序中并行的线程数量,目的是加快单个进程的处理速度。通常情况下每个openMP线程会分配到一个CPU核心,所以可以根据服务器的CPU核数设置大小,但也不能设置过大,会造成计算资源抢占等问题。
当观察到GPU的利用率不高,间歇性降低严重,可能就是GPU在等待CPU进行数据加载,可适当先调整workers_per_gpu ,再调整 OMP_NUM_THREADS 。
workers_per_gpu 这个参数控制的就是每个GPU上同时有多少个进程在准备数据,而omp是线程级。
计算关系:
8 GPU* 4 workers_per_gpu =32 个dataloader进程
32个进程 * N 个omp线程 < cpu核心数
同时还要预留一些核心数来处理其他任务需求。
workers也不宜设置过大,试试4,8。这个设置还要根据数据集存贮的场所决定,本地ssd的 < 分布式存储pfs(12-16)

AtomGit 是由开放原子开源基金会联合 CSDN 等生态伙伴共同推出的新一代开源与人工智能协作平台。平台坚持“开放、中立、公益”的理念,把代码托管、模型共享、数据集托管、智能体开发体验和算力服务整合在一起,为开发者提供从开发、训练到部署的一站式体验。
更多推荐

 10
10 0
0- 0


 已为社区贡献1条内容

所有评论(0)