centos7.9上部署openstack(train版)——1. 环境准备
- 基本环境配置
-
安装Centos7.9
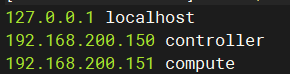
- controller 节点 192.168.200.150 6H 8192M 60G 虚拟化VT-x与CPU性能计数打开
- compute 节点 192.168.200.151 6H 8192M 60G 虚拟化VT-x与CPU性能计数打开
- 安装时划分区,留下40G空间
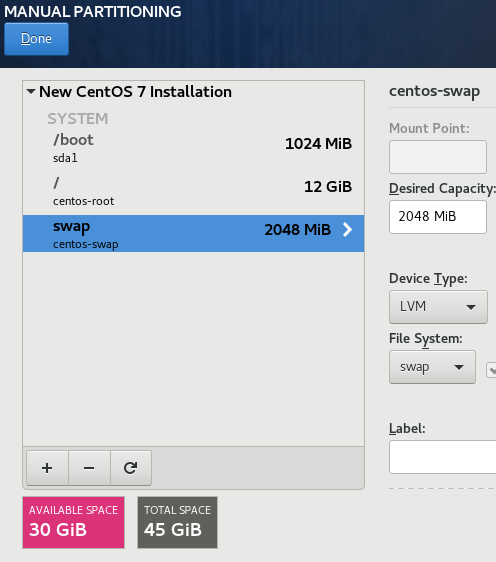
- 安装时划分区,留下40G空间
-
配置网络与主机名
-
controller
- ens32:192.168.200.150 内部管理网络
- ens33:第二块为外部网络网卡
-
compute
- ens32:192.168.200.151 内部管理网络
- ens33:第二块网卡为外部网络网卡

-
-
配置yum源
-
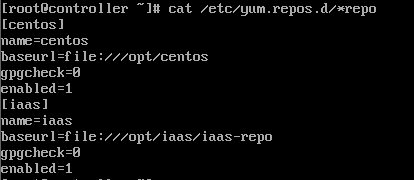
controller 本地源
-
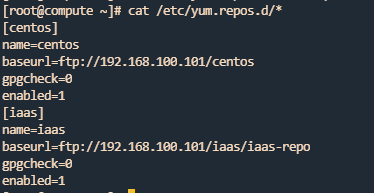
compute ftp源
-
controller挂载iso文件(省硬盘直接永久挂载,正常则挂载后使用cp -rvf进行复制到目标文件夹再取消挂载)


-
controller搭建ftp服务


-
双节点关闭防火墙与Selinux=permissive


-
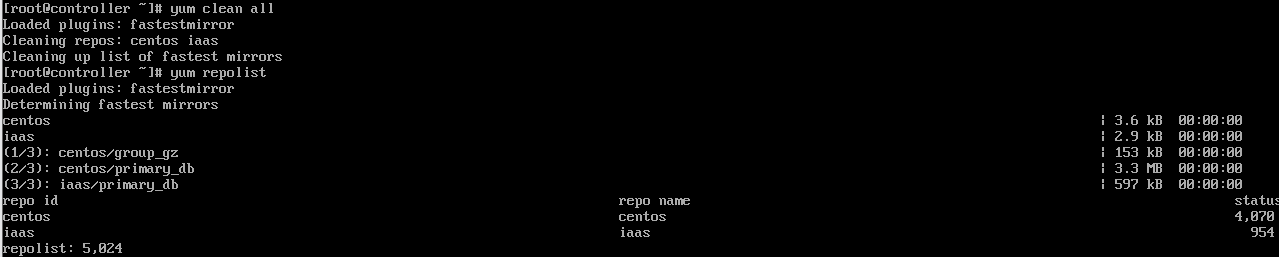
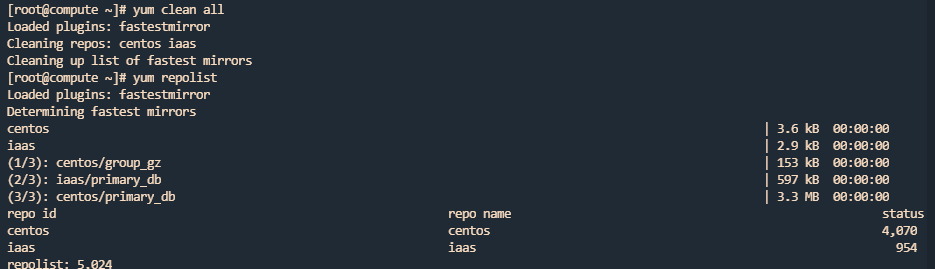
清除yum缓存与验证yum源
-
controller
-
compute
-
-
双节点禁用ipv6
/etc/sysctl.confnet.ipv6.conf.all.disable_ipv6 = 1 net.ipv6.conf.default.disable_ipv6 = 1 -
官方源安装
//all node
https://mirrors.aliyun.com/centos/7/cloud/x86_64
# yum install centos-release-openstack-train -y
# yum upgrade -y
-
-
- 环境
-
网络时间协议 (NTP)
- Controller
# yum install -y chrony # vim /etc/chrony.conf server controller iburst //使用同步的远程时钟源 allow 192.168.200.0/24 //允许指定网络的主机同步时间 local stratum 10 //自己未能同步网络时间,也允许授时给其它客户端 # systemctl enable chronyd.service # systemctl start chronyd.service - Compute
# yum install -y chrony # vim /etc/chrony.conf server controller iburst //使用同步的远程时钟源 # systemctl enable chronyd.service # systemctl start chronyd.service - all note
# chronyc sources -v //验证是否同步,若成功同步,最后一行*开头
- Controller
-
OpenStack客户端相关软件安装
- all note
# yum -y install openstack-utils openstack-selinux python-openstackclient
# yum upgrade
- all note
-
mysql 数据库服务
Most OpenStack services use an SQL database to store information. The database typically runs on the controller node. The procedures in this guide use MariaDB or MySQL depending on the distribution. OpenStack services also support other SQL databases including PostgreSQL.
大多数 OpenStack 服务使用 SQL 数据库来存储信息。数据库通常运行在控制器节点上。本指南中的步骤使用 MariaDB 或 MySQL,具体取决于发行版。OpenStack 服务还支持其他 SQL 数据库,包括 PostgreSQL。- Controller
# yum install -y mariadb mariadb-server python2-PyMySQL
# vim /etc/my.cnf.d/openstack.cnf
[mysqld]
bind-address = 192.168.200.150 //指定了MySQL服务器监听的IP地址,也就是允许哪些客户端连接到服务器

default-storage-engine = innodb //指定了默认的存储引擎,也就是创建表时如果没有指定存储引擎,则使用这个选项设置的引擎。InnoDB是MySQL支持事务、外键和行级锁定等特性的一种存储引擎。
innodb_file_per_table = on //指定了InnoDB存储引擎是否为每个表创建一个单独的数据文件,而不是把所有表都存储在共享表空间中。开启这个选项可以提高数据恢复速度和磁盘空间利用率。
max_connections = 4096 //指定了MySQL服务器可以同时接受的最大连接数
collation-server = utf8_general_ci //指定了服务器级别的字符集排序规则,utf8_general_ci表示使用utf8字符集,并且不区分大小写(ci代表case insensitive)
character-set-server = utf8 //指定储存和处理使用utf8编码
# systemctl enable mariadb.service
# systemctl start mariadb.service
# mysql_secure_installation //密码使用000000,全Y
- Controller
-
Message queue 消息队列服务
OpenStack uses a message queue to coordinate operations and status information among services. The message queue service typically runs on the controller node. OpenStack supports several message queue services including RabbitMQ, Qpid, and ZeroMQ. However, most distributions that package OpenStack support a particular message queue service. This guide implements the RabbitMQ message queue service because most distributions support it. If you prefer to implement a different message queue service, consult the documentation associated with it.
OpenStack 使用消息队列来协调服务之间的操作和状态信息。消息队列服务通常运行在控制器节点上。OpenStack 支持多种消息队列服务,包括 RabbitMQ、Qpid 和 ZeroMQ。但是,大多数打包 OpenStack 的发行版支持特定的消息队列服务。本指南实现了 RabbitMQ 消息队列服务,因为大多数发行版都支持它。如果你更喜欢实现不同的消息队列服务,请参考与之相关的文档。- Controller
# yum install -y rabbitmq-server
# systemctl enable rabbitmq-server.service
# systemctl start rabbitmq-server.service
# rabbitmqctl add_user openstack 000000 //添加用户:openstack 密码:000000
Creating user "openstack" ...
# rabbitmqctl set_permissions openstack ".*" ".*" ".*" //允许用户的配置、写入和读取访问权限
Setting permissions for user "openstack" in vhost "/" ...
- Controller
-
Memcached服务
The Identity service authentication mechanism for services uses Memcached to cache tokens. The memcached service typically runs on the controller node. For production deployments, we recommend enabling a combination of firewalling, authentication, and encryption to secure it.
身份服务的服务认证机制使用 Memcached 来缓存令牌。memcached 服务通常运行在控制器节点上。对于生产部署,我们建议启用防火墙、认证和加密的组合来保护它。- Controller
# yum install -y memcached python-memcached
# vim /etc/sysconfig/memcached
OPTIONS="-l 127.0.0.1,controller" //服务配置为使用控制节点,为允许其他节点通过以下方式访问 管理网络
# systemctl enable memcached.service
# systemctl restart memcached.service
- Controller
-
Etcd服务
OpenStack services may use Etcd, a distributed reliable key-value store for distributed key locking, storing configuration, keeping track of service live-ness and other scenarios.
OpenStack 服务可能使用 Etcd,这是一个分布式可靠的键值存储,用于分布式键锁定、存储配置、跟踪服务活动状态和其他场景。- Controller
# yum install -y etcd
# vim /etc/etcd/etcd.conf //编辑以允许其他节点通过管理网络进行访问
#[Member]
ETCD_DATA_DIR="/var/lib/etcd/default.etcd"
ETCD_LISTEN_PEER_URLS="http://192.168.200.150:2380"
ETCD_LISTEN_CLIENT_URLS="http://192.168.200.150:2379"
ETCD_NAME="controller"
#[Clustering]
ETCD_INITIAL_ADVERTISE_PEER_URLS="http://192.168.200.150:2380"
ETCD_ADVERTISE_CLIENT_URLS="http://192.168.200.150:2379"
ETCD_INITIAL_CLUSTER="controller=http://192.168.200.150:2380"
ETCD_INITIAL_CLUSTER_TOKEN="etcd-cluster-01"
ETCD_INITIAL_CLUSTER_STATE="new"
# systemctl enable etcd
# systemctl start etcd
- Controller
-
- 最小化安装
- keystone
- glance
- placement
- nova
- neutron
- horizon(建议)
- cinder(建议)

AtomGit 是由开放原子开源基金会联合 CSDN 等生态伙伴共同推出的新一代开源与人工智能协作平台。平台坚持“开放、中立、公益”的理念,把代码托管、模型共享、数据集托管、智能体开发体验和算力服务整合在一起,为开发者提供从开发、训练到部署的一站式体验。
更多推荐


 7
7 0
0- 0


 已为社区贡献4条内容

所有评论(0)