MAC终端神器iTerm2设置
最终效果图
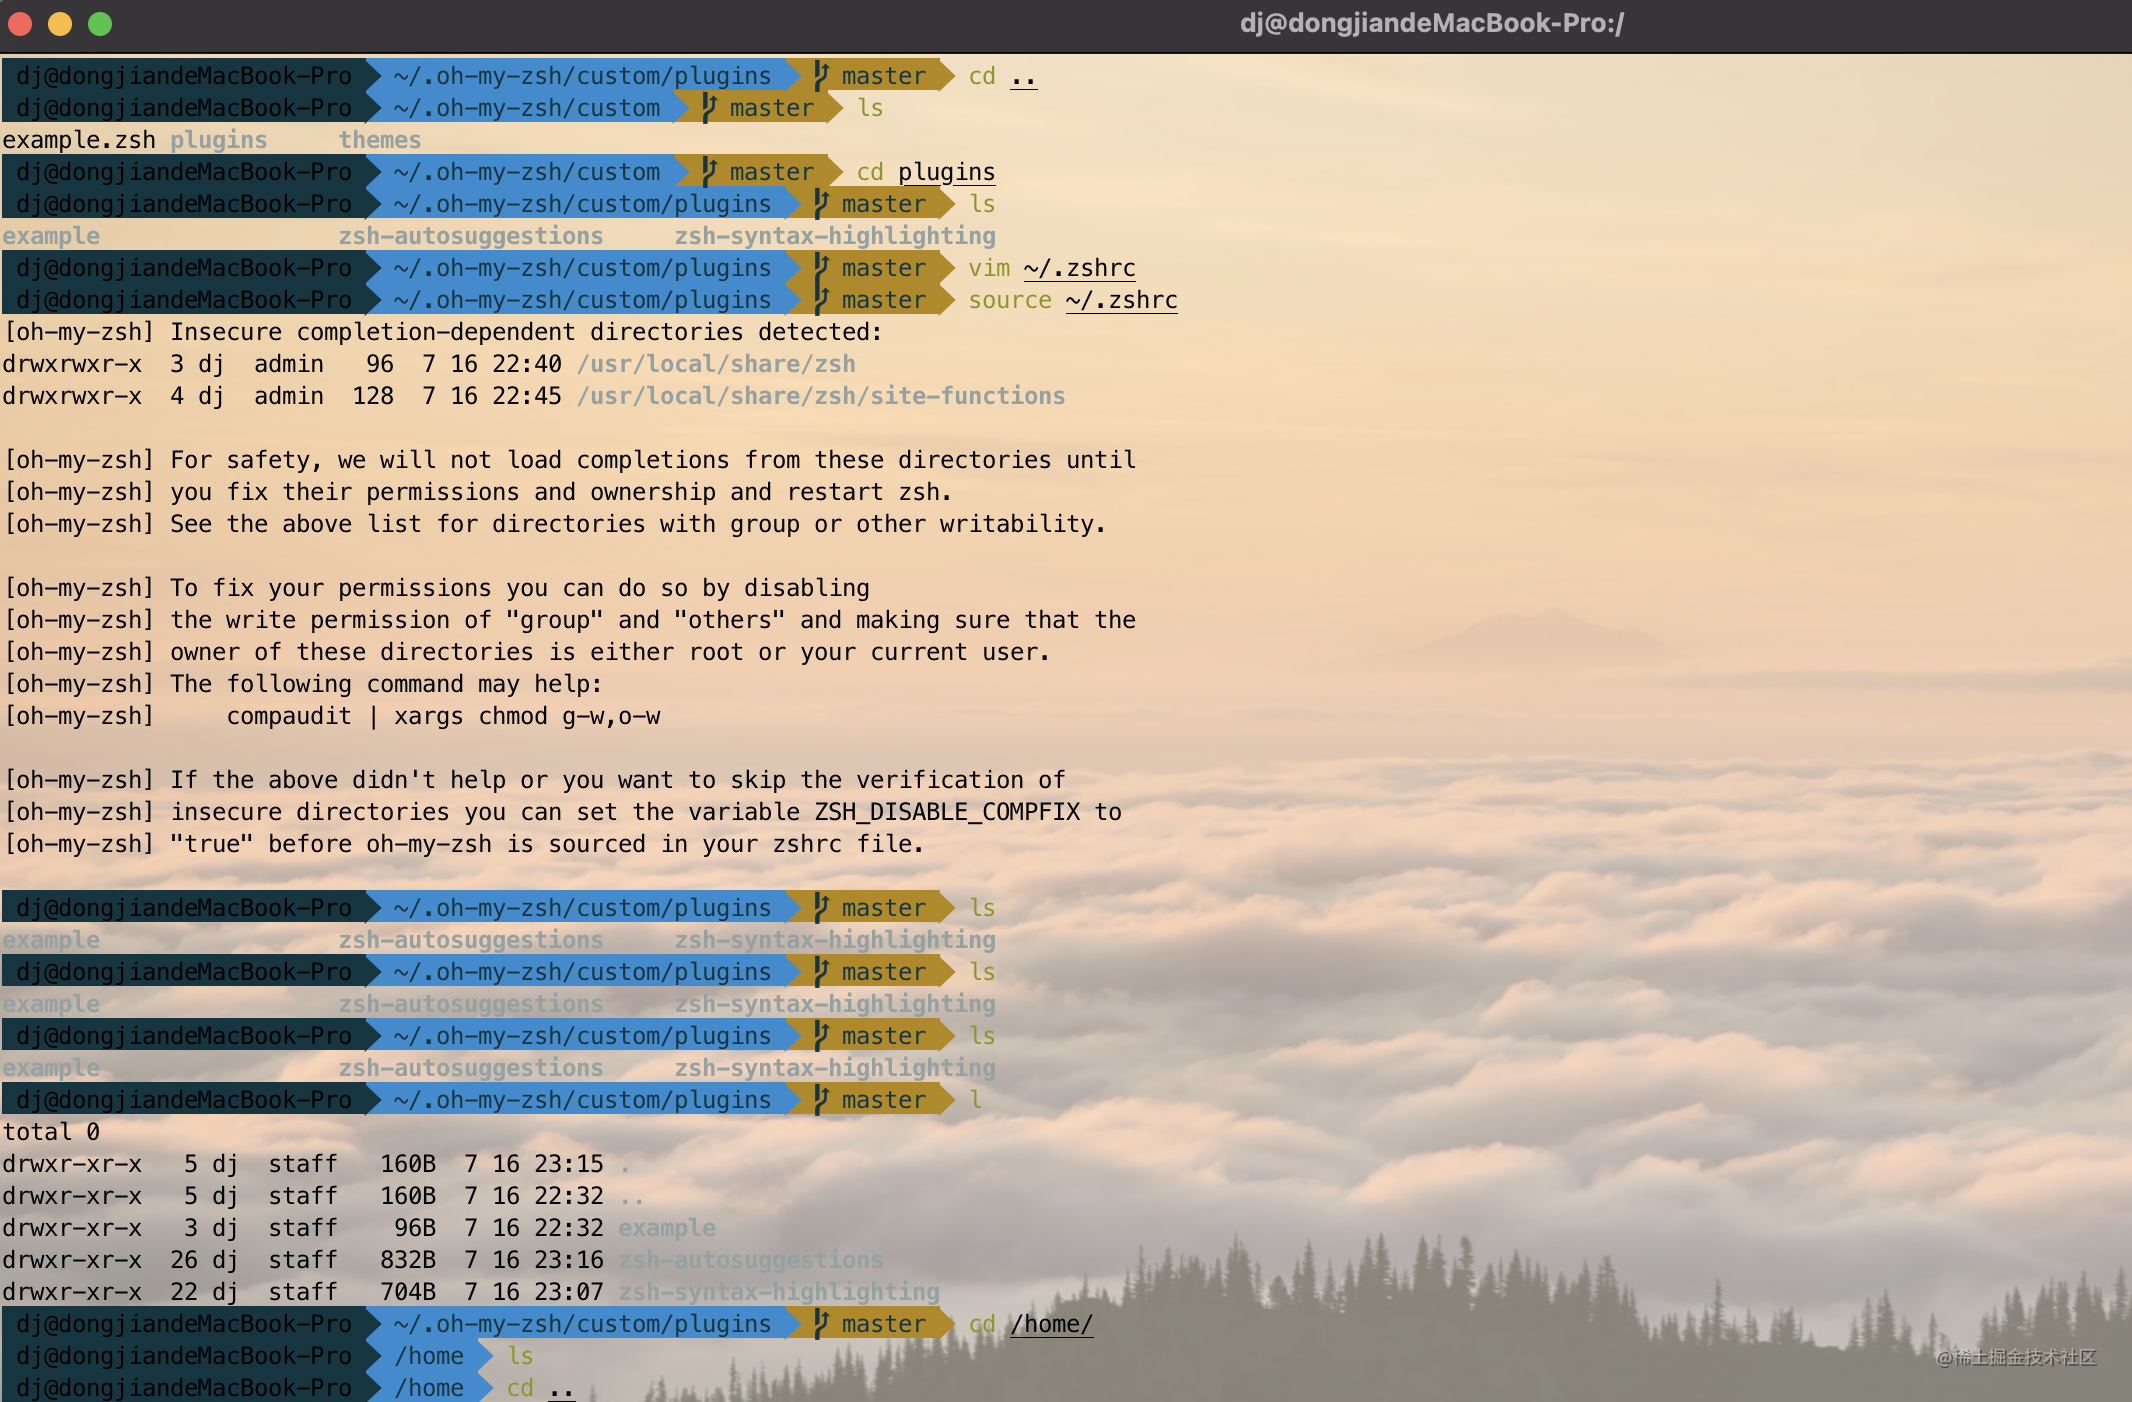
步骤
1. 下载iTerm2
官网下载地址
Mac系统默认使用dash作为终端,可以使用命令修改默认使用zsh:chsh -s /bin/zsh
如果想修改回默认dash,同样使用chsh命令即可:chsh -s /bin/bash
2. 安装Oh my zsh
官方提供两种安装方式,可以任选一种
# curl 安装方式
sh -c "$(curl -fsSL https://raw.githubusercontent.com/robbyrussell/oh-my-zsh/master/tools/install.sh)"

# wget 安装方式
sh -c "$(wget https://raw.githubusercontent.com/robbyrussell/oh-my-zsh/master/tools/install.sh -O -)"
当使用以上两种方法都报错时,可尝试以下方法手动安装:
# 下载 oh-my-zsh 源码
git clone git://github.com/robbyrussell/oh-my-zsh.git ~/.oh-my-zsh
# 并且把 .zshrc 配置文件拷贝到根目录下
cp ~/.oh-my-zsh/templates/zshrc.zsh-template ~/.zshrc
# 让 .zshrc 配置文件生效
source ~/.zshrc
3. 安装PowerLine
使用命令 pip install powerline-status --user 安装
如安装过程中提示没有pip则使用sudo easy_install pip
如果命令仍然执行错误,可能是由于本机默认python2,此时我们安装并默认使用python3,操作如下:
- 安装homebrew。
/bin/zsh -c "$(curl -fsSL https://gitee.com/cunkai/HomebrewCN/raw/master/Homebrew.sh)" - 更新brew。
brew update - 安装python3。
brew install python - 查看python3是否安装成功。
/usr/local/Cellar/目录下是否有python3开头的文件夹,如有既是安装成功 - 指定python3为默认环境。
# 下面Cellar后面的路径根据自身实际python版本修改
export PATH=${PATH}:/usr/local/Cellar/python@3.9/3.9.6/bin
alias python=/usr/local/Cellar/python@3.9/3.9.6/bin/python3
alias pip=/usr/local/Cellar/python@3.9/3.9.6/bin/pip3
4. 安装PowerFonts
安装字体库需要首先将项目git clone至本地,然后执行源码中的install.sh。
在你习惯的位置新建一个文件夹,如:/Users/dj/opensource
mkdir /Users/dj/opensource
cd /Users/dj/opensource
git clone https://github.com/powerline/fonts.git --depth=1
cd fonts
./install.sh
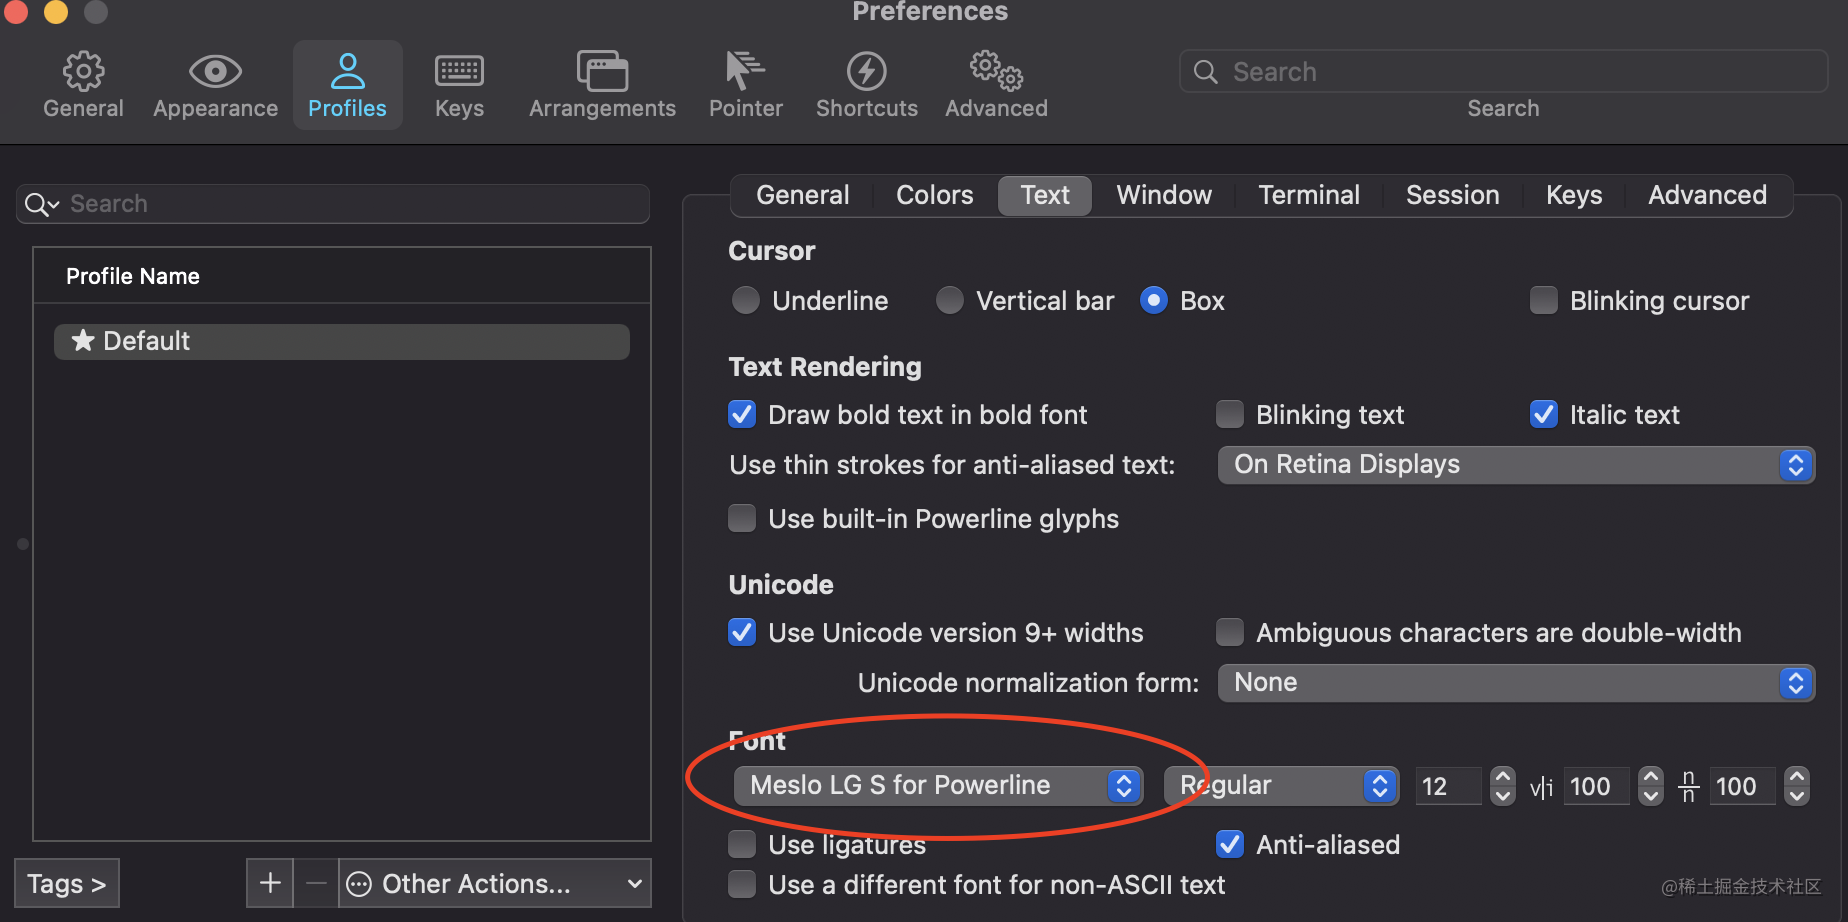
安装好字体库之后,设置iTerm2的字体,具体的操作是iTerm2 -> Preferences -> Profiles -> Text,在Font区域选中Change Font,然后找到Meslo LG字体。
5. 安装配色方案
cd /Users/dj/opensource
git clone https://github.com/altercation/solarized
cd solarized/iterm2-colors-solarized/
open .
在打开的finder窗口中,双击Solarized Dark.itermcolors和Solarized Light.itermcolors即可安装明暗两种配色。
再次进入iTerm2 -> Preferences -> Profiles -> Colors -> Color Presets中根据个人喜好选择这两种配色中的一种即可。
6. 安装主题
下载agnoster主题,执行脚本安装:
cd /Users/dj/opensource
git clone https://github.com/fcamblor/oh-my-zsh-agnoster-fcamblor.git
cd oh-my-zsh-agnoster-fcamblor/
./install
拷贝完成后,执行vim ~/.zshrc命令打开zshrc配置文件,将ZSH_THEME后面的字段改为agnoster。
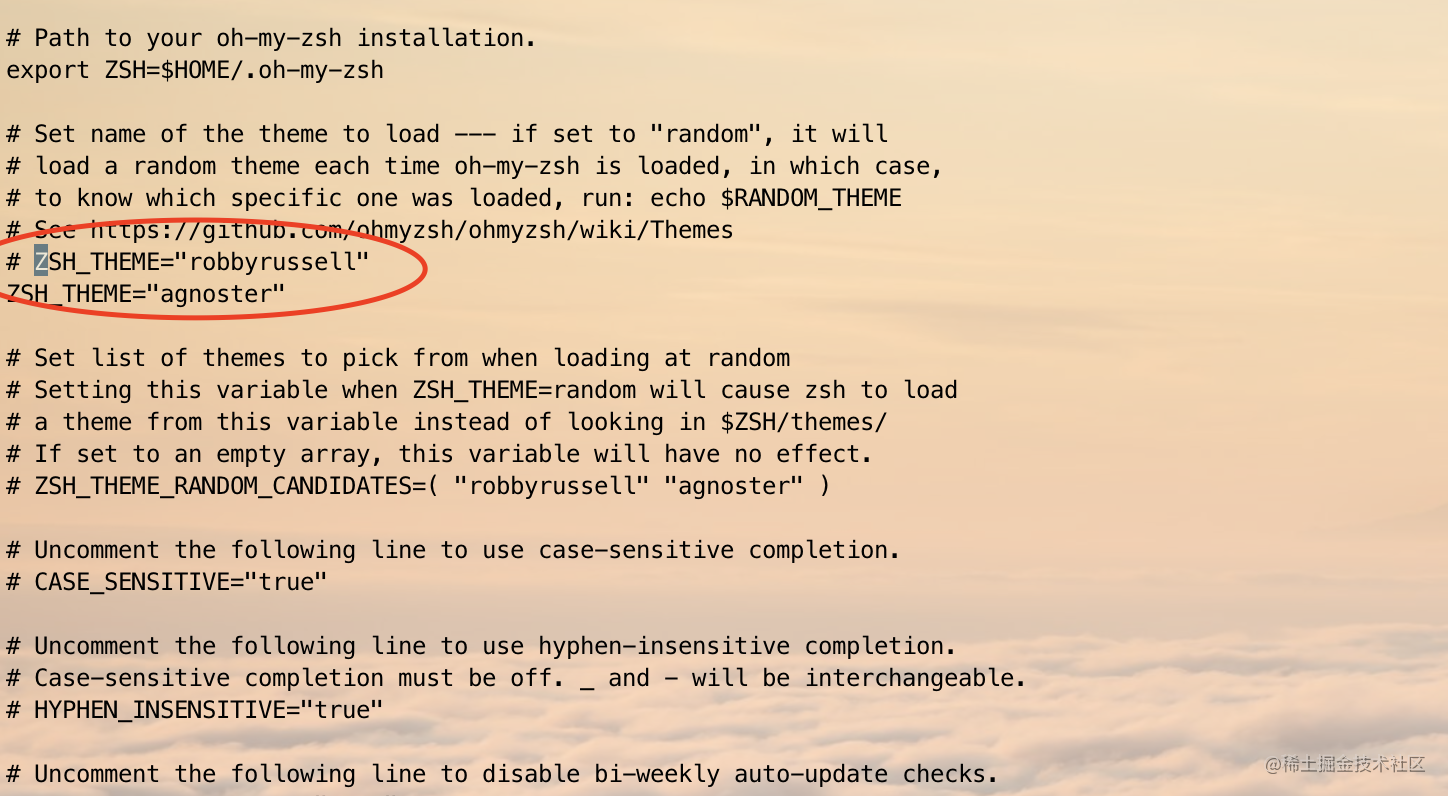
执行 source ~/.zshrc 使配置文件生效。
7. 安装高亮插件和命令补全插件
cd ~/.oh-my-zsh/custom/plugins/
# 高亮插件
git clone https://github.com/zsh-users/zsh-syntax-highlighting.git
# 命令补全插件
git clone https://github.com/zsh-users/zsh-autosuggestions
vi ~/.zshrc
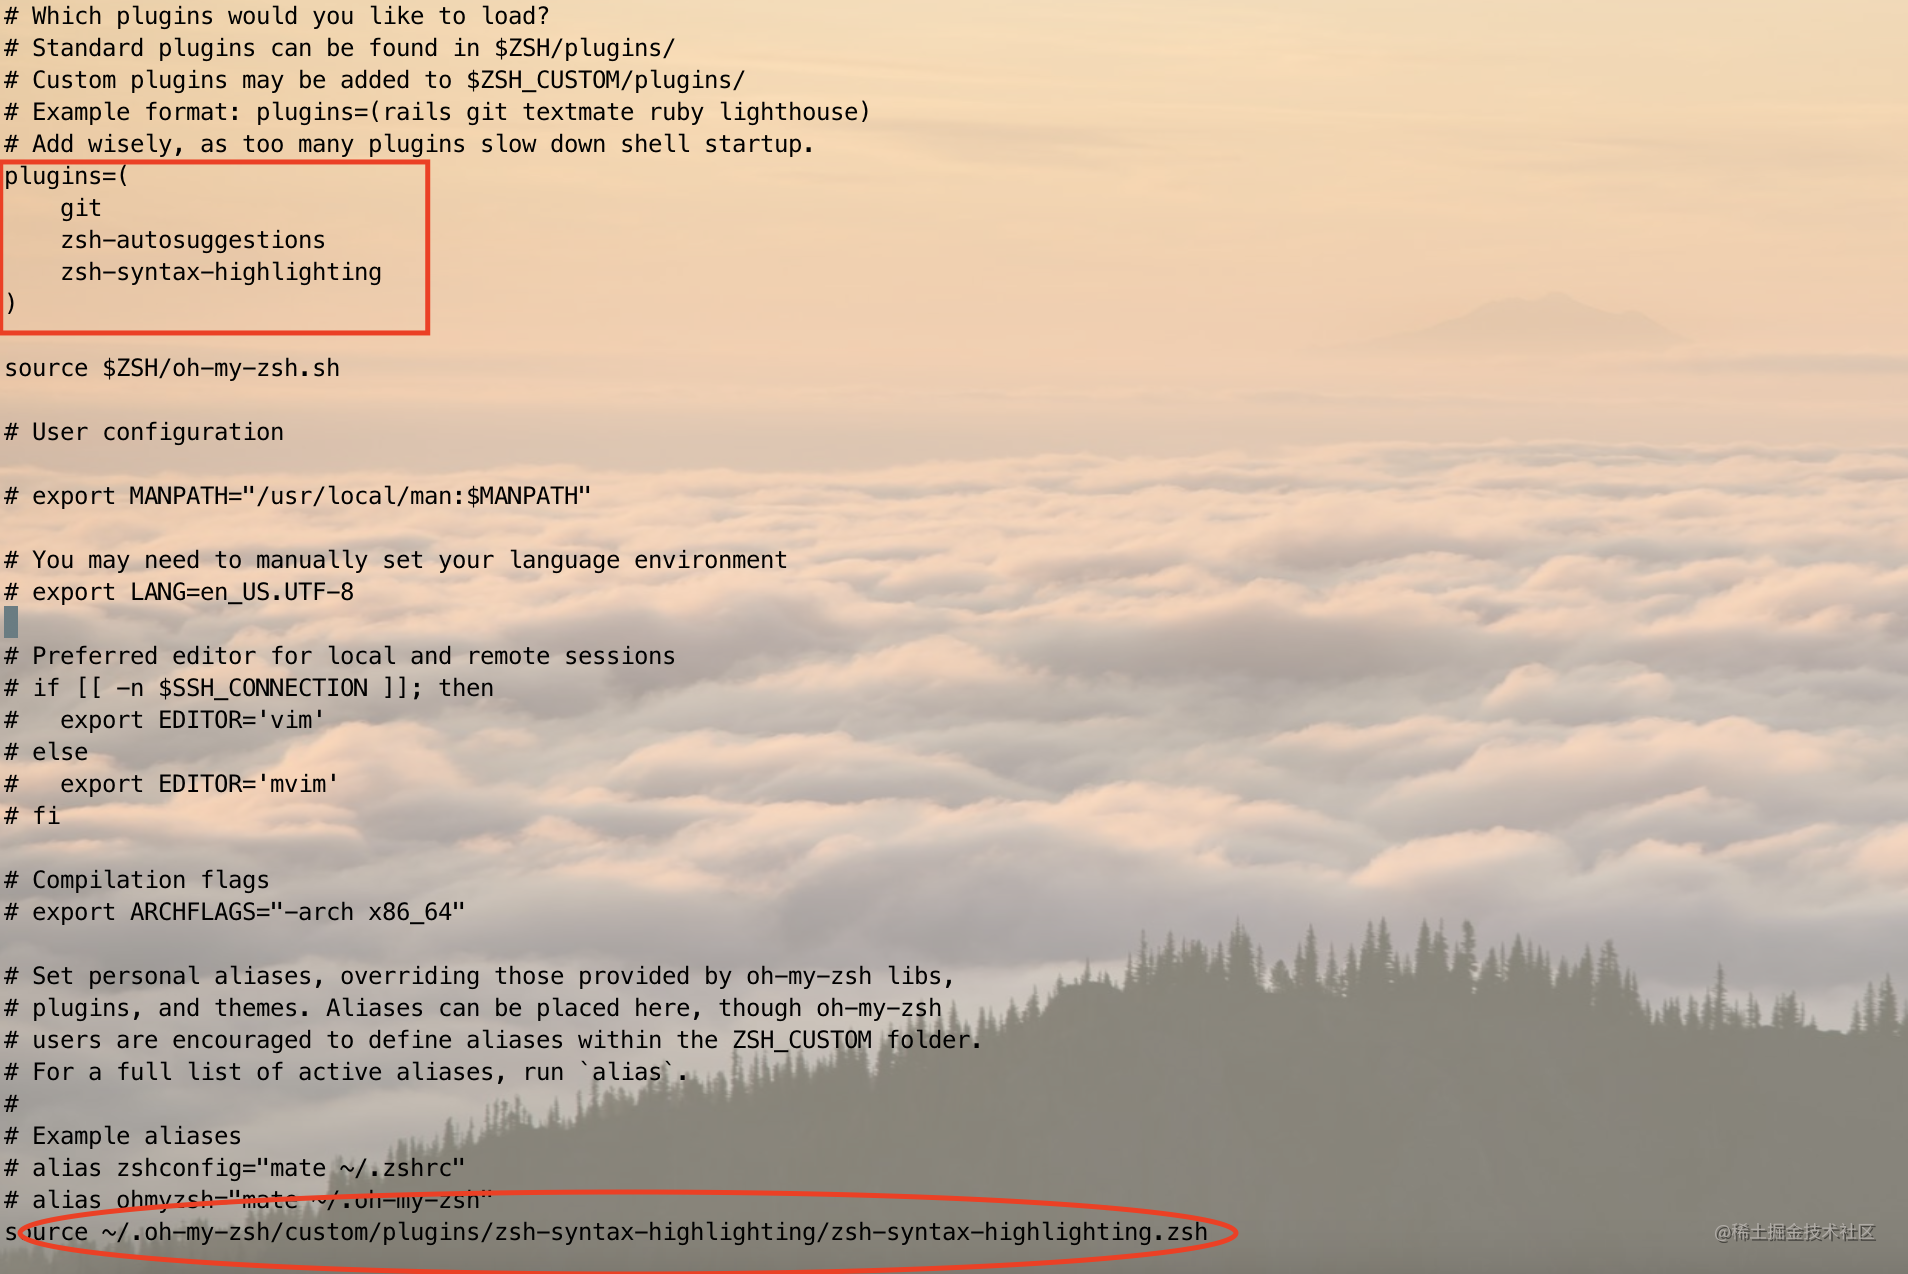
这时我们打开zshrc文件进行编辑。找到plugins,此时plugins中应该已经有了git,我们需要把高亮插件和命令补全插件也加上,高亮插件zsh-syntax-highlighting必须放在最后一个,并且在文件的最后添加 source ~/.oh-my-zsh/custom/plugins/zsh-syntax-highlighting/zsh-syntax-highlighting.zsh,执行source ~/.zshrc使文件生效。
8. 更改背景图片
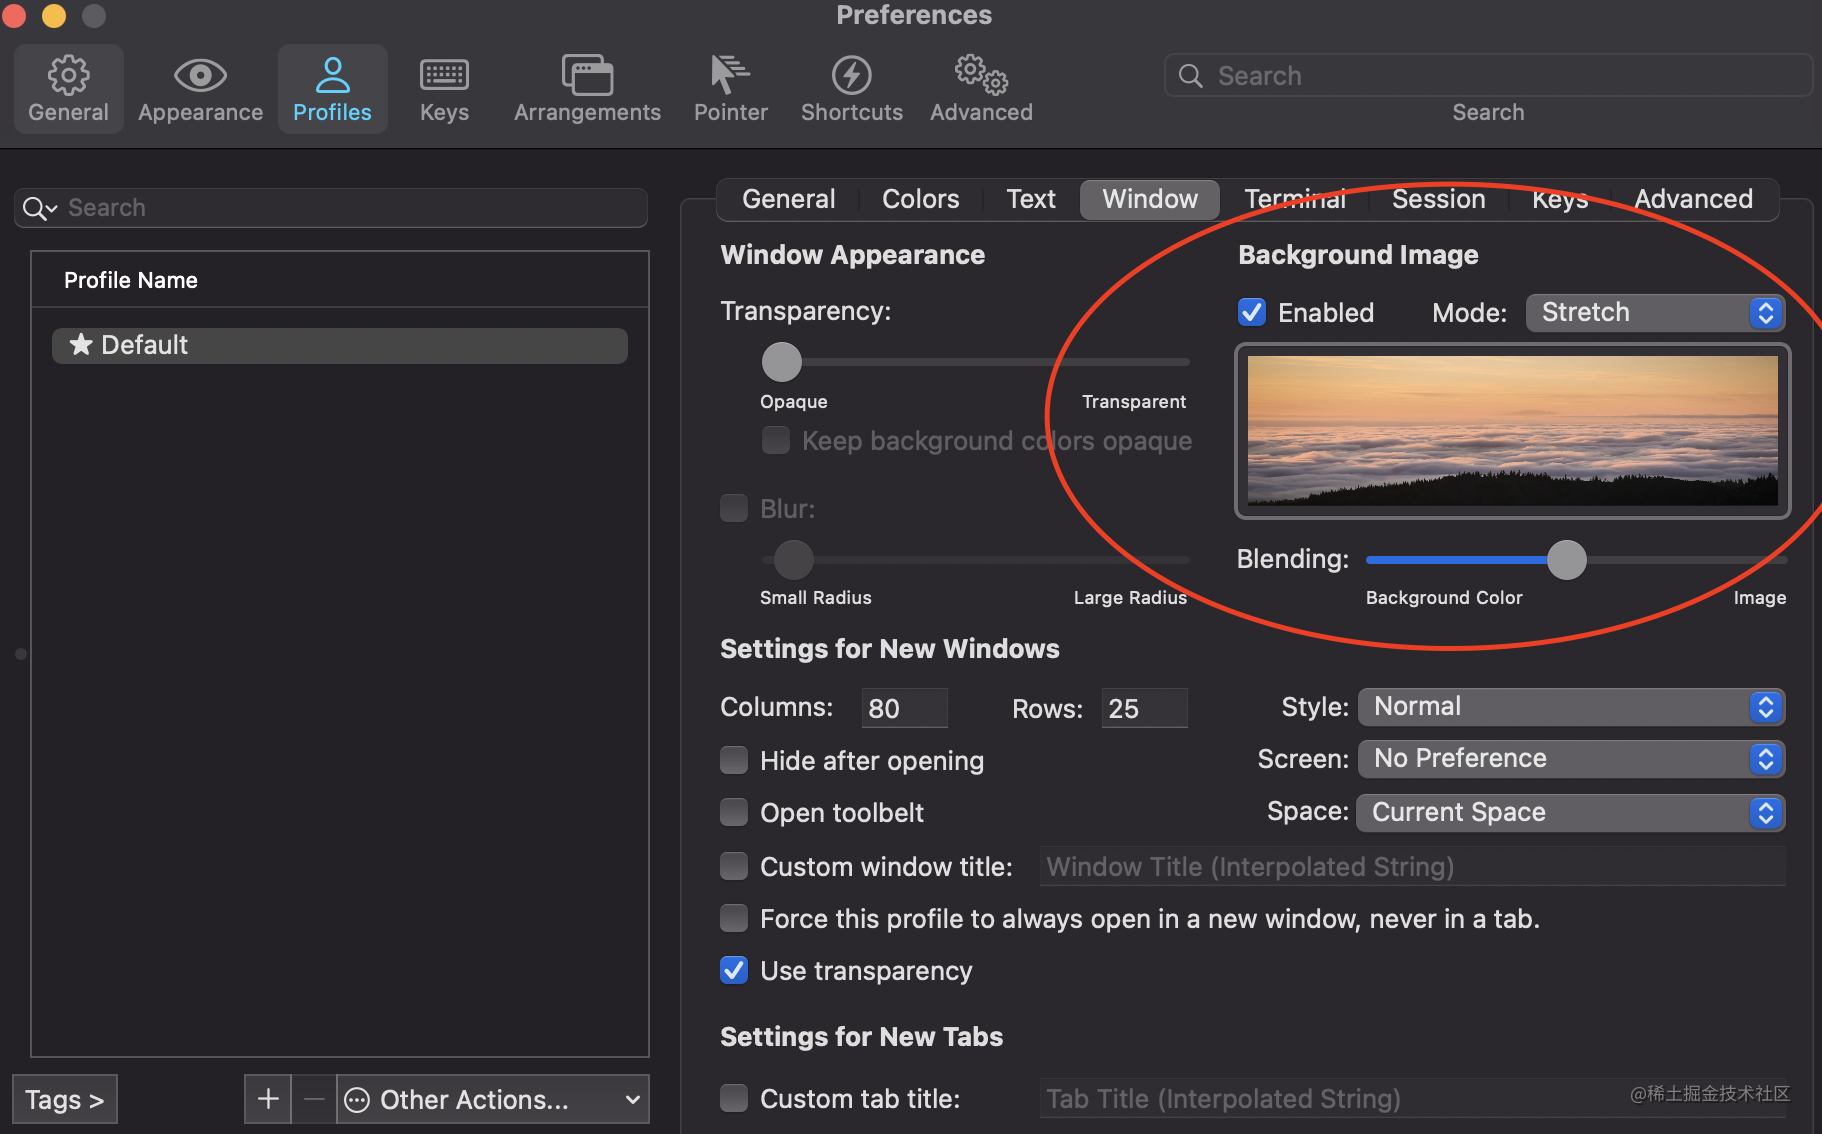
更换背景图片方式:iTerm2 -> Preferences -> Profiles -> Window -> BackGround Image勾选图片即可。
参考文章
- https://www.jianshu.com/p/7de00c73a2bb
- https://www.jianshu.com/p/9c3439cc3bdb
因为根据参考文章在配置过程中有一些地方出现了小问题(如python版本不对导致Powerline失败、由于网络问题安装Oh my zsh失败等),因此以本文记录本次配置过程

AtomGit 是由开放原子开源基金会联合 CSDN 等生态伙伴共同推出的新一代开源与人工智能协作平台。平台坚持“开放、中立、公益”的理念,把代码托管、模型共享、数据集托管、智能体开发体验和算力服务整合在一起,为开发者提供从开发、训练到部署的一站式体验。
更多推荐



 1
1 0
0- 0


 已为社区贡献1条内容

所有评论(0)