ONNX Runtime 版本选择 及 简单测试
一、前言
在使用 PyTorch 训练模型并通过 ONNX Runtime 进行 C++ 部署时,遇到 CUDA、cuDNN 和 ONNX Runtime 版本选择的问题。
例如:
PyTorch 使用 CUDA 11.3、cuDNN 8.3.2
系统安装 CUDA 11.3、cuDNN 8.2.0
此时部署 ONNX Runtime 时应该选择什么版本?
二、查看 CUDA 和 cudnn 版本
1. 查看系统安装的 CUDA 和 cudnn 版本
1.1 查看 CUDA 版本
windows:ctrl+r,输入 cmd,打开终端
终端输入:
nvcc -V输出:
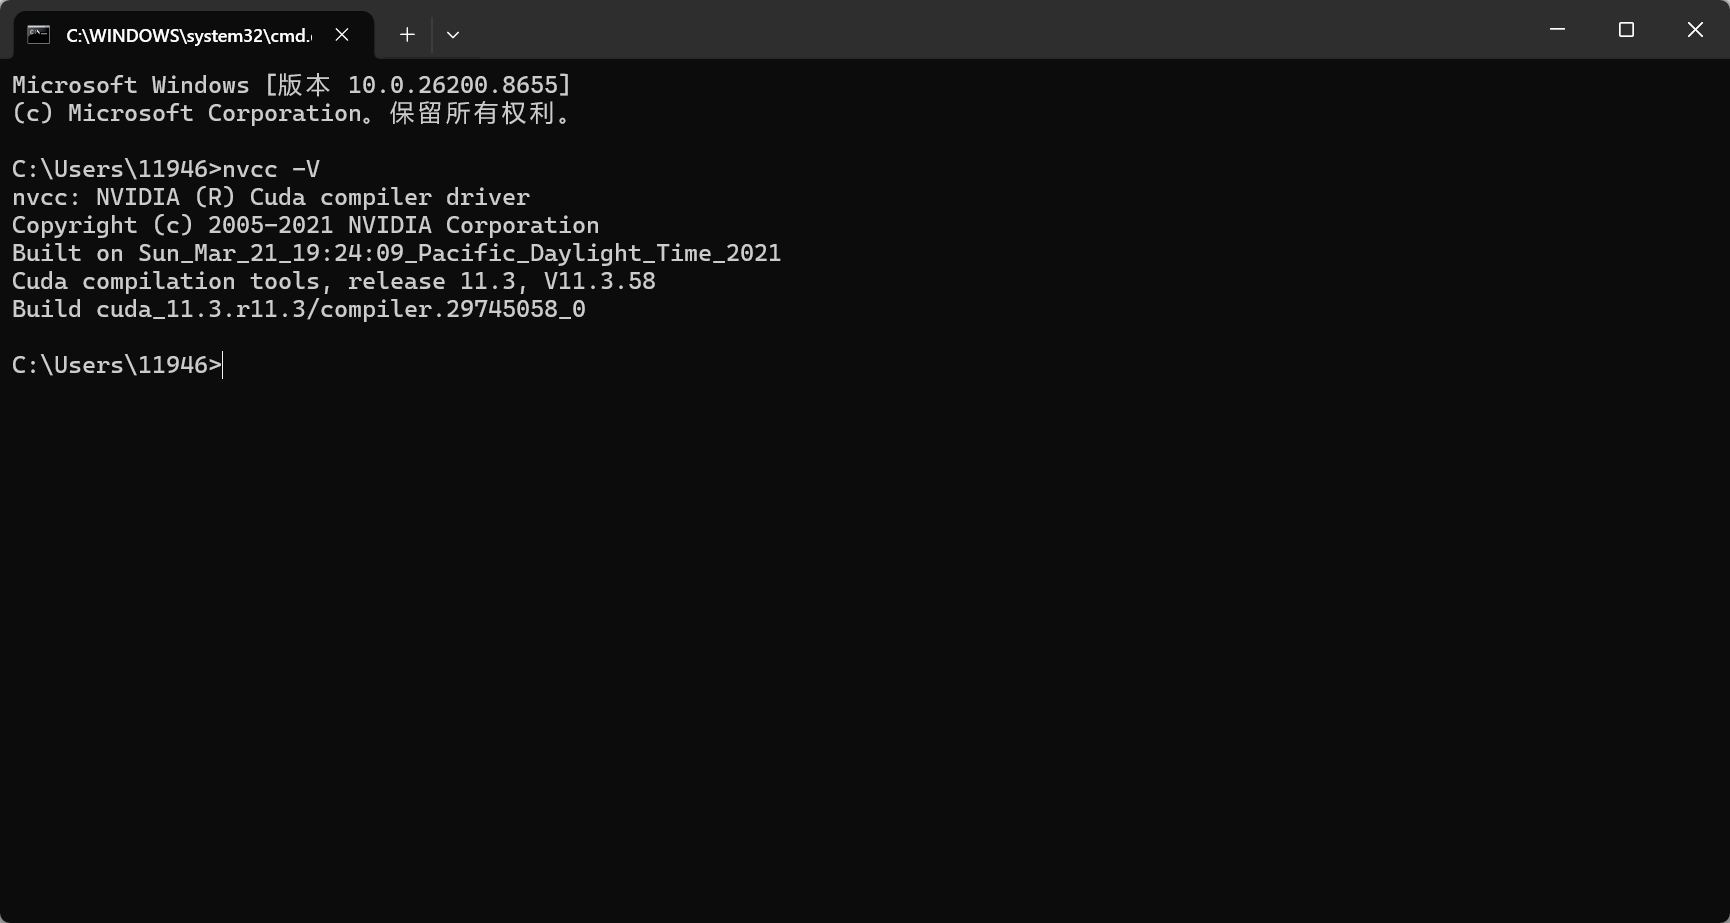
表示 CUDA 版本为11.3
1.2 查看 cuDNN 版本
进入 CUDA 的安装目录查看:
C:\Program Files\NVIDIA GPU Computing Toolkit\CUDA\v11.3\include\cudnn_version.h
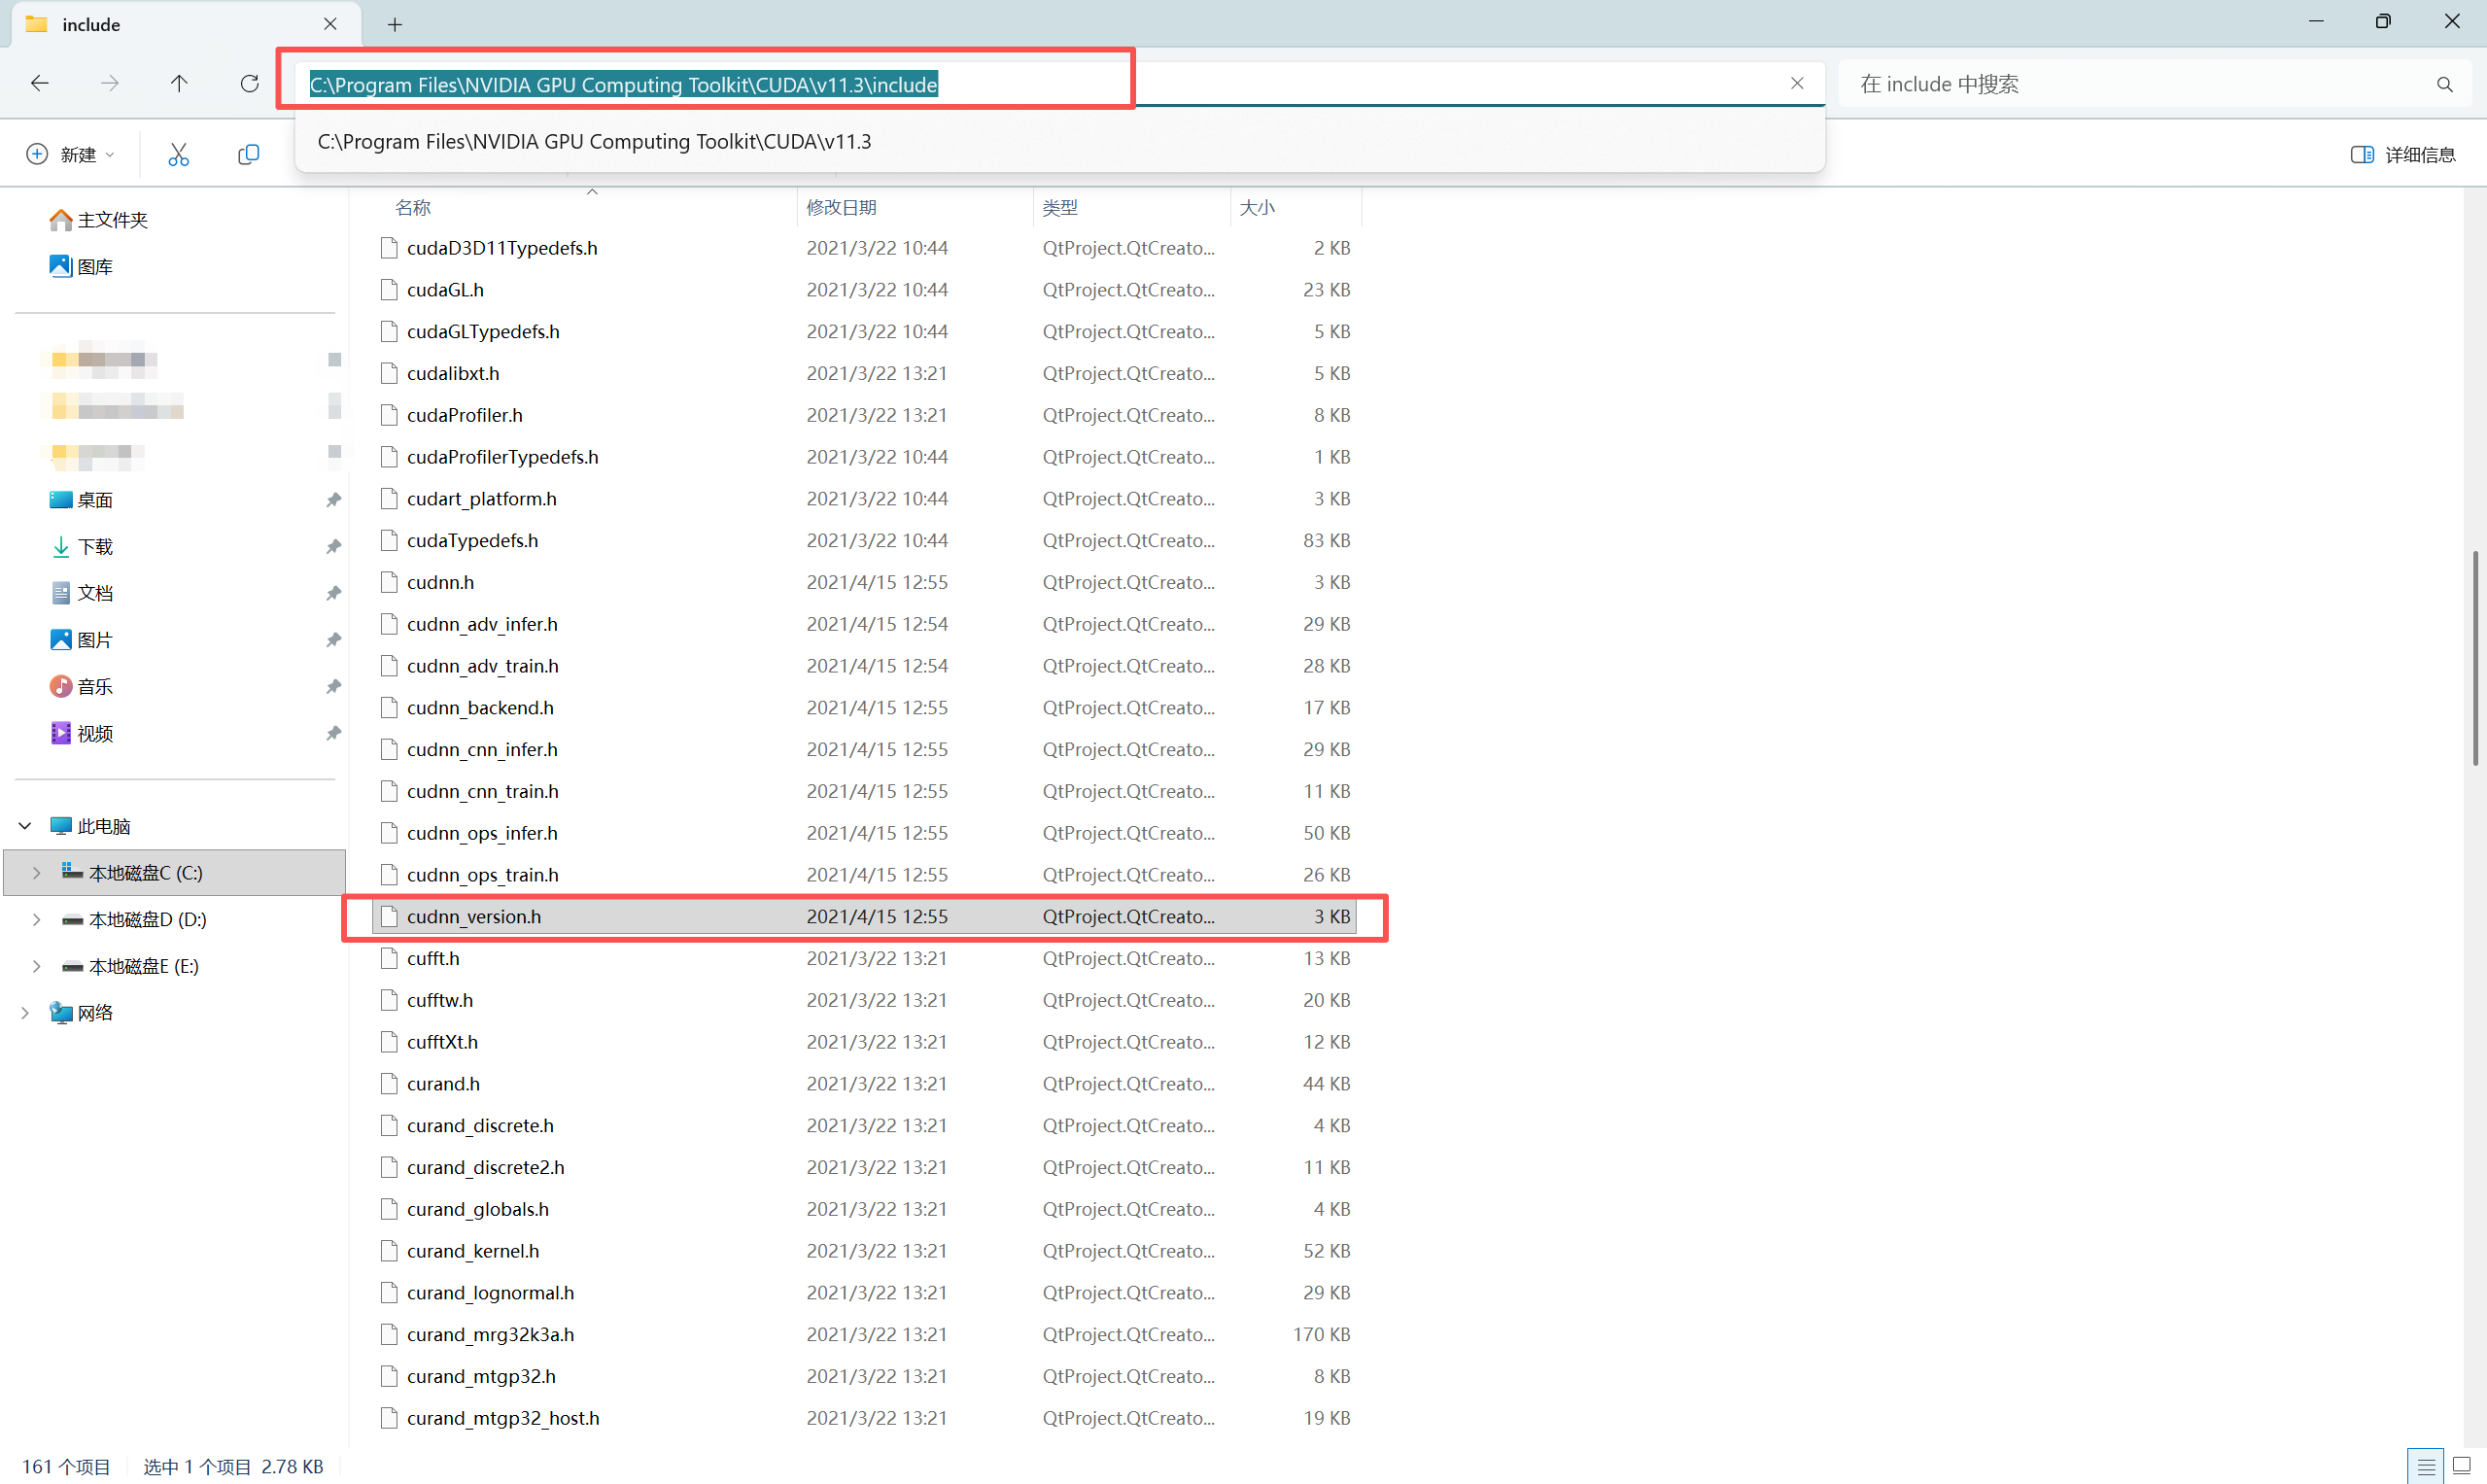
记事本打开,拉到最下面
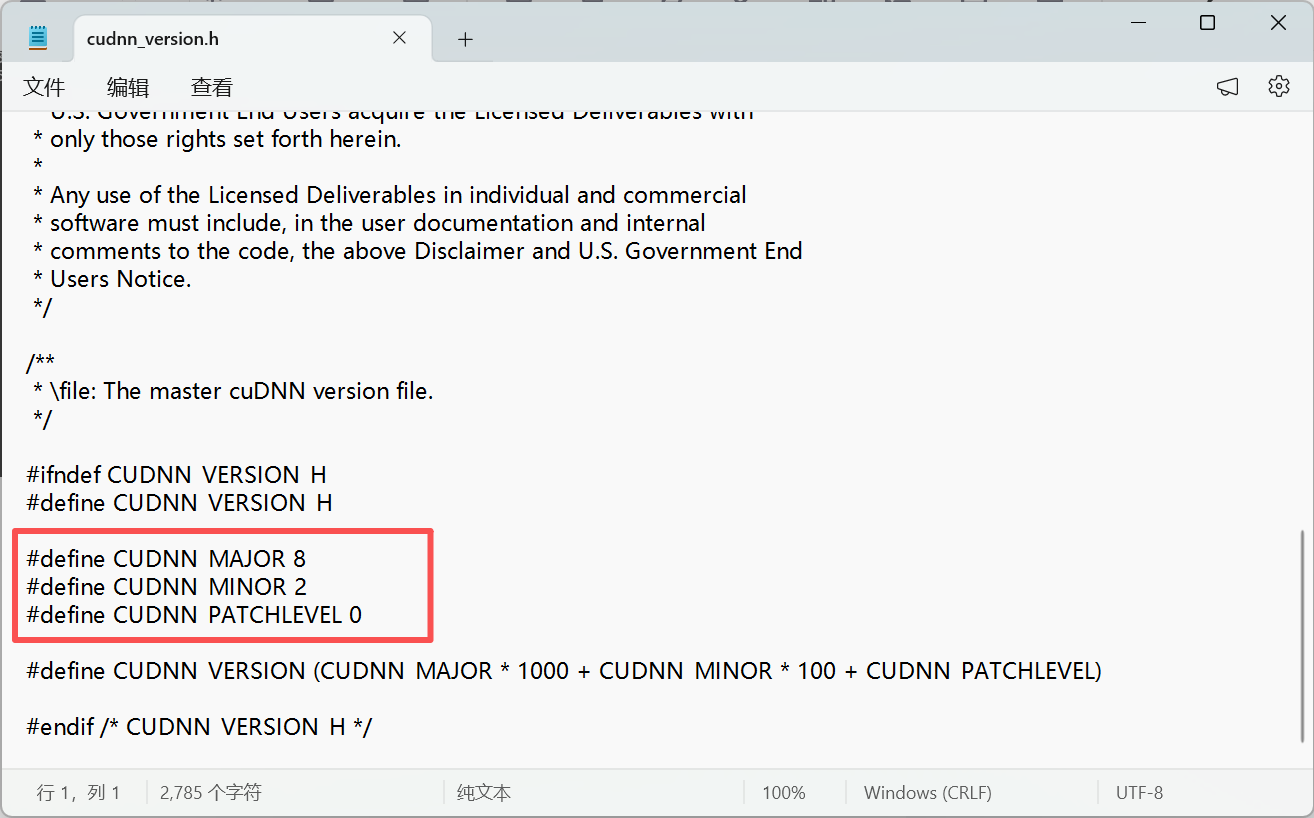
表示 cuDNN 版本为 8.2.0
2. 查看 PyTorch 的 CUDA 和 cudnn 版本
import torch

print(torch.version.cuda)
print(torch.backends.cudnn.version())
输出:
11.3
8302
表示:
CUDA 版本:11.3
cuDNN 版本:8.3.2
3. PyTorch 的 CUDA/cuDNN 和系统 CUDA/cuDNN 的关系
系统:CUDA = 11.3,cuDNN = 8.2.0
PyTorch:CUDA = 11.3,cuDNN = 8.3.2
3.1 模型训练
Conda 或 Pip 安装的 PyTorch 通常自带 CUDA Runtime 和 cuDNN。训练时主要依赖环境里的CUDA/cuDNN,而不是系统目录中的 CUDA/cuDNN。
PyTorch 的 CUDA/cuDNN 版本与系统安装的 CUDA/cuDNN 不一定完全一致。
3.2 开发 ONNX Runtime GPU 的 C++ 程序
如果要把模型通过 ONNX Runtime 进行 C++ 部署时,使用Ort::Session(...)、CUDAExecutionProvider,系统需要安装与 ONNX Runtime GPU 匹配的 CUDA 和 cuDNN。
三、ONNX Runtime版本选择
部署时真正决定版本的是 ONNX Runtime
情况一:新建部署环境
选择 ONNX Runtime ➡ 安装对应 CUDA ➡ 安装对应 cuDNN
例如:
ONNX Runtime 1.20+
CUDA 12.x
cuDNN 9.x
情况二:CUDA 和 cuDNN 已经安装
CUDA/cuDNN ➡ 选择兼容的 ONNX Runtime
例如:
CUDA 11.3
cuDNN 8.2.0
ONNX Runtime 1.15
原因如下:
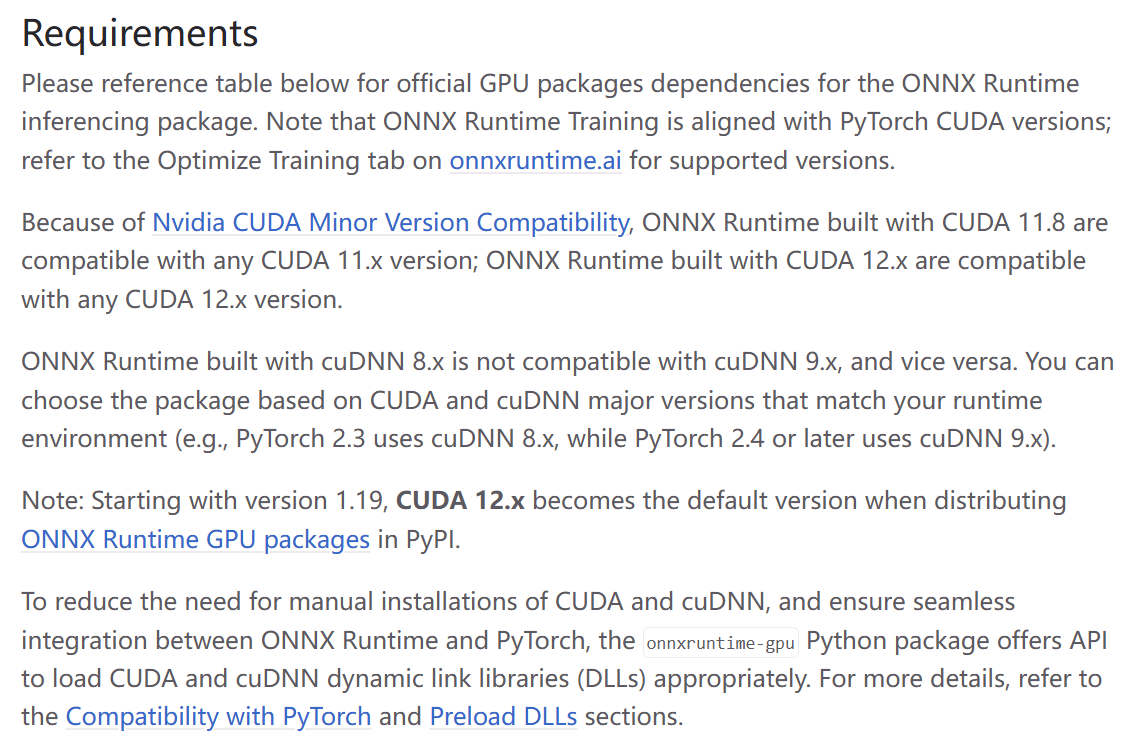
ONNX Runtime官网提到,NVIDIA CUDA次要版本兼容性,使用CUDA 11.8构建的ONNX Runtime与任何CUDA 11.x版本兼容。
意味着用某个CUDA版本(比如11.8)编译出的程序或库,可以在具有不同“小版本号”的CUDA驱动环境下运行(比如11.3、11.6),只要它们的大版本号相同(都是11.x)。
例如:
CUDA = 11.3,cuDNN = 8.2.0
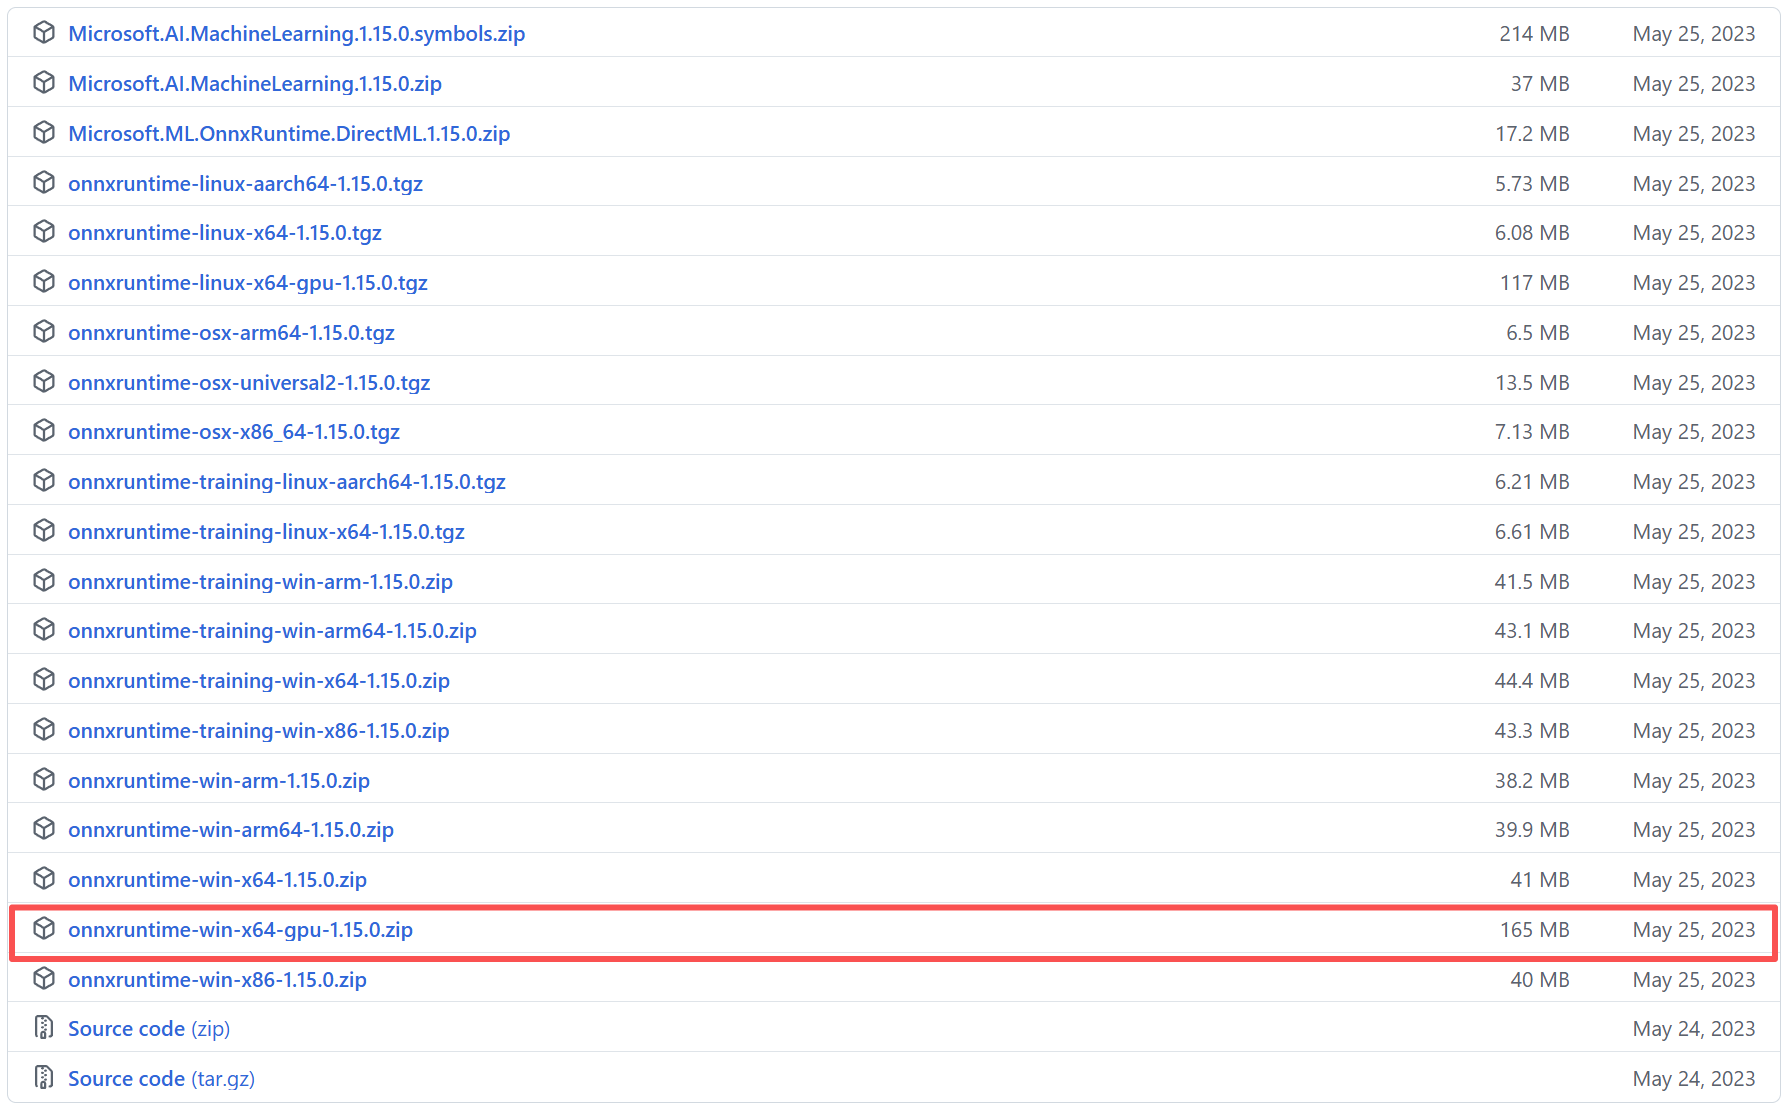
ONNX Runtime 版本的选择可以是 支持 CUDA 11.x + cuDNN 8.x 的最新 ONNX Runtime,不一定要求精确到 11.3。我这里选择 ONNX Runtime 1.15。https://github.com/microsoft/onnxruntime/releases/tag/v1.15.0
可以去官网产看 ONNX Runtime 和 CUDA/cuDNN 对应关系
https://onnxruntime.ai/docs/execution-providers/CUDA-ExecutionProvider.html#install
CUDA 12.x
| ONNX Runtime | CUDA | cuDNN | Notes |
|---|---|---|---|
| 1.20.x | 12.x | 9.x | Avaiable in PyPI. Compatible with PyTorch >= 2.4.0 for CUDA 12.x. |
| 1.19.x | 12.x | 9.x | Avaiable in PyPI. Compatible with PyTorch >= 2.4.0 for CUDA 12.x. |
| 1.18.1 | 12.x | 9.x | cuDNN 9 is required. No Java package. |
| 1.18.0 | 12.x | 8.x | Java package is added. |
| 1.17.x | 12.x | 8.x | Only C++/C# Nuget and Python packages are released. No Java package. |
CUDA 11.x
| ONNX Runtime | CUDA | cuDNN | Notes |
|---|---|---|---|
| 1.20.x | 11.8 | 8.x | Not available in PyPI. See Install ORT for details. Compatible with PyTorch <= 2.3.1 for CUDA 11.8. |
| 1.19.x | 11.8 | 8.x | Not available in PyPI. See Install ORT for details. Compatible with PyTorch <= 2.3.1 for CUDA 11.8. |
| 1.18.x | 11.8 | 8.x | Available in PyPI. |
| 1.17 1.16 1.15 |
11.8 | 8.2.4 (Linux) 8.5.0.96 (Windows) |
Tested with CUDA versions from 11.6 up to 11.8, and cuDNN from 8.2 up to 8.9 |
| 1.14 1.13 |
11.6 | 8.2.4 (Linux) 8.5.0.96 (Windows) |
libcudart 11.4.43 libcufft 10.5.2.100 libcurand 10.2.5.120 libcublasLt 11.6.5.2 libcublas 11.6.5.2 libcudnn 8.2.4 |
| 1.12 1.11 |
11.4 | 8.2.4 (Linux) 8.2.2.26 (Windows) |
libcudart 11.4.43 libcufft 10.5.2.100 libcurand 10.2.5.120 libcublasLt 11.6.5.2 libcublas 11.6.5.2 libcudnn 8.2.4 |
| 1.10 | 11.4 | 8.2.4 (Linux) 8.2.2.26 (Windows) |
libcudart 11.4.43 libcufft 10.5.2.100 libcurand 10.2.5.120 libcublasLt 11.6.1.51 libcublas 11.6.1.51 libcudnn 8.2.4 |
| 1.9 | 11.4 | 8.2.4 (Linux) 8.2.2.26 (Windows) |
libcudart 11.4.43 libcufft 10.5.2.100 libcurand 10.2.5.120 libcublasLt 11.6.1.51 libcublas 11.6.1.51 libcudnn 8.2.4 |
| 1.8 | 11.0.3 | 8.0.4 (Linux) 8.0.2.39 (Windows) |
libcudart 11.0.221 libcufft 10.2.1.245 libcurand 10.2.1.245 libcublasLt 11.2.0.252 libcublas 11.2.0.252 libcudnn 8.0.4 |
| 1.7 | 11.0.3 | 8.0.4 (Linux) 8.0.2.39 (Windows) |
libcudart 11.0.221 libcufft 10.2.1.245 libcurand 10.2.1.245 libcublasLt 11.2.0.252 libcublas 11.2.0.252 libcudnn 8.0.4 |
ONNX Runtime 1.15 下载地址:https://github.com/microsoft/onnxruntime/releases/tag/v1.15.0
四、代码测试
在完成 CUDA、cuDNN 和 ONNX Runtime 配置后,可以通过一个简单的测试程序验证是否真正启用了 GPU 推理。
#include <iostream>
#include <onnxruntime_cxx_api.h>
int main()
{
auto providers = Ort::GetAvailableProviders();
for (auto& p : providers)
{
std::cout << p << std::endl;
}
return 0;
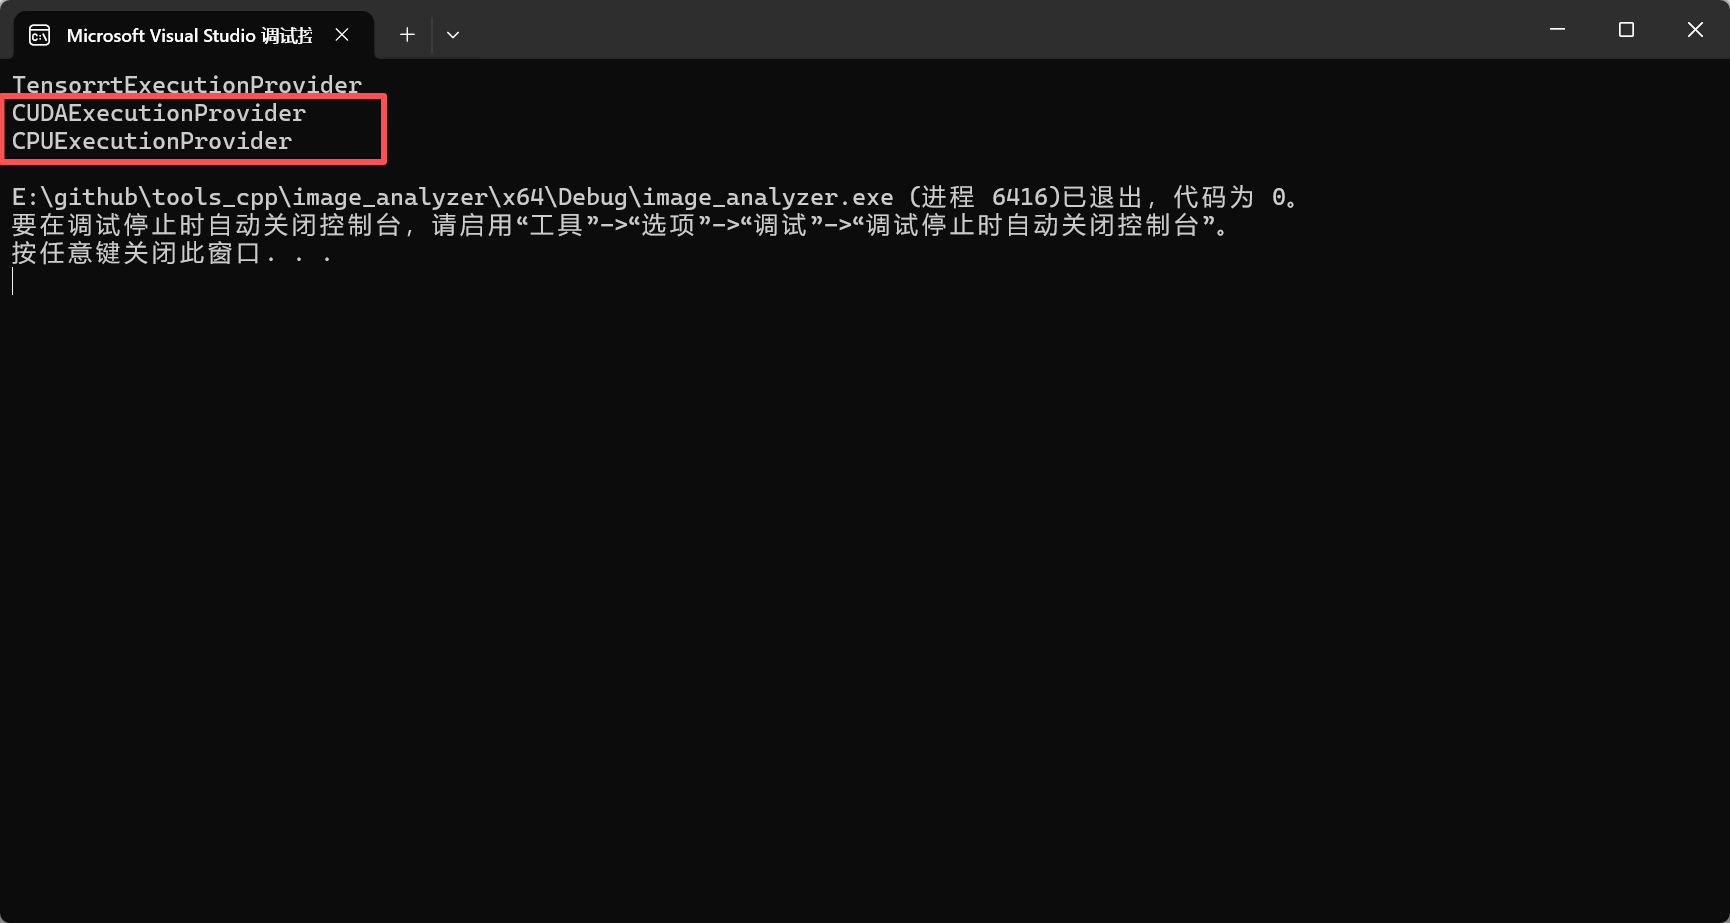
}正常情况输出如下:CUDAExecutionProvider、CPUExecutionProvider
如果看到的是DmlExecutionProvider、CPUExecutionProvider。则表示加载的是 DirectML,而非 CUDA。
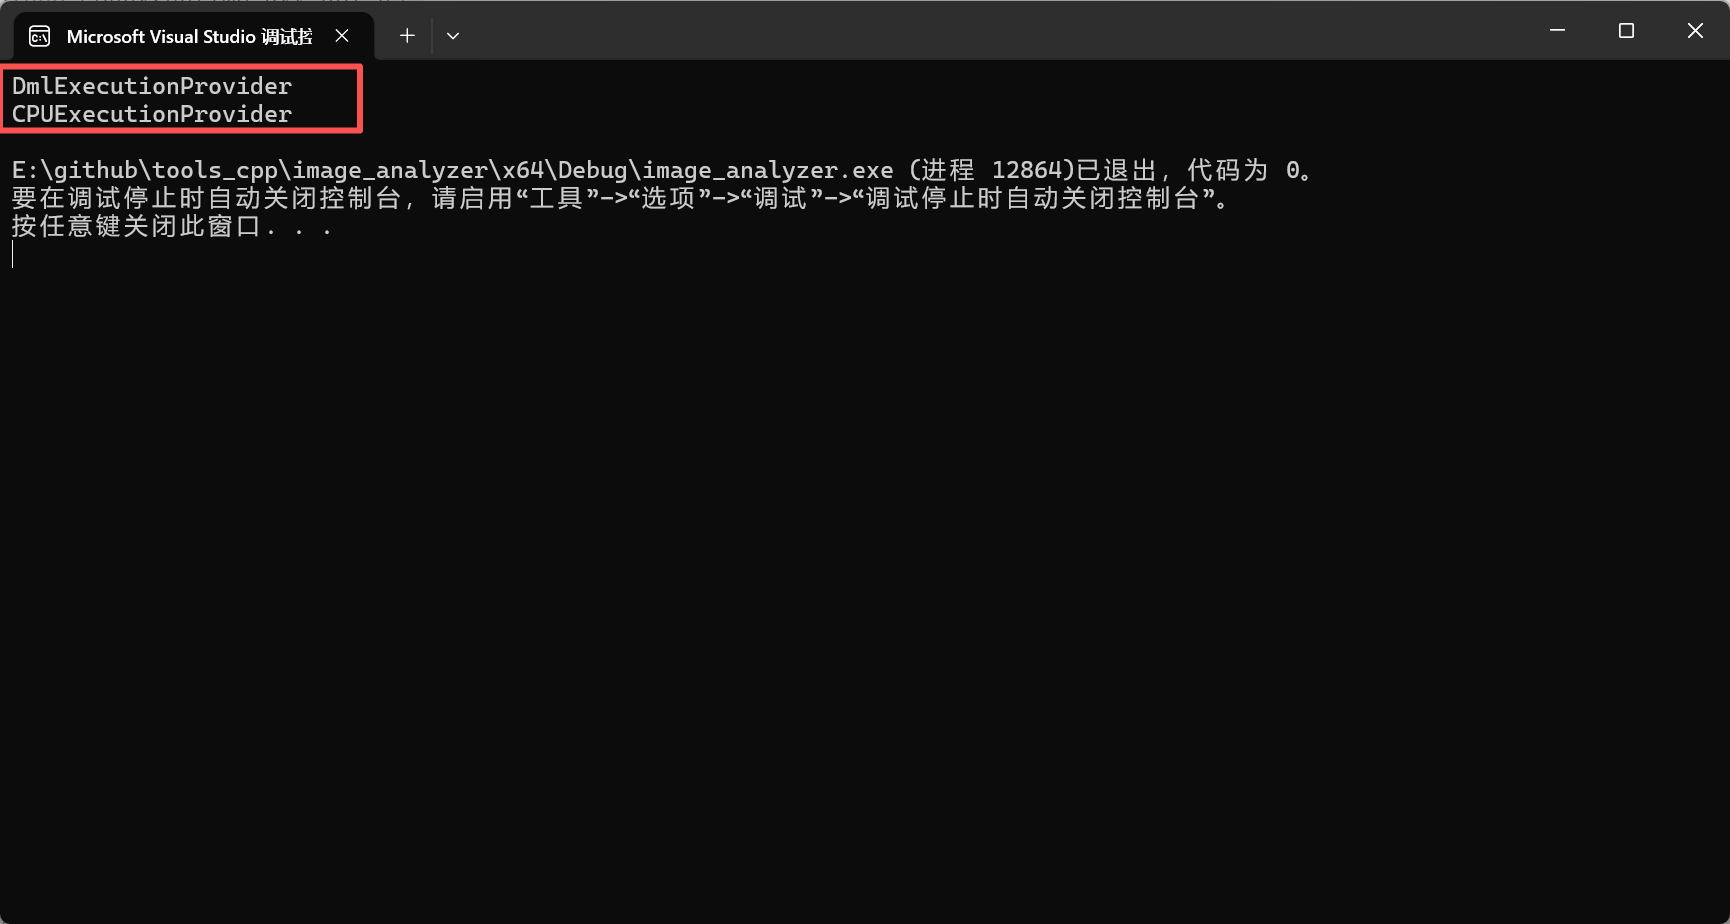
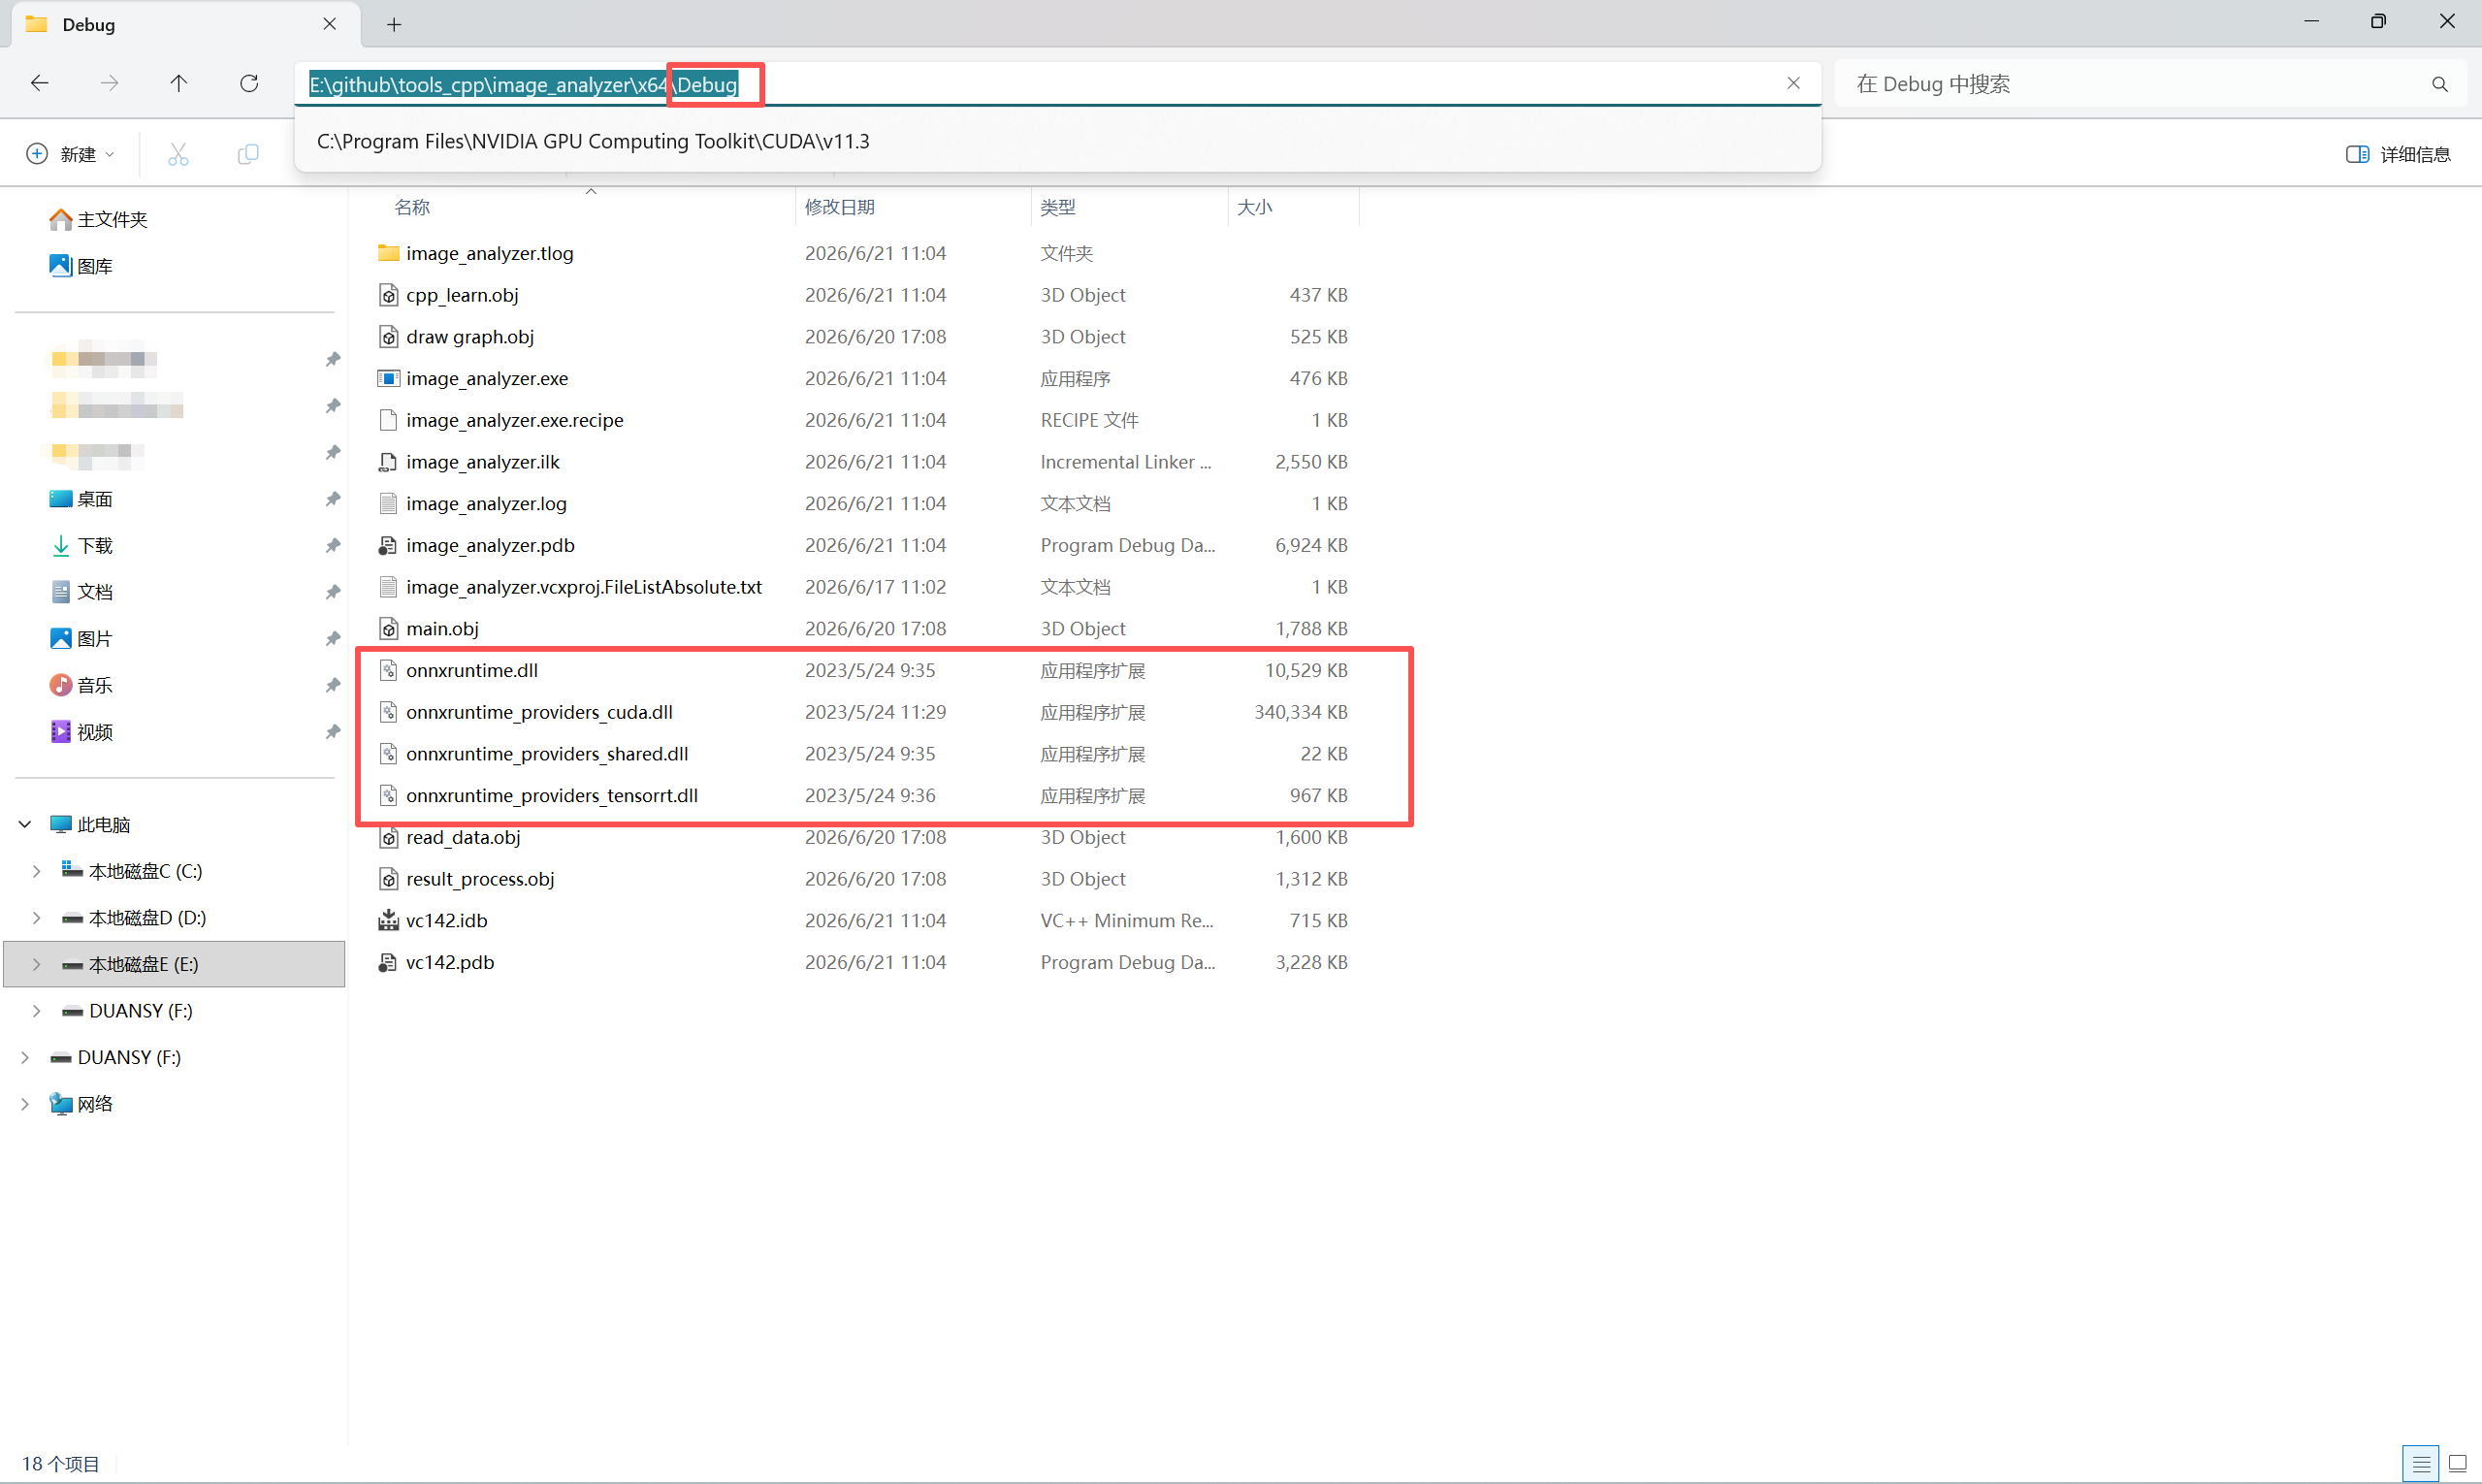
解决方案:需要将OnnxRuntime所需的.dll文件复制到自己项目的Debug/Release下。
.dll 路径:..\onnxruntime-win-x64-gpu-1.15.0\lib

4.1完整检测代码
#include <iostream>
#include <opencv2/opencv.hpp>
#include <onnxruntime_cxx_api.h>


struct PreprocessResult
{
	std::vector<float> tensorValues;
	float scale;
	int padLeft;
	int padTop;
};


struct Detection
{
	cv::Rect box;
	float score;
	int classId;
};


PreprocessResult preprocessImage(const cv::Mat& inputImage, int inputWidth, int inputHeight)
{
	cv::Mat image;
	//inputImage类型为CV_8UC3
	cv::cvtColor(inputImage, image, cv::COLOR_BGR2RGB);

	//将图像转换成模型输入的形式
	float padScale;
	int padLeft, padTop;

	//缩放比例
	float scale_x = static_cast<float>(inputWidth) / image.cols;
	float scale_y = static_cast<float>(inputHeight) / image.rows;
	float scale = std::min(scale_x, scale_y);

	int new_w = static_cast<int>(image.cols * scale);
	int new_h = static_cast<int>(image.rows * scale);

	//缩放
	cv::Mat resized;
	cv::resize(image, resized, cv::Size(new_w, new_h));

	//填充
	int dh = inputHeight - new_h;
	int dw = inputWidth - new_w;
	int top = dh / 2, bottom = dh - top;
	int left = dw / 2, right = dw - left;

	cv::Mat padded(inputHeight, inputWidth, CV_8UC3, cv::Scalar(114, 114, 114));
	resized.copyTo(padded(cv::Rect(left, top, new_w, new_h)));

	cv::Mat new_image;
	padded.convertTo(new_image, CV_32F, 1.0 / 255.0);

	padScale = scale;
	padLeft = left;
	padTop = top;

	//模型tensor输入数据
	std::vector<cv::Mat> channels(3);
	cv::split(new_image, channels);

	std::vector<float> tensorValues(inputHeight * inputWidth * 3);

	for (int c = 0; c < 3; ++c) {
		std::memcpy(
			tensorValues.data() + c * inputWidth * inputHeight,
			channels[c].data,
			inputHeight * inputWidth * sizeof(float)
		);
	}

	return { tensorValues, scale, padLeft, padTop };
}


std::vector<Detection> inferDetections(Ort::Session& session, const cv::Mat& image, const PreprocessResult& prep,
	const std::vector<int64_t>& inputShape, const char* inputName, const char* outputName, float confThreshold, float nmsThreshold)
{
	// ====================== 1. 构建输入 Tensor ======================
	Ort::MemoryInfo memoryInfo = Ort::MemoryInfo::CreateCpu(
		OrtArenaAllocator, OrtMemTypeDefault
	);

	Ort::Value inputTensor = Ort::Value::CreateTensor<float>(
		memoryInfo,
		const_cast<float*>(prep.tensorValues.data()),
		prep.tensorValues.size(),
		inputShape.data(),
		inputShape.size()
		);

	const char* inputNames[] = { inputName };
	const char* outputNames[] = { outputName };

	// ====================== 2. 推理 ======================
	auto outputs = session.Run(
		Ort::RunOptions{ nullptr },
		inputNames, &inputTensor, 1,
		outputNames, 1
	);

	// ====================== 3. 解析输出 ======================
	float* rawData = outputs[0].GetTensorMutableData<float>();
	auto outputShape = outputs[0].GetTensorTypeAndShapeInfo().GetShape();

	int totalSize = 1;
	for (auto s : outputShape) totalSize *= s;

	std::vector<float> rawOutput(rawData, rawData + totalSize);

	int num_values = outputShape[2];

	std::vector<cv::Rect> boxes;
	std::vector<float> confidences;
	std::vector<int> classIds;

	float scale = prep.scale;
	int padLeft = prep.padLeft;
	int padTop = prep.padTop;

	// ====================== 4. 解码 ======================
	for (int i = 0; i < num_values; ++i)
	{
		float x = rawOutput[0 * num_values + i];
		float y = rawOutput[1 * num_values + i];
		float w = rawOutput[2 * num_values + i];
		float h = rawOutput[3 * num_values + i];
		float cls0_conf = rawOutput[4 * num_values + i];
		float cls1_conf = rawOutput[5 * num_values + i];

		float score = std::max(cls0_conf, cls1_conf);
		int classId = (cls0_conf > cls1_conf) ? 0 : 1;

		if (score < confThreshold) continue;

		// 映射回原图
		float cx = (x - padLeft) / scale;
		float cy = (y - padTop) / scale;
		float bw = w / scale;
		float bh = h / scale;

		int x1 = static_cast<int>(cx - bw * 0.5f);
		int y1 = static_cast<int>(cy - bh * 0.5f);
		int x2 = static_cast<int>(cx + bw * 0.5f);
		int y2 = static_cast<int>(cy + bh * 0.5f);

		x1 = std::max(0, x1);
		y1 = std::max(0, y1);
		x2 = std::min(image.cols - 1, x2);
		y2 = std::min(image.rows - 1, y2);

		if (x2 <= x1 || y2 <= y1) continue;

		boxes.emplace_back(x1, y1, x2 - x1, y2 - y1);
		confidences.push_back(score);
		classIds.push_back(classId);
	}

	// ====================== 5. NMS ======================
	std::vector<int> indices;
	if (!boxes.empty()) {
		cv::dnn::NMSBoxes(boxes, confidences, confThreshold, nmsThreshold, indices);
	}

	// ====================== 6. 输出 ======================
	std::vector<Detection> detections;
	for (int idx : indices)
	{
		detections.push_back({
			boxes[idx],
			confidences[idx],
			classIds[idx]
			});
	}

	return detections;
}


int main()
{
	auto providers = Ort::GetAvailableProviders();

	for (auto& p : providers)
	{
		std::cout << p << std::endl;
	}


	Ort::Env env(ORT_LOGGING_LEVEL_WARNING, "test");

	Ort::SessionOptions sessionOptions;
	sessionOptions.SetGraphOptimizationLevel(
		GraphOptimizationLevel::ORT_ENABLE_ALL);

	try
	{
		OrtCUDAProviderOptions cuda_options;

		sessionOptions.AppendExecutionProvider_CUDA(cuda_options);

		std::cout << "CUDA Provider Added" << std::endl;
	}
	catch (const std::exception& e)
	{
		std::cout << e.what() << std::endl;
	}

	Ort::Session session(
		env,
		L"corrected_lhdiff_20251225_best.onnx",
		sessionOptions);

	cv::Mat img = cv::imread("lhd_059.tif");

	if (img.empty())
	{
		std::cout << "image load failed" << std::endl;
		return -1;
	}

	PreprocessResult prep = preprocessImage(img, 1280, 1280);

	std::vector<int64_t> inputShape = { 1,3,1280,1280 };

	auto detections = inferDetections(session, img, prep, inputShape, "images", "output0", 0.5f, 0.45f);

	std::cout
		<< "detections count = "
		<< detections.size()
		<< std::endl;

	for (const auto& det : detections)
	{
		cv::rectangle(img, det.box, cv::Scalar(0, 255, 0), 2);

		std::cout << "class=" << det.classId << " score=" << det.score << std::endl;
	}

	cv::imshow("result", img);
	cv::waitKey(0);

	return 0;
}
AtomGit 是由开放原子开源基金会联合 CSDN 等生态伙伴共同推出的新一代开源与人工智能协作平台。平台坚持“开放、中立、公益”的理念,把代码托管、模型共享、数据集托管、智能体开发体验和算力服务整合在一起,为开发者提供从开发、训练到部署的一站式体验。
更多推荐


 3
3 0
0- 0


 已为社区贡献2条内容

所有评论(0)