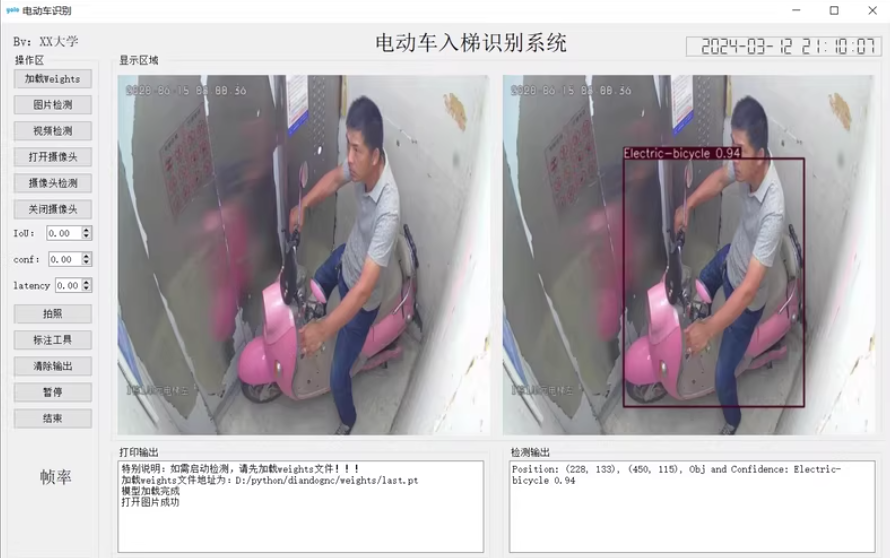
利用深度学习目标检测算法通用Yolov5训练电动车进电梯数据集 建立基于YOLOv5的电动车入梯识别系统 识别检测电梯进电动车的预警识别
·
利用深度学习目标检测算法通用Yolov5训练电动车进电梯数据集 建立基于YOLOv5的电动车入梯识别系统 识别检测电梯进电动车的预警识别
文章目录
基于YOLOv5的电动车入梯识别系统
1
构建一个基于YOLOv5s的电动车入梯识别系统,我们需要完成以下几个步骤:
- 数据准备:收集和标注数据集。
- 模型训练:使用YOLOv5进行模型训练。
- UI设计:使用PyQt5设计用户界面。
- 数据库集成:使用MySQL存储检测结果。
- 实时检测:集成模型到UI中,实现实时检测。
1. 数据准备
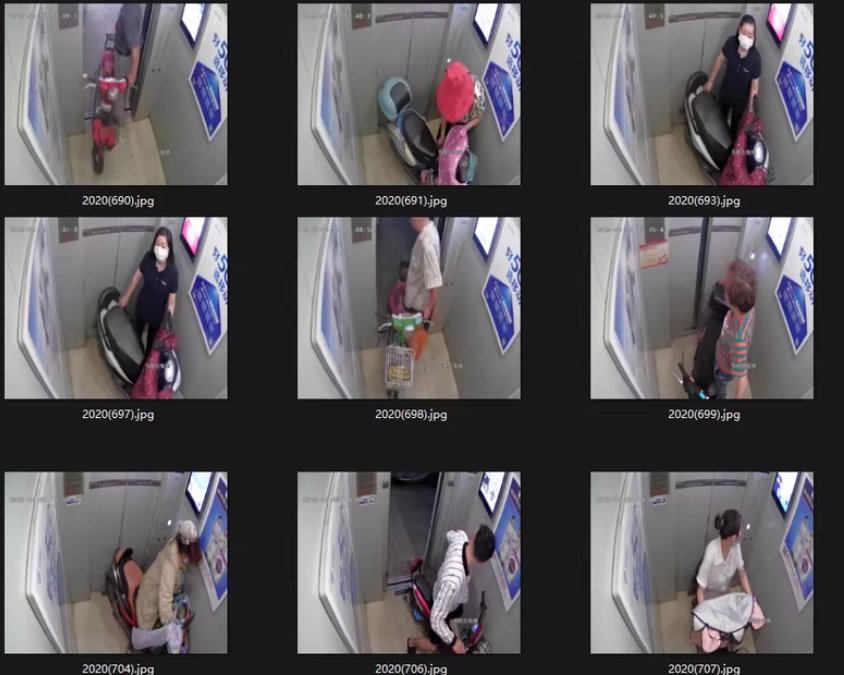
首先,你需要一个包含电动车的数据集。你可以从公开数据集中获取,或者自己采集并标注数据。
标注工具
- 使用LabelImg等工具进行数据标注。
2. 模型训练
安装YOLOv5
git clone https://github.com/ultralytics/yolov5.git
cd yolov5
pip install -r requirements.txt
准备配置文件
在yolov5目录下创建data.yaml:
train: ./images/train
val: ./images/val
test: ./images/test

nc: 1  # number of classes
names: ['electric_bicycle']
训练模型
python train.py --img 640 --batch 16 --epochs 100 --data data.yaml --cfg cfg/training/yolov5s.yaml --weights yolov5s.pt --name yolov5s_results
3. UI设计
使用PyQt5设计用户界面。
安装PyQt5
pip install PyQt5
创建主窗口
import sys
from PyQt5.QtWidgets import QApplication, QMainWindow, QLabel, QPushButton, QVBoxLayout, QWidget, QFileDialog, QMessageBox, QTableWidget, QTableWidgetItem
from PyQt5.QtGui import QPixmap, QImage
from PyQt5.QtCore import QTimer
import cv2
import numpy as np
from ultralytics import YOLO
import mysql.connector

class ElectricBikeDetection(QMainWindow):
    def __init__(self):
        super().__init__()
        self.initUI()
        self.model = YOLO('best.pt')  # 加载训练好的模型
        self.db = DatabaseManager("localhost", "root", "password", "detection_db")

    def initUI(self):
        self.setWindowTitle("电动车入梯识别系统")
        self.setGeometry(100, 100, 800, 600)

        self.label = QLabel(self)
        self.label.setText("请选择视频文件或打开摄像头")
        self.label.setAlignment(Qt.AlignCenter)

        self.button_load = QPushButton("选择文件", self)
        self.button_load.clicked.connect(self.load_video)

        self.button_start = QPushButton("开始识别", self)
        self.button_start.clicked.connect(self.start_detection)

        self.button_camera = QPushButton("打开摄像头", self)
        self.button_camera.clicked.connect(self.open_camera)

        self.button_close_camera = QPushButton("关闭摄像头", self)
        self.button_close_camera.clicked.connect(self.close_camera)

        self.table = QTableWidget(self)
        self.table.setColumnCount(4)
        self.table.setHorizontalHeaderLabels(["时间", "位置", "置信度", "图片"])

        layout = QVBoxLayout()
        layout.addWidget(self.label)
        layout.addWidget(self.button_load)
        layout.addWidget(self.button_start)
        layout.addWidget(self.button_camera)
        layout.addWidget(self.button_close_camera)
        layout.addWidget(self.table)

        container = QWidget()
        container.setLayout(layout)
        self.setCentralWidget(container)

        self.cap = None
        self.timer = None

    def load_video(self):
        options = QFileDialog.Options()
        file_name, _ = QFileDialog.getOpenFileName(self, "选择视频文件", "", "Video Files (*.mp4 *.avi)", options=options)
        if file_name:
            self.video_path = file_name
            self.cap = cv2.VideoCapture(file_name)
            self.timer = QTimer(self)
            self.timer.timeout.connect(self.update_frame)
            self.timer.start(30)  # 每秒更新30帧

    def start_detection(self):
        if not hasattr(self, 'video_path'):
            QMessageBox.warning(self, "警告", "请先选择视频文件!")
            return
        self.button_start.setEnabled(False)
        self.detect_electric_bikes()

    def detect_electric_bikes(self):
        while self.cap.isOpened():
            ret, frame = self.cap.read()
            if not ret:
                break
            results = self.model(frame)
            annotated_frame = results[0].plot()
            height, width, channel = annotated_frame.shape
            bytes_per_line = 3 * width
            q_img = QImage(annotated_frame.data, width, height, bytes_per_line, QImage.Format_RGB888).rgbSwapped()
            self.label.setPixmap(QPixmap.fromImage(q_img))
            for result in results:
                boxes = result.boxes.xyxy.cpu().numpy()
                confidences = result.boxes.conf.cpu().numpy()
                classes = result.boxes.cls.cpu().numpy()
                for box, conf, cls in zip(boxes, confidences, classes):
                    x_min, y_min, x_max, y_max = map(int, box)
                    confidence = conf.item()
                    self.db.insert_detection(x_min, y_min, x_max, y_max, confidence)
                    self.update_table()
            self.app.processEvents()  # 更新UI

    def update_frame(self):
        ret, frame = self.cap.read()
        if not ret:
            self.timer.stop()
            self.cap.release()
            self.button_start.setEnabled(True)
            return
        results = self.model(frame)
        annotated_frame = results[0].plot()
        height, width, channel = annotated_frame.shape
        bytes_per_line = 3 * width
        q_img = QImage(annotated_frame.data, width, height, bytes_per_line, QImage.Format_RGB888).rgbSwapped()
        self.label.setPixmap(QPixmap.fromImage(q_img))

    def open_camera(self):
        self.cap = cv2.VideoCapture(0)
        self.timer = QTimer(self)
        self.timer.timeout.connect(self.update_frame)
        self.timer.start(30)  # 每秒更新30帧

    def close_camera(self):
        if self.cap is not None:
            self.timer.stop()
            self.cap.release()
            self.cap = None

    def update_table(self):
        detections = self.db.get_all_detections()
        self.table.clearContents()
        self.table.setRowCount(len(detections))
        for i, detection in enumerate(detections):
            time = detection['time']
            position = f"({detection['x_min']}, {detection['y_min']}, {detection['x_max']}, {detection['y_max']})"
            confidence = detection['confidence']
            image_path = detection['image_path']
            self.table.setItem(i, 0, QTableWidgetItem(time))
            self.table.setItem(i, 1, QTableWidgetItem(position))
            self.table.setItem(i, 2, QTableWidgetItem(f"{confidence:.2f}"))
            self.table.setItem(i, 3, QTableWidgetItem(image_path))

if __name__ == "__main__":
    app = QApplication(sys.argv)
    window = ElectricBikeDetection()
    window.show()
    sys.exit(app.exec_())
4. 数据库集成
使用MySQL存储检测结果。
数据库管理 (db_utils.py)
import mysql.connector

class DatabaseManager:
    def __init__(self, host, user, password, db_name):
        self.conn = mysql.connector.connect(host=host, user=user, password=password, database=db_name)
        self.create_tables()

    def create_tables(self):
        cursor = self.conn.cursor()
        cursor.execute('''
            CREATE TABLE IF NOT EXISTS detections (
                id INT AUTO_INCREMENT PRIMARY KEY,
                time TIMESTAMP DEFAULT CURRENT_TIMESTAMP,
                x_min INT,
                y_min INT,
                x_max INT,
                y_max INT,
                confidence FLOAT,
                image_path VARCHAR(255)
            )
        ''')
        self.conn.commit()

    def insert_detection(self, x_min, y_min, x_max, y_max, confidence, image_path=None):
        cursor = self.conn.cursor()
        cursor.execute('''
            INSERT INTO detections (x_min, y_min, x_max, y_max, confidence, image_path)
            VALUES (?, ?, ?, ?, ?, ?)
        ''', (x_min, y_min, x_max, y_max, confidence, image_path))
        self.conn.commit()

    def get_all_detections(self):
        cursor = self.conn.cursor()
        cursor.execute('SELECT * FROM detections')
        return cursor.fetchall()

    def close(self):
        self.conn.close()
5. 实时检测
在上述代码中,我们实现了以下功能:
- 选择视频文件。
- 开始识别按钮触发检测过程。
- 打开和关闭摄像头。
- 实时显示检测结果。
- 将检测结果存储到MySQL数据库中。
总结
仅供参考,同学构建一个基于YOLOv5s的电动车入梯识别系统。这个系统包括数据准备、模型训练、UI设计、数据库集成和实时检测等功能。

AtomGit 是由开放原子开源基金会联合 CSDN 等生态伙伴共同推出的新一代开源与人工智能协作平台。平台坚持“开放、中立、公益”的理念,把代码托管、模型共享、数据集托管、智能体开发体验和算力服务整合在一起,为开发者提供从开发、训练到部署的一站式体验。
更多推荐

 7
7 0
0- 0


 已为社区贡献97条内容

所有评论(0)