鸿蒙原生应用实战(二):首页开发与全局数据流设计
鸿蒙原生应用实战(二):首页开发与全局数据流设计
系列目录:
- 第一篇:项目搭建与页面架构设计
- 第二篇:首页开发与全局数据流设计 ← 当前
- 第三篇:笔记详情与编辑页面的路由与CRUD
- 第四篇:分类浏览与个人中心的多维数据展示
- 第五篇:构建调试、异常处理与HAP发布
一、前言
上一篇我们搭建了项目骨架并设计了 5 页面的路由架构。本篇将正式进入编码——开发 App 的 首页(Index.ets),它是整个应用的门面,承载着笔记列表展示、搜索、分类筛选和新建入口等核心功能。
同时,我们将设计全局数据流方案,让 5 个页面共享同一份笔记数据。
二、首页布局架构
首页是一个全屏 Stack 布局,包含三层:
Stack (根容器)
├── Column (主内容层)
│   ├── 顶部导航栏 (Row)
│   ├── 搜索栏 (Row)
│   ├── 分类筛选标签 (Scroll → Row)
│   ├── 笔记列表 (List) 或 空状态 (Column)
│   └── 底部导航栏 (Row)
└── Column (悬浮FAB按钮层)
    └── 圆形新建按钮
使用 Stack 作为根容器的好处:FAB 按钮可以通过 .align(Alignment.BottomEnd) 轻松定位到右下角,不会影响主内容区的布局。
三、数据模型与全局状态
3.1 定义 Note 接口
在 Index.ets 顶部定义数据模型:
interface Note {
  id: number;
  title: string;
  content: string;
  category: string;   // '工作' | '学习' | '生活' | '灵感'
  date: string;       // 'YYYY-MM-DD'
}
3.2 AppStorage 全局状态
鸿蒙的 AppStorage 是应用级的 UI 状态存储,跨页面共享。我们用它来存储笔记数组:
// 写入(任意页面)
AppStorage.setOrCreate<string>('notes', JSON.stringify(allNotes));

// 读取(任意页面)
let stored: string | undefined = AppStorage.get<string>('notes');
let notes: Note[] = stored ? JSON.parse(stored) as Note[] : [];
为什么用 JSON 字符串而不是直接存对象数组?
因为 AppStorage 对复杂对象的序列化支持有限,存储 JSON 字符串是跨版本最稳定的方式。
3.3 预置示例数据
为了让 App 第一次启动时有内容可看,在 getDefaultNotes() 中预置 6 条笔记:
getDefaultNotes(): Note[] {
  let defaultNotes: Note[] = [
    {
      id: 1,
      title: '鸿蒙开发入门指南',
      content: 'HarmonyOS 是面向全场景的分布式操作系统...',
      category: '学习',
      date: '2024-12-01'
    },
    {
      id: 2,
      title: '项目周报 - 第十二周',
      content: '本周完成:1. 用户模块接口联调 2. 首页UI重构...',
      category: '工作',
      date: '2024-12-15'
    },
    // ... 更多示例数据
  ];
  return defaultNotes;
}
整个数据流的生命周期:
App 启动 → aboutToAppear() → loadNotes()
                               ├── AppStorage 有数据?→ 读取 → filterNotes()
                               └── 无数据?→ 预置数据 → 存入 AppStorage → filterNotes()
四、顶部导航栏实现
// 顶部导航栏
Row() {
  Text($r('app.string.page_title_home'))  // "我的笔记"
    .fontSize($r('app.float.title_font_size'))
    .fontWeight(FontWeight.Bold)
    .fontColor($r('app.color.text_primary'))
  Blank()
  Image($r('app.media.foreground'))        // 头像图标
    .width(28).height(28).borderRadius(14)
    .onClick(() => this.goToProfilePage())
}
.width('100%')
.padding({ left: $r('app.float.page_padding'), right: $r('app.float.page_padding') })
这里使用了 $r() 引用资源文件,ArkTS 编译时会自动替换为实际值。注意 Image 这里用了默认资源的占位图,实际开发中应替换为自定义头像。
五、搜索栏实现
搜索栏有点击展开/收起两种状态:
@State isSearchActive: boolean = false;
@State searchText: string = '';

// 搜索栏
Row() {
  if (this.isSearchActive) {
    TextInput({ placeholder: '搜索笔记...', text: this.searchText })
      .layoutWeight(1).height(40)
      .onChange((value: string) => this.onSearchChange(value))
  } else {
    Text('搜索笔记...')
      .fontColor($r('app.color.text_tertiary'))
      .layoutWeight(1)
  }
  // 搜索图标
  Image($r('app.media.foreground'))
    .onClick(() => this.toggleSearch())
}
搜索触发过滤逻辑:
filterNotes(): void {
  let result: Note[] = this.notes;
  // 分类过滤
  if (this.selectedCategory !== '全部') {
    result = result.filter((note: Note) => note.category === this.selectedCategory);
  }
  // 关键词过滤(标题+正文)
  if (this.searchText.length > 0) {
    let keyword: string = this.searchText.toLowerCase();
    result = result.filter((note: Note) =>
      note.title.toLowerCase().includes(keyword) ||
      note.content.toLowerCase().includes(keyword)
    );
  }
  this.filteredNotes = result;
}
六、分类筛选标签
5 个分类标签用横向滚动的 Scroll 实现:
private categories: CategoryItem[] = [
  { label: '全部', key: '全部' },
  { label: '工作', key: '工作' },
  { label: '学习', key: '学习' },
  { label: '生活', key: '生活' },
  { label: '灵感', key: '灵感' }
];

Scroll() {
  Row() {
    ForEach(this.categories, (item: CategoryItem) => {
      Text(item.label)
        .padding({ left: 16, right: 16, top: 6, bottom: 6 })
        .backgroundColor(
          this.selectedCategory === item.label
            ? $r('app.color.primary')   // 选中时蓝色
            : $r('app.color.card_bg')    // 未选中时白色
        )
        .fontColor(
          this.selectedCategory === item.label
            ? Color.White
            : $r('app.color.text_secondary')
        )
        .borderRadius(16)
        .onClick(() => this.onCategoryChange(item.label))
    }, (item: CategoryItem) => item.key)
  }
}
.scrollable(ScrollDirection.Horizontal)
.scrollBar(BarState.Off)
ForEach 的第三个参数 (item) => item.key 是键值生成器,帮助 ArkTS 高效地 diff 和重用组件。
七、笔记卡片列表
每个笔记卡片包含:分类标签、标题、内容预览、日期。
List() {
  ForEach(this.filteredNotes, (note: Note) => {
    ListItem() {
      Column() {
        // 分类标签
        Text(note.category)
          .fontColor(this.getCategoryColor(note.category))
          .border({ width: 1, color: this.getCategoryColor(note.category) })
          .borderRadius(4)
          .alignSelf(ItemAlign.Start)

        // 标题 - 最多1行
        Text(note.title)
          .fontSize($r('app.float.subtitle_font_size'))
          .fontWeight(FontWeight.Medium)
          .maxLines(1).textOverflow({ overflow: TextOverflow.Ellipsis })

        // 预览 - 最多2行
        Text(note.content)
          .fontSize($r('app.float.small_font_size'))
          .fontColor($r('app.color.text_secondary'))
          .maxLines(2).textOverflow({ overflow: TextOverflow.Ellipsis })

        // 日期
        Text(note.date)
          .fontSize($r('app.float.tiny_font_size'))
          .fontColor($r('app.color.text_tertiary'))
      }
      .padding(14)
      .backgroundColor($r('app.color.card_bg'))
      .borderRadius($r('app.float.card_radius'))
    }
    .onClick(() => this.goToNoteDetail(note))
  }, (note: Note) => note.id.toString())
}
空状态处理
当过滤结果为空时,显示友好的空状态:
if (this.filteredNotes.length > 0) {
  // ... 列表
} else {
  Column() {
    Text('还没有笔记,点击下方按钮新建')
      .fontColor($r('app.color.text_tertiary'))
  }
  .layoutWeight(1)
  .justifyContent(FlexAlign.Center)
}
八、悬浮新建按钮(FAB)
利用 Stack 的特性,将 FAB 放在主内容层之上:
Stack() {
  // 主内容 Column ...
  Column().width('100%').height('100%)

  // FAB
  Column() { /* 加号图标 */ }
    .width(56).height(56)
    .backgroundColor($r('app.color.primary'))
    .borderRadius(28)
    .onClick(() => this.goToEditPage())
    .align(Alignment.BottomEnd)
    .margin({ bottom: 72, right: 24 })
}
注意:早期版本我用过 .overlay() 的 inline builder 方案,但 ArkTS 严格模式不允许在 .overlay() 参数中使用内联 builder。改用 Stack + .align() 是最简洁可靠的方案。
九、底部导航栏
三个底部 Tab 使用简单的文字 + 点击跳转,当前页面高亮:
Row() {
  Text('笔记').fontColor($r('app.color.primary'))      // 高亮当前页
  Text('分类').onClick(() => this.goToCategoryPage())
  Text('我的').onClick(() => this.goToProfilePage())
}
.justifyContent(FlexAlign.SpaceAround)
.backgroundColor($r('app.color.card_bg'))
十、onPageShow 生命周期
鸿蒙的页面生命周期中,onPageShow 在每次页面可见时调用。我们在首页和分类页都注册了它:
aboutToAppear(): void {
  this.loadNotes();  // 首次加载
}

onPageShow(): void {
  this.loadNotes();  // 从其他页面返回时刷新
}
这样当用户从编辑页面保存笔记返回后,首页会自动刷新列表。
十一、ArkTS 严格模式避坑
11.1 对象字面量必须有类型
// ❌ 错误:arkts-no-untyped-obj-literals
private categories = [
  { label: '全部', key: '全部' }
];

// ✅ 正确:定义接口并用类型注解
interface CategoryItem { label: string; key: string; }
private categories: CategoryItem[] = [
  { label: '全部', key: '全部' }
];
11.2 数组字面量必须可推断类型
// ✅ 正确:数组类型明确
@State notes: Note[] = [];
@State filteredNotes: Note[] = [];
11.3 build() 方法只能有一个根节点
// ❌ 错误:build 中不能有 let 语句
build() {
  let x = 1;  // 编译错误!
  Column() { }
}

// ✅ 正确:在变量声明处计算,或直接内联
build() {
  Column() { }
}
十二、本篇总结
本篇我们完成了:
- ✅ 首页的完整布局:导航栏、搜索栏、分类标签、笔记列表、FAB
- ✅ 基于 AppStorage 的全局数据流设计,5 页面共享数据
- ✅ 搜索+分类双重过滤逻辑
- ✅ 空状态处理、生命周期刷新
- ✅ ArkTS 严格模式避坑指南
下一篇将进入笔记详情页和编辑页面的开发,重点讲解路由参数传递、CRUD 操作和删除确认弹窗。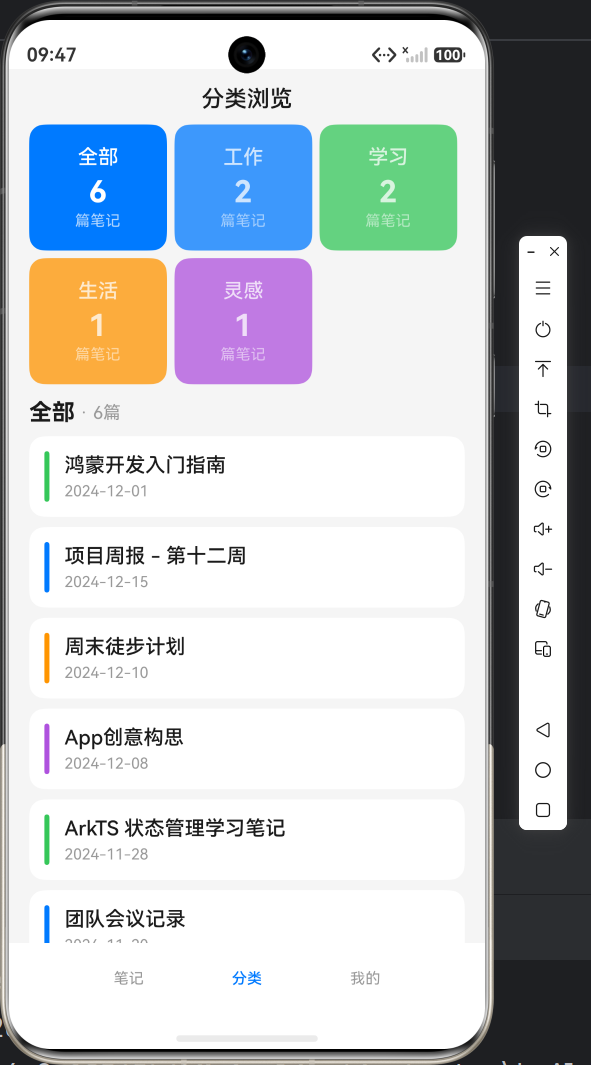
作者:AtomCode
GitHub: [项目链接]
如果本文对你有帮助,请点赞👍收藏⭐关注➕

AtomGit 是由开放原子开源基金会联合 CSDN 等生态伙伴共同推出的新一代开源与人工智能协作平台。平台坚持“开放、中立、公益”的理念,把代码托管、模型共享、数据集托管、智能体开发体验和算力服务整合在一起,为开发者提供从开发、训练到部署的一站式体验。
更多推荐


 9
9 0
0- 0


 已为社区贡献15条内容

所有评论(0)