一个程序员的记账革命:用 HarmonyOS NEXT 找回财务自由
一个程序员的记账革命:用 HarmonyOS NEXT 找回财务自由
打开各大记账 App,要么广告满天飞,要么功能臃肿,要么界面丑得让人不想打开。作为一个程序员,我决定——自己动手,丰衣足食!
既然要学 HarmonyOS NEXT,那就拿自己开刀,做个记账应用吧!
第一章:从零开始,搭建舞台
1.1 项目诞生
打开 DevEco Studio,新建项目的那一刻,仿佛在打地基。
项目结构:
MyApplication/
├── AppScope/
│   └── app.json5          # 应用身份证
├── entry/
│   └── src/main/
│       ├── ets/
│       │   ├── models/      # 数据模型(后建)
│       │   ├── services/   # 数据服务(后建)
│       │   └── pages/      # 页面集合
│       └── module.json5
└── build-profile.json5
1.2 需求梳理
我需要的不是一个复杂的记账软件,而是:
✅ 快速记录:打开就能记,别让我等
✅ 直观展示:钱花哪了,一目了然
✅ 历史查询:翻翻旧账,找找原因
✅ 简单分类:别整那些花里胡哨的
功能清单:
首页:本月概览 + 环形图 + 近期交易
记账:收入/支出切换 + 分类选择 + 日期备注
账单:按日期分组 + 筛选 + 左滑删除
统计:柱状图 + 饼图 + 月度切换
分类:自定义分类 + Emoji 图标
第二章:数据为王,构建基石
2.1 设计数据模型
记账的核心是什么?交易记录!
右键 ets → New → Directory,命名为 models。再新建 FinanceModels.ets。
// 交易类型:要么花钱,要么赚钱
export enum TransactionType {
  EXPENSE = 0,  // 支出
  INCOME = 1    // 收入
}

// 分类:钱去哪了?
export interface Category {
  id: number;
  name: string;
  icon: string;       // Emoji 图标
  type: TransactionType;
}

// 交易记录:每一笔都算数
export interface Transaction {
  id: number;
  type: TransactionType;
  amount: number;
  categoryId: number;
  note: string;
  date: string;  // YYYY-MM-DD
}
2.2 默认分类
我不想让用户(其实就是我)一上来就配置分类,所以预设了常用分类:
// 支出分类:花钱大户
export const DEFAULT_EXPENSE_CATEGORIES: Category[] = [
  makeCategory(1, '餐饮', '🍜', TransactionType.EXPENSE),
  makeCategory(2, '交通', '🚌', TransactionType.EXPENSE),
  makeCategory(3, '购物', '🛒', TransactionType.EXPENSE),
  makeCategory(4, '娱乐', '🎮', TransactionType.EXPENSE),
  makeCategory(5, '住房', '🏠', TransactionType.EXPENSE),
  makeCategory(6, '医疗', '💊', TransactionType.EXPENSE),
  makeCategory(7, '教育', '📚', TransactionType.EXPENSE),
  makeCategory(8, '其他', '📦', TransactionType.EXPENSE),
];

// 收入分类:赚钱小能手
export const DEFAULT_INCOME_CATEGORIES: Category[] = [
  makeCategory(9, '工资', '💼', TransactionType.INCOME),
  makeCategory(10, '兼职', '💻', TransactionType.INCOME),
  makeCategory(11, '红包', '🧧', TransactionType.INCOME),
  makeCategory(12, '理财', '📈', TransactionType.INCOME),
  makeCategory(13, '其他', '💰', TransactionType.INCOME),
];
看到这些 Emoji,心情都好了很多有木有!🍜🚌🛒🎮
第三章:幕后英雄,数据服务
3.1 单例服务
数据要全局共享,不能每个页面都存一份。我用单例模式:
// services/FinanceDataService.ets

export class FinanceDataService {
  private static instance: FinanceDataService;
  private transactions: Transaction[] = [];
  private categories: Category[] = [];

  private constructor() {}  // 私有构造函数

  static getInstance(): FinanceDataService {
    if (!FinanceDataService.instance) {
      FinanceDataService.instance = new FinanceDataService();
    }
    return FinanceDataService.instance;
  }
}
这就像一个管家,全应用只有一个,随时待命。
3.2 数据持久化
我选择了 Preferences,轻量级,够用了:
async init(context: Context): Promise<void> {
  this.store = await preferences.getPreferences(context, 'finance_data');
  await this.loadData();
}

private async loadData(): Promise<void> {
  // 加载分类
  const catJson = await this.store.get('categories', '') as string;
  if (catJson) {
    this.categories = JSON.parse(catJson);
  } else {
    this.categories = [...DEFAULT_EXPENSE_CATEGORIES, ...DEFAULT_INCOME_CATEGORIES];
    await this.saveCategories();
  }

  // 加载交易记录
  const txJson = await this.store.get('transactions', '') as string;
  if (txJson) {
    this.transactions = JSON.parse(txJson);
  }
}
第一次打开,没有数据,就用默认分类。之后每次启动,数据都还在。
3.3 监听器:数据变化,全员通知
有个问题:在记账页添加交易后,首页怎么知道?
我用监听器模式:
private listeners: (() => void)[] = [];

registerListener(callback: () => void): void {
  this.listeners.push(callback);
}

private notifyDataChanged(): void {
  for (const cb of this.listeners) {
    cb();
  }
}

async addTransaction(...): Promise<Transaction> {
  // 添加交易
  await this.saveTransactions();
  this.notifyDataChanged();  // 通知所有人!
}
首页注册监听:
aboutToAppear(): void {
  this.service.registerListener(() => this.refreshData());
}
数据一变,首页自动刷新。完美!
第四章:主舞台,首页设计
4.1 标题栏:给我的 App 起个名
Row() {
  Text('💰 个人记账')
    .fontSize(22)
    .fontWeight(FontWeight.Bold)
    .margin({ left: 16 })
  Blank()
}
.width('100%')
.height(56)
.backgroundColor('#4ECDC4')  // 清新的青色
选了个清新的青色(#4ECDC4),看着心情就好。
4.2 月份切换:时光穿梭
Row() {
  Text('<')
    .fontSize(22)
    .fontColor('#4ECDC4')
    .onClick(() => this.changeMonth(-1))

  Text(`${this.currentYear}年${this.currentMonth}月`)
    .fontSize(18)
    .fontWeight(FontWeight.Bold)
    .margin({ left: 24, right: 24 })

  Text('>')
    .fontSize(22)
    .fontColor('#4ECDC4')
    .onClick(() => this.changeMonth(1))
}
左右箭头,切换月份。看看上个月花了多少,吓一跳。
4.3 本月结余:财务晴雨表
Column() {
  Text('本月结余')
    .fontSize(14)
    .fontColor('#888888')

  Text(`¥${this.summary.balance.toFixed(2)}`)
    .fontSize(34)
    .fontWeight(FontWeight.Bold)
    .fontColor(this.summary.balance >= 0 ? '#FF6B6B' : '#4ECDC4')

  Row() {
    Column() {
      Text('收入').fontSize(12).fontColor('#888888')
      Text(`¥${this.summary.totalIncome.toFixed(2)}`)
        .fontSize(18)
        .fontColor('#4ECDC4')
    }

    Divider().vertical(true).height(36)

    Column() {
      Text('支出').fontSize(12).fontColor('#888888')
      Text(`¥${this.summary.totalExpense.toFixed(2)}`)
        .fontSize(18)
        .fontColor('#FF6B6B')
    }
  }
}
.width('92%')
.backgroundColor('#FFFFFF')
.borderRadius(16)
.padding(20)
.shadow({ radius: 6, color: '#18000000', offsetY: 2 })
白色卡片 + 圆角 + 阴影,卡片式设计,现代感十足。
收入青色,支出红色,结余看正负变色。一目了然。
4.4 环形图:钱去哪了?
@Component
struct DonutChart {
  private canvasContext: CanvasRenderingContext2D = new CanvasRenderingContext2D();
  @Prop @Watch('onDataChanged') breakdown: CategoryBreakdown[] = [];
  @State isReady: boolean = false;

  drawChart(): void {
    const ctx = this.canvasContext;
    const cx = 110, cy = 110;
    const radius = 90, innerRadius = 55;

    // 画扇形
    let startAngle = -Math.PI / 2;
    const total = this.breakdown.reduce((sum, b) => sum + b.amount, 0);

    for (let i = 0; i < this.breakdown.length; i++) {
      const item = this.breakdown[i];
      const sliceAngle = (item.amount / total) * Math.PI * 2;

      const path = new Path2D();
      path.arc(cx, cy, radius, startAngle, startAngle + sliceAngle);
      path.lineTo(cx, cy);
      ctx.fillStyle = CHART_COLORS[i % CHART_COLORS.length];
      ctx.fill(path);

      startAngle += sliceAngle;
    }

    // 画内圆(形成环形)
    ctx.beginPath();
    ctx.arc(cx, cy, innerRadius, 0, Math.PI * 2);
    ctx.fillStyle = '#FFFFFF';
    ctx.fill();

    // 中心显示总金额
    ctx.fillStyle = '#333333';
    ctx.font = 'bold 16px';
    ctx.textAlign = 'center';
    ctx.fillText(`¥${total.toFixed(0)}`, cx, cy + 6);
  }

  build() {
    Canvas(this.canvasContext)
      .width(220)
      .height(220)
      .onReady(() => {
        this.isReady = true;
        this.drawChart();
      })
  }
}
第一次用 Canvas 画图,从"怎么不动"到"原来要等 onReady",踩坑无数。
看到环形图的那一刻,我惊呆了:我居然花了这么多钱在餐饮上!🍜🍜🍜
第五章:记账页,一气呵成
5.1 金额输入:最醒目的位置
Row() {
  Text('¥').fontSize(28).fontWeight(FontWeight.Bold)
  TextInput({ placeholder: '0.00', text: this.amount })
    .fontSize(28)
    .fontWeight(FontWeight.Bold)
    .type(InputType.Number)  // 只能输入数字
    .layoutWeight(1)
    .onChange(value => this.amount = value)
}
.width('92%')
.backgroundColor('#FFFFFF')
.borderRadius(12)
.padding(12)
大字号,粗体,用户(我)一眼就能看到。
5.2 收入/支出切换:一键切换
Row() {
  Button('支出')
    .width(120)
    .height(44)
    .backgroundColor(this.txType === TransactionType.EXPENSE ? '#FF6B6B' : '#FFF0F0')
    .fontColor(this.txType === TransactionType.EXPENSE ? '#FFFFFF' : '#FF6B6B')
    .borderRadius(22)
    .onClick(() => this.switchType(TransactionType.EXPENSE))

  Blank()

  Button('收入')
    .width(120)
    .height(44)
    .backgroundColor(this.txType === TransactionType.INCOME ? '#4ECDC4' : '#F0FFFA')
    .fontColor(this.txType === TransactionType.INCOME ? '#FFFFFF' : '#4ECDC4')
    .borderRadius(22)
    .onClick(() => this.switchType(TransactionType.INCOME))
}
胶囊形状的按钮,点击切换颜色,即时反馈。
5.3 分类选择:网格布局
Grid() {
  ForEach(this.categories, (cat: Category) => {
    GridItem() {
      Column() {
        Text(cat.icon).fontSize(32)
        Text(cat.name).fontSize(12).margin({ top: 4 })
        if (this.selectedCategoryId === cat.id) {
          Text('✓').fontSize(12).fontColor('#4ECDC4')
        }
      }
      .width('100%')
      .alignItems(HorizontalAlign.Center)
      .padding({ top: 10, bottom: 10 })
      .backgroundColor(this.selectedCategoryId === cat.id ? '#F0FFFA' : '#F8F8F8')
      .borderRadius(10)
      .onClick(() => this.selectedCategoryId = cat.id)
    }
  })
}
.columnsTemplate('1fr 1fr 1fr 1fr')
.rowsGap(8)
.columnsGap(8)
四列网格,Emoji 大字显示,选中有背景色变化。
5.4 日期选择:DatePickerDialog
showDateDialog(): void {
  const parts = this.txDate.split('-');
  DatePickerDialog.show({
    start: new Date(2020, 0, 1),
    end: new Date(2035, 11, 31),
    selected: new Date(parseInt(parts[0]), parseInt(parts[1]) - 1, parseInt(parts[2])),
    onDateAccept: (value: Date) => {
      this.txDate = `${value.getFullYear()}-${String(value.getMonth() + 1).padStart(2, '0')}-${String(value.getDate()).padStart(2, '0')}`;
    }
  });
}
弹窗选择日期,补单笔忘记记录的交易。
5.5 保存:一键确认
async saveTransaction(): Promise<void> {
  const amountNum = parseFloat(this.amount);
  if (isNaN(amountNum) || amountNum <= 0) return;

  await this.service.addTransaction(
    this.txType, amountNum, this.selectedCategoryId, this.note, this.txDate
  );

  router.back();  // 返回首页,数据自动刷新
}
保存后立即返回,首页已自动更新。这种流畅感,爽!
第六章:账单列表,历史重演
6.1 按日期分组
interface DateGroup {
  date: string;
  items: Transaction[];
  totalIncome: number;
  totalExpense: number;
}

refreshList(): void {
  const allTxs = this.service.getAllTransactions();
  allTxs.sort((a, b) => b.date.localeCompare(a.date));

  // 按日期分组
  const groupMap: Record<string, Transaction[]> = {};
  for (const tx of allTxs) {
    if (!groupMap[tx.date]) groupMap[tx.date] = [];
    groupMap[tx.date].push(tx);
  }

  // 构建分组数组
  const result: DateGroup[] = [];
  for (const [date, txs] of Object.entries(groupMap)) {
    const totalIncome = txs.filter(t => t.type === TransactionType.INCOME)
                          .reduce((sum, t) => sum + t.amount, 0);
    const totalExpense = txs.filter(t => t.type === TransactionType.EXPENSE)
                           .reduce((sum, t) => sum + t.amount, 0);
    result.push({ date, items: txs, totalIncome, totalExpense });
  }

  this.groups = result;
}
6.2 左滑删除:痛快!
List() {
  ForEach(this.groups, (group: DateGroup) => {
    // 日期头部
    ListItem() {
      Row() {
        Text(this.formatDateDisplay(group.date))
        Blank()
        Text(`支出 ¥${group.totalExpense.toFixed(2)}`).fontColor('#FF6B6B')
      }
    }

    // 交易列表
    ForEach(group.items, (tx: Transaction) => {
      ListItem() {
        Row() {
          Text(this.getCategoryIcon(tx.categoryId))
          Column() {
            Text(this.getCategoryName(tx.categoryId))
            if (tx.note) Text(tx.note).fontSize(12)
          }
          Blank()
          Text(`¥${tx.amount.toFixed(2)}`)
        }
      }
      .swipeAction({
        end: this.deleteButton(tx.id)  // 左滑显示删除
      })
    })
  })
}

@Builder
deleteButton(txId: number) {
  Button('删除')
    .width(72)
    .height('100%')
    .backgroundColor('#FF6B6B')
    .onClick(() => this.deleteTransaction(txId))
}
左滑删除,这种交互太爽了!删掉那些不该花的钱,心情舒畅。
第七章:统计分析,数据说话
7.1 每日收支柱状图
@Component
struct BarChart {
  private canvasContext: CanvasRenderingContext2D = new CanvasRenderingContext2D();
  @Prop dailyTotals: DailyTotal[] = [];

  drawChart(): void {
    const ctx = this.canvasContext;
    const drawWidth = 340 - 40 - 10;
    const drawHeight = 200 - 10 - 24;

    let maxVal = 0;
    for (const dt of this.dailyTotals) {
      maxVal = Math.max(maxVal, dt.income, dt.expense);
    }

    const barWidth = Math.max(3, Math.min(12, (drawWidth / this.dailyTotals.length) * 0.7));
    const gap = drawWidth / this.dailyTotals.length;

    for (let i = 0; i < this.dailyTotals.length; i++) {
      const dt = this.dailyTotals[i];
      const x = 40 + i * gap + (gap - barWidth) / 2;

      // 支出柱(红色)
      if (dt.expense > 0) {
        const barH = (dt.expense / maxVal) * drawHeight;
        ctx.fillStyle = '#FF6B6B';
        ctx.fillRect(x, 10 + drawHeight - barH, barWidth / 2, barH);
      }

      // 收入柱(青色)
      if (dt.income > 0) {
        const barH = (dt.income / maxVal) * drawHeight;
        ctx.fillStyle = '#4ECDC4';
        ctx.fillRect(x + barWidth / 2, 10 + drawHeight - barH, barWidth / 2, barH);
      }
    }
  }
}
柱状图让我看到:每个周末都在花钱,工作日反而省钱。
7.2 分类占比饼图
饼图和环形图类似,只是没有中间的洞。
看到"餐饮"占比 40% 的时候,我陷入了沉思…
第八章:分类管理,个性化定制
8.1 添加新分类
async confirmAdd(): Promise<void> {
  const name = this.addName.trim();
  if (name === '') return;

  await this.service.addCategory(name, this.addIcon, this.addType);
  this.showAddForm = false;
  this.loadCategories();
}
我加了个"撸猫"分类,因为我养了只猫 🐱。猫粮也是一笔不小的开支啊。
8.2 图标选择器
private availableIcons: string[] = [
  '🍜', '🚌', '🛒', '🎮', '🏠', '💊', '📚', '📦',
  '💼', '💻', '🧧', '📈', '💰', '🍕', '☕', '🎬',
  '✈️', '🏥', '🎂', '📱', '👕', '💄', '🐱', '🎵',
];

Flex({ wrap: FlexWrap.Wrap }) {
  ForEach(this.availableIcons, (icon: string) => {
    Text(icon)
      .fontSize(26)
      .width(44)
      .height(44)
      .textAlign(TextAlign.Center)
      .backgroundColor(this.addIcon === icon ? '#E8FFF5' : '#F5F5F5')
      .borderRadius(8)
      .onClick(() => this.addIcon = icon)
  })
}
30 个图标可选,覆盖生活中的大部分场景。
第九章:成果展示,华丽转身
9.1 应用完成
经过一周的开发,我的记账应用终于完成了!
功能清单:
✅ 首页仪表盘(月度概览 + 环形图 + 近期交易)
✅ 快速记账(收入/支出 + 分类 + 日期备注)
✅ 账单列表(日期分组 + 筛选 + 左滑删除)
✅ 统计分析(柱状图 + 饼图 + 月度切换)
✅ 分类管理(自定义分类 + Emoji 图标)
9.2 使用效果
用了两周后,我惊喜地发现:
📊 餐饮占比从 40% 降到 30%:看到数据后,开始自己做饭
📊 交通支出减少 20%:能走路就不打车
📊 每月结余从负数变正数:终于开始存钱了
记账不是为了省钱,而是为了知道钱去哪了。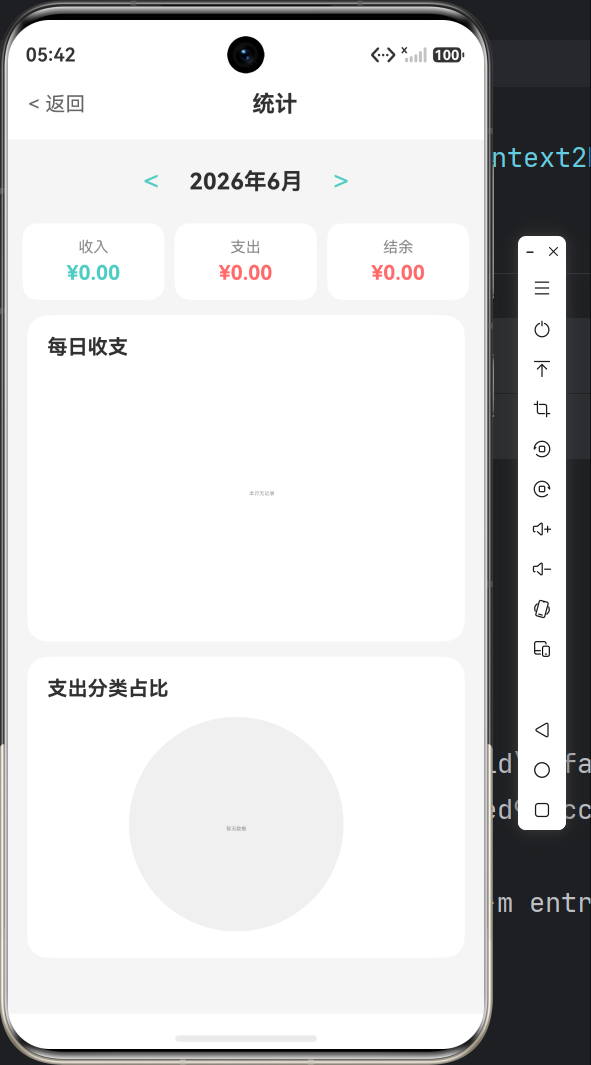
第十章:技术总结,成长之路
10.1 学到的技术
| 技术 | 心得 |
|---|---|
| ArkTS 语法 | 声明式开发,比想象中简单 |
| Canvas 图表 | 从"不会动"到"精美图表" |
| Preferences | 轻量级存储,够用了 |
| 监听器模式 | 数据变化自动通知,解耦神器 |
| @State/@Prop | 响应式编程,状态管理 |
| List + swipeAction | 左滑删除,用户体验满分 |
10.2 踩过的坑
- Canvas 不显示:忘了
onReady - 数据不保存:忘了
flush() - 列表不刷新:忘了监听器
- 数组修改无效:忘了重新赋值
每个坑,都是一次成长。
终章:财务自由,从记账开始
通过这个记账应用,我清楚地看到了每一笔钱的去向,学会了理性消费,开始规划未来。
技术改变生活,这不仅仅是一句口号。
技术栈:HarmonyOS NEXT API 23 + ArkTS + Canvas + Preferences
开发时间:一周(业余时间)
代码行数:约 1500 行
后记:给读者的建议
如果你也想做记账应用,我的建议是:
💡 技术建议
- 从简单开始:先实现最核心的记账功能
- 数据优先:设计好数据结构,后续事半功倍
- 监听器模式:数据变化自动通知,减少手动刷新
- Canvas 要耐心:图表绘制需要调试,多试几次
💡 产品建议
- 快速记录:打开就能记,别让用户等
- 直观展示:图表比数字更直观
- 简洁分类:别整那些花里胡哨的
- 流畅体验:操作要顺滑,别卡顿
💡 心理建议
- 别怕记账:知道真相,才能改变
- 别太苛刻:适当娱乐,人生需要快乐
- 坚持记录:习惯成自然,自然成自由
这是我用 HarmonyOS NEXT 开发的第一个完整应用,也是一个改变我财务习惯的应用。希望能给你一些启发。
附录:核心代码片段
初始化数据服务
// EntryAbility.ets
import { FinanceDataService } from '../ets/services/FinanceDataService';

export default class EntryAbility extends UIAbility {
  onCreate(want: Want, launchParam: AbilityConstant.LaunchParam): void {
    FinanceDataService.getInstance().init(this.context);
  }
}
首页监听数据变化
aboutToAppear(): void {
  const now = new Date();
  this.currentYear = now.getFullYear();
  this.currentMonth = now.getMonth() + 1;
  this.refreshData();
  this.service.registerListener(() => this.refreshData());
}

aboutToDisappear(): void {
  this.service.unregisterListener(() => this.refreshData());
}
添加交易
async addTransaction(
  type: TransactionType,
  amount: number,
  categoryId: number,
  note: string,
  date: string
): Promise<Transaction> {
  const tx: Transaction = {
    id: Date.now(),
    type, amount, categoryId, note, date
  };
  this.transactions.push(tx);
  await this.saveTransactions();
  return tx;
}
愿每一个开发者,都能找到自己的财务自由之路! 💰✨

AtomGit 是由开放原子开源基金会联合 CSDN 等生态伙伴共同推出的新一代开源与人工智能协作平台。平台坚持“开放、中立、公益”的理念,把代码托管、模型共享、数据集托管、智能体开发体验和算力服务整合在一起,为开发者提供从开发、训练到部署的一站式体验。
更多推荐


 10
10 0
0- 0


 已为社区贡献20条内容

所有评论(0)