爆发效果技术——基于鸿蒙PC Electron框架实现
欢迎加入开源鸿蒙PC社区:
https://harmonypc.csdn.net/
atomgit仓库地址: https://atomgit.com/tizibanfan/lujingdonghua
一、概述
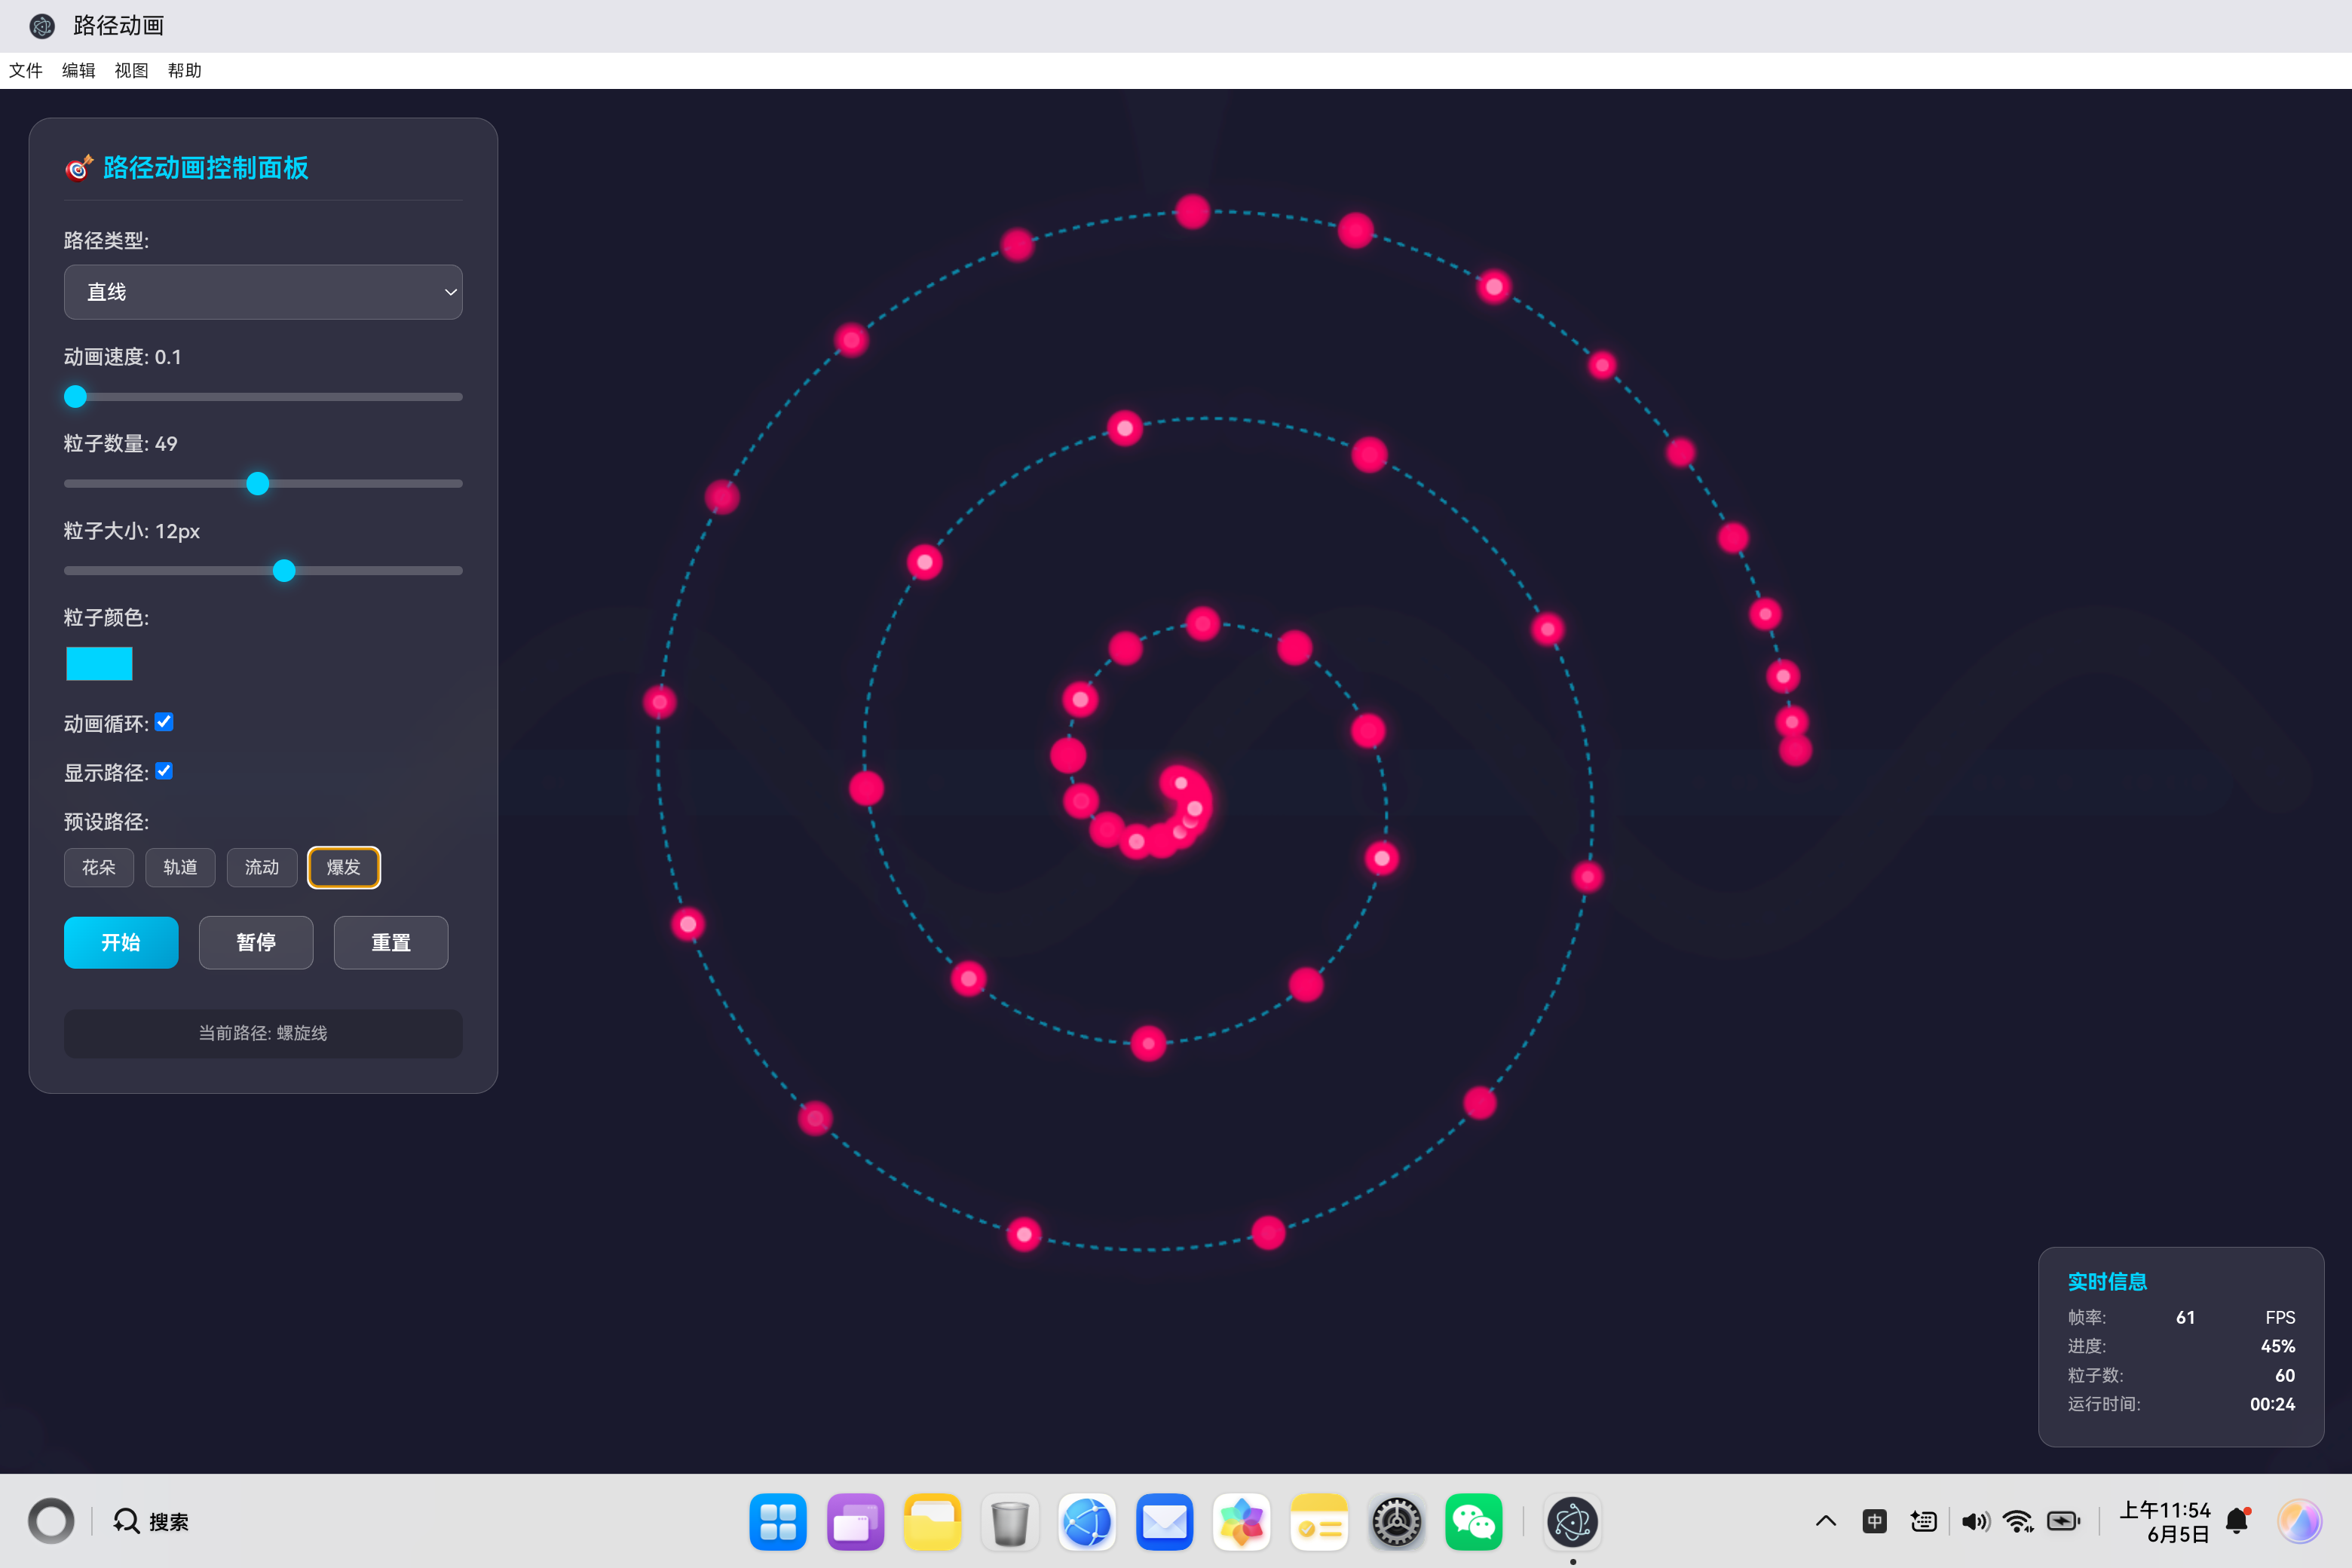
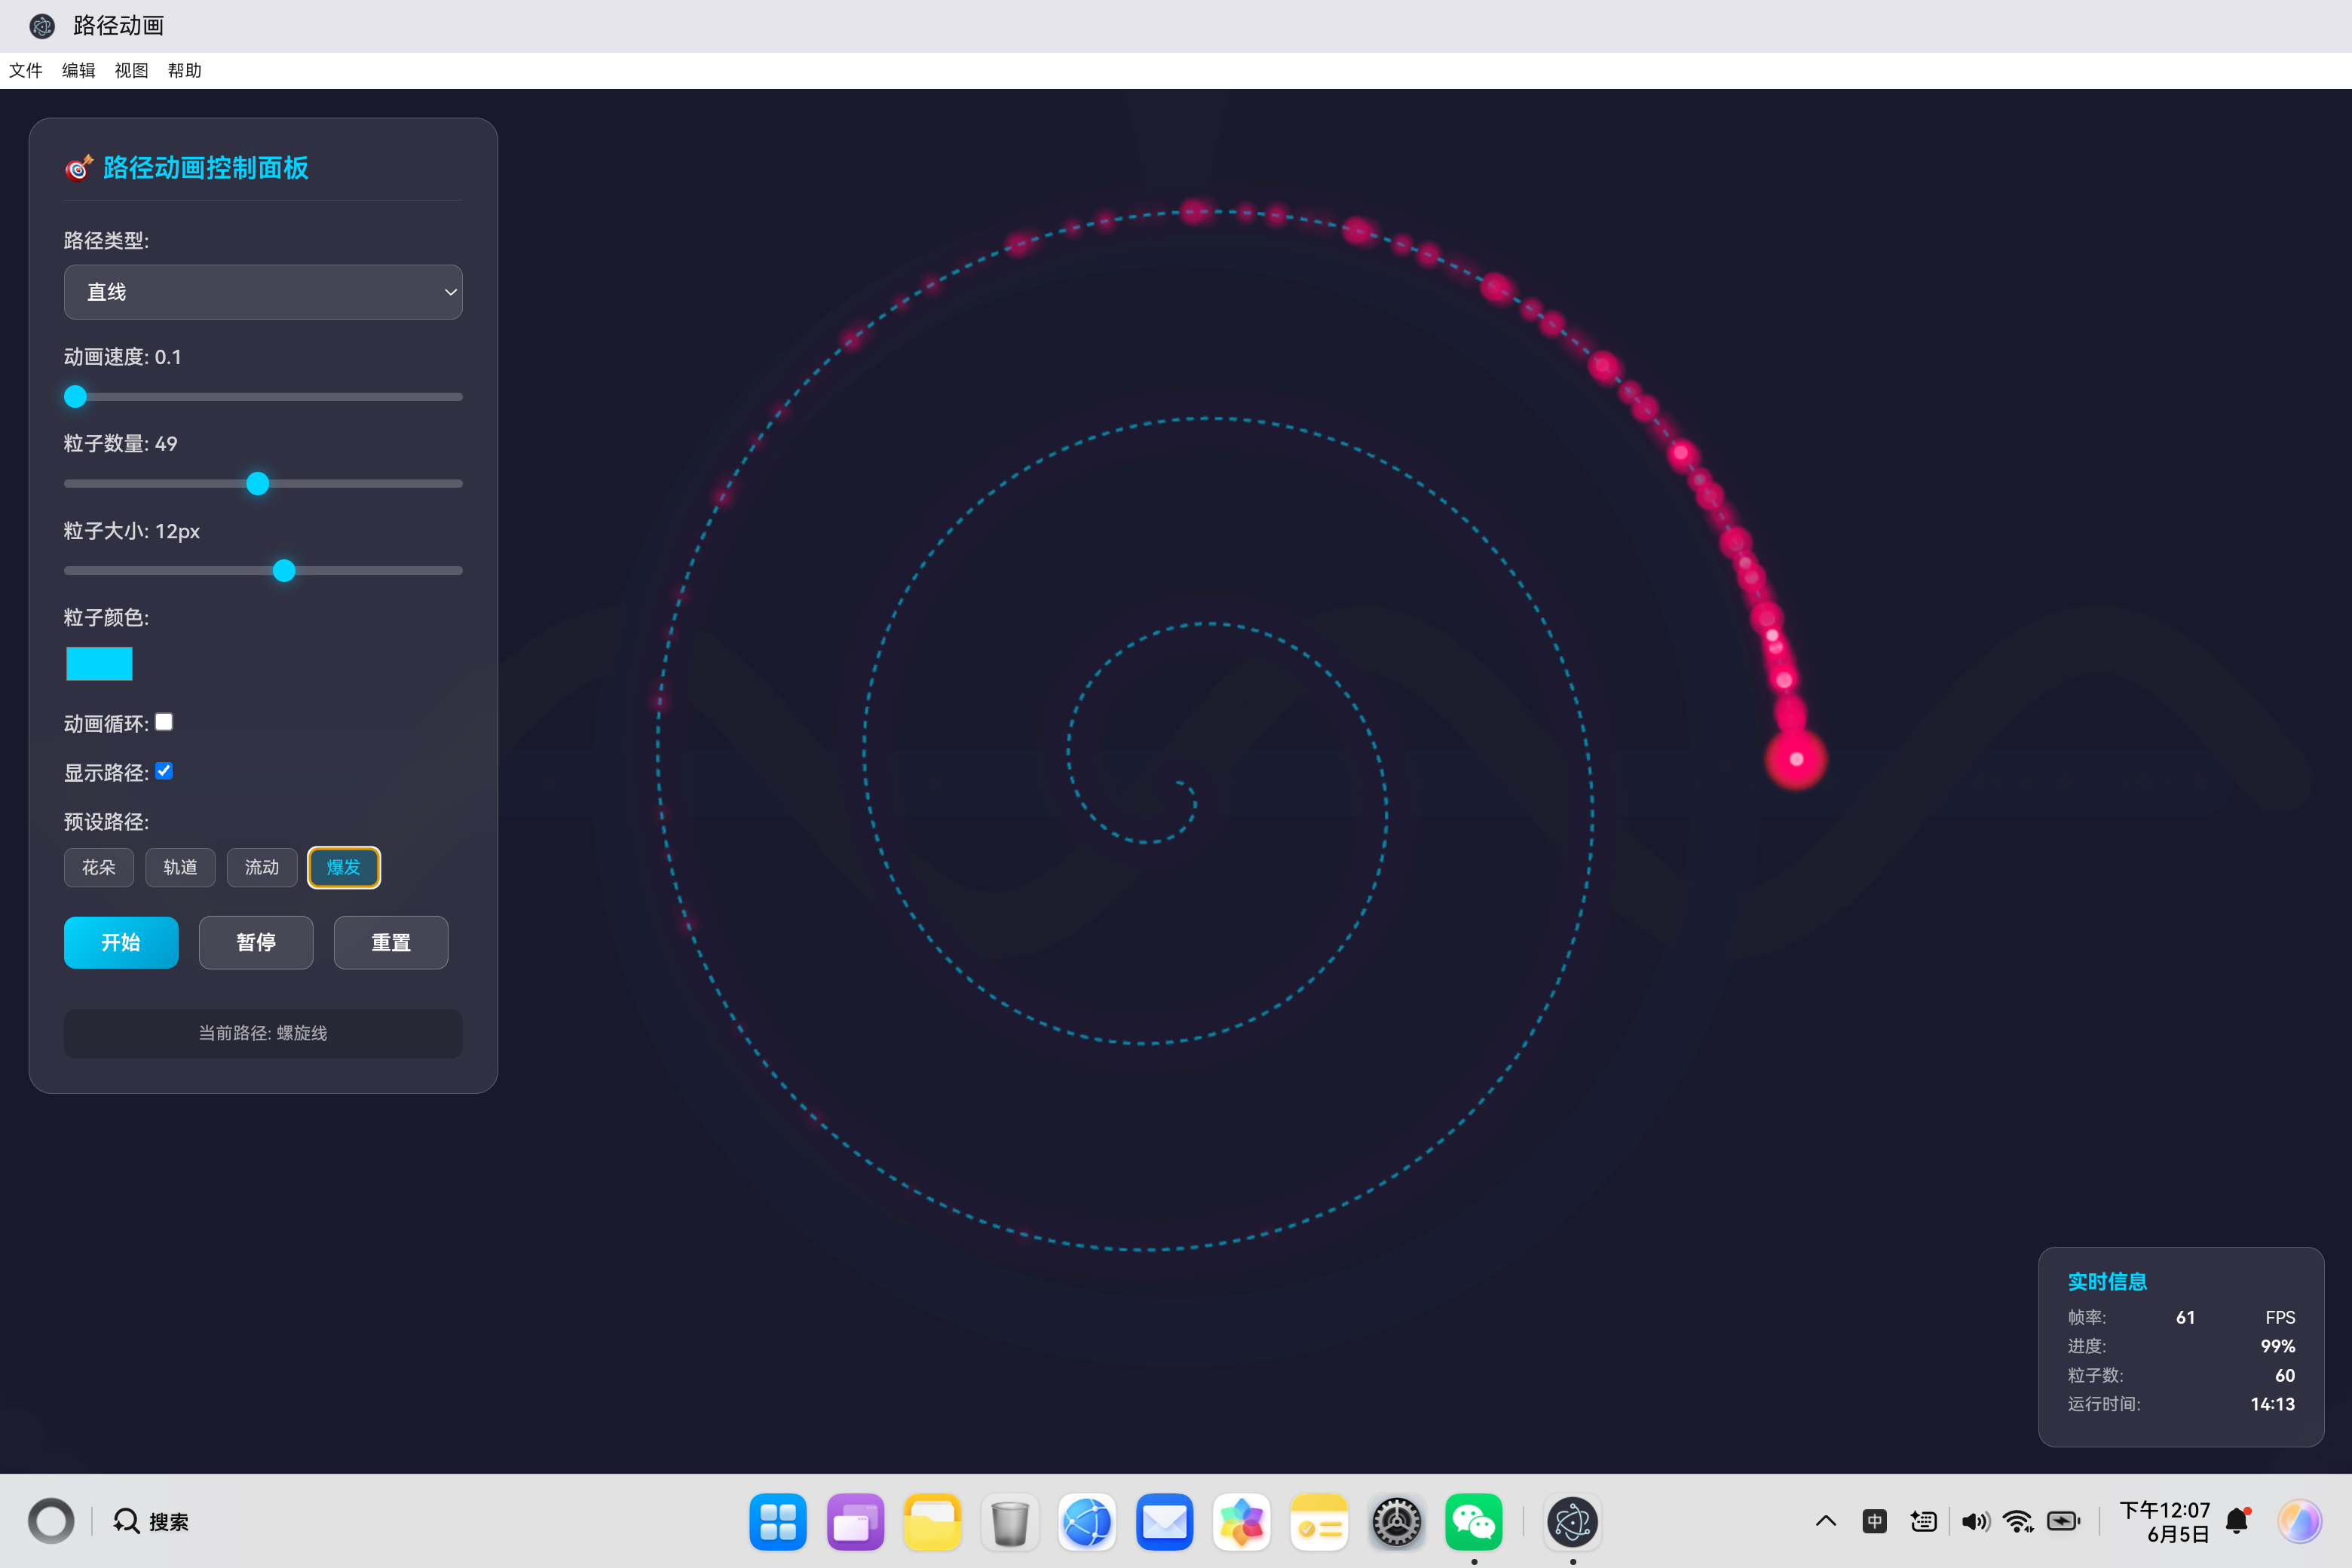
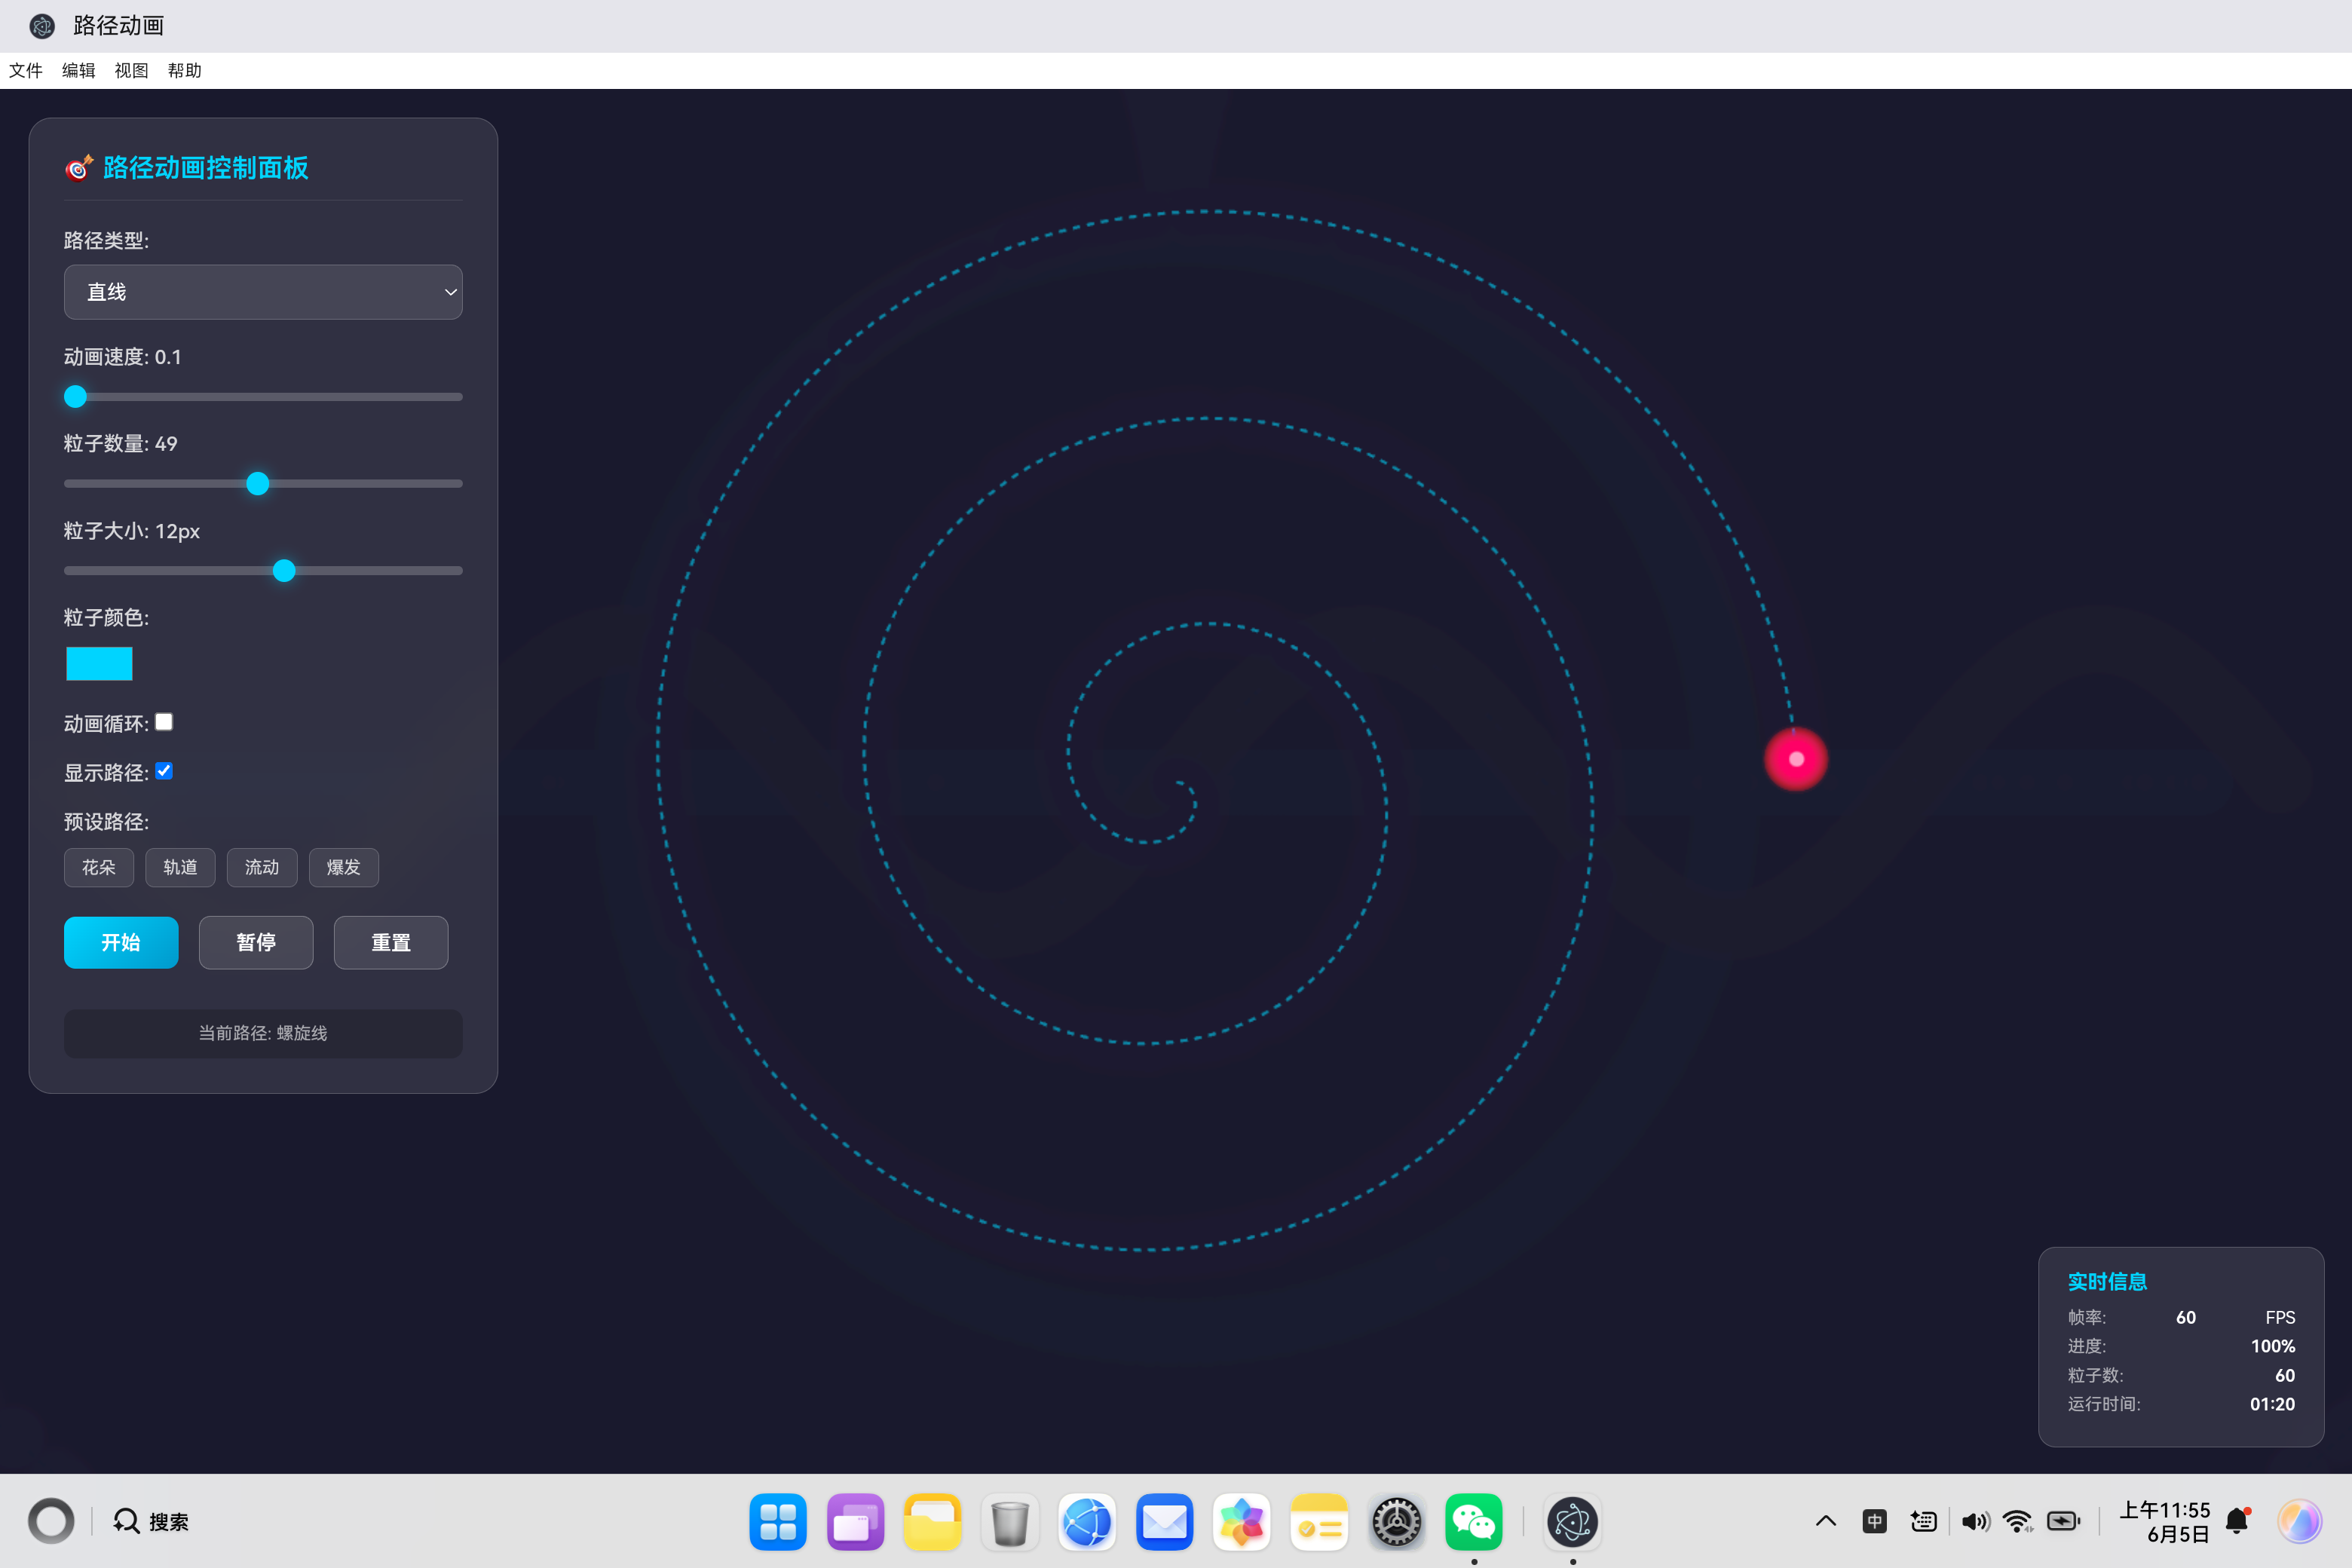
爆发效果(Burst)是路径动画应用中最具视觉冲击力的预设之一,模拟粒子从中心向外螺旋扩散的视觉效果。这种效果灵感来源于爆炸、能量爆发、星系旋转等现象,通过螺旋线运动创造出强烈的动态视觉体验。本文深入剖析爆发效果的实现原理、数学基础和优化策略。
二、爆发效果设计理念
2.1 效果特点
爆发效果展现强烈的视觉冲击力:
- 螺旋扩散:粒子从中心向外螺旋运动
- 加速运动:速度逐渐增加,模拟爆发能量
- 视觉焦点:中心汇聚,向外发散
- 动态层次:粒子大小和透明度随距离变化
2.2 应用场景
| 场景 | 说明 |
|---|---|
| 能量爆发 | 爆炸、冲击波效果 |
| 星系模拟 | 螺旋星系旋转 |
| 粒子喷泉 | 从中心喷发的粒子 |
| 数据爆炸 | 信息扩散可视化 |
| 庆祝动画 | 烟花、彩带效果 |
三、螺旋路径生成算法
3.1 数学原理
螺旋线的核心是极坐标参数化:
r ( t ) = r m a x ⋅ t r(t) = r_{max} \cdot t r(t)=rmax⋅t
θ ( t ) = 2 π ⋅ t u r n s ⋅ t \theta(t) = 2\pi \cdot turns \cdot t θ(t)=2π⋅turns⋅t
转换为笛卡尔坐标:
x = c x + r ( t ) ⋅ cos ( θ ( t ) ) x = cx + r(t) \cdot \cos(\theta(t)) x=cx+r(t)⋅cos(θ(t))
y = c y + r ( t ) ⋅ sin ( θ ( t ) ) y = cy + r(t) \cdot \sin(\theta(t)) y=cy+r(t)⋅sin(θ(t))
其中:
- ( c x , c y ) (cx, cy) (cx,cy) 是螺旋中心
- r m a x r_{max} rmax 是最大半径
- t u r n s turns turns 是螺旋圈数
- t ∈ [ 0 , 1 ] t \in [0, 1] t∈[0,1] 是参数
3.2 路径生成实现
generateSpiralPath() {
    const points = [];
    const maxRadius = Math.min(this.centerX, this.centerY) - 50;
    const turns = 3;

    for (let t = 0; t <= 1; t += 0.002) {
        const angle = t * Math.PI * 2 * turns;
        const radius = maxRadius * t;
        points.push({
            x: this.centerX + Math.cos(angle) * radius,
            y: this.centerY + Math.sin(angle) * radius
        });
    }
    return points;
}
技术要点:
- 半径递增:半径随参数t线性增加,从0到maxRadius
- 角度递增:角度随参数t线性增加,完成turns圈
- 点密度:步长0.002生成501个路径点,保证螺旋平滑
3.3 参数影响分析
| 参数 | 取值范围 | 视觉效果 |
|---|---|---|
| maxRadius | 100-400 | 螺旋范围大小 |
| turns | 1-10 | 螺旋圈数 |
| step | 0.001-0.01 | 路径点密度 |
四、粒子系统设计
4.1 粒子初始化策略
initParticles() {
    this.particles = [];
    for (let i = 0; i < this.particleCount; i++) {
        const progress = i / this.particleCount;
        const pointIndex = Math.floor(progress * (this.pathPoints.length - 1));
        const point = this.pathPoints[pointIndex] || { x: 0, y: 0 };

        this.particles.push({
            progress: progress,
            x: point.x,
            y: point.y,
            size: this.particleSize + (Math.random() - 0.5) * 4,
            opacity: 0.6 + Math.random() * 0.4,
            rotation: Math.random() * Math.PI * 2,
            rotationSpeed: (Math.random() - 0.5) * 0.1,
            trail: []
        });
    }
}
螺旋分布策略:
粒子从螺旋起点(中心)到终点(边缘)均匀分布,初始位置根据progress计算:
粒子0: progress = 0/60 = 0.00 (中心)
粒子1: progress = 1/60 = 0.0167
...
粒子59: progress = 59/60 = 0.983 (边缘)
4.2 粒子属性设计
| 属性 | 范围 | 作用 |
|---|---|---|
| progress | [0, 1] | 粒子在螺旋上的位置 |
| size | [size-2, size+2] | 粒子大小变化 |
| opacity | [0.6, 1.0] | 透明度变化 |
| rotation | [0, 2π] | 初始旋转角度 |
| rotationSpeed | [-0.05, 0.05] | 旋转速度 |
| trail | [] | 轨迹点数组 |
五、运动控制与缓动
5.1 easeOutCubic 缓动函数
爆发效果采用 easeOutCubic 缓动函数,实现快速爆发的视觉效果:
this.easingFunctions = {
    easeOutCubic: t => (--t) * t * t + 1,
    // ... 其他缓动函数
};
数学分析:
f ( t ) = 1 − ( 1 − t ) 3 f(t) = 1 - (1 - t)^3 f(t)=1−(1−t)3
- 初始速度快: f ′ ( 0 ) = 3 f'(0) = 3 f′(0)=3
- 末尾速度慢: f ′ ( 1 ) = 0 f'(1) = 0 f′(1)=0
- 适合表现爆发后减速的效果
5.2 粒子位置更新
updateParticles() {
    const speedFactor = this.speed * 0.005;

    this.particles.forEach(particle => {
        particle.progress += speedFactor;

        if (particle.progress > 1) {
            if (this.loop) {
                particle.progress = 0;  // 回到中心
            } else {
                particle.progress = 1;
            }
        }

        const easedProgress = this.easingFunctions.easeOutCubic(particle.progress);
        const point = this.getPointAtProgress(easedProgress);

        particle.trail.push({ x: particle.x, y: particle.y });
        if (particle.trail.length > 10) {
            particle.trail.shift();
        }

        particle.x = point.x;
        particle.y = point.y;
        particle.rotation += particle.rotationSpeed;
    });
}
关键流程:
- 更新进度:
progress += speedFactor - 应用缓动:
easedProgress = easeOutCubic(progress) - 计算位置:
point = getPointAtProgress(easedProgress) - 更新轨迹:
trail.push(currentPosition) - 更新位置和旋转
5.3 速度控制
爆发效果速度设置为4,是最快的预设:
applyPreset('burst') {
    this.setPathType('spiral');
    this.setParticleCount(60);
    this.setColor('#ff0066');
    this.setSpeed(4);
}
速度选择原因:
- 螺旋路径较长,需要高速才能展现爆发感
- easeOutCubic缓动使初始速度更快
- 高粒子数(60个)需要较快速度避免拥挤
六、视觉效果优化
6.1 多层渲染结构
drawParticles() {
    this.particles.forEach(particle => {
        // 绘制轨迹
        particle.trail.forEach((trailPoint, index) => {
            const trailOpacity = (index / particle.trail.length) * particle.opacity * 0.5;
            this.ctx.beginPath();
            this.ctx.arc(trailPoint.x, trailPoint.y,
                        particle.size * (index / particle.trail.length), 0, Math.PI * 2);
            this.ctx.fillStyle = this.hexToRgba(this.color, trailOpacity);
            this.ctx.fill();
        });

        // 绘制发光层
        this.ctx.shadowColor = this.color;
        this.ctx.shadowBlur = 15;
        this.ctx.beginPath();
        this.ctx.arc(particle.x, particle.y, particle.size * 0.6, 0, Math.PI * 2);
        this.ctx.fillStyle = this.hexToRgba(this.color, 0.3);
        this.ctx.fill();
        this.ctx.shadowBlur = 0;

        // 绘制主体渐变
        const gradient = this.ctx.createRadialGradient(
            particle.x, particle.y, 0,
            particle.x, particle.y, particle.size
        );
        gradient.addColorStop(0, this.color);
        gradient.addColorStop(0.5, this.hexToRgba(this.color, 0.7));
        gradient.addColorStop(1, this.hexToRgba(this.color, 0));

        this.ctx.beginPath();
        this.ctx.arc(particle.x, particle.y, particle.size, 0, Math.PI * 2);
        this.ctx.fillStyle = gradient;
        this.ctx.fill();

        // 绘制高光点
        this.ctx.beginPath();
        this.ctx.arc(particle.x, particle.y, particle.size * 0.4, 0, Math.PI * 2);
        this.ctx.fillStyle = '#fff';
        this.ctx.fill();
    });
}
渲染层次:
| 层级 | 效果 | 实现方式 |
|---|---|---|
| 轨迹层 | 渐变拖尾 | 透明度和大小递减 |
| 发光层 | 光晕效果 | shadowBlur + 半透明 |
| 主体层 | 径向渐变 | 中心亮边缘暗 |
| 高光层 | 白色亮点 | 中心小白圆 |
6.2 颜色方案设计
爆发效果使用紫红色系配色 #ff0066:
applyPreset('burst') {
    this.setPathType('spiral');
    this.setParticleCount(60);
    this.setColor('#ff0066');
    this.setSpeed(4);
}
颜色选择原因:
- 紫红色代表能量和激情
- 高饱和度颜色增强视觉冲击力
- 在深色背景上对比度极高
七、螺旋数学特性分析
7.1 螺旋线参数方程
阿基米德螺旋的参数方程:
r = a ⋅ θ r = a \cdot \theta r=a⋅θ
在计算机图形学中,我们通常参数化为:
x = c x + t ⋅ r m a x ⋅ cos ( 2 π ⋅ t u r n s ⋅ t ) x = cx + t \cdot r_{max} \cdot \cos(2\pi \cdot turns \cdot t) x=cx+t⋅rmax⋅cos(2π⋅turns⋅t)
y = c y + t ⋅ r m a x ⋅ sin ( 2 π ⋅ t u r n s ⋅ t ) y = cy + t \cdot r_{max} \cdot \sin(2\pi \cdot turns \cdot t) y=cy+t⋅rmax⋅sin(2π⋅turns⋅t)
7.2 螺旋线特性
| 特性 | 说明 | 数学表达 |
|---|---|---|
| 等距性 | 相邻螺旋线间距相等 | Δ r = a ⋅ Δ θ \Delta r = a \cdot \Delta \theta Δr=a⋅Δθ |
| 自相似 | 缩放后形状相同 | 分形特性 |
| 收敛性 | 趋向中心或无限延伸 | 取决于参数 |
7.3 螺旋圈数影响
// 不同圈数的螺旋
const turnCounts = [1, 2, 3, 5];
turnCounts.forEach(turns => {
    for (let t = 0; t <= 1; t += 0.002) {
        const angle = t * Math.PI * 2 * turns;
        const radius = maxRadius * t;
        points.push({
            x: centerX + Math.cos(angle) * radius,
            y: centerY + Math.sin(angle) * radius
        });
    }
});
圈数对比:
| 圈数 | 视觉效果 | 适用场景 |
|---|---|---|
| 1 | 松散螺旋 | 温和扩散 |
| 2 | 中等螺旋 | 平衡效果 |
| 3 | 紧密螺旋 | 爆发效果 |
| 5 | 密集螺旋 | 强烈视觉冲击 |
八、性能优化策略
8.1 路径预计算
generatePath() {
    this.pathPoints = [];
    const generator = this.pathGenerators[this.currentPathType];
    if (generator) {
        this.pathPoints = generator();
    }
}
螺旋线计算涉及三角函数,预计算可以显著提高性能。
8.2 轨迹长度限制
if (particle.trail.length > 10) {
    particle.trail.shift();
}
限制轨迹长度为10,避免内存增长。
8.3 requestAnimationFrame 优化
使用浏览器原生动画API,确保流畅动画。
九、扩展应用
9.1 多螺旋系统
generateMultiSpiralPath() {
    const spirals = [];
    const arms = 3;

    for (let arm = 0; arm < arms; arm++) {
        const points = [];
        const maxRadius = Math.min(this.centerX, this.centerY) - 50;
        const turns = 2;
        const offset = (arm / arms) * Math.PI * 2;

        for (let t = 0; t <= 1; t += 0.002) {
            const angle = t * Math.PI * 2 * turns + offset;
            const radius = maxRadius * t;
            points.push({
                x: this.centerX + Math.cos(angle) * radius,
                y: this.centerY + Math.sin(angle) * radius
            });
        }
        spirals.push(points);
    }

    return spirals;
}
创建多臂螺旋,模拟星系旋转效果。
9.2 收缩螺旋
generateInwardSpiral() {
    const points = [];
    const maxRadius = Math.min(this.centerX, this.centerY) - 50;
    const turns = 3;

    for (let t = 0; t <= 1; t += 0.002) {
        const angle = (1 - t) * Math.PI * 2 * turns;
        const radius = maxRadius * (1 - t);
        points.push({
            x: this.centerX + Math.cos(angle) * radius,
            y: this.centerY + Math.sin(angle) * radius
        });
    }
    return points;
}
创建向内收缩的螺旋,模拟黑洞吸积效果。
十、总结
爆发效果通过以下技术实现:
- 螺旋路径生成:极坐标参数化,半径和角度随参数递增
- 粒子系统:从中心到边缘均匀分布
- 缓动函数:easeOutCubic实现快速爆发效果
- 多层渲染:轨迹、发光、主体、高光四层渲染
- 性能优化:路径预计算、轨迹限制
爆发效果展现了数学与视觉艺术的完美结合,通过螺旋运动创造出强烈的视觉冲击力,广泛应用于游戏特效、数据可视化和艺术创作等领域。
附录:螺旋线数学公式
阿基米德螺旋
r = a θ r = a\theta r=aθ
对数螺旋
r = a e b θ r = ae^{b\theta} r=aebθ
双曲螺旋
r = a θ r = \frac{a}{\theta} r=θa
斐波那契螺旋(黄金螺旋)
r = a ϕ 2 θ / π r = a\phi^{2\theta/\pi} r=aϕ2θ/π
其中 ϕ = 1 + 5 2 ≈ 1.618 \phi = \frac{1+\sqrt{5}}{2} \approx 1.618 ϕ=21+5≈1.618 是黄金比例。

AtomGit 是由开放原子开源基金会联合 CSDN 等生态伙伴共同推出的新一代开源与人工智能协作平台。平台坚持“开放、中立、公益”的理念,把代码托管、模型共享、数据集托管、智能体开发体验和算力服务整合在一起,为开发者提供从开发、训练到部署的一站式体验。
更多推荐

 3
3 0
0- 0


 已为社区贡献4条内容

所有评论(0)