Terraform入门
一、Terraform介绍
Terraform 是由 HashiCorp 公司开发的一款开源基础设施即代码(Infrastructure as Code, IaC)工具。下面我简单介绍一下,如果想详细了解的话,可以参考阿里云Terraform的介绍
简单来说,它允许你使用代码(配置文件)来定义、预览和部署云基础设施(如服务器、数据库、网络等),而不是通过云提供商的控制台手动点击创建。
1. 基础设施即代码 (IaC)
- 你将基础设施的需求写成代码文件(通常以
.tf结尾)。 - 这些代码可以像软件代码一样进行版本控制(Git)、审查、测试和复用。
一定要做版本控制,因为terraforn主要是依赖state文件,如果state文件被误删,只能靠恢复版本来import已有资源,再进行相应的操作。
2. 声明式语言 (HCL)
- Terraform 使用 HashiCorp Configuration Language (HCL),这是一种人类可读的声明式语言。
- 你只需要告诉 Terraform “我想要什么状态”(例如:“我需要 3 台 AWS EC2 实例”),而不需要编写“如何创建它们”的步骤脚本。
- Terraform 会自动计算并执行必要的操作来达到目标状态。
3. 执行计划 (Execution Plan)
- 在真正应用更改之前,Terraform 会生成一个执行计划(Plan),展示它将创建、修改或销毁哪些资源。
- 这让你在实际操作前有机会审查和确认变更,避免误操作。
4. 状态管理 (State Management)
- Terraform 维护一个状态文件(
terraform.tfstate),记录当前基础设施的实际状态。 - 每次运行时,它会对比“代码期望的状态”和“状态文件记录的实际状态”,只执行必要的差异部分。
state文件相当重要,请谨慎修改和删除!!!
5. 多云支持 (Multi-Cloud)
- Terraform 通过 Provider(提供者) 插件机制支持数百种云平台和服务:
- 公有云:AWS, Azure, Google Cloud, Alibaba Cloud 等。
- 私有云/虚拟化:VMware, OpenStack, Kubernetes 等。
- SaaS 服务:GitHub, Datadog, Cloudflare 等。
- 你可以用同一套工具管理混合云环境。
二、Terraform 的工作流程
典型的 Terraform 工作流包含三个主要命令:
-
terraform init- 初始化工作目录。
- 下载所需的 Provider 插件和模块。
- 准备后端存储(用于保存状态文件)。
-
terraform plan- 预演变更。
- 读取代码和当前状态,计算出需要执行的操作。
- 输出一个详细的执行计划(例如:+ create, ~ update, - destroy)。
-
terraform apply- 执行变更。
- 根据
plan的结果,调用云提供商的 API 创建、修改或销毁资源。 - 更新状态文件以反映新的基础设施状态。
-
terraform destroy(可选)请谨慎操作- 销毁所有由该配置管理的资源。
- 用于清理测试环境或废弃项目。
三、安装terraform
1.手动安装
本来想yum安装的,但环境有问题,所以选择手动安装
[root@test ~]# wget https://releases.hashicorp.com/terraform/1.15.5/terraform_1.15.5_linux_amd64.zip
--2026-06-02 16:08:48--  https://releases.hashicorp.com/terraform/1.15.5/terraform_1.15.5_linux_amd64.zip
Resolving releases.hashicorp.com (releases.hashicorp.com)... 108.157.254.99, 108.157.254.88, 108.157.254.87, ...
Connecting to releases.hashicorp.com (releases.hashicorp.com)|108.157.254.99|:443... connected.
HTTP request sent, awaiting response... 200 OK
Length: 35283009 (34M) [application/zip]
Saving to: ‘terraform_1.15.5_linux_amd64.zip’

100%[====================================================================================================================================================================>] 35,283,009  14.7MB/s   in 2.3s

2026-06-02 16:08:51 (14.7 MB/s) - ‘terraform_1.15.5_linux_amd64.zip’ saved
[root@test ~]# unzip terraform_1.15.5_linux_amd64.zip -d /opt/terraform/
[root@test ~]# cd /opt/terraform/
[root@test terraform]# ln -s /opt/terraform/terraform /usr/local/bin/terraform
[root@test terraform]# terraform version
Terraform v1.15.5
on linux_amd64
[root@test terraform]# terraform --help
Usage: terraform [global options] <subcommand> [args]

The available commands for execution are listed below.
The primary workflow commands are given first, followed by
less common or more advanced commands.

Main commands:
  init          Prepare your working directory for other commands
  validate      Check whether the configuration is valid
  plan          Show changes required by the current configuration
  apply         Create or update infrastructure
  destroy       Destroy previously-created infrastructure

All other commands:
  console       Try Terraform expressions at an interactive command prompt
  fmt           Reformat your configuration in the standard style
  force-unlock  Release a stuck lock on the current workspace
  get           Install or upgrade remote Terraform modules
  graph         Generate a Graphviz graph of the steps in an operation
  import        Associate existing infrastructure with a Terraform resource
  login         Obtain and save credentials for a remote host
  logout        Remove locally-stored credentials for a remote host
  metadata      Metadata related commands
  modules       Show all declared modules in a working directory
  output        Show output values from your root module
  providers     Show the providers required for this configuration
  query         Search and list remote infrastructure with Terraform
  refresh       Update the state to match remote systems
  show          Show the current state or a saved plan
  stacks        Manage HCP Terraform stack operations
  state         Advanced state management
  taint         Mark a resource instance as not fully functional
  test          Execute integration tests for Terraform modules
  untaint       Remove the 'tainted' state from a resource instance
  version       Show the current Terraform version
  workspace     Workspace management

Global options (use these before the subcommand, if any):
  -chdir=DIR    Switch to a different working directory before executing the
                given subcommand.
  -help         Show this help output or the help for a specified subcommand.
  -version      An alias for the "version" subcommand.
2.配置镜像加速
本次测试主要是用阿里云平台,所以需要用到阿里云镜像和阿里云provider,默认是的镜像是Hashicorp官方镜像,所以需要配置镜像加速。
[root@test terraform]# vim ~/.terraformrc
provider_installation {
  network_mirror {
    url = "https://mirrors.aliyun.com/terraform/"
    # 限制只有阿里云相关 Provider 从国内镜像源下载
    include = ["registry.terraform.io/aliyun/alicloud",
               "registry.terraform.io/hashicorp/alicloud",
              ]
  }
  direct {
    # 声明除了阿里云相关Provider, 其它Provider保持原有的下载链路
    exclude = ["registry.terraform.io/aliyun/alicloud",
               "registry.terraform.io/hashicorp/alicloud",
              ]
  }
}
到这里,terraform就算是安装完成了,下面我们简单测试一下
四、用terraform测试
下面演示terraform的标准工作流程,需要强调的是:每次新建目录都需要在目录下做一遍此流程,因为terraform主要是获取当前目录的state文件来进行操作。
1.创建一个的目录
目前比较好的管理方案就是用不同的目录去管理不同的功能,从这个方案可以衍生出模块的概念,如果做到标准化管理的话,后期可以直接复用此模块
[root@test terraform]# mkdir learn-terraform-alicloud
[root@test terraform]# ls
learn-terraform-alicloud  LICENSE.txt  terraform
[root@test terraform]# cd  learn-terraform-alicloud
[root@test learn-terraform-alicloud]#
2.初始化工作目录
这个功能是terraform的标准工作流程第一步,初始化工作目录主要是为了做一些terraform的配置。比如:本次测试要用阿里云provider,所以需要访问阿里云控制台,那么就需要配置provider信息和阿里云控制台的账密。
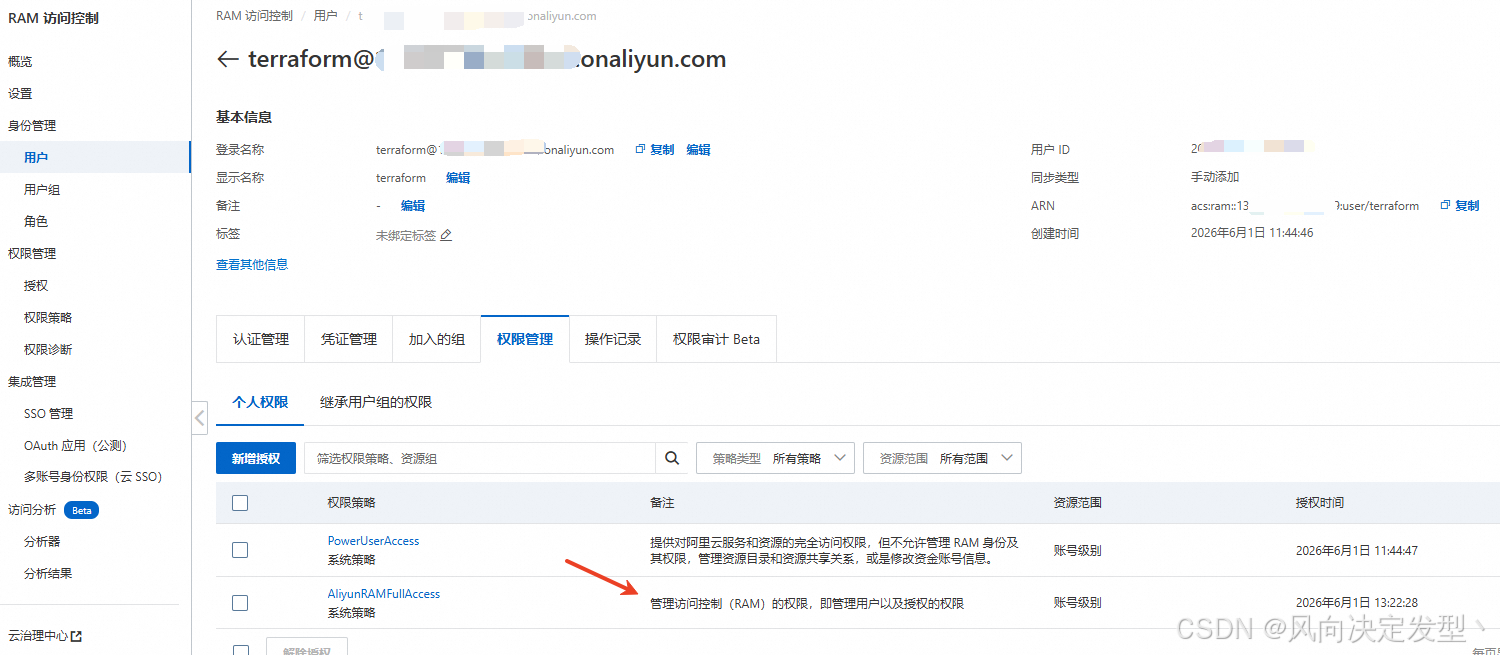
先创建一个专门给terraform使用的子账号,赋予合适的权限,不然在初始化的时候会报错403
生成terraform要配置的AK、SK,需要保留好

先创建初始化配置,可以改成易读的文件名称
[root@test learn-terraform-alicloud]# vim terraform_conf.tf
terraform {
# 配置阿里云provider
  required_providers {
    alicloud = {
      source  = "aliyun/alicloud"
      version = "1.279.0"
    }
  }
}

#配置阿里云控制台AK、SK,
provider "alicloud" {
  # 此处已打码
  access_key = "********************"
  secret_key = "**************************"
  region = "cn-zhangjiakou"
}
执行初始化命令
[root@test learn-terraform-alicloud]# terraform init
Initializing provider plugins found in the configuration...
- Reusing previous version of aliyun/alicloud from the dependency lock file
- Using previously-installed aliyun/alicloud v1.279.0

Initializing the backend...


Terraform has been successfully initialized!

You may now begin working with Terraform. Try running "terraform plan" to see
any changes that are required for your infrastructure. All Terraform commands
should now work.

If you ever set or change modules or backend configuration for Terraform,
rerun this command to reinitialize your working directory. If you forget, other
commands will detect it and remind you to do so if necessary.
查看provider,能看到阿里云provider已经配置成功了
[root@test learn-terraform-alicloud]# terraform providers

Providers required by configuration:
.
└── provider[registry.terraform.io/aliyun/alicloud] 1.279.0
3.编写创建子账号的tf文件
这个例子来自阿里云官网:在Linux上使用Terraform创建和管理阿里云资源-Terraform-阿里云
[root@test learn-terraform-alicloud]# vim main.tf
variable "user_name" {
  default = "terraform_user_test"
}

variable "user_password" {
  default = "!Test@123456"
}

variable "user_display_name" {
  default = "TestAccount"
}

variable "user_mobile" {
  default = "86-18688888888"
}

variable "user_email" {
  default = "example@example.com"
}

resource "alicloud_ram_user" "user" {
  name         = var.user_name
  display_name = var.user_display_name
  mobile       = var.user_mobile
  email        = var.user_email
  comments     = "Terraform create"
  force        = true
}

resource "alicloud_ram_login_profile" "profile" {
  user_name = alicloud_ram_user.user.name
  password  = var.user_password
}

resource "alicloud_ram_access_key" "ak" {
  user_name   = alicloud_ram_user.user.name
  secret_file = "accesskey.txt"
}

resource "alicloud_ram_policy" "policy" {
  policy_name     = "tf-example-policy"
  policy_document = <<EOF
  {
    "Statement": [
      {
        "Action": "ecs:*",
        "Effect": "Allow",
        "Resource":"*"
      }
    ],
      "Version": "1"
  }
  EOF
  description     = "this is a policy test"
}

resource "alicloud_ram_user_policy_attachment" "attach" {
  policy_name = alicloud_ram_policy.policy.policy_name
  policy_type = alicloud_ram_policy.policy.type
  user_name   = alicloud_ram_user.user.name
}
4.执行创建
先terraform plan预检一下
[root@test learn-terraform-alicloud]# terraform plan

Terraform used the selected providers to generate the following execution plan. Resource actions are indicated with the following symbols:
  + create

Terraform will perform the following actions:

  # alicloud_ram_access_key.ak will be created
  + resource "alicloud_ram_access_key" "ak" {
      + create_time      = (known after apply)
      + encrypted_secret = (known after apply)
      + id               = (known after apply)
      + key_fingerprint  = (known after apply)
      + secret           = (sensitive value)
      + secret_file      = "accesskey.txt"
      + status           = (known after apply)
      + user_name        = "terraform_user_test"
    }

  # alicloud_ram_login_profile.profile will be created
  + resource "alicloud_ram_login_profile" "profile" {
      + create_time       = (known after apply)
      + id                = (known after apply)
      + mfa_bind_required = (known after apply)
      + password          = "!Test@123456"
      + user_name         = "terraform_user_test"
    }

  # alicloud_ram_policy.policy will be created
  + resource "alicloud_ram_policy" "policy" {
      + attachment_count = (known after apply)
      + create_time      = (known after apply)
      + default_version  = (known after apply)
      + description      = "this is a policy test"
      + document         = (known after apply)
      + id               = (known after apply)
      + name             = (known after apply)
      + policy_document  = <<-EOT
            {
                "Statement": [
                  {
                    "Action": "ecs:*",
                    "Effect": "Allow",
                    "Resource":"*"
                  }
                ],
                  "Version": "1"
              }
        EOT
      + policy_name      = "tf-example-policy"
      + type             = (known after apply)
      + version          = "1"
      + version_id       = (known after apply)

      + statement (known after apply)
    }

  # alicloud_ram_user.user will be created
  + resource "alicloud_ram_user" "user" {
      + comments     = "Terraform create"
      + display_name = "TestAccount"
      + email        = "example@example.com"
      + force        = true
      + id           = (known after apply)
      + mobile       = "86-18688888888"
      + name         = "terraform_user_test"
    }

  # alicloud_ram_user_policy_attachment.attach will be created
  + resource "alicloud_ram_user_policy_attachment" "attach" {
      + id          = (known after apply)
      + policy_name = "tf-example-policy"
      + policy_type = (known after apply)
      + user_name   = "terraform_user_test"
    }

Plan: 5 to add, 0 to change, 0 to destroy.

─────────────────────────────────────────────────────────────────────────────────────────────────────────────────────────────────────────────────────────────────────────────────────────────────────────────

Note: You didn't use the -out option to save this plan, so Terraform can't guarantee to take exactly these actions if you run "terraform apply" now.
预检提示有5项新增,然后执行terraform apply创建
[root@test learn-terraform-alicloud]# terraform apply

Terraform used the selected providers to generate the following execution plan. Resource actions are indicated with the following symbols:
  + create

Terraform will perform the following actions:

  # alicloud_ram_access_key.ak will be created
  + resource "alicloud_ram_access_key" "ak" {
      + create_time      = (known after apply)
      + encrypted_secret = (known after apply)
      + id               = (known after apply)
      + key_fingerprint  = (known after apply)
      + secret           = (sensitive value)
      + secret_file      = "accesskey.txt"
      + status           = (known after apply)
      + user_name        = "terraform_user_test"
    }

  # alicloud_ram_login_profile.profile will be created
  + resource "alicloud_ram_login_profile" "profile" {
      + create_time       = (known after apply)
      + id                = (known after apply)
      + mfa_bind_required = (known after apply)
      + password          = "!Test@123456"
      + user_name         = "terraform_user_test"
    }

  # alicloud_ram_policy.policy will be created
  + resource "alicloud_ram_policy" "policy" {
      + attachment_count = (known after apply)
      + create_time      = (known after apply)
      + default_version  = (known after apply)
      + description      = "this is a policy test"
      + document         = (known after apply)
      + id               = (known after apply)
      + name             = (known after apply)
      + policy_document  = <<-EOT
            {
                "Statement": [
                  {
                    "Action": "ecs:*",
                    "Effect": "Allow",
                    "Resource":"*"
                  }
                ],
                  "Version": "1"
              }
        EOT
      + policy_name      = "tf-example-policy"
      + type             = (known after apply)
      + version          = "1"
      + version_id       = (known after apply)

      + statement (known after apply)
    }

  # alicloud_ram_user.user will be created
  + resource "alicloud_ram_user" "user" {
      + comments     = "Terraform create"
      + display_name = "TestAccount"
      + email        = "example@example.com"
      + force        = true
      + id           = (known after apply)
      + mobile       = "86-18688888888"
      + name         = "terraform_user_test"
    }

  # alicloud_ram_user_policy_attachment.attach will be created
  + resource "alicloud_ram_user_policy_attachment" "attach" {
      + id          = (known after apply)
      + policy_name = "tf-example-policy"
      + policy_type = (known after apply)
      + user_name   = "terraform_user_test"
    }

Plan: 5 to add, 0 to change, 0 to destroy.

Do you want to perform these actions?
  Terraform will perform the actions described above.
  Only 'yes' will be accepted to approve.

  Enter a value: yes     ### 这里需要注意,apply的时候需要输入yes二次确认

alicloud_ram_user.user: Creating...
alicloud_ram_policy.policy: Creating...
alicloud_ram_policy.policy: Creation complete after 2s [id=tf-example-policy]
alicloud_ram_user.user: Creation complete after 2s [id=208680680400617569]
alicloud_ram_user_policy_attachment.attach: Creating...
alicloud_ram_login_profile.profile: Creating...
alicloud_ram_access_key.ak: Creating...
alicloud_ram_login_profile.profile: Creation complete after 1s [id=terraform_user_test]
alicloud_ram_user_policy_attachment.attach: Creation complete after 1s [id=user:tf-example-policy:Custom:terraform_user_test]
alicloud_ram_access_key.ak: Creation complete after 1s [id=LTAI5t9RE6qyosP2X2QzLKbe]

Apply complete! Resources: 5 added, 0 changed, 0 destroyed.
截止目前,我们已经完成了terraform的标准工作流:init、plan、apply。
到控制台验证一下,能看都按terraform_user_test用子账号已经被创建好了

5.导入现有资源
这一步比较麻烦,因为terraform执行都需要寻找当前目录tf文件,所以如果你现有的资源比较多,那么需要先简单准备一些资源文件才行。
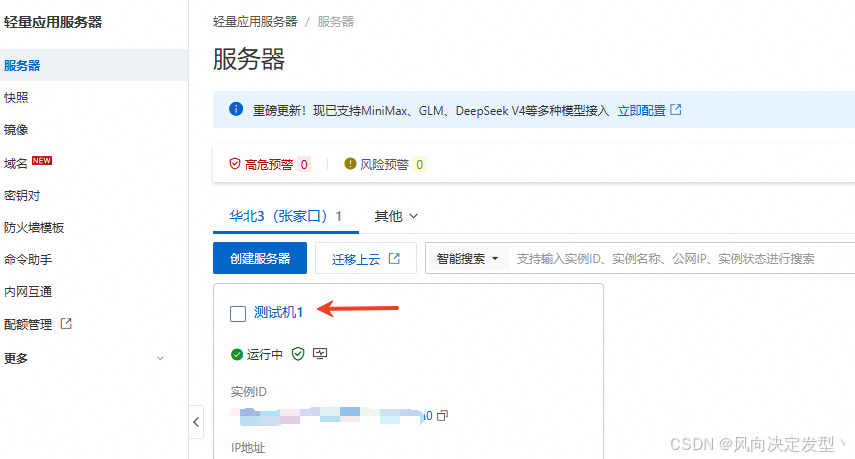
我们新建一个import目录,在此目录下创建需要导入的资源文件,我账号下有个正在使用的轻量级应用服务器,我们可以用terraform导入,关于轻量级服务器的tf文件,可以参考阿里云官网:Terraform资源alicloud_simple_application_server_instance-Terraform-阿里云
[root@test learn-terraform-alicloud]# mkdir import
[root@test learn-terraform-alicloud]# cd import
[root@test import]# vim import.tf
variable "name" {
  default = "测试机1"
}

data "alicloud_simple_application_server_images" "default" {
  platform = "Linux"
}

data "alicloud_simple_application_server_plans" "default" {
  platform = "Linux"
}

resource "alicloud_simple_application_server_instance" "testServer" {
  # (resource arguments)
  instance_name  = var.name
  plan_id        = data.alicloud_simple_application_server_plans.default.plans.0.id
  image_id       = data.alicloud_simple_application_server_images.default.images.0.id
  period         = 6
  data_disk_size = "40"
  status         = "Running"
}
[root@test import]# cp ../terraform_conf.tf ./
[root@test import]# ls
import.tf  terraform_conf.tf
再执行terraform的工作流
先terraform init
[root@test import]# terraform init
Initializing provider plugins found in the configuration...
- Finding aliyun/alicloud versions matching "1.279.0"...
- Installing aliyun/alicloud v1.279.0...
- Installed aliyun/alicloud v1.279.0 (verified checksum)

Initializing the backend...


Terraform has created a lock file .terraform.lock.hcl to record the provider
selections it made above. Include this file in your version control repository
so that Terraform can guarantee to make the same selections by default when
you run "terraform init" in the future.

╷
│ Warning: Incomplete lock file information for providers
│
│ Due to your customized provider installation methods, Terraform was forced to calculate lock file checksums locally for the following providers:
│   - aliyun/alicloud
│
│ The current .terraform.lock.hcl file only includes checksums for linux_amd64, so Terraform running on another platform will fail to install these providers.
│
│ To calculate additional checksums for another platform, run:
│   terraform providers lock -platform=linux_amd64
│ (where linux_amd64 is the platform to generate)
╵
Terraform has been successfully initialized!

You may now begin working with Terraform. Try running "terraform plan" to see
any changes that are required for your infrastructure. All Terraform commands
should now work.

If you ever set or change modules or backend configuration for Terraform,
rerun this command to reinitialize your working directory. If you forget, other
commands will detect it and remind you to do so if necessary.
初始化目录完成之后,就可以import了,import后面跟的资源ID需要在控制台查看
[root@test import]# terraform import alicloud_simple_application_server_instance.testServer '2535a5d025714b1bb08cf2f066311ca0'
data.alicloud_simple_application_server_images.default: Reading...
data.alicloud_simple_application_server_plans.default: Reading...
data.alicloud_simple_application_server_plans.default: Read complete after 2s [id=2618655375]
data.alicloud_simple_application_server_images.default: Read complete after 2s [id=3045989412]
alicloud_simple_application_server_instance.testServer: Importing from ID "2535a5d025714b1bb08cf2f066311ca0"...
alicloud_simple_application_server_instance.testServer: Import prepared!
  Prepared alicloud_simple_application_server_instance for import
alicloud_simple_application_server_instance.testServer: Refreshing state... [id=2535a5d025714b1bb08cf2f066311ca0]

Import successful!

The resources that were imported are shown above. These resources are now in
your Terraform state and will henceforth be managed by Terraform.
查看导入信息
[root@test import]# terraform show
。。。。。。
# alicloud_simple_application_server_instance.testServer:
resource "alicloud_simple_application_server_instance" "testServer" {
    id            = "2535a5d025714b1bb08cf2f066311ca0"
    image_id      = "c9bd528877d34878a17c10672fac33a7"
    instance_name = "测试机"
    payment_type  = "Subscription"
    plan_id       = "swas.s.c2m2s40b1.linux"
    status        = "Running"

    timeouts {}
}
有导入信息之后一定要将信息更新到本地的import.tf文件里面,这一步非常重要,不然用本地文件执行terraform apply时会修改现有资源。
*6.更新本地tf文件
[root@test import]# vim import.tf
#修改了主机名称,等会用本地tf文件更新主机名称,看看效果
variable "name" {
  default = "测试机1"
}

data "alicloud_simple_application_server_images" "default" {
  platform = "Linux"
}

data "alicloud_simple_application_server_plans" "default" {
  platform = "Linux"
}

#resource中实际是没用到data信息的,但data可以打印出来供后期使用
resource "alicloud_simple_application_server_instance" "testServer" {
  # (resource arguments)
  instance_name  = var.name
  plan_id        = "swas.s.c2m2s40b1.linux"
  image_id       = "bdde0344f65942f3adce35d421732c87"
  period         = 6
  status         = "Running"
}
7.测试修改主机名称
先执行terraform plan,能看到有1项变更
[root@test import]# terraform plan
data.alicloud_simple_application_server_plans.default: Reading...
data.alicloud_simple_application_server_images.default: Reading...
alicloud_simple_application_server_instance.testServer: Refreshing state... [id=2535a5d025714b1bb08cf2f066311ca0]
data.alicloud_simple_application_server_plans.default: Read complete after 0s [id=2618655375]
data.alicloud_simple_application_server_images.default: Read complete after 0s [id=3045989412]

Terraform used the selected providers to generate the following execution plan. Resource actions are indicated with the following symbols:
  ~ update in-place

Terraform will perform the following actions:

  # alicloud_simple_application_server_instance.testServer will be updated in-place
  ~ resource "alicloud_simple_application_server_instance" "testServer" {
        id            = "2535a5d025714b1bb08cf2f066311ca0"
      ~ instance_name = "测试机" -> "测试机1"
      + period        = 6
        # (4 unchanged attributes hidden)

      - timeouts {}
    }

Plan: 0 to add, 1 to change, 0 to destroy.

─────────────────────────────────────────────────────────────────────────────────────────────────────────────────────────────────────────────────────────────────────────────────────────────────────────────

Note: You didn't use the -out option to save this plan, so Terraform can't guarantee to take exactly these actions if you run "terraform apply" now.
再执行terraform apply
[root@test import]# terraform apply
data.alicloud_simple_application_server_images.default: Reading...
data.alicloud_simple_application_server_plans.default: Reading...
alicloud_simple_application_server_instance.testServer: Refreshing state... [id=2535a5d025714b1bb08cf2f066311ca0]
data.alicloud_simple_application_server_plans.default: Read complete after 1s [id=2618655375]
data.alicloud_simple_application_server_images.default: Read complete after 1s [id=3045989412]

Terraform used the selected providers to generate the following execution plan. Resource actions are indicated with the following symbols:
  ~ update in-place

Terraform will perform the following actions:

  # alicloud_simple_application_server_instance.testServer will be updated in-place
  ~ resource "alicloud_simple_application_server_instance" "testServer" {
        id            = "2535a5d025714b1bb08cf2f066311ca0"
      ~ instance_name = "测试机" -> "测试机1"
      + period        = 6
        # (4 unchanged attributes hidden)

      - timeouts {}
    }

Plan: 0 to add, 1 to change, 0 to destroy.

Do you want to perform these actions?
  Terraform will perform the actions described above.
  Only 'yes' will be accepted to approve.

  Enter a value: yes

alicloud_simple_application_server_instance.testServer: Modifying... [id=2535a5d025714b1bb08cf2f066311ca0]
alicloud_simple_application_server_instance.testServer: Modifications complete after 6s [id=2535a5d025714b1bb08cf2f066311ca0]

Apply complete! Resources: 0 added, 1 changed, 0 destroyed.
8.验证主机名是否更新
[root@test import]# terraform show
# alicloud_simple_application_server_instance.testServer:
resource "alicloud_simple_application_server_instance" "testServer" {
    id            = "2535a5d025714b1bb08cf2f066311ca0"
    image_id      = "bdde0344f65942f3adce35d421732c87"
    instance_name = "测试机1"
    payment_type  = "Subscription"
    period        = 6
    plan_id       = "swas.s.c2m2s40b1.linux"
    status        = "Running"
}

# instance_name已经变成“测试机1”了
去云控制台查看主机名已经变更为“测试机1”
五、使用场景
测试到这里,我们发现这些操作在白屏操作不也很简单吗?那terraform能发挥作用的场景到底有哪些?
答:①混合云场景 ②复杂的建站场景 ③需要频繁购买云服务场景。在这些场景下我们用terraform就能提高效率,快速完成任务

AtomGit 是由开放原子开源基金会联合 CSDN 等生态伙伴共同推出的新一代开源与人工智能协作平台。平台坚持“开放、中立、公益”的理念,把代码托管、模型共享、数据集托管、智能体开发体验和算力服务整合在一起,为开发者提供从开发、训练到部署的一站式体验。
更多推荐


 7
7 0
0- 0


 已为社区贡献3条内容

所有评论(0)