【Electron】第1章—新建工程(基于 Electron + Vite + JavaScript)
适用环境:
- Windows
- Electron
- Vite
- JavaScript
- VSCode
一、创建 Electron 工程
1. 创建工程目录
例如:
D:\Electron\project\serial
进入该目录。
2. 打开 CMD
在文件夹路径栏输入:
cmd
回车进入命令行。
3. 创建 Electron 项目
执行:
npm create electron-app@latest serialAssistant
其中:
serialAssistant
为工程名称。
二、创建过程中的选项
1. Select a bundler
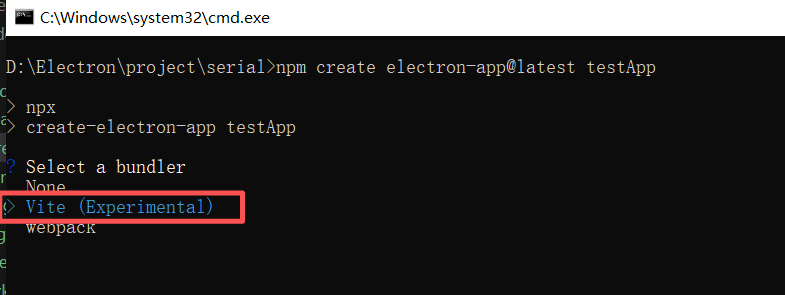
选择:
Vite
特点:
- 现代化构建工具
- 热更新速度快
- 启动速度快
- 适合 Electron 新项目
2. Select a programming language
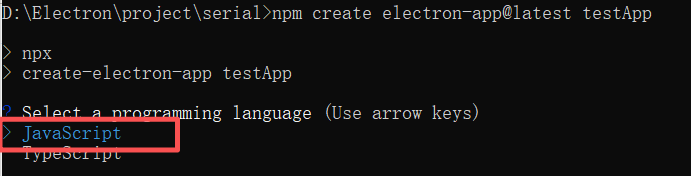
选择:
JavaScript
特点:
- 学习成本低
- 开发简单
- 适合 Electron 入门
3. Initialize Git repository?
选择:
Yes
用于初始化 Git 仓库。
三、使用 VSCode 打开工程
进入工程目录:
cd serialAssistant
执行:
code .
或者直接通过 VSCode 打开该目录。
四、首次运行项目
打开 VSCode 终端,执行:
npm start
五、首次运行常见问题
可能出现类似错误:
Downloading Electron binary...
TypeError: fetch failed
或者:
Electron failed to install correctly
原因分析
Electron 首次运行时需要下载运行时文件:
- Electron
- Chromium
- Node Runtime
默认从国外服务器下载。
国内网络环境下容易失败。
六、解决 Electron 下载失败
1. 删除 node_modules
PowerShell:
rm -r node_modules
或者:
Remove-Item -Recurse -Force node_modules
2. 配置 Electron 国内镜像
PowerShell:
$env:ELECTRON_MIRROR="https://npmmirror.com/mirrors/electron/"
注意不要写成:
$env:NPM_CONFIG_ELECTRON_MIRROR
否则会出现:
npm warn Unknown env config "electron-mirror"
3. 重新安装依赖
执行:
npm install
4. 重新启动项目
执行:
npm start
七、运行成功后的现象
终端会显示:
✔ Launched Electron app
随后自动弹出 Electron 窗口。
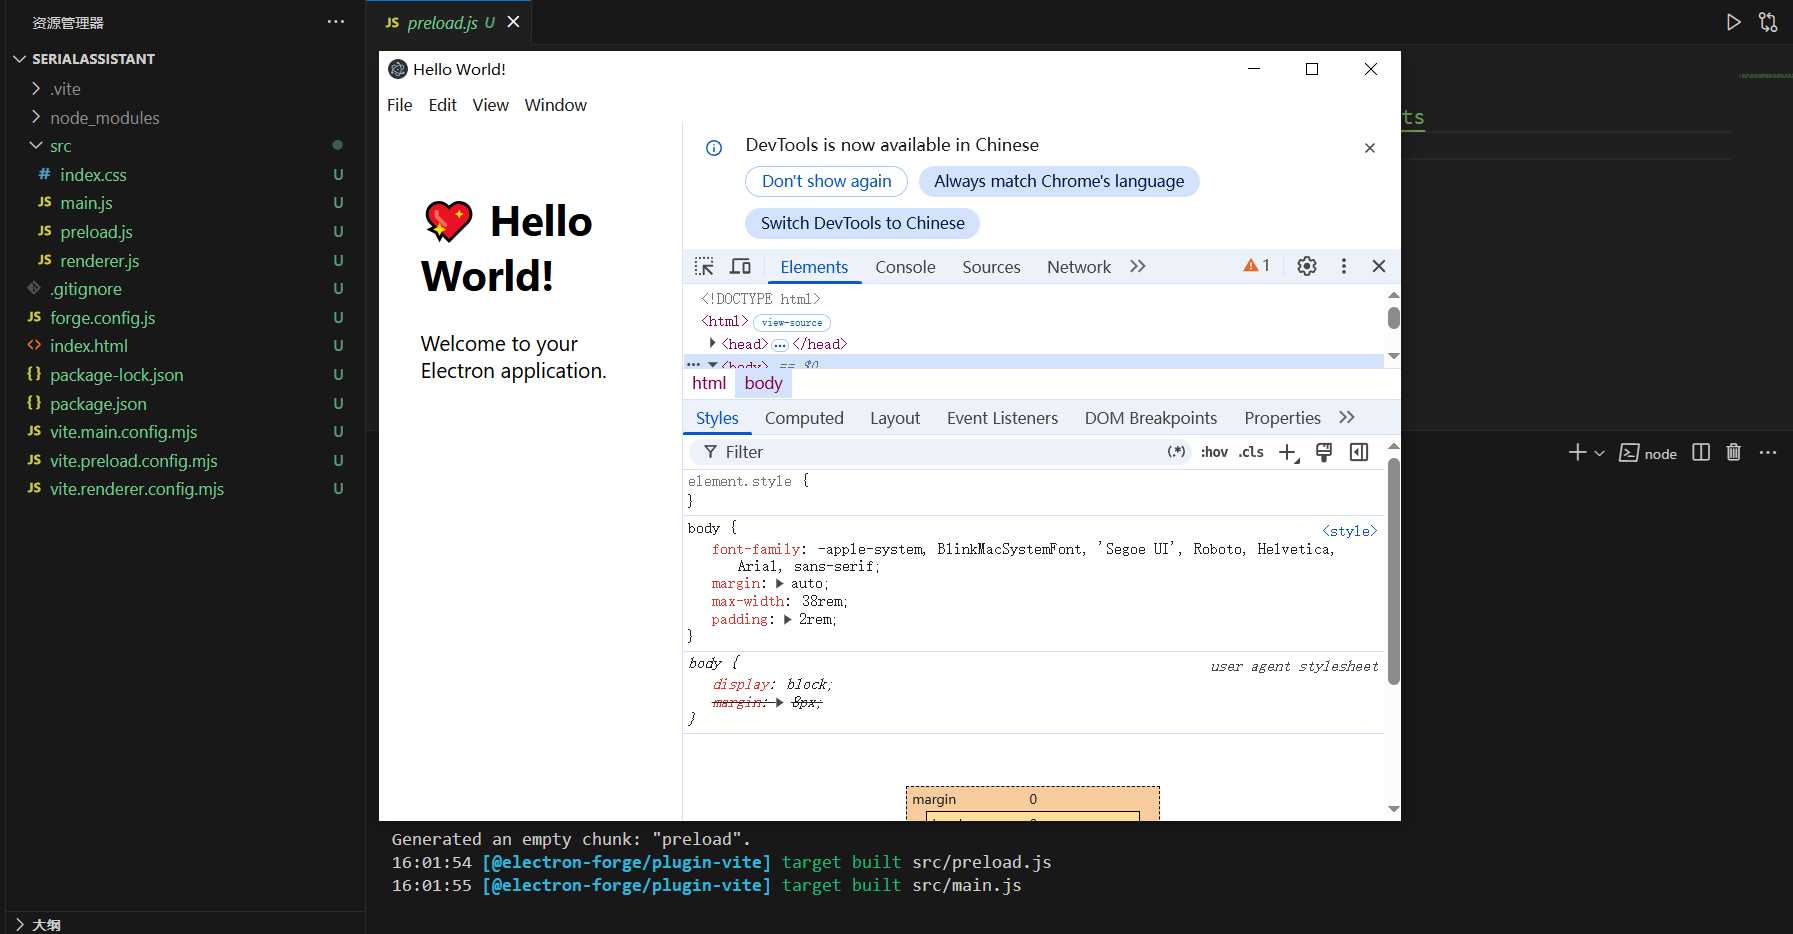
Vite 开发服务器地址通常为:
http://localhost:5173/
八、项目目录结构
当前工程目录结构如下:
serialAssistant/
│
├── .vite/
│   └── build/
│       ├── main.js
│       └── preload.js
│
├── node_modules/
│
├── src/
│   ├── index.css
│   ├── main.js
│   ├── preload.js
│   └── renderer.js
│
├── .gitignore
├── forge.config.js
├── index.html
├── package-lock.json
├── package.json
├── vite.main.config.mjs
├── vite.preload.config.mjs
└── vite.renderer.config.mjs
九、项目文件与目录说明
1. .vite/
Vite 自动生成的临时构建目录。
主要保存编译后的 Electron 文件,例如:
.vite/build/main.js
.vite/build/preload.js
属于构建缓存文件,一般无需手动修改。
2. node_modules/
npm 依赖库目录。
包括:
- Electron
- Vite
- Electron Forge
- 其它 npm 包
特点:
- 体积较大
- 自动生成
- 通常不提交到 Git 仓库
删除后可通过:
npm install
重新生成。
3. src/
项目源码目录。
核心开发代码通常都位于此目录。
4. src/main.js
Electron 主进程入口文件。
主要负责:
- 创建窗口
- 管理应用生命周期
- 调用系统 API
- 管理窗口行为
- 执行主进程逻辑
属于 Electron 的后台核心程序。
5. src/preload.js
预加载脚本。
位于:
主进程 ↔ 渲染进程
之间。
主要作用:
- 安全通信
- IPC 数据交互
- Node.js 与页面桥接
- 向页面暴露 API
常用接口:
contextBridge.exposeInMainWorld()
ipcRenderer.send()
6. src/renderer.js
渲染进程脚本。
负责页面逻辑与前端交互。
例如:
- 按钮事件
- 页面更新
- DOM 操作
- 数据显示
属于 Electron 的前端部分。
7. src/index.css
全局样式文件。
负责:
- 页面布局
- 字体样式
- 颜色主题
- 动画效果
8. index.html
Electron 加载的网页入口文件。
用于定义页面基础结构。
Electron 启动后会加载该页面。
9. package.json
Node.js 项目核心配置文件。
主要包含:
- 项目名称
- npm scripts
- 项目依赖
- Electron 配置
- 启动命令
例如:
npm start
即由其中 scripts 配置。
10. package-lock.json
npm 自动生成的依赖锁定文件。
作用:
- 固定依赖版本
- 保证不同环境安装一致
11. .gitignore
Git 忽略配置文件。
用于指定:
哪些文件或目录不提交到 Git 仓库。
例如:
node_modules/
12. forge.config.js
Electron Forge 配置文件。
主要负责:
- Electron 打包配置
- 构建流程配置
- 插件配置
- 安装包生成配置
后期打包 EXE 时会使用。
13. vite.main.config.mjs
Vite 对主进程的构建配置文件。
用于配置:
src/main.js
的编译行为。
14. vite.preload.config.mjs
Vite 对 preload 的构建配置文件。
用于配置:
src/preload.js
的编译行为。
15. vite.renderer.config.mjs
Vite 对渲染进程的构建配置文件。
主要负责:
- 前端页面构建
- 开发服务器
- 热更新功能
十、Electron 程序运行流程
Electron 项目运行流程如下:
main.js
    ↓
创建 BrowserWindow
    ↓
加载 index.html
    ↓
执行 renderer.js
    ↓
页面显示
其中:
preload.js
负责主进程与页面之间的通信桥接。

AtomGit 是由开放原子开源基金会联合 CSDN 等生态伙伴共同推出的新一代开源与人工智能协作平台。平台坚持“开放、中立、公益”的理念,把代码托管、模型共享、数据集托管、智能体开发体验和算力服务整合在一起,为开发者提供从开发、训练到部署的一站式体验。
更多推荐

 12
12 0
0- 0


 已为社区贡献3条内容

所有评论(0)