SpringAI简单
SpringAI
父POM.xml 文件
<?xml version="1.0" encoding="UTF-8"?>
<project xmlns="http://maven.apache.org/POM/4.0.0" xmlns:xsi="http://www.w3.org/2001/XMLSchema-instance"
xsi:schemaLocation="http://maven.apache.org/POM/4.0.0 https://maven.apache.org/xsd/maven-4.0.0.xsd">
<modelVersion>4.0.0</modelVersion>
<parent>
<groupId>org.springframework.boot</groupId>
<artifactId>spring-boot-starter-parent</artifactId>
<version>3.5.11</version>
<relativePath/> <!-- lookup parent from repository -->
</parent>
<groupId>com.example</groupId>
<artifactId>AI_Learn</artifactId>
<version>0.0.1-SNAPSHOT</version>
<name>AI_Learn</name>
<description>AI_Learn</description>
<packaging>pom</packaging>
<modules>
<module>quick-start</module>
<module>chat-client</module>
<module>03more_module</module>
</modules>
<properties>
<java.version>17</java.version>
<spring-ai.version>1.0.0</spring-ai.version>
<spring-ai-alibaba.version>1.0.0.2</spring-ai-alibaba.version>
<lombok.version>1.18.36</lombok.version>
</properties>
<dependencies>
<dependency>
<groupId>org.springframework.boot</groupId>
<artifactId>spring-boot-starter-web</artifactId>
</dependency>
<dependency>
<groupId>org.springframework.boot</groupId>
<artifactId>spring-boot-starter-test</artifactId>
<scope>test</scope>
</dependency>
</dependencies>
<dependencyManagement>
<!-- 子项目依赖版本管理 -->
<dependencies>
<!-- Spring AI 项目的 •BOM(Bill of Materials)依赖•,用于统一管理 Spring AI 生态中各个模块的版本。通过引入该 BOM,可以简化依赖配置,无需为每个子模块手动指定版本号 -->
<dependency>
<groupId>org.springframework.ai</groupId>
<artifactId>spring-ai-bom</artifactId>
<version>${spring-ai.version}</version>
<type>pom</type>
<scope>import</scope>
</dependency>
<!-- Spring AI Alibaba 项目的 •BOM 依赖•,用于管理 Alibaba 相关的 AI 模块版本,例如 DashScope、Milvus 等。它确保在使用 Spring AI Alibaba 提供的功能时,依赖项版本保持一致-->
<dependency>
<groupId>com.alibaba.cloud.ai</groupId>
<artifactId>spring-ai-alibaba-bom</artifactId>
<version>${spring-ai-alibaba.version}</version>
<type>pom</type>
<scope>import</scope>
</dependency>
<dependency>
<groupId>org.projectlombok</groupId>
<artifactId>lombok</artifactId>
<version>${lombok.version}</version>
</dependency>
</dependencies>
</dependencyManagement>
<build>
<plugins>
<plugin>
<groupId>org.apache.maven.plugins</groupId>
<artifactId>maven-compiler-plugin</artifactId>
<configuration>
<!-- 通过 <annotationProcessorPaths> 明确指定在编译期使用 Lombok 作为注解处理器 -->
<annotationProcessorPaths>
<path>
<!-- 这样可以确保在编译阶段,Lombok 的注解(如 @Data、@Getter、@Setter 等)能够被正确处理,自动生成对应的 getter/setter 等方法 -->
<groupId>org.projectlombok</groupId>
<artifactId>lombok</artifactId>
<version>${lombok.version}</version>
</path>
</annotationProcessorPaths>
</configuration>
</plugin>
<plugin>
<groupId>org.springframework.boot</groupId>
<artifactId>spring-boot-maven-plugin</artifactId>
</plugin>
</plugins>
</build>
</project>
快速开始
pom 依赖
<?xml version="1.0" encoding="UTF-8"?>
<project xmlns="http://maven.apache.org/POM/4.0.0" xmlns:xsi="http://www.w3.org/2001/XMLSchema-instance"
xsi:schemaLocation="http://maven.apache.org/POM/4.0.0 https://maven.apache.org/xsd/maven-4.0.0.xsd">
<modelVersion>4.0.0</modelVersion>
<parent>
<groupId>com.example</groupId>
<artifactId>AI_Learn</artifactId>
<version>0.0.1-SNAPSHOT</version>
<relativePath/> <!-- lookup parent from repository -->
</parent>
<groupId>com.example</groupId>
<artifactId>quick-start</artifactId>
<version>0.0.1-SNAPSHOT</version>
<name>quick-start</name>
<description>quick-start</description>
<properties>
<java.version>17</java.version>
</properties>
<dependencies>
<!-- deepseek 依赖-->
<dependency>
<groupId>org.springframework.ai</groupId>
<artifactId>spring-ai-starter-model-deepseek</artifactId>
</dependency>
<!-- 阿里百炼 依赖-->
<dependency>
<groupId>com.alibaba.cloud.ai</groupId>
<artifactId>spring-ai-alibaba-starter-dashscope</artifactId>
</dependency>
<dependency>
<groupId>com.alibaba</groupId>
<artifactId>dashscope-sdk-java</artifactId>
<version>2.22.10</version>
</dependency>
<!-- ollama 依赖-->
<dependency>
<groupId>org.springframework.ai</groupId>
<artifactId>spring-ai-starter-model-ollama</artifactId>
</dependency>
</dependencies>
<build>
<plugins>
<plugin>
<groupId>org.springframework.boot</groupId>
<artifactId>spring-boot-maven-plugin</artifactId>
</plugin>
</plugins>
</build>
</project>
application.yml
spring: application: name: quick-start ai: deepseek: # deepseek api-key: xxxxxx # deepseek 网址 https://platform.deepseek.com/usage chat: options: # model: deepseek-chat model: deepseek-reasoner # 模型名称 dashscope: # bailian key api-key: xxxxxxxxxxx # 阿里百炼网址 https://bailian.console.aliyun.com/cn-beijing?tab=model#/api-key chat: options: model: qwen-plus-latest # 模型名称 ollama: base-url: http://localhost:11434 # ollama chat: model: qwen3.5:4b # 模型名称
deepseek
https://api-docs.deepseek.com/zh-cn/
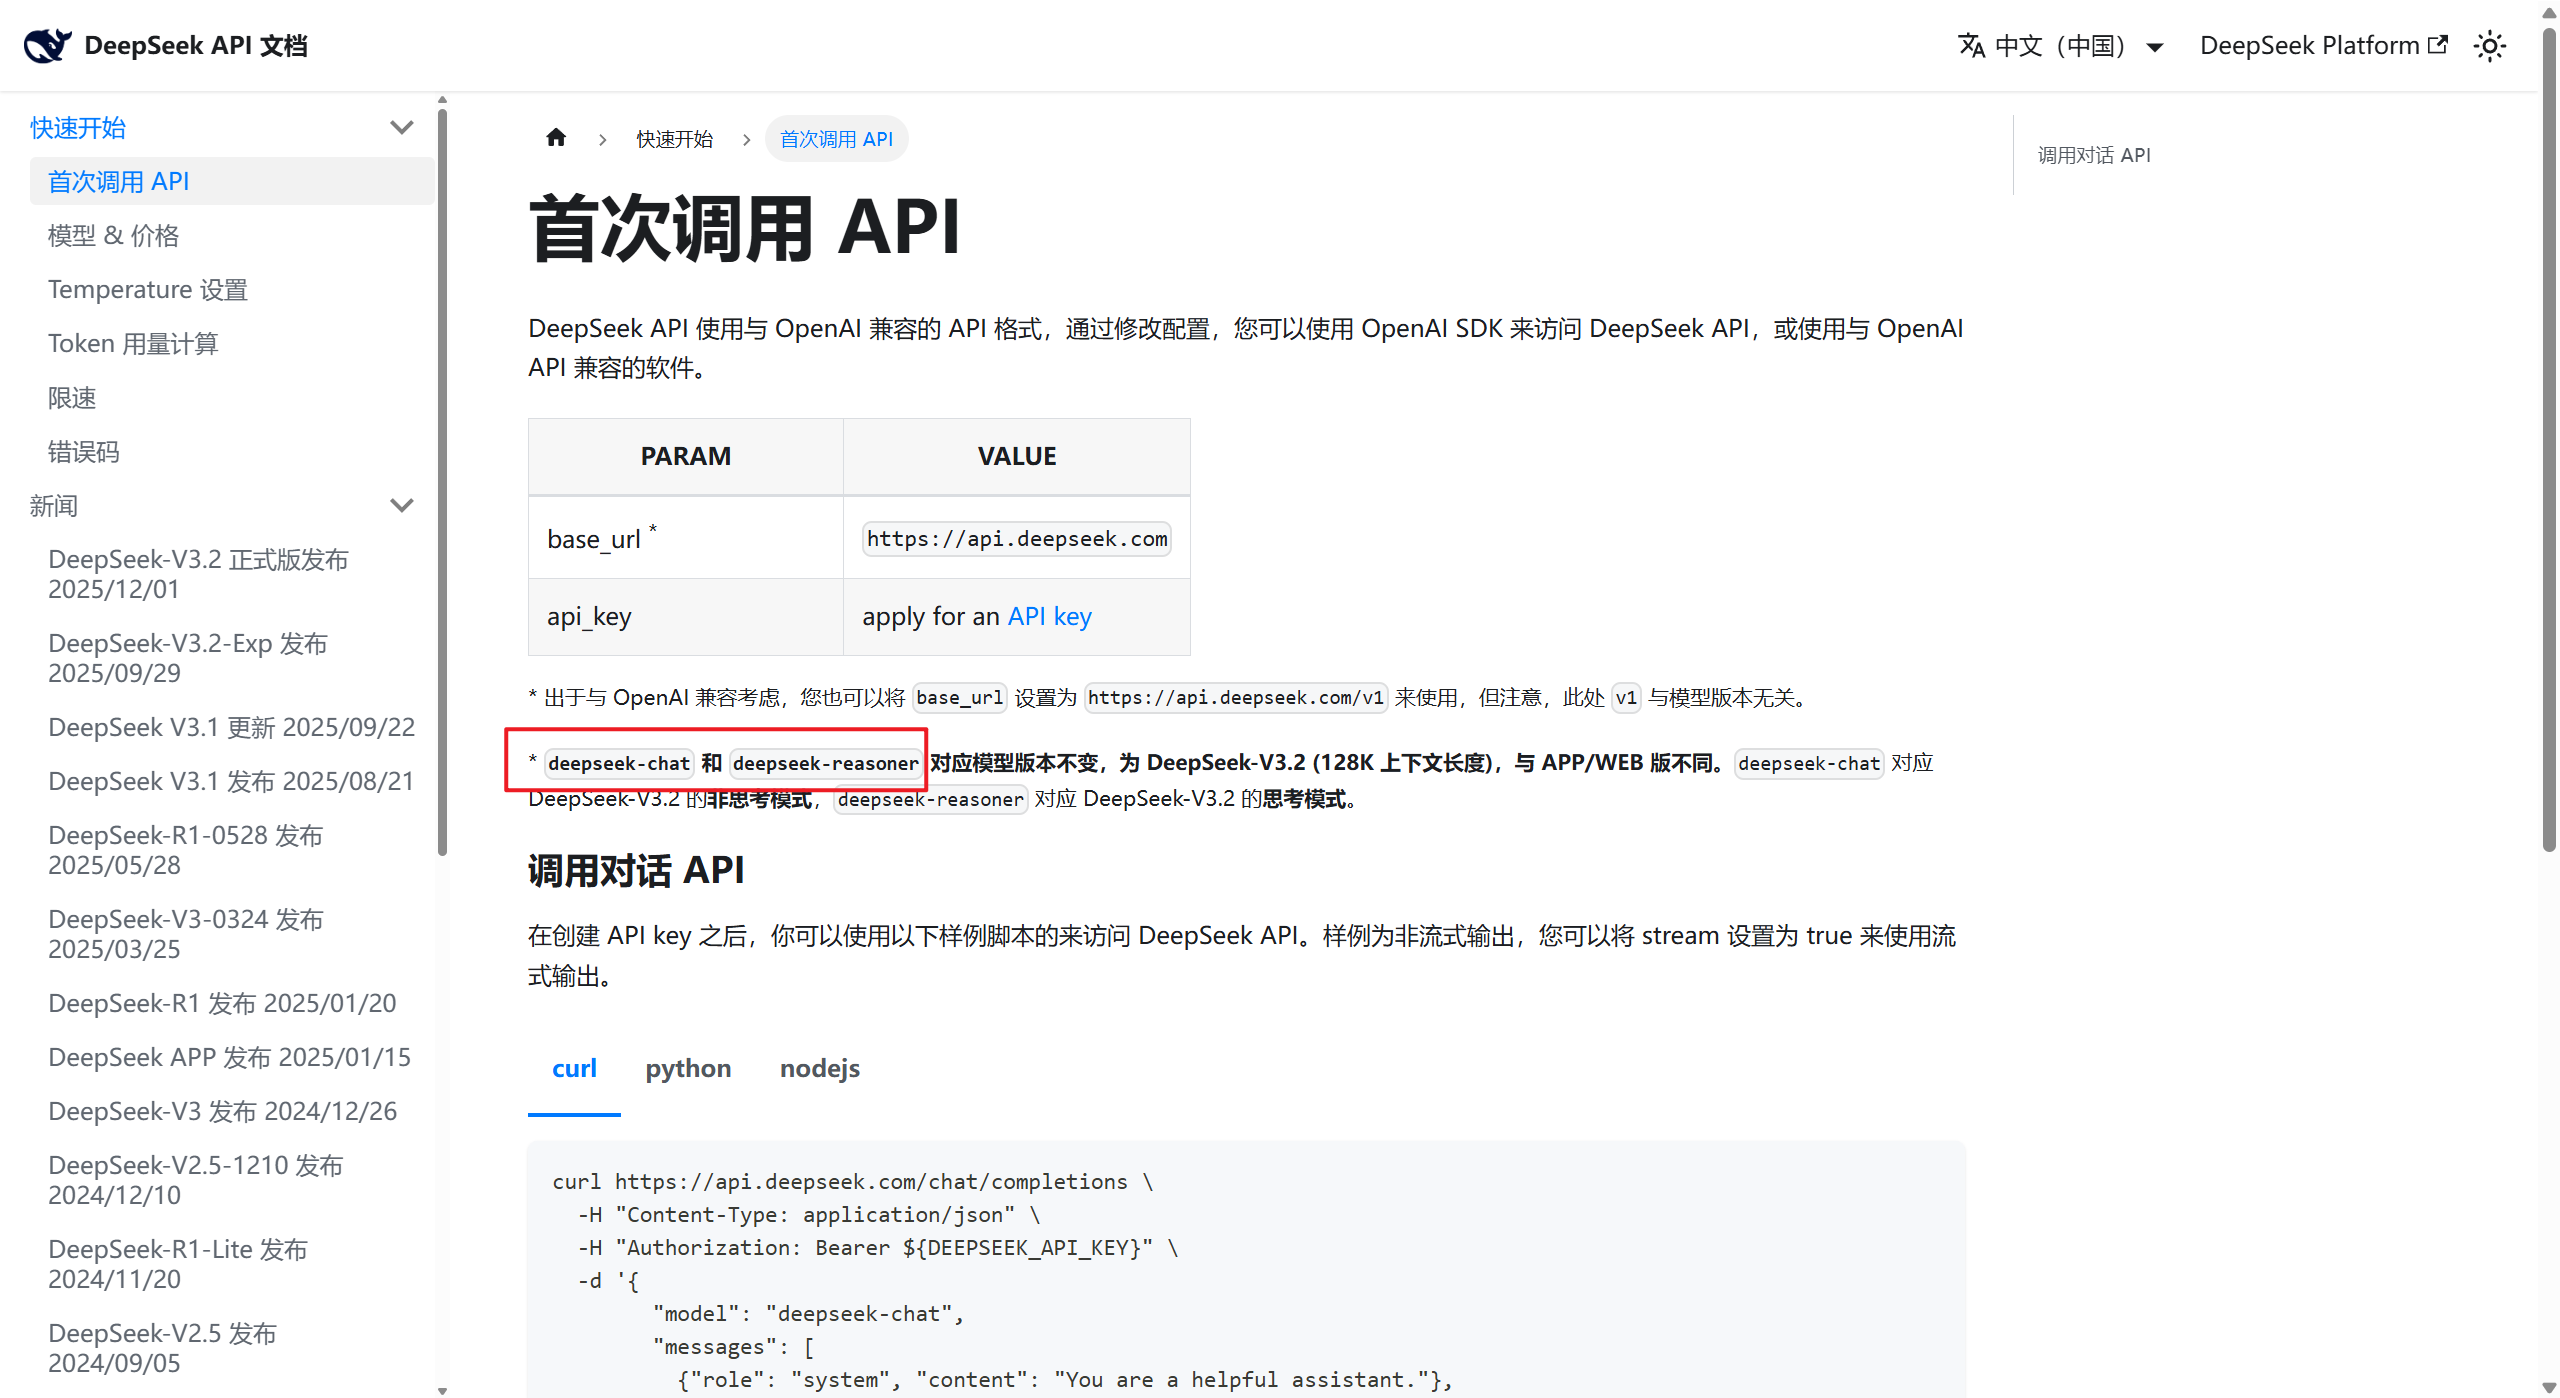
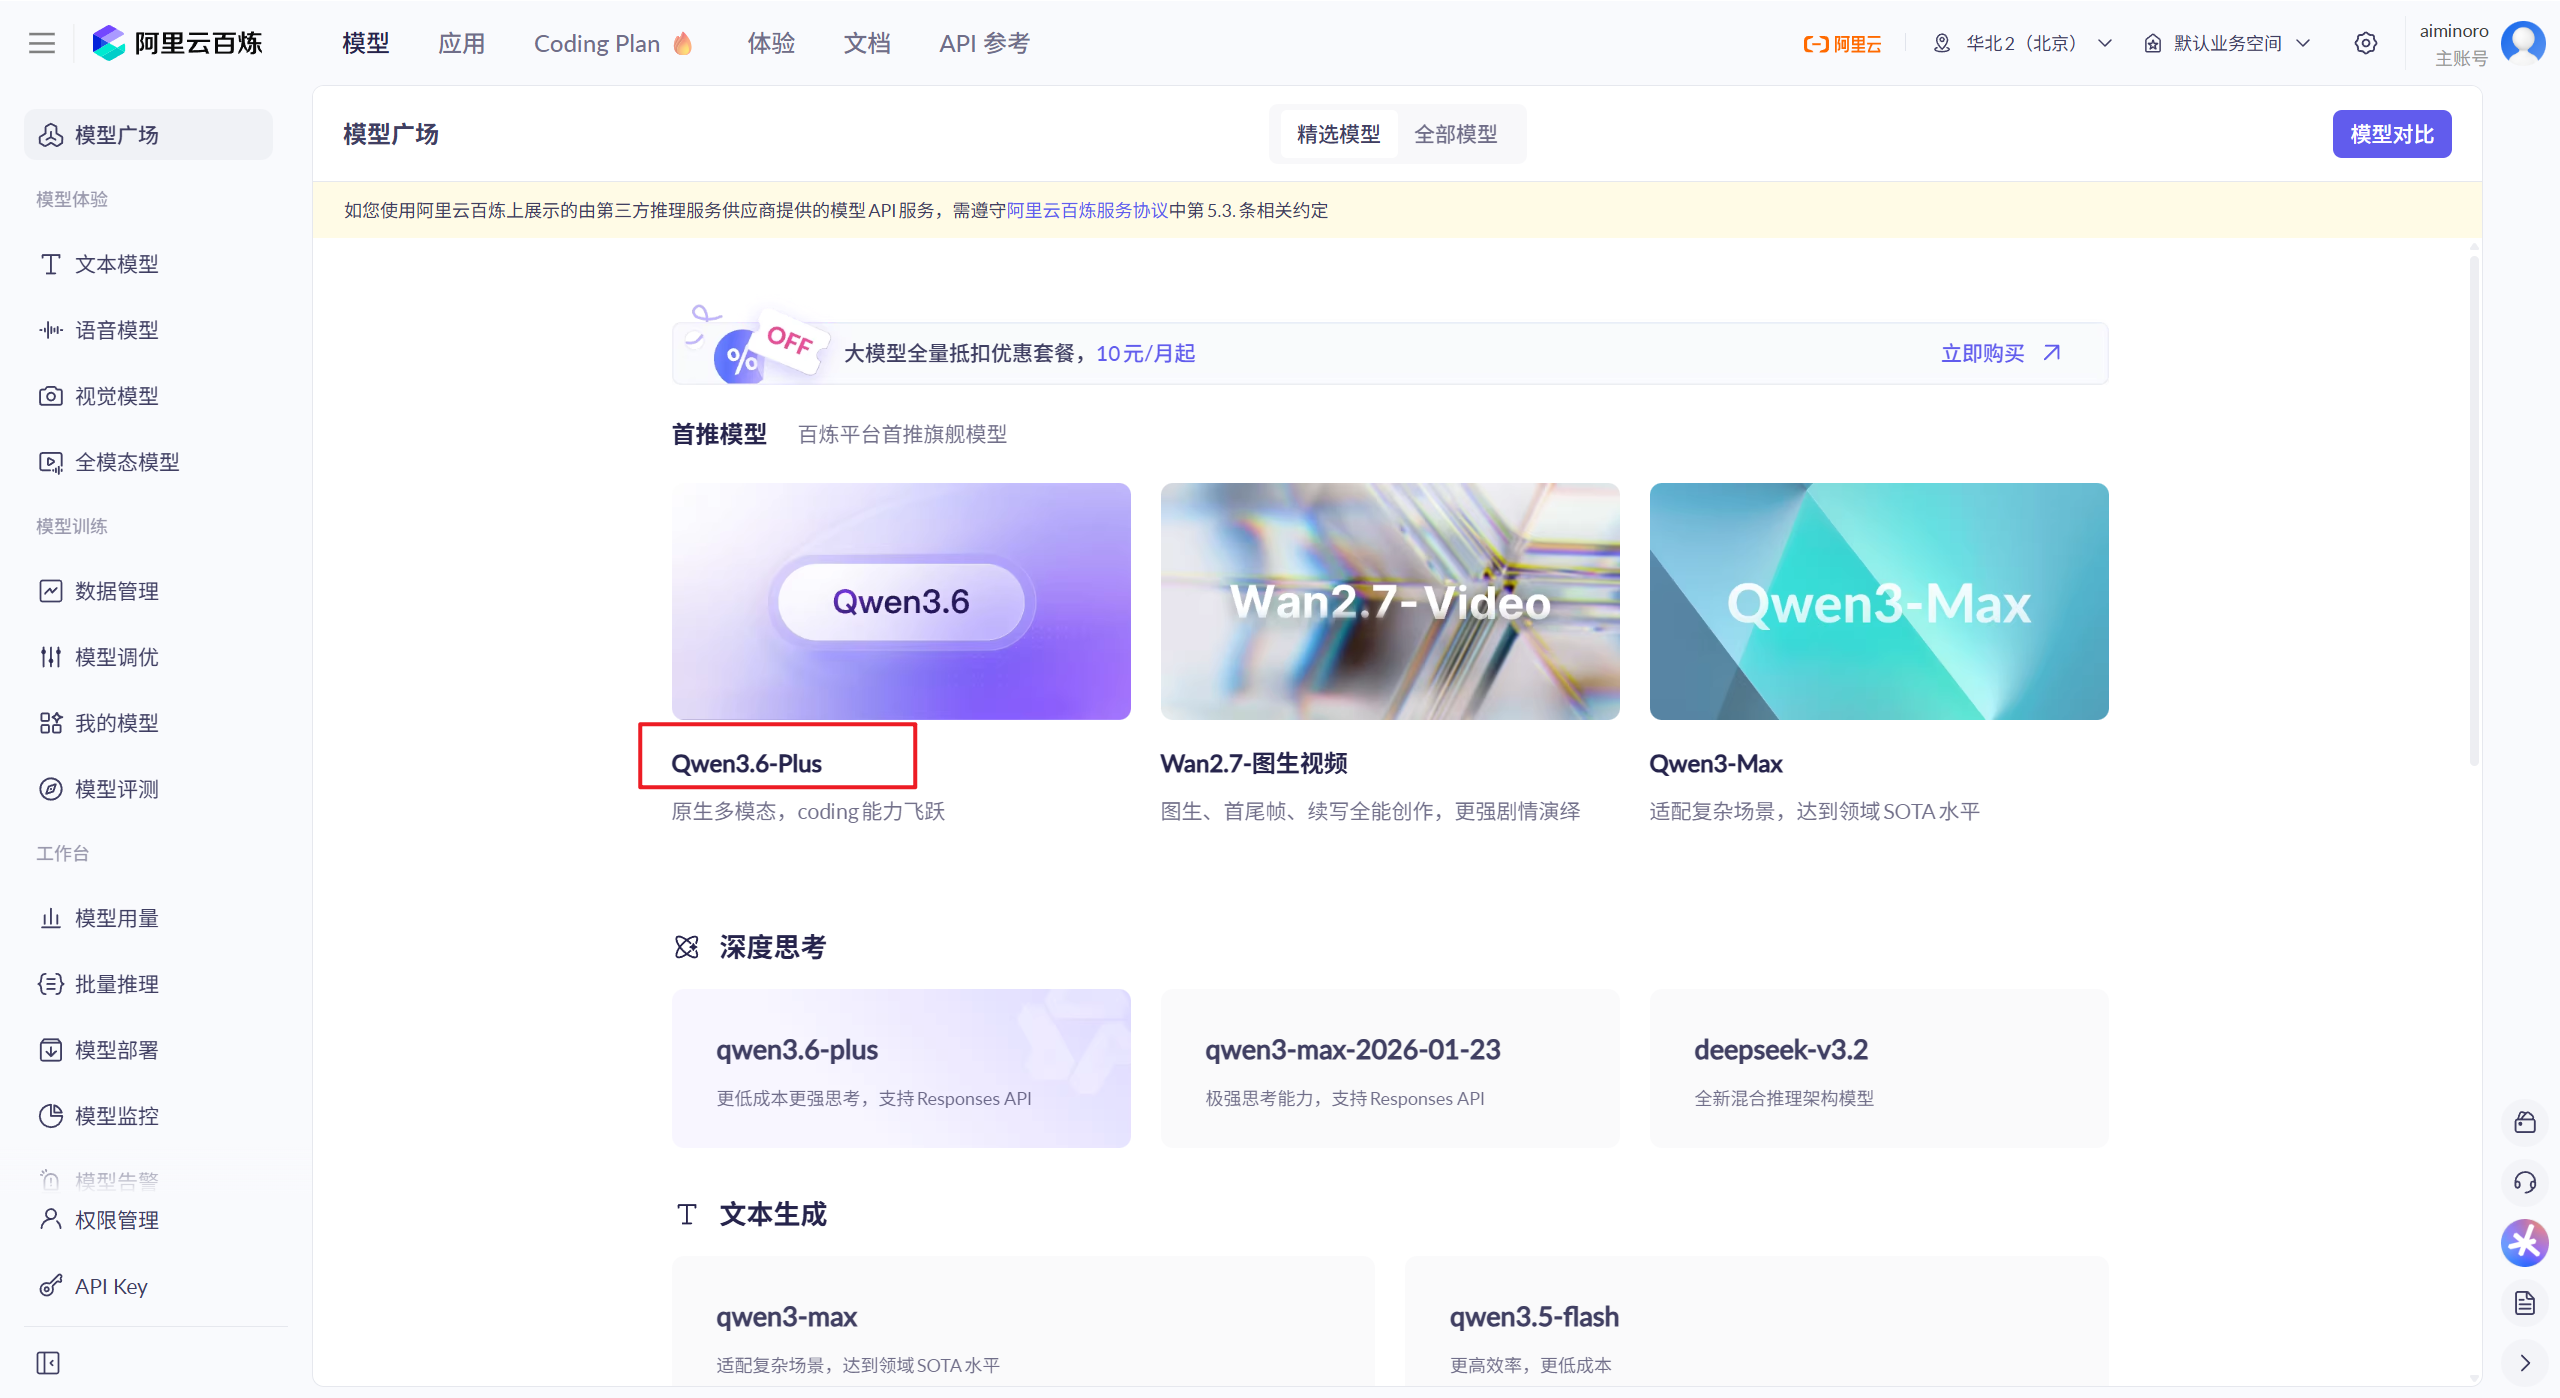
百炼
https://bailian.console.aliyun.com/cn-beijing?tab=model#/model-market
名称小写
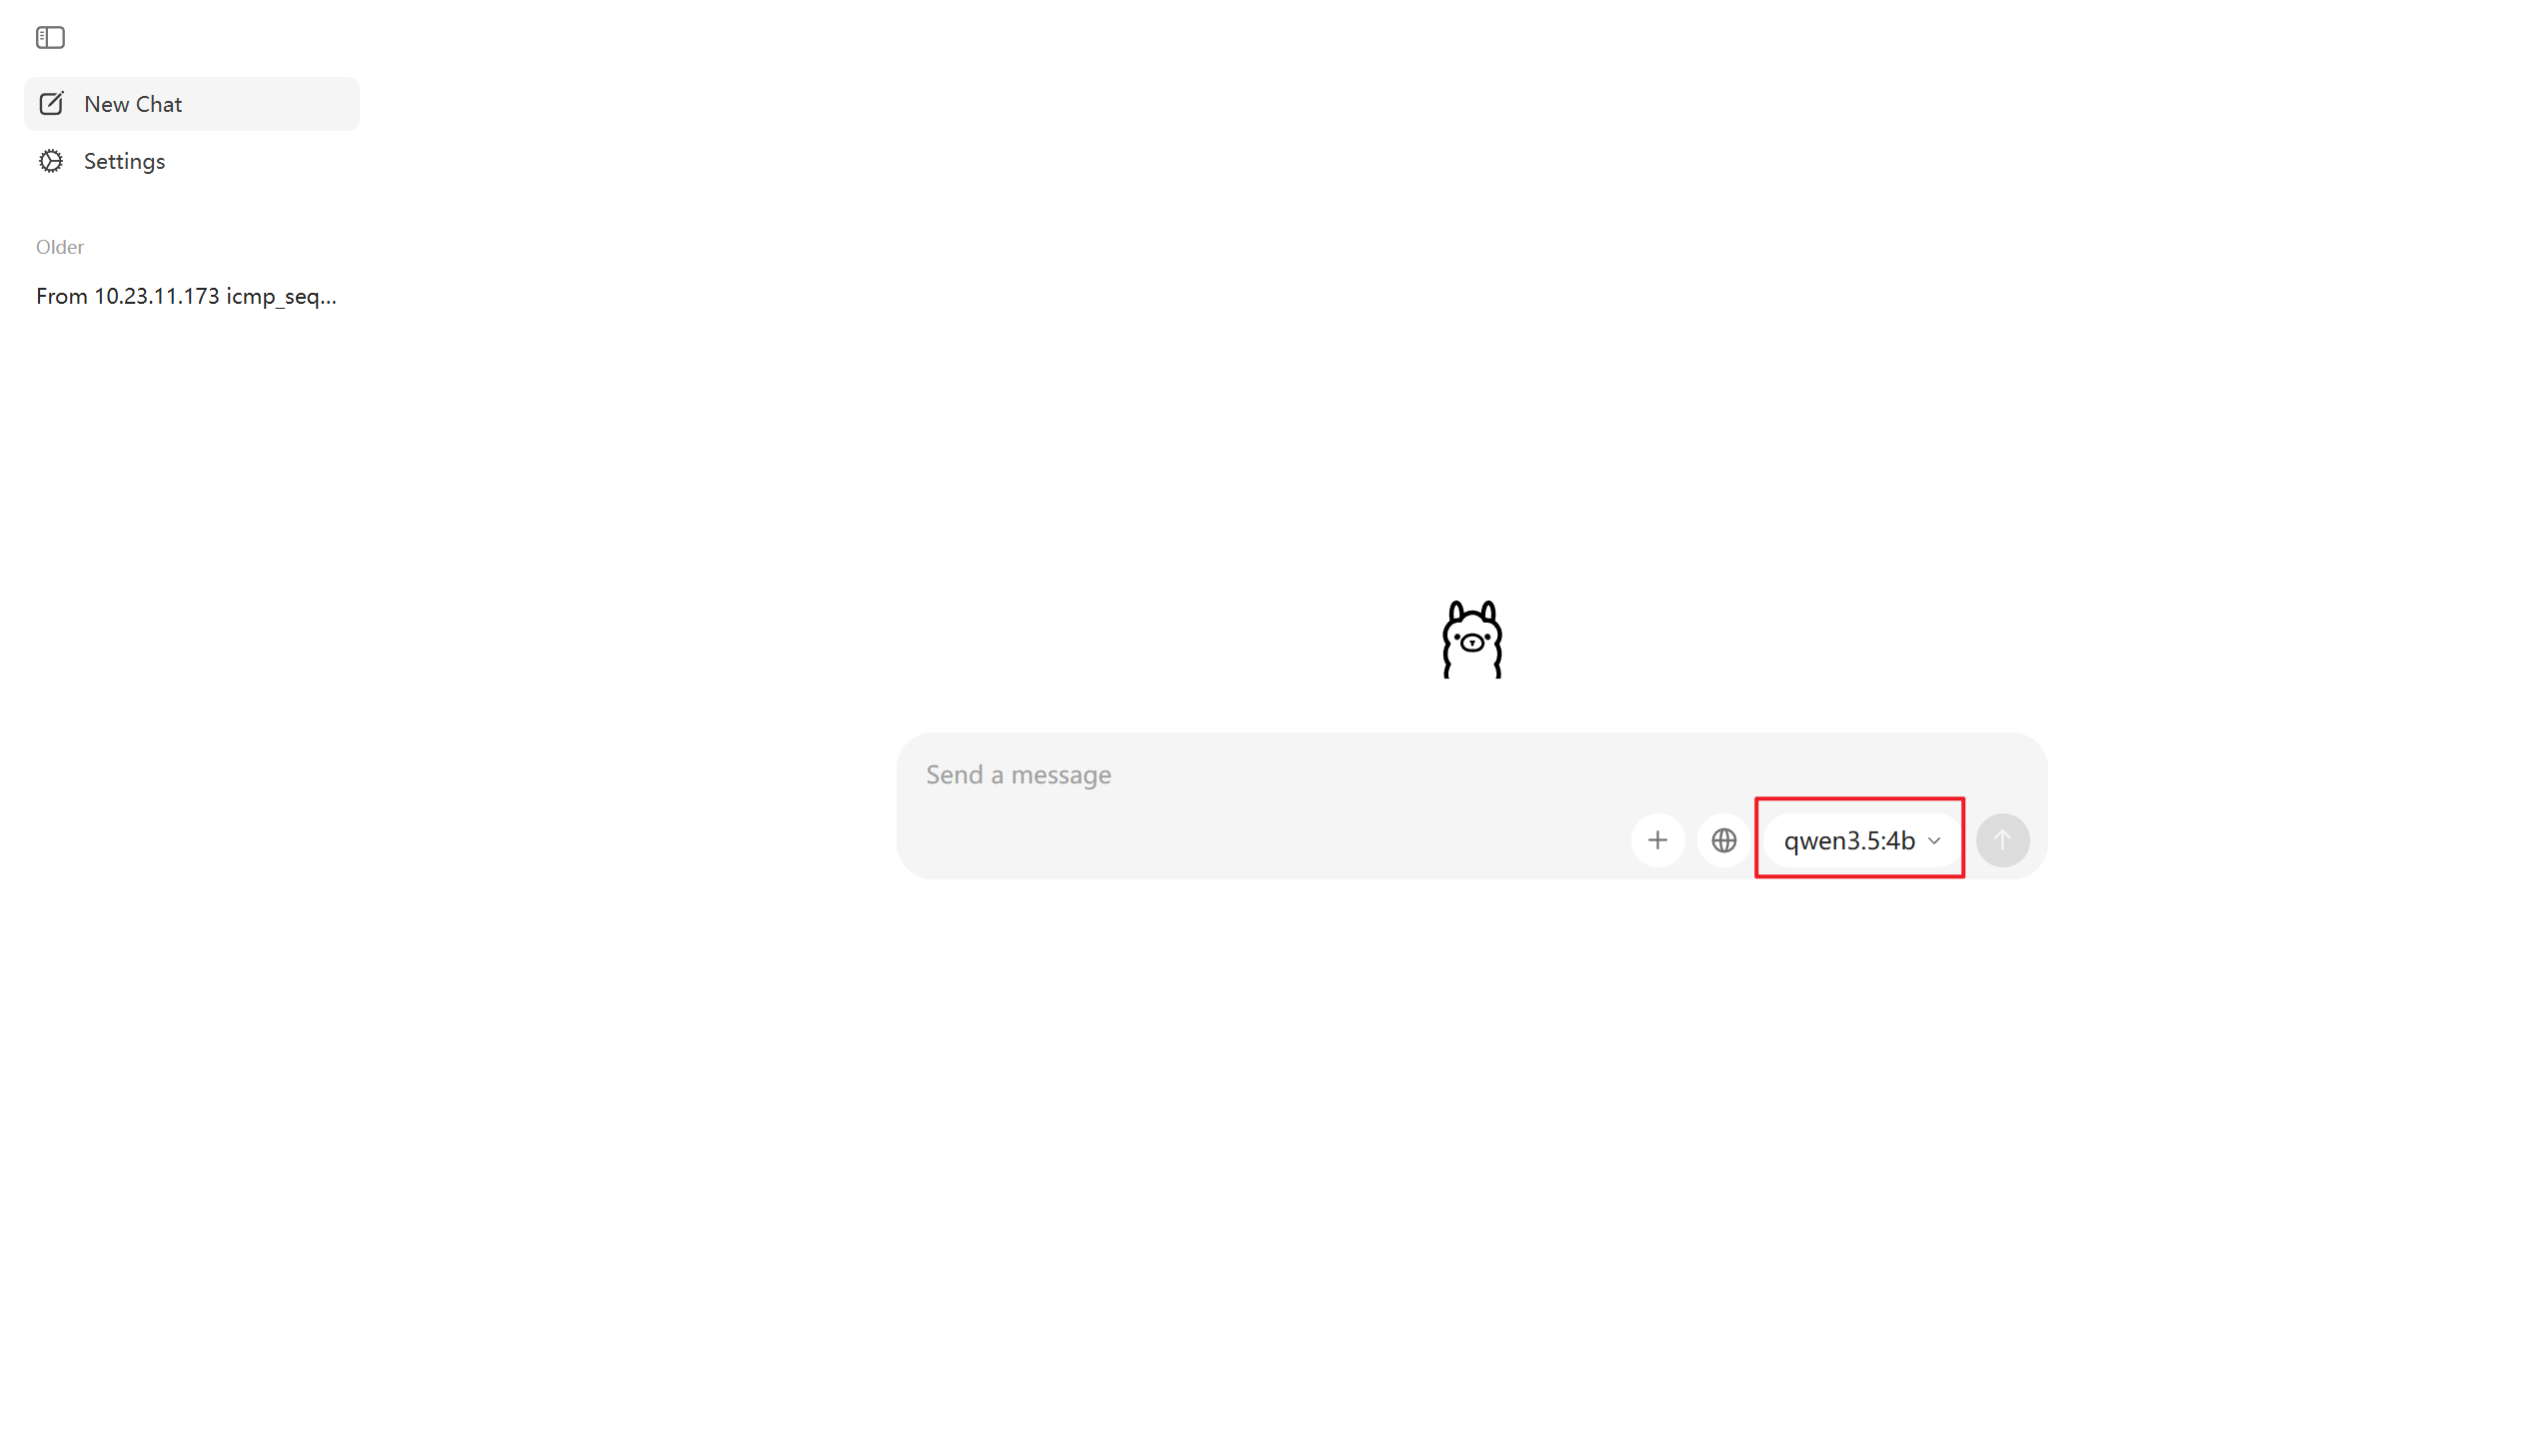
ollama
看红框中的名称,下载下来的模型,直接使用即可
DeepSeek QuickStart
import org.junit.jupiter.api.Test;
import org.springframework.ai.chat.model.ChatResponse;
import org.springframework.ai.chat.prompt.Prompt;
import org.springframework.ai.deepseek.DeepSeekAssistantMessage;
import org.springframework.ai.deepseek.DeepSeekChatModel;
import org.springframework.ai.deepseek.DeepSeekChatOptions;
import org.springframework.beans.factory.annotation.Autowired;
import org.springframework.boot.test.context.SpringBootTest;
import reactor.core.publisher.Flux;
import java.util.Arrays;
@SpringBootTest
public class TestDeepSeek {
/**
* 阻塞方式
*
* @param deepSeekChatModel
*/
@Test
public void testDeepSeek(@Autowired DeepSeekChatModel deepSeekChatModel) {
String call = deepSeekChatModel.call("你好介绍一下你自己!");
System.out.println(call);
}
/**
* 流式方式
*
* @param deepSeekChatModel
*/
@Test
public void testDeepSeekStream(@Autowired DeepSeekChatModel deepSeekChatModel) {
Flux<String> stream = deepSeekChatModel.stream("10元钱的你可以做多少次调用?");
stream.toIterable().forEach(System.out::println);
}
/**
* 配置热情度
*
* @param chatModel
*/
@Test
public void testChatOptions(@Autowired DeepSeekChatModel chatModel) {
DeepSeekChatOptions options = DeepSeekChatOptions.builder()
.model("deepseek-reasoner") // 模型名称
.maxTokens(1024) // 最大输出长度
.stop(Arrays.asList("注意","总结","。")) // 停止符, array 里面自定义停止符
.temperature(0.5).build();
ChatResponse response = chatModel.call(new Prompt("请写一句诗描述清晨。", options));
System.out.println(response);
System.out.println("=============================================================");
System.out.println(response.getResult());
System.out.println("=============================================================");
System.out.println(response.getResult().getOutput());
System.out.println("=============================================================");
System.out.println(response.getResult().getOutput().getText());
}
/**
* 深度思考,流展示
* @param deepSeekChatModel
*/
@Test
public void testDeepStream(@Autowired DeepSeekChatModel deepSeekChatModel){
Flux<ChatResponse> stream = deepSeekChatModel.stream(new Prompt("今天试试吃什么呢"));
stream.toIterable().forEach(response ->{
DeepSeekAssistantMessage msg = (DeepSeekAssistantMessage) response.getResult().getOutput();
System.out.println(msg.getReasoningContent());
});
System.out.println("=============================================================");
stream.toIterable().forEach(response ->{
DeepSeekAssistantMessage msg = (DeepSeekAssistantMessage) response.getResult().getOutput();
System.out.println(msg.getText());
});
}
}
BaiLian QuickStart
import com.alibaba.cloud.ai.dashscope.agent.DashScopeAgent;
import com.alibaba.cloud.ai.dashscope.audio.DashScopeSpeechSynthesisModel;
import com.alibaba.cloud.ai.dashscope.audio.DashScopeSpeechSynthesisOptions;
import com.alibaba.cloud.ai.dashscope.audio.synthesis.SpeechSynthesisPrompt;
import com.alibaba.cloud.ai.dashscope.audio.synthesis.SpeechSynthesisResponse;
import com.alibaba.cloud.ai.dashscope.chat.DashScopeChatModel;
import com.alibaba.cloud.ai.dashscope.image.DashScopeImageModel;
import com.alibaba.cloud.ai.dashscope.image.DashScopeImageOptions;
import com.alibaba.dashscope.aigc.imagesynthesis.ImageSynthesis;
import com.alibaba.dashscope.aigc.imagesynthesis.ImageSynthesisParam;
import com.alibaba.dashscope.aigc.imagesynthesis.ImageSynthesisResult;
import com.alibaba.dashscope.aigc.videosynthesis.VideoSynthesis;
import com.alibaba.dashscope.aigc.videosynthesis.VideoSynthesisParam;
import com.alibaba.dashscope.aigc.videosynthesis.VideoSynthesisResult;
import com.alibaba.dashscope.exception.ApiException;
import com.alibaba.dashscope.exception.InputRequiredException;
import com.alibaba.dashscope.exception.NoApiKeyException;
import com.alibaba.dashscope.utils.Constants;
import com.alibaba.dashscope.utils.JsonUtils;
import org.junit.jupiter.api.Test;
import org.springframework.ai.chat.model.ChatResponse;
import org.springframework.ai.chat.prompt.Prompt;
import org.springframework.ai.deepseek.DeepSeekAssistantMessage;
import org.springframework.ai.deepseek.DeepSeekChatModel;
import org.springframework.ai.deepseek.DeepSeekChatOptions;
import org.springframework.ai.image.ImagePrompt;
import org.springframework.ai.image.ImageResponse;
import org.springframework.beans.BeanUtils;
import org.springframework.beans.factory.annotation.Autowired;
import org.springframework.boot.test.context.SpringBootTest;
import org.springframework.web.bind.annotation.ResponseStatus;
import reactor.core.publisher.Flux;
import java.io.File;
import java.io.FileOutputStream;
import java.io.IOException;
import java.nio.ByteBuffer;
import java.util.Arrays;
import java.util.HashMap;
import java.util.Map;
@SpringBootTest
public class TestALIBaiLian {
/**
* 测试千问模型 与deepseek模型调用相同
*
* @param dashScopeChatModel
*/
@Test
public void testQwen(@Autowired DashScopeChatModel dashScopeChatModel) {
// 简单请求
String call = dashScopeChatModel
.call("你好介绍一下你自己!");
System.out.println(call);
System.out.println("=============================================================");
// 自定义设置
DashScopeChatOptions options = DashScopeChatOptions.builder()
.withModel("qwen-plus") // 模型名称
.withMaxToken(1024) // 最大输出长度
.withStop(Arrays.asList("注意", "总结", "。")) // 停止符
.withTemperature(0.5) // 温度
.build();
ChatResponse c1 = dashScopeChatModel.call(new Prompt("请写一句描述清明的诗句!", options));
System.out.println(c1.getResult().getOutput().getText());
}
/**
* 调用 图片 模型
*
* @param dashScopeImageModel
*/
@Test
public void testImages(@Autowired DashScopeImageModel dashScopeImageModel) {
// DashScopeImageOptions build = DashScopeImageOptions.builder().build();
// .withModel("wan2.6-t2i").build();
DashScopeImageOptions build = DashScopeImageOptions.builder()
.withModel("wanx2.1-t2i-turbo") // 使用快速模型
.withSize("1024*1024") // 指定合适的尺寸
.build();
ImageResponse imageResponse = dashScopeImageModel.call(
new ImagePrompt("喜马拉雅山", build)
);
String url = imageResponse.getResult().getOutput().getUrl();
System.out.println("图片 URL: " + url);
// base64 编码
String b64Json = imageResponse.getResult().getOutput().getB64Json();
System.out.println("b64Json = " + b64Json);
}
/**
* 闻声语音模型
*/
@Test
public void testTextAudio(@Autowired DashScopeSpeechSynthesisModel dashScopeSpeechSynthesisModel) {
DashScopeSpeechSynthesisOptions options = DashScopeSpeechSynthesisOptions.builder()
// .voice("xiaoyan")
// .model("vip-tts-v2")
// .speed(1.0f)
.build();
SpeechSynthesisResponse response = dashScopeSpeechSynthesisModel.call(
new SpeechSynthesisPrompt("大家好,我是新生", options)
);
File file = new File(System.getProperty("./") + "output.mp3");
try (FileOutputStream fos = new FileOutputStream(file)){
ByteBuffer audio = response.getResult().getOutput().getAudio();
fos.write(audio.array());
}catch (IOException e){
e.printStackTrace();
}
}
/**
* 视频处理
*/
@Test
public void test2Video() throws NoApiKeyException, InputRequiredException {
VideoSynthesis vs = new VideoSynthesis();
VideoSynthesisParam param = VideoSynthesisParam.builder()
.model("wan2.6-t2v")
.prompt("一只小猫在月光下奔跑")
.size("1280*720")
.apiKey("xxxxxxxxxx")
.build();
System.out.println("wait ....");
VideoSynthesisResult result = vs.call(param);
System.out.println(result.getOutput().getVideoUrl());
}
static {
// 以下为北京地域url,若使用新加坡地域的模型,需将url替换为:https://dashscope-intl.aliyuncs.com/api/v1
Constants.baseHttpApiUrl = "https://dashscope.aliyuncs.com/api/v1";
}
// 新加坡和北京地域的API Key不同。获取API Key:https://help.aliyun.com/zh/model-studio/get-api-key
// 若没有配置环境变量,请用百炼API Key将下行替换为:static String apiKey = "sk-xxx"
String apiKey = "xxxxxxxxxxxxx";
/**
* 文本生成图像
*/
@Test
public void basicCall() {
String prompt = "一副典雅庄重的对联悬挂于厅堂之中,房间是个安静古典的中式布置,桌子上放着一些青花瓷,对联上左书“义本生知人机同道善思新”,右书“通云赋智乾坤启数高志远”, 横批“智启千问”,字体飘逸,在中间挂着一幅中国风的画作,内容是岳阳楼。";
Map<String, Object> parameters = new HashMap<>();
parameters.put("prompt_extend", true);
parameters.put("watermark", false);
parameters.put("negative_prompt", " ");
ImageSynthesisParam param =
ImageSynthesisParam.builder()
.apiKey(apiKey)
// 当前仅qwen-image-plus、qwen-image模型支持异步接口
.model("qwen-image-plus")
.prompt(prompt)
.n(1)
.size("1664*928")
.parameters(parameters)
.build();
ImageSynthesis imageSynthesis = new ImageSynthesis();
ImageSynthesisResult result = null;
try {
System.out.println("---同步调用,请等待任务执行----");
result = imageSynthesis.call(param);
} catch (ApiException | NoApiKeyException e){
throw new RuntimeException(e.getMessage());
}
System.out.println(JsonUtils.toJson(result));
}
}
Ollama QuickStart
import org.junit.jupiter.api.Test;
import org.springframework.ai.ollama.OllamaChatModel;
import org.springframework.beans.factory.annotation.Autowired;
import org.springframework.boot.test.context.SpringBootTest;
@SpringBootTest
public class TestOllama {
@Test
public void testOllame(@Autowired OllamaChatModel ollamaChatModel){
// 简单调用
System.out.println(ollamaChatModel.call("你好你是谁!"));
System.out.println("=============================================================");
// 配置参数
OllamaOptions options = OllamaOptions.builder()
.model("qwen3.5:4b")
.temperature(0.5)
.numPredict(1024) // 最大 token 数量
.stop(Arrays.asList("注意", "总结", "。")).build();
ChatResponse call = ollamaChatModel.call(new Prompt("请写一句描述清明的诗句!", options));
System.out.println(call.getResult().getOutput().getText());
}
}
自定义配置
注意:每个模型存在差异,但是大差不差。
1、module:自定义指定使用那个模型
2、temperature:模型温度 0~2 的浮点数字,数字越高 拟人 程度越高,回答越有温度。反之温度越低,回答的就越机械化。
3、stop:停止词。输出到指定的词语就停止输出。需要传入一个 ArrayList 列表
4、maxTokens:最大返回字数(简单理解,设置的越大,可返回的字数就越多)
deepseek:maxTokens
bailian:withMaxToken
ollama:numPredict
处理 ollama,整体大差不差。
deepseek
    /**
     * 配置热情度
     *
     * @param chatModel
     */
    @Test
    public void testChatOptions(@Autowired DeepSeekChatModel chatModel) {
        DeepSeekChatOptions options = DeepSeekChatOptions.builder()
                .model("deepseek-reasoner") // 模型名称
                .maxTokens(1024) // 最大输出长度
                .stop(Arrays.asList("注意","总结","。")) // 停止符, array 里面自定义停止符
                .temperature(0.5).build();

        ChatResponse response = chatModel.call(new Prompt("请写一句诗描述清晨。", options));
        System.out.println(response.getResult().getOutput().getText());
    }
百炼
    /**
     * 测试千问模型  与deepseek模型调用相同
     *
     * @param dashScopeChatModel
     */
    @Test
    public void testQwen(@Autowired DashScopeChatModel dashScopeChatModel) {
        // 自定义设置
        DashScopeChatOptions options = DashScopeChatOptions.builder()
                .withModel("qwen-plus") // 模型名称
                .withMaxToken(1024) // 最大输出长度
                .withStop(Arrays.asList("注意", "总结", "。")) // 停止符
                .withTemperature(0.5) // 温度
                .build();

        ChatResponse c1 = dashScopeChatModel.call(new Prompt("请写一句描述清明的诗句!", options));
        System.out.println(c1.getResult().getOutput().getText());
    }
总结:
1、调用的 chatModel 不同
deepseek:DeepSeekChatModel
bailian:DashScopeChatModel
ollama:OllamaChatModel
2、阻塞请求与流请求
以 deepseek 为例(方式都是一样的,调用的模型不同)
阻塞:call();
/**
 * 阻塞方式
 *
 * @param deepSeekChatModel
 */
@Test
public void testDeepSeek(@Autowired DeepSeekChatModel deepSeekChatModel) {
    String call = deepSeekChatModel.call("你好介绍一下你自己!");
    System.out.println(call);
}
流请求:stream();
/**
 * 流式方式
 *
 * @param deepSeekChatModel
 */
@Test
public void testDeepSeekStream(@Autowired DeepSeekChatModel deepSeekChatModel) {
    Flux<String> stream = deepSeekChatModel.stream("10元钱的你可以做多少次调用?");
    stream.toIterable().forEach(System.out::println);
}
ChatClient(重点)
ChatClient 简介:
从上面的文档中看到,调用不同的模型需要使用不同的 model,管理起来很麻烦,同时还要使用不同的功能调用(虽然大差不差)。而 ChatClient 则是将模型的 module 整合成一个公共的入口,简化的功能的调用。
注意:引入多个模型依赖,chatclient会出现注入异常,需要手动处理,指定默认模型,如果项目中只引入了一个 module (假设:deepseek),chatclient 会自动注入(spring 底层,自动注入逻辑)。
Pom.xml 依赖
<?xml version="1.0" encoding="UTF-8"?> <project xmlns="http://maven.apache.org/POM/4.0.0" xmlns:xsi="http://www.w3.org/2001/XMLSchema-instance" xsi:schemaLocation="http://maven.apache.org/POM/4.0.0 https://maven.apache.org/xsd/maven-4.0.0.xsd"> <modelVersion>4.0.0</modelVersion> <parent> <groupId>com.example</groupId> <artifactId>AI_Learn</artifactId> <version>0.0.1-SNAPSHOT</version> <relativePath/> <!-- lookup parent from repository --> </parent> <artifactId>chat-client</artifactId> <version>0.0.1-SNAPSHOT</version> <name>chat-client</name> <description>chat-client</description> <properties> <java.version>17</java.version> </properties> <dependencies> <!-- deepseek 依赖--> <!-- <dependency>--> <!-- <groupId>org.springframework.ai</groupId>--> <!-- <artifactId>spring-ai-starter-model-deepseek</artifactId>--> <!-- </dependency>--> <!-- 阿里百炼 依赖--> <dependency> <groupId>com.alibaba.cloud.ai</groupId> <artifactId>spring-ai-alibaba-starter-dashscope</artifactId> </dependency> <!-- chatmemory 自动配置启动类 --> <dependency> <groupId>org.springframework.ai</groupId> <artifactId>spring-ai-autoconfigure-model-chat-memory</artifactId> </dependency> <!-- springai 对话存储到数据库--> <dependency> <groupId>org.springframework.ai</groupId> <artifactId>spring-ai-starter-model-chat-memory-repository-jdbc</artifactId> </dependency> <dependency> <groupId>org.springframework.boot</groupId> <artifactId>spring-boot-starter-jdbc</artifactId> </dependency> <!-- mysql 连接数据库依赖--> <dependency> <groupId>com.mysql</groupId> <artifactId>mysql-connector-j</artifactId> <scope>runtime</scope> </dependency> <!-- springalibaba 事项 ai 记忆存储到 redis--> <dependency> <groupId>com.alibaba.cloud.ai</groupId> <artifactId>spring-ai-alibaba-starter-memory-redis</artifactId> </dependency> <dependency> <groupId>redis.clients</groupId> <artifactId>jedis</artifactId> <version>5.2.0</version> </dependency> </dependencies> <build> <plugins> <plugin> <groupId>org.springframework.boot</groupId> <artifactId>spring-boot-maven-plugin</artifactId> </plugin> </plugins> </build> </project>
实例
1、普通调用
/**
* 普通调用,项目中只引入一个module依赖的情况
* @param chatClient
*/
@Test
public void testChatClient(@Autowired ChatClient.Builder chatClient){
ChatClient client = chatClient.build();
String nihao = client.prompt()
.user("nihao")
.call().content();
System.out.println(nihao);
}
/**
* 流式调用
* @param chatClient
*/
@Test
public void testChatClientStream(@Autowired ChatClient.Builder chatClient){
ChatClient client = chatClient.build();
Flux<String> content = client.prompt()
.user("nihao")
.stream().content();
content.toIterable().forEach(System.out::println);
}
/**
* 选择模块,多个模块注入
* @param dashScopeChatModel
*/
@Test
public void testChatClientChooseModulle(@Autowired DashScopeChatModel dashScopeChatModel){
ChatClient client = ChatClient.builder(dashScopeChatModel).build();
String nihao = client.prompt()
.user("nihao")
.call().content();
System.out.println(nihao);
}
2、prompt 参数
系统提示词
chatClientBuilder.defaultSystem();
@Test
public void testSystemPrompt(@Autowired ChatClient.Builder chatClientBuilder) {
// 可以多模块共享
ChatClient chatClient = chatClientBuilder
.defaultSystem("\"# 角色说明你是一名专业法律顾问AI...\n" +
" #回复格式\n" +
" 1.问题分析\n" +
" 2.相关依据\n" +
" 3.梳理和建议\n" +
" **特别注意:**\n" +
" 不承担律师责任。\n" +
" 不生成涉敏、虚假内容。\"" +
"当前服务的用户:" +
"姓名:{name},年龄:{age},性别:{gender}")
.build();
String content = chatClient.prompt()
// .system("") // 某一次对话使用
.system(promptSystemSpec ->
promptSystemSpec.param("name", "张三")
.param("age", "18")
.param("gender", "male")) // 传入参数
.user("你好")
.call().content();
System.out.println(content);
}
/**
* 通过读取文件的方式加载提示词
* 下方有图片 与 文件内容
* @param chatClientBuilder
*/
@Test
public void testSystemPromptInfile(@Autowired ChatClient.Builder chatClientBuilder,
@Value("classpath:/files/prompt.st") Resource systemResources) {
// 可以多模块共享
ChatClient chatClient = chatClientBuilder
.defaultSystem(systemResources)
.build();
String content = chatClient.prompt()
// .system("") // 某一次对话使用
.system(promptSystemSpec ->
promptSystemSpec.param("name", "张三")
.param("age", "18")
.param("gender", "male")) // 传入参数
.user("你好")
.call().content();
System.out.println(content);
}
# 角色说明
你是一名专业法律顾问AI...
#回复格式
1.问题分析
2.相关依据
3.梳理和建议
**特别注意:**
- 不承担律师责任。
- 不生成涉敏、虚假内容。
当前服务的用户:
姓名:{name},年龄:{age},性别:{gender}

提示词
在 Spring AI 中,提示词(Prompt)是与大语言模型(LLM)进行交互的核心指令和载体。它的作用远不止是简单地传递一个问题,而是通过结构化的方式,精确地引导 AI 生成符合预期的内容。
简单来说,提示词就是你为 AI 编写的“任务说明书”。
提示词的核心作用
-
定义 AI 的角色与行为 通过系统提示词(
SystemMessage),你可以为 AI 设定一个特定的“人设”或行为准则。例如,你可以要求 AI 扮演一位“资深的 Java 开发工程师”,并规定其回答“需简洁、专业,仅使用中文”。这能确保 AI 的输出风格和内容符合你的应用需求。 -
传递用户的任务与问题 这是提示词最基础的功能,通过用户提示词(
UserMessage)来实现。它将用户的具体需求、问题或指令传达给 AI,是 AI 需要处理的核心内容。 -
提供上下文与示例 提示词可以包含背景信息、参考资料或具体的示例(即少样本学习,Few-shot Learning)。这能帮助 AI 更好地理解任务的背景和期望的输出格式,从而生成更准确、更相关的回答。
-
控制输出格式与长度 你可以在提示词中明确要求 AI 以何种格式(如 JSON、Markdown 列表等)输出结果,或者限制回答的字数。这对于后续的程序化处理或提升用户体验至关重要。
/**
 * 从上方复制下来的代码
 * TODO 解释一下提示词的作用:
 * AI 模型是没有角色这一个设定的,如果想要某些特定角色,需要给系统进行默认提示。
 * 基于用户使用简便性与复用性,API 支持添加一个默认提示词的参数
 * 在用户发送信息的是,会默认携带默认提示词里面的数据,提供给 AI模型 使用,来更加景区的来推算
 */
@Test
public void testSystemPrompt(@Autowired ChatClient.Builder chatClientBuilder) {
    // 可以多模块共享
    ChatClient chatClient = chatClientBuilder
        // 类似于全局的系统提示词,所有使用 chatClient 这个变量的,都会默认使用 这个系统提示词
            .defaultSystem("XXXXXXXXXXXXXXXX")
            .build();

    String content = chatClient.prompt()
            // .system("") // 某一次对话使用
            // 临时提示词,此次会话结束后,开启使用的会话时,此提示词将无效化
            .system(promptSystemSpec ->
                    promptSystemSpec.param("name", "张三")
                            .param("age", "18")
                            .param("gender", "male")) // 传入参数
            .user("你好")
            .call().content();
    System.out.println(content);
}
Advisor(拦截器:重点)
代码实例
添加拦截器
defaultAdvisors:添加拦截器,可以添加多个
@SpringBootTest
public class TestAdvisor {
/**
* 铭感词拦截
* @param chatClient
*/
@Test
public void testAdvisor(@Autowired ChatClient.Builder chatClient){
ChatClient client = chatClient
// 添加 拦截器
.defaultAdvisors(new SimpleLoggerAdvisor(),
// 敏感词 涉及敏感词的醋味返回 回应顺序
new SafeGuardAdvisor(List.of("美女"),"请注意个人言辞!",1))
.build();
String nihao = client.prompt()
.user("点一个漂亮美女")
.call().content();
System.out.println(nihao);
}
/**
* 重读
* @param chatClient
*/
@Test
public void testReReadAdvisor(@Autowired ChatClient.Builder chatClient){
ChatClient client = chatClient
.defaultAdvisors(new SimpleLoggerAdvisor(),
new ReReadingAdvisor())
.build();
String nihao = client.prompt()
.user("我帅不帅")
.call().content();
System.out.println(nihao);
}
}
添加拦截器日志打印
logging.level 后面的拦截器的包名地址。最后面是拦截击毙。info \normal \debug ........
注: 自定义的拦截器也可以写
logging:
  level:
    org:
      springframework:
        ai:
          chat:
            client:
              advisor: debug
自定义拦截器
什么是拦截器
在 Spring AI 中,自定义拦截器被称为 Advisor。它的设计模式类似于 Spring AOP 或 Servlet Filter,允许你在 AI 模型调用前后执行自定义逻辑。
Spring AI 的 Advisor 体系主要包含两个核心接口,分别对应非流式和流式两种场景:
1. CallAdvisor (非流式/同步场景)
-
作用:用于拦截普通的、同步的 AI 调用请求。即“发送请求 -> 等待完整响应”的模式。
2. StreamAdvisor (流式场景)
-
作用:用于拦截流式 AI 调用请求(如 SSE 或 WebSocket)。即 AI 逐字或逐段输出内容的模式。
💡 最佳实践:为了让你的拦截器能同时支持同步和流式调用,通常建议创建一个类同时实现这两个接口。
3. BaseAdvisor
-
springAI 中直接实现 BaseAdvisor 接口,内部已经继承 CallAdvisor, StreamAdvisor 两个接口
import java.util.Objects;
import org.springframework.ai.chat.client.ChatClientRequest;
import org.springframework.ai.chat.client.ChatClientResponse;
import org.springframework.ai.chat.client.advisor.AdvisorUtils;
import org.springframework.util.Assert;
import reactor.core.publisher.Flux;
import reactor.core.publisher.Mono;
import reactor.core.scheduler.Scheduler;
import reactor.core.scheduler.Schedulers;
public interface BaseAdvisor extends CallAdvisor, StreamAdvisor {
Scheduler DEFAULT_SCHEDULER = Schedulers.boundedElastic();
default ChatClientResponse adviseCall(ChatClientRequest chatClientRequest, CallAdvisorChain callAdvisorChain) {
Assert.notNull(chatClientRequest, "chatClientRequest cannot be null");
Assert.notNull(callAdvisorChain, "callAdvisorChain cannot be null");
ChatClientRequest processedChatClientRequest = this.before(chatClientRequest, callAdvisorChain);
ChatClientResponse chatClientResponse = callAdvisorChain.nextCall(processedChatClientRequest);
return this.after(chatClientResponse, callAdvisorChain);
}
default Flux<ChatClientResponse> adviseStream(ChatClientRequest chatClientRequest, StreamAdvisorChain streamAdvisorChain) {
Assert.notNull(chatClientRequest, "chatClientRequest cannot be null");
Assert.notNull(streamAdvisorChain, "streamAdvisorChain cannot be null");
Assert.notNull(this.getScheduler(), "scheduler cannot be null");
Mono var10000 = Mono.just(chatClientRequest).publishOn(this.getScheduler()).map((request) -> {
return this.before(request, streamAdvisorChain);
});
Objects.requireNonNull(streamAdvisorChain);
Flux<ChatClientResponse> chatClientResponseFlux = var10000.flatMapMany(streamAdvisorChain::nextStream);
return chatClientResponseFlux.map((response) -> {
if (AdvisorUtils.onFinishReason().test(response)) {
response = this.after(response, streamAdvisorChain);
}
return response;
}).onErrorResume((error) -> {
return Flux.error(new IllegalStateException("Stream processing failed", error));
});
}
default String getName() {
return this.getClass().getSimpleName();
}
ChatClientRequest before(ChatClientRequest chatClientRequest, AdvisorChain advisorChain);
ChatClientResponse after(ChatClientResponse chatClientResponse, AdvisorChain advisorChain);
default Scheduler getScheduler() {
return DEFAULT_SCHEDULER;
}
}
示例代码:自定义拦截器
before 方法
这是整个拦截器的核心逻辑所在。它负责在 AI 请求真正被调用前进行处理和修改。
-
ChatClientRequest chatClientRequest: 这是原始的、未经修改的 AI 请求对象。它包含了发送给 AI 模型的所有信息,其中最关键的是用户的提问内容(prompt)。 -
AdvisorChain advisorChain: 这是一个责任链对象。它代表了当前所有已配置的 Advisor 的执行链条。通过它,你可以将处理后的请求传递给链中的下一个 Advisor,或者在当前方法中直接决定后续流程。方法作用:
before方法的主要任务是从chatClientRequest中提取用户的原始问题,将其包装成一个新的格式,例如{原始问题} \n Read the question again: {原始问题},然后创建一个新的ChatClientRequest对象并返回。这个新的请求对象将取代原始请求,继续沿着advisorChain传递下去。、
after 方法
这个方法负责在 AI 模型返回响应后,对响应结果进行后处理。
-
ChatClientResponse chatClientResponse: 这是 AI 模型返回的原始响应对象,包含了 AI 的回答内容。 -
AdvisorChain advisorChain: 同样是责任链对象,用于在响应处理阶段继续链式调用。方法作用: 在
ReReadingAdvisor的场景中,我们只关心修改请求,不关心修改响应。因此,这个方法通常直接返回原始的chatClientResponse,不做任何改动。但在其他场景下,你可以在这里对 AI 的回答进行格式化、过滤或记录日志等操作。
getOrder 方法
这个方法用于定义当前 Advisor 在整个责任链中的执行顺序(优先级)。
-
返回值
int: 返回一个整数值。数值越小,优先级越高,意味着这个 Advisor 会更早地被执行。例如,如果配置了多个 Advisor,getOrder()返回0的会比返回10的先执行。
public class ReReadingAdvisor implements BaseAdvisor {
@Override
public ChatClientRequest before(ChatClientRequest chatClientRequest, AdvisorChain advisorChain) {
return null;
}
@Override
public ChatClientResponse after(ChatClientResponse chatClientResponse, AdvisorChain advisorChain) {
return null;
}
@Override
public int getOrder() {
return 0;
}
}
import org.springframework.ai.chat.client.ChatClientRequest;
import org.springframework.ai.chat.client.ChatClientResponse;
import org.springframework.ai.chat.client.advisor.api.*;
import org.springframework.ai.chat.prompt.Prompt;
import org.springframework.ai.chat.prompt.PromptTemplate;
import reactor.core.publisher.Flux;
import java.util.Map;
/**
* 自动拦截器
* CallAdvisor:阻塞式拦截器接口
* StreamAdvisor:流式拦截器接口
* public interface BaseAdvisor extends CallAdvisor, StreamAdvisor{}
*/
public class ReReadingAdvisor implements BaseAdvisor {
private static final String DEFAULT_USER_TEXT = """
{re2_text}
Read the question again: {re2_text}
""";
@Override
public ChatClientRequest before(ChatClientRequest chatClientRequest, AdvisorChain advisorChain) {
// 请求之前从写提示提
String contents = chatClientRequest.prompt().getContents();
// 设置提示词模板
String re2Text = PromptTemplate.builder().template(DEFAULT_USER_TEXT)
.build()
.render(Map.of("re2_text", contents));
// 生成一个新的 request,二次构建 复制
ChatClientRequest build = chatClientRequest.mutate()
.prompt(
Prompt.builder().content(re2Text).build()
).build();
return build;
}
@Override
public ChatClientResponse after(ChatClientResponse chatClientResponse, AdvisorChain advisorChain) {
return null;
}
@Override
public int getOrder() {
return 0;
}
}
ChatMemory(对话记忆)
接口变量(了解):
接口代码
public interface ChatMemory {
String DEFAULT_CONVERSATION_ID = "default";
String CONVERSATION_ID = "chat_memory_conversation_id";
default void add(String conversationId, Message message) {
Assert.hasText(conversationId, "conversationId cannot be null or empty");
Assert.notNull(message, "message cannot be null");
this.add(conversationId, List.of(message));
}
void add(String conversationId, List<Message> messages);
List<Message> get(String conversationId);
void clear(String conversationId);
}
String DEFAULT_CONVERSATION_ID = "default"; String CONVERSATION_ID = "chat_memory_conversation_id";
这两个常量在 Spring AI 的 ChatMemory 接口中扮演着“会话标识符”的关键角色,它们共同解决了“如何区分不同用户或不同对话”的问题。
简单来说,DEFAULT_CONVERSATION_ID 是“兜底方案”,而 CONVERSATION_ID 是“查找钥匙”。
1. DEFAULT_CONVERSATION_ID = "default"
作用:兜底的会话标识(单聊模式)
-
含义:这是一个默认的字符串常量,值为
"default"。 -
使用场景:当你的应用场景非常简单,不需要区分不同的用户(例如:一个单机运行的命令行机器人,或者一个不需要登录的简单测试接口),你可以直接使用这个常量作为
conversationId。 -
效果:所有调用都使用这个 ID,意味着所有的聊天记录都会混在同一个“窗口”里。对于多用户系统,绝对不能使用这个默认值,否则用户 A 会看到用户 B 的聊天记录。
2. CONVERSATION_ID = "chat_memory_conversation_id"
作用:上下文传递的“键名”(Key)
-
含义:这是一个字符串常量,定义了 Spring AI 内部上下文中用于查找会话 ID 的属性键。
-
使用场景:当你使用
ChatClient或ChatModel进行调用时,通常需要动态地传入当前用户的会话 ID(比如用户的 UUID)。你不需要把这个 ID 直接传给get()或add()方法,而是把它放入请求的上下文(Context)或参数(Advisors)中。 -
工作原理:
-
你在调用 AI 时,通过
.advisors()或上下文设置一个参数,键名为CONVERSATION_ID的值(即"chat_memory_conversation_id"),值为具体的会话 ID(如"user-123-session-456")。 -
Spring AI 的内部拦截器(如
MessageChatMemoryAdvisor)会拿着这个键名去上下文中查找。 -
找到后,它就知道当前操作应该归属于哪个具体的会话 ID。
-
总结对比
| 常量名 | 值 | 核心作用 | 形象比喻 |
|---|---|---|---|
| DEFAULT_CONVERSATION_ID | "default" |
默认值:当没有特定会话时使用。 | 就像是一个公共记事本,谁没带自己的本子,就都写在这个上面。 |
| CONVERSATION_ID | "chat_memory_conversation_id" |
查找键:用于在请求上下文中提取真正的会话 ID。 | 就像是存包柜的钥匙孔编号,系统通过这个编号去找到你具体存的是哪个包(会话)。 |
代码中的实际应用
在 MessageChatMemoryAdvisor 等内部组件中,代码逻辑通常长这样(伪代码):
// 1. 尝试从上下文中获取会话 ID,使用的 Key 就是 CONVERSATION_ID 常量
String conversationId = context.get(ChatMemory.CONVERSATION_ID);
// 2. 如果上下文中没找到(用户没传),则降级使用默认 ID
if (conversationId == null) {
conversationId = ChatMemory.DEFAULT_CONVERSATION_ID;
}
// 3. 使用最终确定的 ID 去存取消息
chatMemory.add(conversationId, message);
内存记忆(短暂的会话记忆)
内存记忆,顾名思义,就是存储在内存中的会话记忆,完成此次的连接会话后,记忆就会消失清除。
以下是最简单的一个对话模型
示例代码
/**
* 对话记忆
*
* @param dashScopeChatModel
*/
@Test
public void testMemory(@Autowired DashScopeChatModel dashScopeChatModel) {
// 创建对话记忆
MessageWindowChatMemory chatMemory = MessageWindowChatMemory.builder().build();
// 对话 ID
String conversationId = "xs001";
// 填写对话
UserMessage user1 = new UserMessage("我叫远之");
// 将对话添加到记忆中
chatMemory.add(conversationId, user1);
// 请求模型,对话
ChatResponse response1 = dashScopeChatModel
.call(new Prompt(
chatMemory.get(conversationId)
));
// 将返回的数据再次添加到 chatMemmery 中记忆,用于下一轮对话使用
chatMemory.add(conversationId, response1.getResult().getOutput());
// 下一轮对话
UserMessage user2 = new UserMessage("我叫什么?");
// 重复上面的步骤,添加用户请求内容,记录返回数据
chatMemory.add(conversationId, user2);
ChatResponse response2 = dashScopeChatModel.call(new Prompt(chatMemory.get(conversationId)));
chatMemory.add(conversationId, response2.getResult().getOutput());
// 打印最后模型返回的内容
System.out.println(response2.getResult().getOutput());
}
对话记忆,多用户隔离
对话不能所有用户用同一套对话记忆,
A、B 两个用户同时访问,
A 提问 a 问题,模型记录 a 问题并返回 a 问题的答案。
B 提问 b 问题,模型记录 b 问题属于 B 用户,返回 b 问题的答案。
而不能,A 用户问了 a 问题,之后 B 用户再去问题 b 问题时,B 用户返回了 a、b 两个问题的答案,会出现脏数据问题。此时就需要做数据隔离。
示例代码
数据隔离:chatMemmery 中提供了 ID 参数,不同的用户使用自己的私有 ID 即可。
/**
* 对话记忆,多用户隔离
*/
@Test
public void testMemoryDUser() {
String userA = "xs001"; // 用户A ID
String userB = "xs001"; // 用户B ID
String content = chatClient.prompt()
.user("我叫远之")
// 通过拦截器添加 chatMemory
.advisors(advisorSpec -> advisorSpec.param(ChatMemory.CONVERSATION_ID, userA))
.call()
.content();
System.out.println(content);
System.out.println("-------------------------------------------------------------------------");
content = chatClient.prompt()
.user("我叫什么?")
.advisors(advisorSpec -> advisorSpec.param(ChatMemory.CONVERSATION_ID, userA))
.call()
.content();
System.out.println(content);
System.out.println("-------------------------------------------------------------------------");
content = chatClient.prompt()
.user("我叫什么?")
.advisors(advisorSpec -> advisorSpec.param(ChatMemory.CONVERSATION_ID, userB))
.call()
.content();
System.out.println(content);
System.out.println("-------------------------------------------------------------------------");
}
ChatMemory 自动注入
注入的 Bean 是什么?
当你引入了 spring-ai-autoconfigure-model-chat-memory 依赖后,Spring Boot 的自动配置类(通常是 ChatMemoryAutoConfiguration)会执行以下操作:
-
创建 Bean:它会创建一个类型为
MessageWindowChatMemory的 Bean。 -
实现接口:
MessageWindowChatMemory类实现了ChatMemory接口。 -
注入:当你使用
@Autowired ChatMemory chatMemory时,Spring 容器会查找ChatMemory类型的 Bean,并将这个MessageWindowChatMemory实例注入进去。在的
init方法中,参数chatMemory的运行时类型其实是MessageWindowChatMemory。
代码逻辑深度解析
public void init(@Autowired ChatClient.Builder builder,
@Autowired ChatMemory chatMemory) { // 这里注入的是 MessageWindowChatMemory
// 1. 构建 Advisor
// PromptChatMemoryAdvisor 是 Spring AI 提供的一个拦截器
// 它的作用是在发送请求前获取历史消息,并在收到响应后保存新消息
PromptChatMemoryAdvisor advisor = PromptChatMemoryAdvisor.builder(chatMemory)
.build();
// 2. 配置 ChatClient
// 将这个 Advisor 设置为默认拦截器
// 这意味着每次使用这个 chatClient 对话,都会自动带上记忆功能
chatClient = builder.defaultAdvisors(advisor).build();
}
为什么是 MessageWindowChatMemory?
Spring AI 选择 MessageWindowChatMemory 作为默认实现是因为它实现了最经典的“滑动窗口”记忆策略:
-
核心机制:它只保留最近的 N 条消息(默认通常是 10 条,可以通过配置修改)。
-
工作流程:
-
当新消息加入时,如果总消息数未超过限制,直接添加。
-
如果超过限制,它会自动移除最早的一条消息,保持窗口大小恒定。
-
-
底层存储:它内部持有一个
ChatMemoryRepository(默认是InMemoryChatMemoryRepository),用于实际存储数据。
总结
-
接口:
ChatMemory -
实现类:
MessageWindowChatMemory -
功能:负责管理对话历史的“滑动窗口”逻辑(保留最近 N 条)。
-
你的代码:成功地将这个自动配置好的记忆组件集成到了
ChatClient中,使其具备了自动记忆上下文的能力。
POM 依赖
<!-- chatmemory 自动配置启动类 -->
<dependency>
    <groupId>org.springframework.ai</groupId>
    <artifactId>spring-ai-autoconfigure-model-chat-memory</artifactId>
</dependency>
示例代码
import com.alibaba.cloud.ai.dashscope.chat.DashScopeChatModel;
import org.junit.jupiter.api.BeforeEach;
import org.junit.jupiter.api.Test;
import org.springframework.ai.chat.client.ChatClient;
import org.springframework.ai.chat.client.advisor.PromptChatMemoryAdvisor;
import org.springframework.ai.chat.memory.ChatMemory;
import org.springframework.ai.chat.memory.ChatMemoryRepository;
import org.springframework.ai.chat.memory.MessageWindowChatMemory;
import org.springframework.ai.chat.messages.UserMessage;
import org.springframework.ai.chat.model.ChatResponse;
import org.springframework.ai.chat.prompt.Prompt;
import org.springframework.beans.factory.annotation.Autowired;
import org.springframework.boot.test.context.SpringBootTest;
import org.springframework.boot.test.context.TestConfiguration;
import org.springframework.context.annotation.Bean;
@SpringBootTest
public class TestMemory {
/**
* 初始化要给 client
*
* @param builder
* @param chatMemory
*/
ChatClient chatClient;
@BeforeEach
public void init(@Autowired ChatClient.Builder builder,
@Autowired ChatMemory chatMemory) {
chatClient = builder.defaultAdvisors(
PromptChatMemoryAdvisor.builder(chatMemory)
.build()
).build();
}
/**
* chatMemory
*/
@Test
public void testMemoryAdvisor() {
String content = chatClient.prompt()
.user("我叫远之")
.call()
.content();
System.out.println(content);
System.out.println("-------------------------------------------------------------------------");
content = chatClient.prompt()
.user("我叫什么?")
.call()
.content();
System.out.println(content);
System.out.println("-------------------------------------------------------------------------");
}
}
修改ChatMemory的注入类参数
/**
 * 配置 charMemory
 */
@TestConfiguration
static class Config {
    @Bean
    ChatMemory chatMemory(ChatMemoryRepository chatMemoryRepository) {
        return MessageWindowChatMemory.builder()
                .maxMessages(10) // 存储的最大对话次数
                .chatMemoryRepository(chatMemoryRepository) // chatMemory 要使用的存储类型
                .build();
    }
}
全部整合的代码
import com.alibaba.cloud.ai.dashscope.chat.DashScopeChatModel;
import org.junit.jupiter.api.BeforeEach;
import org.junit.jupiter.api.Test;
import org.springframework.ai.chat.client.ChatClient;
import org.springframework.ai.chat.client.advisor.PromptChatMemoryAdvisor;
import org.springframework.ai.chat.memory.ChatMemory;
import org.springframework.ai.chat.memory.ChatMemoryRepository;
import org.springframework.ai.chat.memory.MessageWindowChatMemory;
import org.springframework.ai.chat.messages.UserMessage;
import org.springframework.ai.chat.model.ChatResponse;
import org.springframework.ai.chat.prompt.Prompt;
import org.springframework.beans.factory.annotation.Autowired;
import org.springframework.boot.test.context.SpringBootTest;
import org.springframework.boot.test.context.TestConfiguration;
import org.springframework.context.annotation.Bean;
@SpringBootTest
public class TestMemory {
/**
* 初始化要给 client
*
* @param builder
* @param chatMemory
*/
ChatClient chatClient;
/**
* chatMemory 自定义依赖注入
* @param builder
* @param chatMemory
*/
@BeforeEach
public void init(@Autowired ChatClient.Builder builder,
@Autowired ChatMemory chatMemory) {
chatClient = builder.defaultAdvisors(
PromptChatMemoryAdvisor.builder(chatMemory)
.build()
).build();
}
/**
* 配置 charMemory
*/
@TestConfiguration
static class Config {
@Bean
ChatMemory chatMemory(ChatMemoryRepository chatMemoryRepository) {
return MessageWindowChatMemory.builder()
.maxMessages(10) // 存储的最大对话次数
.chatMemoryRepository(chatMemoryRepository)
.build();
}
}
/**
* 对话记忆
*
* @param dashScopeChatModel
*/
@Test
public void testMemory(@Autowired DashScopeChatModel dashScopeChatModel) {
// 创建对话记忆
MessageWindowChatMemory chatMemory = MessageWindowChatMemory.builder().build();
// 对话 ID
String conversationId = "xs001";
// 填写对话
UserMessage user1 = new UserMessage("我叫远之");
// 将对话添加到记忆中
chatMemory.add(conversationId, user1);
// 请求模型,对话
ChatResponse response1 = dashScopeChatModel
.call(new Prompt(
chatMemory.get(conversationId)
));
// 将返回的数据再次添加到 chatMemmery 中记忆,用于下一轮对话使用
chatMemory.add(conversationId, response1.getResult().getOutput());
// 下一轮对话
UserMessage user2 = new UserMessage("我叫什么?");
// 重复上面的步骤,添加用户请求内容,记录返回数据
chatMemory.add(conversationId, user2);
ChatResponse response2 = dashScopeChatModel.call(new Prompt(chatMemory.get(conversationId)));
chatMemory.add(conversationId, response2.getResult().getOutput());
// 打印最后模型返回的内容
System.out.println(response2.getResult().getOutput());
}
/**
* chatMemory
*/
@Test
public void testMemoryAdvisor() {
String content = chatClient.prompt()
.user("我叫远之")
.call()
.content();
System.out.println(content);
System.out.println("-------------------------------------------------------------------------");
content = chatClient.prompt()
.user("我叫什么?")
.call()
.content();
System.out.println(content);
System.out.println("-------------------------------------------------------------------------");
}
/**
* 测试对话记忆,多用户隔离
*/
@Test
public void testMemoryDUser() {
String userA = "xs001";
String userB = "xs001";
String content = chatClient.prompt()
.user("我叫远之")
.advisors(advisorSpec -> advisorSpec.param(ChatMemory.CONVERSATION_ID, userA))
.call()
.content();
System.out.println(content);
System.out.println("-------------------------------------------------------------------------");
content = chatClient.prompt()
.user("我叫什么?")
.advisors(advisorSpec -> advisorSpec.param(ChatMemory.CONVERSATION_ID, userA))
.call()
.content();
System.out.println(content);
System.out.println("-------------------------------------------------------------------------");
content = chatClient.prompt()
.user("我叫什么?")
.advisors(advisorSpec -> advisorSpec.param(ChatMemory.CONVERSATION_ID, userB))
.call()
.content();
System.out.println(content);
System.out.println("-------------------------------------------------------------------------");
}
}
JDBCMemory 关系型数据库记忆存储
maven 依赖包
<!-- springai 对话存储到数据库--> <dependency> <groupId>org.springframework.ai</groupId> <artifactId>spring-ai-starter-model-chat-memory-repository-jdbc</artifactId> </dependency> <!-- JDBC 数据库驱动 --> <!-- jdbc 驱动--> <dependency> <groupId>org.springframework.boot</groupId> <artifactId>spring-boot-starter-jdbc</artifactId> </dependency> <!-- mysql 连接数据库依赖--> <dependency> <groupId>com.mysql</groupId> <artifactId>mysql-connector-j</artifactId> <scope>runtime</scope> </dependency>
示例代码
import com.alibaba.cloud.ai.dashscope.chat.DashScopeChatModel;
import org.junit.jupiter.api.BeforeEach;
import org.junit.jupiter.api.Test;
import org.springframework.ai.chat.client.ChatClient;
import org.springframework.ai.chat.client.advisor.PromptChatMemoryAdvisor;
import org.springframework.ai.chat.memory.ChatMemory;
import org.springframework.ai.chat.memory.MessageWindowChatMemory;
import org.springframework.ai.chat.memory.repository.jdbc.JdbcChatMemoryRepository;
import org.springframework.beans.factory.annotation.Autowired;
import org.springframework.boot.test.context.SpringBootTest;
import org.springframework.boot.test.context.TestConfiguration;
import org.springframework.context.annotation.Bean;
@SpringBootTest
public class TestJDBCMemory {
/**
* 公共变量方法
*/
ChatClient chatClient;
/**
* chatClient 配置
* @param dashScopeChatModel 手动注入要使用的模型
* @param chatMemory 自动注入 chatMemory
*/
@BeforeEach
public void init(@Autowired DashScopeChatModel dashScopeChatModel,
@Autowired ChatMemory chatMemory) {
chatClient = ChatClient.builder(dashScopeChatModel)
.defaultAdvisors(
PromptChatMemoryAdvisor.builder(chatMemory)
.build()
)
.build();
}
/**
* chatMemory 对话记忆配置
*/
@TestConfiguration
static class Config {
/**
* @param jdbcChatMemoryRepository 使用的记录类型
* @return 返回 bean
*/
@Bean
ChatMemory chatMemory(JdbcChatMemoryRepository jdbcChatMemoryRepository) {
return MessageWindowChatMemory
.builder()
.maxMessages(1) // 存储的最大对话次数
.chatMemoryRepository(jdbcChatMemoryRepository) // 使用的记录类型
.build();
}
}
/**
* 测试对话记忆,多用户隔离
*/
@Test
public void testMemoryDUser() {
String content = chatClient.prompt()
.user("我叫远之")
.advisors(advisorSpec -> advisorSpec.param(ChatMemory.CONVERSATION_ID, "xs001"))
.call()
.content();
System.out.println(content);
System.out.println("-------------------------------------------------------------------------");
content = chatClient.prompt()
.user("我叫什么?")
.advisors(advisorSpec -> advisorSpec.param(ChatMemory.CONVERSATION_ID, "xs001"))
.call()
.content();
System.out.println(content);
System.out.println("-------------------------------------------------------------------------");
content = chatClient.prompt()
.user("我叫什么?")
.advisors(advisorSpec -> advisorSpec.param(ChatMemory.CONVERSATION_ID, "xs002"))
.call()
.content();
System.out.println(content);
System.out.println("-------------------------------------------------------------------------");
}
}
配置文件
spring: application: name: chat-client ai: chat: memory: repository: # Spring AI 中用于配置基于 JDBC 的聊天记忆持久化存储的核心命名空间。通过该配置,可以将对话历史保存到关系型数据库(如 MySQL、PostgreSQL)中,解决内存存储易失性和容量限制问题。 jdbc: # 开发环境:总是尝试初始化表结构 # always(总是初始化) # never(从不) # embedded(默认值) initialize-schema: always # 可选:自定义建表脚本路径 schema: classpath:/sql/schema-mysql.sql # 指定数据库平台,确保使用正确的 SQL 方言 # 通常可省略,由框架自动检测 mysql、postgres、sqlserver、hsql platform: mysql datasource: # 数据库配置 driver-class-name: com.mysql.cj.jdbc.Driver url: jdbc:mysql://localhost:3306/springai?serverTimezone=Asia/Shanghai&useUnicode=true&characterEncoding=utf-8&allowPublicKeyRetrieval=true&useSSL=false username: root password: xxxxx
解释
spring.ai.chat.memory.repository.jdbc.initialize-schema
-
embedded(默认值)
-
作用:仅在检测到嵌入式数据库时自动初始化。
-
行为逻辑:
-
如果应用使用的是嵌入式数据库(如 H2、HSQLDB、Derby),Spring AI 会在启动时自动执行建表脚本。
-
如果使用的是生产级外部数据库(如 MySQL、PostgreSQL、Oracle),则不会自动初始化表结构。
-
-
适用场景:开发测试环境或使用内存/文件型数据库的快速原型开发。这是为了安全起见,防止在生产环境中意外修改数据库结构。
-
always
-
作用:每次应用启动时都尝试自动初始化。
-
行为逻辑:
-
无论使用何种数据库,应用启动时都会尝试执行建表 SQL 脚本。
-
通常脚本中会包含
CREATE TABLE IF NOT EXISTS语句,因此如果表已存在且结构兼容,通常不会报错;但如果表结构不一致或权限不足,可能会导致启动失败。
-
-
适用场景:
-
开发环境:方便快速搭建环境,无需手动建表。
-
首次部署:确保新实例启动时数据库表结构就绪。
-
注意:部分早期版本或特定配置下,可能需要将其设置为布尔值
true才能生效,但在标准 Spring Boot 规范中推荐使用枚举值always。
-
-
never
-
作用:禁止自动初始化。
-
行为逻辑:
-
Spring AI 在启动时完全跳过建表步骤。
-
如果数据库中不存在
SPRING_AI_CHAT_MEMORY表,应用在尝试读写聊天记忆时会抛出“表不存在”的异常。
-
-
适用场景:
-
生产环境(推荐):生产环境通常要求数据库结构变更由专业的迁移工具(如 Flyway、Liquibase)或 DBA 手动管理,以确保版本控制和安全性。
-
权限受限环境:当应用数据库账号没有
CREATE TABLE权限时,必须设为never并提前手动建表。
-
spring.ai.chat.memory.repository.jdbc.platform
可用的值:默认自动检测,可以不用写
mysql postgres sqlserver hsql
注意:自定义的,如 Oracle、Dameng(达梦) 这些不支持的数据库时,必须设置该参数,找一个接近的目标数据库的方言,防止报错。
spring.ai.chat.memory.repository.jdbc.schema
可执行的初始化 sql 文件
关键注意事项
A. 表名与结构
无论配置如何,JdbcChatMemoryRepository 默认操作的表名为 SPRING_AI_CHAT_MEMORY。该表通常包含以下核心字段:
-
conversation_id: 会话 ID,用于隔离不同用户的对话。 -
content: 消息内容。 -
type: 消息类型(USER, ASSISTANT, SYSTEM 等)。 -
timestamp: 消息时间戳。若设置
initialize-schema: never,请务必确保数据库中已存在该表,否则运行时会抛出“表不存在”异常。B. 方言适配 (Dialect)
platform参数至关重要。如果使用的数据库不在官方原生支持列表(MySQL, PostgreSQL, SQL Server, HSQLDB)中,或者自动检测失效,必须:
-
手动设置
platform为最接近的方言。 -
或者在 Java Config 中手动构建
JdbcChatMemoryRepositoryBean,并注入自定义的JdbcChatMemoryRepositoryDialect实现。
数据库初始化文件
CREATE TABLE IF NOT EXISTS SPRING_AI_CHAT_MEMORY(
    `conversation_id` VARCHAR ( 36 ) NOT NULL,
    `content` TEXT NOT NULL,
    `type` VARCHAR ( 10 ) NOT NULL,
    `timestamp` TIMESTAMP NOT NULL,
    INDEX `SPRING_AI_CHAT_MEMORY_CONVERSATION_ID_TIMESTAMP_IDX` (
                                                                    `conversation_id` ,`timestamp`
                                                                )
    );
使用工具
JdbcChatMemoryRepository 是 Spring AI 框架中用于实现聊天记录持久化的核心组件,它通过 JDBC 将对话历史存储到关系型数据库(如 MySQL、PostgreSQL 等),从而解决内存存储带来的数据易失、内存溢出和无法追溯历史等问题。
该组件实现了 ChatMemoryRepository 接口,支持多数据库方言适配,并与 MessageWindowChatMemory 配合使用,实现基于会话 ID(conversationId)的上下文管理与持久化存储。其主要优势包括:
-
数据持久化:服务重启后仍可恢复用户对话历史,提升用户体验。
-
避免内存泄漏:聊天记录不再堆积在 JVM 内存中,防止 OOM(Out of Memory)风险。
-
支持多会话隔离:通过
conversationId实现不同用户的会话独立存储,避免串聊。 -
可扩展性强:适用于生产环境,支持数据库备份、数据分析与长期记忆构建。
拓展
1、 不是所有支持 JDBC 连接的数据库都可以直接作为 JdbcChatMemoryRepository 的记忆存储数据库。
虽然 JdbcChatMemoryRepository 基于标准的 JDBC 技术,理论上可以连接任何提供 JDBC 驱动的数据库,但在 Spring AI 框架中,它依赖于特定的 数据库方言(Dialect) 来生成符合该数据库语法的 SQL 语句。如果某个数据库没有对应的方言实现,或者其 SQL语法与现有方言不兼容,则无法直接使用。
2、Spring AI 内置了以下数据库的方言实现,配置好依赖和连接信息后即可直接使用:
-
PostgreSQL
-
MySQL / MariaDB
-
Microsoft SQL Server
-
HSQLDB (通常用于测试或嵌入式场景)
Oracle, DB2, SQLite, ClickHouse, Dameng(达梦) 等暂不支持
3、自扩展
Spring AI 提供了 JdbcChatMemoryRepositoryDialect 接口。如果使用的数据库不在原生支持列表中,可以手动实现该接口,定义适合该数据库的 SQL 语句(如创建表、插入消息、查询历史消息、删除消息等语句),然后通过 Java Config 手动构建 JdbcChatMemoryRepository Bean 并注入自定义的 Dialect。
示例代码逻辑
@Bean
public ChatMemoryRepository chatMemoryRepository(JdbcTemplate jdbcTemplate,
                                                 PlatformTransactionManager transactionManager) {
    // 假设你为 Oracle 实现了 OracleChatMemoryDialect
    JdbcChatMemoryRepositoryDialect dialect = new OracleChatMemoryDialect();

    return JdbcChatMemoryRepository.builder()
            .jdbcTemplate(jdbcTemplate)
            .dialect(dialect)
            .transactionManager(transactionManager)
            .build();
}
4、关键依赖条件
-
引入正确的 Starter 依赖:必须添加
spring-ai-starter-model-chat-memory-repository-jdbc。 -
表结构初始化:
-
可以通过配置
spring.ai.chat.memory.repository.jdbc.initialize-schema=always让框架自动建表(仅限支持的方言)。 -
如果自动初始化失败或不支持,你需要手动执行 SQL 脚本创建
SPRING_AI_CHAT_MEMORY表。不同数据库的建表语句(DDL)可能不同,需参考对应方言的 Schema 文件。
-
-
JDBC 驱动存在 :项目中必须包含目标数据库的 JDBC 驱动依赖(如
mysql-connector-j,postgresql,mssql-jdbc等)。
总结
-
可以直接用的:PostgreSQL, MySQL, MariaDB, SQL Server, HSQLDB。
-
不能直接用的:Oracle, SQLite, DB2, 国产数据库(达梦、OceanBase等)以及其他非标准关系型数据库。
-
解决方案:对于不支持的数据库,你需要自定义实现
JdbcChatMemoryRepositoryDialect接口,才能将其用作记忆存储后端。“支持 JDBC”是必要条件,但不是充分条件。能否使用取决于 Spring AI 是否提供了该数据库的方言适配
RedisMemory Reids数据库记忆存储
Maven依赖包
<!--        springalibaba 事项 ai 记忆存储到 redis-->
        <dependency>
            <groupId>com.alibaba.cloud.ai</groupId>
            <artifactId>spring-ai-alibaba-starter-memory-redis</artifactId>
        </dependency>
<!--     Jedis 依赖 -->
        <dependency>
            <groupId>redis.clients</groupId>
            <artifactId>jedis</artifactId>
            <version>5.2.0</version>
        </dependency>
示例代码
import com.alibaba.cloud.ai.dashscope.chat.DashScopeChatModel;
import com.alibaba.cloud.ai.memory.redis.RedisChatMemoryRepository;
import org.junit.jupiter.api.BeforeEach;
import org.junit.jupiter.api.Test;
import org.springframework.ai.chat.client.ChatClient;
import org.springframework.ai.chat.client.advisor.PromptChatMemoryAdvisor;
import org.springframework.ai.chat.memory.ChatMemory;
import org.springframework.ai.chat.memory.MessageWindowChatMemory;
import org.springframework.beans.factory.annotation.Autowired;
import org.springframework.beans.factory.annotation.Value;
import org.springframework.boot.test.context.SpringBootTest;
import org.springframework.boot.test.context.TestConfiguration;
import org.springframework.context.annotation.Bean;
@SpringBootTest
public class TestRedisMemory {
/**
* 公共变量
*/
ChatClient chatClient;
/**
* chatClient 配置
* @param dashScopeChatModel 手动注入要使用的模型
* @param chatMemory 自动注入 chatMemory
*/
@BeforeEach
public void init(@Autowired DashScopeChatModel dashScopeChatModel,
@Autowired ChatMemory chatMemory) {
chatClient = ChatClient.builder(dashScopeChatModel)
.defaultAdvisors(PromptChatMemoryAdvisor.builder(chatMemory).build())
.build();
}
/**
* redis momory 配置
*/
@TestConfiguration
static class Config {
@Value("${spring.ai.memory.redis.host}")
private String redisHost;
@Value("${spring.ai.memory.redis.port}")
private int redisPort;
@Value("${spring.ai.memory.redis.password}")
private String redisPassword;
@Value("${spring.ai.memory.redis.timeout}")
private int redisTimeout;
@Bean
public RedisChatMemoryRepository redisChatMemoryRepository() {
return RedisChatMemoryRepository.builder()
.host(redisHost) // redis 地址
.port(redisPort) // redis 端口
// .password(redisPassword) // redis 密码
.timeout(redisTimeout) // redis 超时时间
.build();
}
/**
* @param redisChatMemoryRepository 使用的记录类型
* @return 返回 bean
*/
@Bean
ChatMemory chatMemory(RedisChatMemoryRepository redisChatMemoryRepository) {
return MessageWindowChatMemory
.builder()
.maxMessages(10)
.chatMemoryRepository(redisChatMemoryRepository).build();
}
}
/**
* 测试对话记忆,多用户隔离
*/
@Test
public void testMemoryDUser() {
String content = chatClient.prompt()
.user("我叫远之")
.advisors(advisorSpec -> advisorSpec.param(ChatMemory.CONVERSATION_ID, "xs001"))
.call()
.content();
System.out.println(content);
System.out.println("-------------------------------------------------------------------------");
content = chatClient.prompt()
.user("我叫什么?")
.advisors(advisorSpec -> advisorSpec.param(ChatMemory.CONVERSATION_ID, "xs001"))
.call()
.content();
System.out.println(content);
System.out.println("-------------------------------------------------------------------------");
content = chatClient.prompt()
.user("我叫什么?")
.advisors(advisorSpec -> advisorSpec.param(ChatMemory.CONVERSATION_ID, "xs002"))
.call()
.content();
System.out.println(content);
System.out.println("-------------------------------------------------------------------------");
}
}
配置文件
spring:
  application:
    name: chat-client
  ai:
    memory:  # redis 配置
      redis:
        host: localhost
        port: 6379
        timeout: 5000
        password:
拓展
RedisChatMemoryRepository 是 Spring AI 框架中用于将会话聊天历史(Chat Memory)持久化存储到 Redis 数据库的核心组件。它实现了 ChatMemoryRepository 接口,解决了默认内存存储(InMemoryChatMemoryRepository)在服务重启后数据丢失以及不支持分布式部署的问题。
以下是关于 RedisChatMemoryRepository 的核心功能、架构角色、实现方式及配置指南。
1. 核心功能与优势
-
持久化存储:将对话消息序列化为 JSON 或其他格式存储在 Redis 中,确保服务重启后聊天记录不丢失。
-
分布式支持:由于 Redis 是外部存储,多个微服务实例可以共享同一份聊天记忆,适合集群和微服务架构。
-
自动过期(TTL):支持为会话设置生存时间(Time-To-Live),自动清理长时间未活动的对话,节省存储空间。
-
高性能读写:利用 Redis内存数据库特性,提供低延迟的消息读取和写入能力。
2. 在 Spring AI 架构中的角色
Spring AI 的聊天记忆体系采用分层设计,RedisChatMemoryRepository 位于数据存储层:
-
ChatMemory (业务逻辑层):如
MessageWindowChatMemory,负责管理记忆策略(例如只保留最近 N 条消息)。它不直接操作数据库,而是委托给 Repository。 -
ChatMemoryRepository (数据存储层):
RedisChatMemoryRepository在此层实现。它只负责数据的 CRUD(增删改查),不关心业务逻辑(如窗口裁剪)。 -
Advisor (拦截器层):如
MessageChatMemoryAdvisor,在调用 LLM 前后自动拦截请求,从ChatMemory获取历史并保存新消息。注意:自定义存储时,只需实现或配置
ChatMemoryRepository,无需修改 Advisor 或 ChatMemory 的逻辑,符合开闭原则。
3. 主要 API 方法
根据 Spring AI 的标准接口定义,RedisChatMemoryRepository 通常包含以下核心方法:
-
List<Message> get(String conversationId): 获取指定会话的所有历史消息。 -
List<Message> get(String conversationId, int lastN): 获取指定会话最近的 N 条消息。 -
void saveAll(String conversationId, List<Message> messages): 保存或替换指定会话的全部消息。 -
void add(String conversationId, Message message): 向指定会话追加单条消息。 -
void clear(String conversationId): 清空指定会话的所有消息。 -
List<String> findConversationIds(): 获取所有存在的会话 ID 列表。
4. 实现与集成方式
目前主要有两种方式使用 Redis 作为聊天记忆存储:
方案 A:使用官方或社区提供的 Starter (推荐)
Spring AI 生态中存在第三方或社区维护的 Starter 包(如 spring-ai-starter-model-chat-memory-repository-redis),提供了开箱即用的自动配置。
1. 添加依赖
<dependency>
    <groupId>com.github.cyanty</groupId> <!-- 示例 groupId,具体视使用的库而定 -->
    <artifactId>spring-ai-starter-model-chat-memory-repository-redis</artifactId>
    <version>1.0.0</version>
</dependency>
2. 配置文件 (application.yml)
spring:
  ai:
    chat:
      memory:
        repository:
          redis:
            key-prefix: "my_chat_memory:" # Redis Key 前缀
            time-to-live: "7d"            # 会话过期时间
  data:
    redis:
      host: localhost
      port: 6379
3. 使用 直接注入即可使用,Spring Boot 会自动配置 Bean:
@Autowired
private RedisChatMemoryRepository redisChatMemoryRepository;
方案 B:自定义实现 (手动编码)
如果需要更细粒度的控制,可以手动实现 ChatMemoryRepository 接口。
1. 核心代码结构
public class CustomRedisChatMemoryRepository implements ChatMemoryRepository {
private final StringRedisTemplate redisTemplate;
private final ObjectMapper objectMapper;
private final String keyPrefix;
public CustomRedisChatMemoryRepository(StringRedisTemplate redisTemplate, ObjectMapper objectMapper) {
this.redisTemplate = redisTemplate;
this.objectMapper = objectMapper;
this.keyPrefix = "chat:memory:";
}
@Override
public List<Message> findByConversationId(String conversationId) {
String key = keyPrefix + conversationId;
String json = redisTemplate.opsForValue().get(key);
if (json == null) return Collections.emptyList();
try {
// 反序列化 JSON 为 Message 列表
return objectMapper.readValue(json, new TypeReference<List<Message>>() {});
} catch (JsonProcessingException e) {
throw new RuntimeException("Failed to deserialize messages", e);
}
}
@Override
public void saveAll(String conversationId, List<Message> messages) {
String key = keyPrefix + conversationId;
try {
String json = objectMapper.writeValueAsString(messages);
redisTemplate.opsForValue().set(key, json);
// 可选:设置过期时间
// redisTemplate.expire(key, Duration.ofDays(7));
} catch (JsonProcessingException e) {
throw new RuntimeException("Failed to serialize messages", e);
}
}
@Override
public void deleteByConversationId(String conversationId) {
redisTemplate.delete(keyPrefix + conversationId);
}
// 其他方法实现...
}
2. 注册 Bean 在配置类中将自定义实现注册为 Bean,Spring AI 会自动识别并使用它。
5. 最佳实践与优化
-
序列化选择:建议使用 Jackson 进行 JSON 序列化,确保
Message对象(包括用户消息、助手消息、系统消息)能正确转换。 -
Key 设计:使用清晰的前缀(如
spring_ai:chat:{conversationId})以便于管理和清理。 -
性能优化:
-
对于高频读写,确保 Redis 连接池配置合理。
-
如果只需要最近几条消息,使用
get(conversationId, lastN)避免加载全部历史。 -
利用 Redis 的 List 或 Stream 数据结构可能比简单的 String JSON 更高效地处理消息追加操作(取决于具体实现)。
-
-
安全性:在生产环境中,务必配置 Redis 密码和 SSL 连接。
通过引入
RedisChatMemoryRepository,你可以构建出高可用、可扩展且具备持久化能力的 AI 聊天应用,有效解决大模型无状态带来的上下文管理难题。
Agent SpringAI TOOL 重点、重点、重点
作用与定义:详细读一下
TOOL 可以理解 AI 模型的手脚,AI 如果只是可以回答问题,就是只是一个聊天工具,而添加上 TOOL 后,AI 就可以操作调用其他功能。
比如,请求其他服务的 API、调用接口等等。不再是只会在窗口回应用户的问答模型,而是可以帮助用户做事的工具。
简单来说,@Tool 注解只是一个“标记”,Spring AI 框架会识别这个标记,并自动完成一系列复杂的“翻译”和“连接”工作,从而让 AI 模型能够理解并调用你的 Java 方法。
@Tool 注解本身并不能让 AI 直接调用方法。它更像是一个触发器,启动了 Spring AI 框架背后强大的自动化流程:
@Tool 注解 → Spring AI 扫描并生成“工具说明书”(JSON Schema) → 将“说明书”提供给 AI 模型 → AI 模型决定调用并返回调用指令 → Spring AI 拦截指令并执行真实的 Java 方法 → 将执行结果返回给 AI 模型 → AI 模型整合结果并生成最终回答。
1. 工具定义与描述:给 AI 一本“说明书”
当使用 @Tool 注解时,实际上是在为方法创建一份 AI 能够理解的“说明书”。
-
@Tool(description = "..."): 注解中的description属性是关键。它用自然语言清晰地描述了这个方法的功能、用途和返回值。这就像告诉 AI:“当需要完成某项任务时,可以使用我这个工具”。 -
参数描述 (
@ToolParam或@JsonPropertyDescription): 同样,方法的参数也需要描述。通过@ToolParam(description = "...")或@JsonPropertyDescription等注解,告诉 AI 调用这个工具时需要提供什么信息,以及这些信息的具体格式和要求。例如,一个获取天气的方法,其“说明书”会包含:
-
工具名称:
getWeather -
工具描述: “获取指定城市的天气预报”
-
参数描述:
city(城市名称,例如 "Beijing")
2. 工具注册与转换:将 Java 方法“翻译”给 AI
这是最核心的一步。Spring AI 框架在后台自动完成了以下工作:
-
扫描与发现: 当将一个包含
@Tool方法的类(例如WeatherService)注册到ChatClient或ChatModel时(例如通过.tools(weatherService)),Spring AI 会利用反射机制扫描这个类,找出所有被@Tool注解标记的方法。 -
生成工具定义 (JSON Schema): Spring AI 会将这些方法的信息(方法名、描述、参数名、参数描述、参数类型等)“翻译”成一个大语言模型(LLM)能够理解的标准格式,通常是 JSON Schema。这个 JSON Schema 就是给 AI 模型的“工具列表”或“能力清单”。
-
发送给 AI 模型: 在向 AI 模型发送用户请求(Prompt)时,Spring AI 会悄悄地将这份“工具列表”也一并发送给 AI 模型。此时,AI 模型不仅知道了用户的问题,还知道了它拥有哪些可以调用的工具。
3. 调用与执行循环:AI 与框架的“对话”
当 AI 模型接收到用户问题和工具列表后,一个精妙的协作循环就开始了:
-
AI 决策: AI 模型分析用户的问题(例如,“北京明天天气怎么样?”),并根据收到的“工具列表”判断是否需要调用某个工具来更好地回答问题。如果决定调用,它会生成一个结构化的函数调用请求,而不是直接的文本回复。例如:
{ "name": "getWeather", "arguments": { "city": "北京" } }。 -
框架拦截与执行: Spring AI 框架接收到 AI 模型的这个“函数调用请求”。它会解析这个请求,找到对应的 Java 方法
getWeather,并使用 AI 提供的参数city="北京"来实际执行这个方法。 -
返回结果:
getWeather方法执行完毕,返回结果(例如,“北京天晴”)。Spring AI 框架会捕获这个结果。 -
结果回传: Spring AI 将这个方法执行的结果再次“翻译”成 AI 模型能理解的格式,并作为新一轮的对话内容发送回给 AI 模型。
-
生成最终回答: AI 模型收到工具的执行结果,结合最初的用户问题,生成一个包含真实数据的、最终的、友好的自然语言回答,例如:“北京明天天气晴朗,最高气温25摄氏度。”
示例代码
controller
前端请求 / API 请求入口
import org.springframework.ai.chat.client.ChatClient;
import org.springframework.web.bind.annotation.RequestMapping;
import org.springframework.web.bind.annotation.RequestParam;
import org.springframework.web.bind.annotation.RestController;
@RestController
public class ToolsController {
ChatClient chatClient;
public ToolsController(ChatClient.Builder chatClientBuilder,
ToolsService weatherService) {
this.chatClient = chatClientBuilder
// 将工具绑定到对话上
.defaultTools(weatherService)
.build();
}
/**
* 测试工具
*
* @param message 参数
* @return 返回
*/
@RequestMapping("tool")
public String tool(@RequestParam(value = "message", defaultValue = "") String message) {
return chatClient.prompt().user(message)
.call().content();
}
}
Tool Service
Tool 定义服务
@Tool(description = "描述")
description:书写该方法的使用说明,什么情况下使用该方法。
用自然语言清晰地描述了这个方法的功能、用途和返回值。这就像告诉 AI:“当你需要完成某项任务时,可以使用我这个工具”。
@ToolParam(description = "描述")
同样,方法的参数也需要描述。通过 @ToolParam(description = "...") 或 @JsonPropertyDescription 等注解,你告诉 AI 调用这个工具时需要提供什么信息,以及这些信息的具体格式和要求。
import org.springframework.ai.tool.annotation.Tool;
import org.springframework.ai.tool.annotation.ToolParam;
import org.springframework.beans.factory.annotation.Autowired;
import org.springframework.stereotype.Service;
@Service
public class ToolsService {
@Autowired
private WeatherService weatherService;
// @Tool 高速大模型提供了什么工具
@Tool(description = "天气")
public String cancel(
// @ToolParam 告诉大模型调用工具需要什么参数
@ToolParam(description = "地市") String city,
@ToolParam(description = "日期") String time
) {
return weatherService.getWeather(address, time);
}
}
api server
写的一个任意方法啊,后期在上面的代码中 TooService 中,被 @Tool 修饰的方法中替换为任意方法
import org.springframework.stereotype.Service;
@Service
public class WeatherService {
/**
* 查询天气接口
*
* @param address 地市
* @param time 日期
* @return 天气
*/
public String getWeather(String city, String time) {
String msg = city + time +"号天气晴朗!";
System.out.println(msg);
return msg;
}
}
指定类型返回
示例代码
import com.alibaba.cloud.ai.dashscope.chat.DashScopeChatModel;
import com.alibaba.cloud.ai.memory.redis.RedisChatMemoryRepository;
import org.junit.jupiter.api.BeforeEach;
import org.junit.jupiter.api.Test;
import org.springframework.ai.chat.client.ChatClient;
import org.springframework.ai.chat.client.advisor.PromptChatMemoryAdvisor;
import org.springframework.ai.chat.memory.ChatMemory;
import org.springframework.ai.chat.memory.MessageWindowChatMemory;
import org.springframework.ai.chat.model.ChatResponse;
import org.springframework.ai.chat.prompt.PromptTemplate;
import org.springframework.ai.converter.BeanOutputConverter;
import org.springframework.beans.factory.annotation.Autowired;
import org.springframework.beans.factory.annotation.Value;
import org.springframework.boot.test.context.SpringBootTest;
import org.springframework.boot.test.context.TestConfiguration;
import org.springframework.context.annotation.Bean;
import java.util.Map;
@SpringBootTest
public class TestStructures {
ChatClient chatClient;
@BeforeEach
public void init(@Autowired DashScopeChatModel dashScopeChatModel,
@Autowired ChatMemory chatMemory) {
chatClient = ChatClient
.builder(dashScopeChatModel)
.defaultAdvisors(PromptChatMemoryAdvisor.builder(chatMemory).build())
.build();
}
@TestConfiguration
static class Config {
@Value("${spring.ai.memory.redis.host}")
private String redisHost;
@Value("${spring.ai.memory.redis.port}")
private int redisPort;
@Value("${spring.ai.memory.redis.password}")
private String redisPassword;
@Value("${spring.ai.memory.redis.timeout}")
private int redisTimeout;
@Bean
public RedisChatMemoryRepository redisChatMemoryRepository() {
return RedisChatMemoryRepository.builder()
.host(redisHost)
.port(redisPort)
// .password(redisPassword)
.timeout(redisTimeout)
.build();
}
@Bean
ChatMemory chatMemory(RedisChatMemoryRepository redisChatMemoryRepository) {
return MessageWindowChatMemory
.builder()
.maxMessages(10)
.chatMemoryRepository(redisChatMemoryRepository).build();
}
}
@Test
public void testBoolOut() {
Boolean isComplain = chatClient
.prompt()
.system("判断当前用户信息是否表达投诉意图?只能用 true 或 false 回答,不要输出多余内容")
.user("商品质量不行,我要退货!")
.call()
.entity(Boolean.class);
if (Boolean.TRUE.equals(isComplain)) {
System.out.println("用户投诉");
} else {
System.out.println("系统机器人");
}
}
public record UserInfo(String name, String age, String job, String text) {
}
@Test
public void testPojoOut() {
UserInfo entity = chatClient
.prompt()
.system("从下面的对话中提取出姓名、年龄、工作以为这段话的目的")
.user("姓名:张三,年龄:30,工作:编辑员,与2025年乘车离开香港")
.call()
.entity(UserInfo.class);
System.out.println(entity);
}
@Test
public void testLowEntityOut(
@Autowired DashScopeChatModel dashScopeChatModel
) {
BeanOutputConverter<UserInfo> beanOutputConverter = new BeanOutputConverter<>(UserInfo.class);
String format = beanOutputConverter.getFormat();
System.out.println(format);
String actor = "周星驰";
String template = "提供5部{actor}地点电影。{format}";
PromptTemplate promptTemplate = PromptTemplate.builder()
.template(template)
.variables(Map.of("actor", actor, "format", format))
.build();
ChatResponse response = dashScopeChatModel.call(
promptTemplate.create()
);
UserInfo convert = beanOutputConverter.convert(response.getResult().getOutput().getText());
System.out.println(convert);
}
}
AtomGit 是由开放原子开源基金会联合 CSDN 等生态伙伴共同推出的新一代开源与人工智能协作平台。平台坚持“开放、中立、公益”的理念,把代码托管、模型共享、数据集托管、智能体开发体验和算力服务整合在一起,为开发者提供从开发、训练到部署的一站式体验。
更多推荐
 5
5 0
0- 0


 已为社区贡献1条内容

所有评论(0)