002.OpenClaw脚本部署-渠道对接全指南
OpenClaw部署
前置准备
- 大模型key
安装过程或安装完后的配置,需要通过key对接一个大模型,支持丰富的大模型对接,常见的有OpenAI、Anthropic、MiniMax、Moonshot AI (Kimi K2.5)、Google、xAI (Grok)、Qwen (OAuth)、Qianfan、Alibaba Cloud Model Studio、Copilot、OllamavLLM等。
本实验基于 火山方舟 进行演示,方舟apikey的创建可在API Key 管理 进行。
使用方舟 Coding Plan 使用更实惠,具体可参考:方舟 Coding Plan 。
类型:Volcano Engine
模型ID:ark-code-latest
Base URL:https://ark.cn-beijing.volces.com/api/coding/v3
API Key:d7ac0990-cac1-4c91-86fa-6fxxxxxxxxxx
提示:务必使用 Coding Plan 支持的模型及 Base URL:https://ark.cn-beijing.volces.com/api/coding/v3(兼容 OpenAI 协议)或https://ark.cn-beijing.volces.com/api/coding(兼容 Anthropic 接口协议)。
其他模型无法在 Coding Plan 中使用。
如未使用指定的 Base URL,将无法使用 Coding Plan 额度,并可能产生额外 API 请求的费用。
提示:若想申请免费token来使用和验证,可参考:玩 OpenClaw 不花一分钱
提示:对于火山方舟对接 openclaw 可参考:OpenClaw (原 Clawdbot) 。
- Web搜素
后续初始化的时候建议配置搜索提供商(Search provider),也就是 OpenClaw 用来获取网页搜索或信息检索结果的来源。
本安装过程计划采用Kimi,因此需要创建Kimi的API key,开放平台 。
类型:Kimi
ID:ak-f9b6gnpf3um111arfnzi
API Key:sk-xjYh2CUuyq2LU1TBszOQ3mNvg8QxmWw978xxxxxxxxxxxxx
Base URL:https://api.moonshot.cn/v1
- 渠道频道
配置飞书、钉钉、企微,并且每个channel配置两个机器人,运维专家+生活助手。
国内各大常见渠道channel对接参考:OpenClaw 接入微信、钉钉、飞书、QQ 详细教程
域名IP
本指南不使用任何厂商捆绑的快捷openclaw(轻量)主机,直接购买独立云服务器进行部署,并且后续规划结合 Nginx 做域名代理,同时使用 TLS 证书做安全通信,整个 openclaw 使用域名访问。
OS:Ubuntu 24.04
IP:149.88.xx.yy
域名:openclaw.linuxsb.com
root@openclaw:~# cat /etc/os-release
PRETTY_NAME="Ubuntu 24.04.4 LTS"
NAME="Ubuntu"
VERSION_ID="24.04"
VERSION="24.04.4 LTS (Noble Numbat)"
VERSION_CODENAME=noble
ID=ubuntu
ID_LIKE=debian
HOME_URL="https://www.ubuntu.com/"
SUPPORT_URL="https://help.ubuntu.com/"
BUG_REPORT_URL="https://bugs.launchpad.net/ubuntu/"
PRIVACY_POLICY_URL="https://www.ubuntu.com/legal/terms-and-policies/privacy-policy"
UBUNTU_CODENAME=noble
LOGO=ubuntu-logo
root@openclaw:~# cip
149.88.xx.yy
配置规划
当前 OpenClaw 采用多个 agent 来匹配不同场景的使用,一个 agent 对应一个自建应用,更符合使用逻辑。
企业微信通道
登录 企业微信管理后台 。
企业微信可以创建 智能机器人 和 自建应用 ,区别如下:
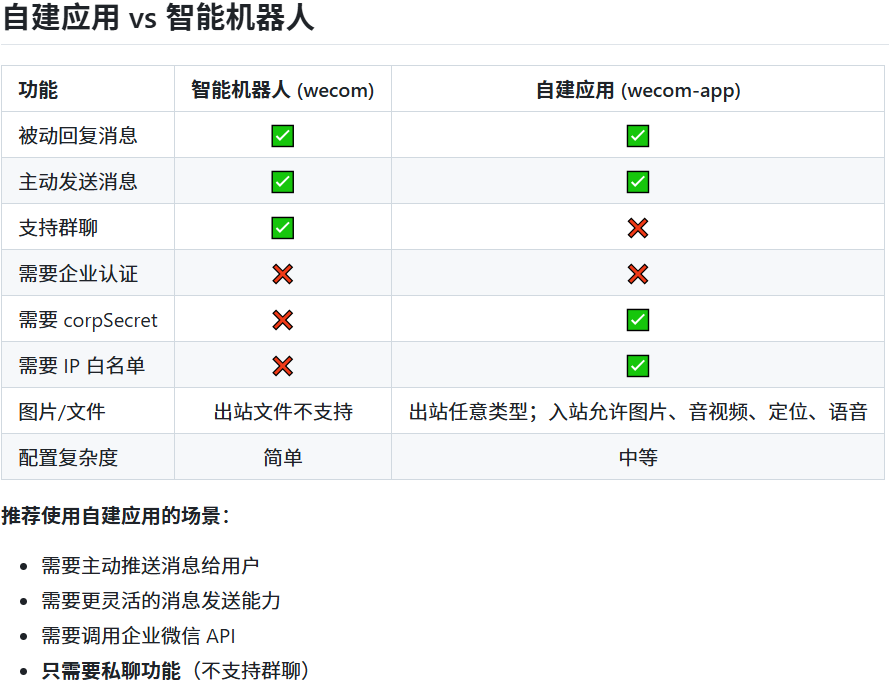
注意:本指南使用自建应用,企业微信机器人创建和使用比自建应用更简单,大致的过程如下:
- 创建机器人
登录企业微信管理后台 → 安全与管理 → 管理工具 → 智能机器人 → 创建机器人 → API 模式创建。 - 获取凭证
填写机器人名称、简介和可见范围。点击“随机获取” Token 和 EncodingAESKey,并保存。同样先不要点击“创建”。 - 设置回调
URL:https://openclaw.linuxsb.com/wecom
使用机器人则配置可如下所示:
openclaw config set channels.wecom.enabled true
openclaw config set channels.wecom.webhookPath /wecom
openclaw config set channels.wecom.token "你的Token"
openclaw config set channels.wecom.encodingAESKey "你的EncodingAESKey"
更详细的企业微信机器人使用参考:云上OpenClaw快速接入企业微信指南 。
创建企业
如尚未在企业微信中拥有企业,可以参考创建&注册企业来创建一个新企业。
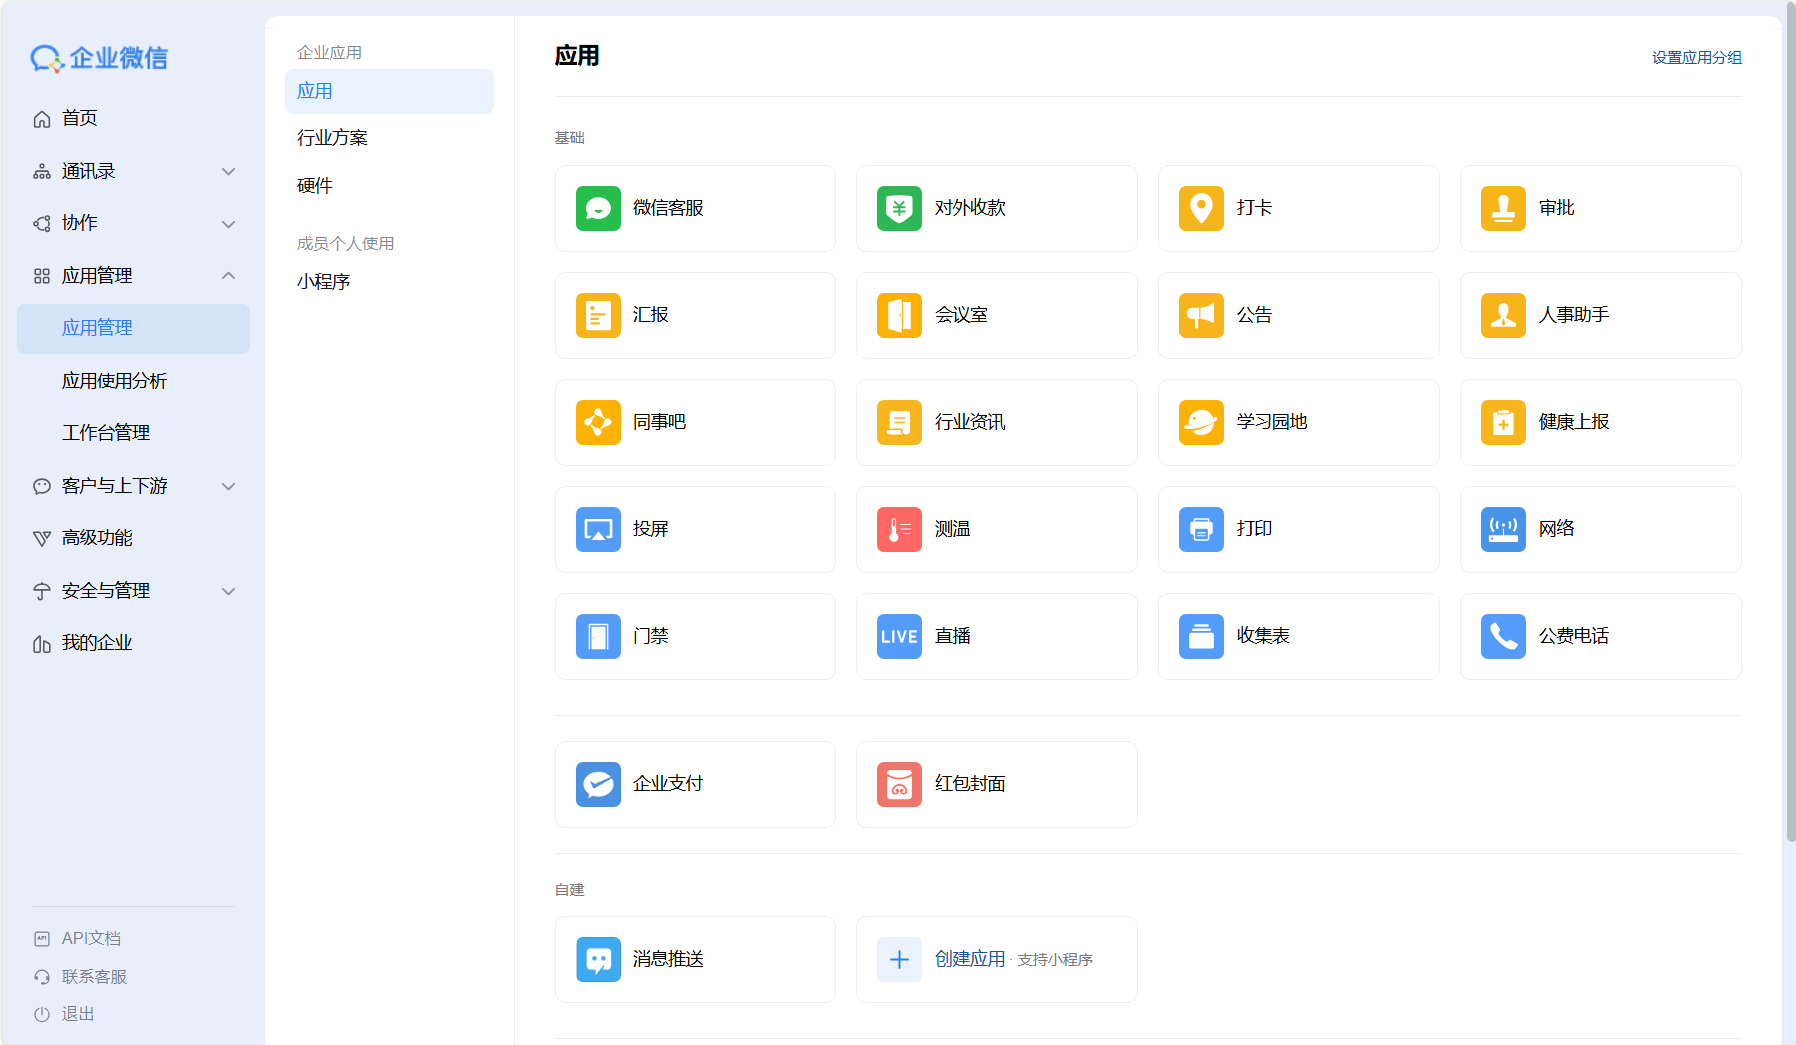
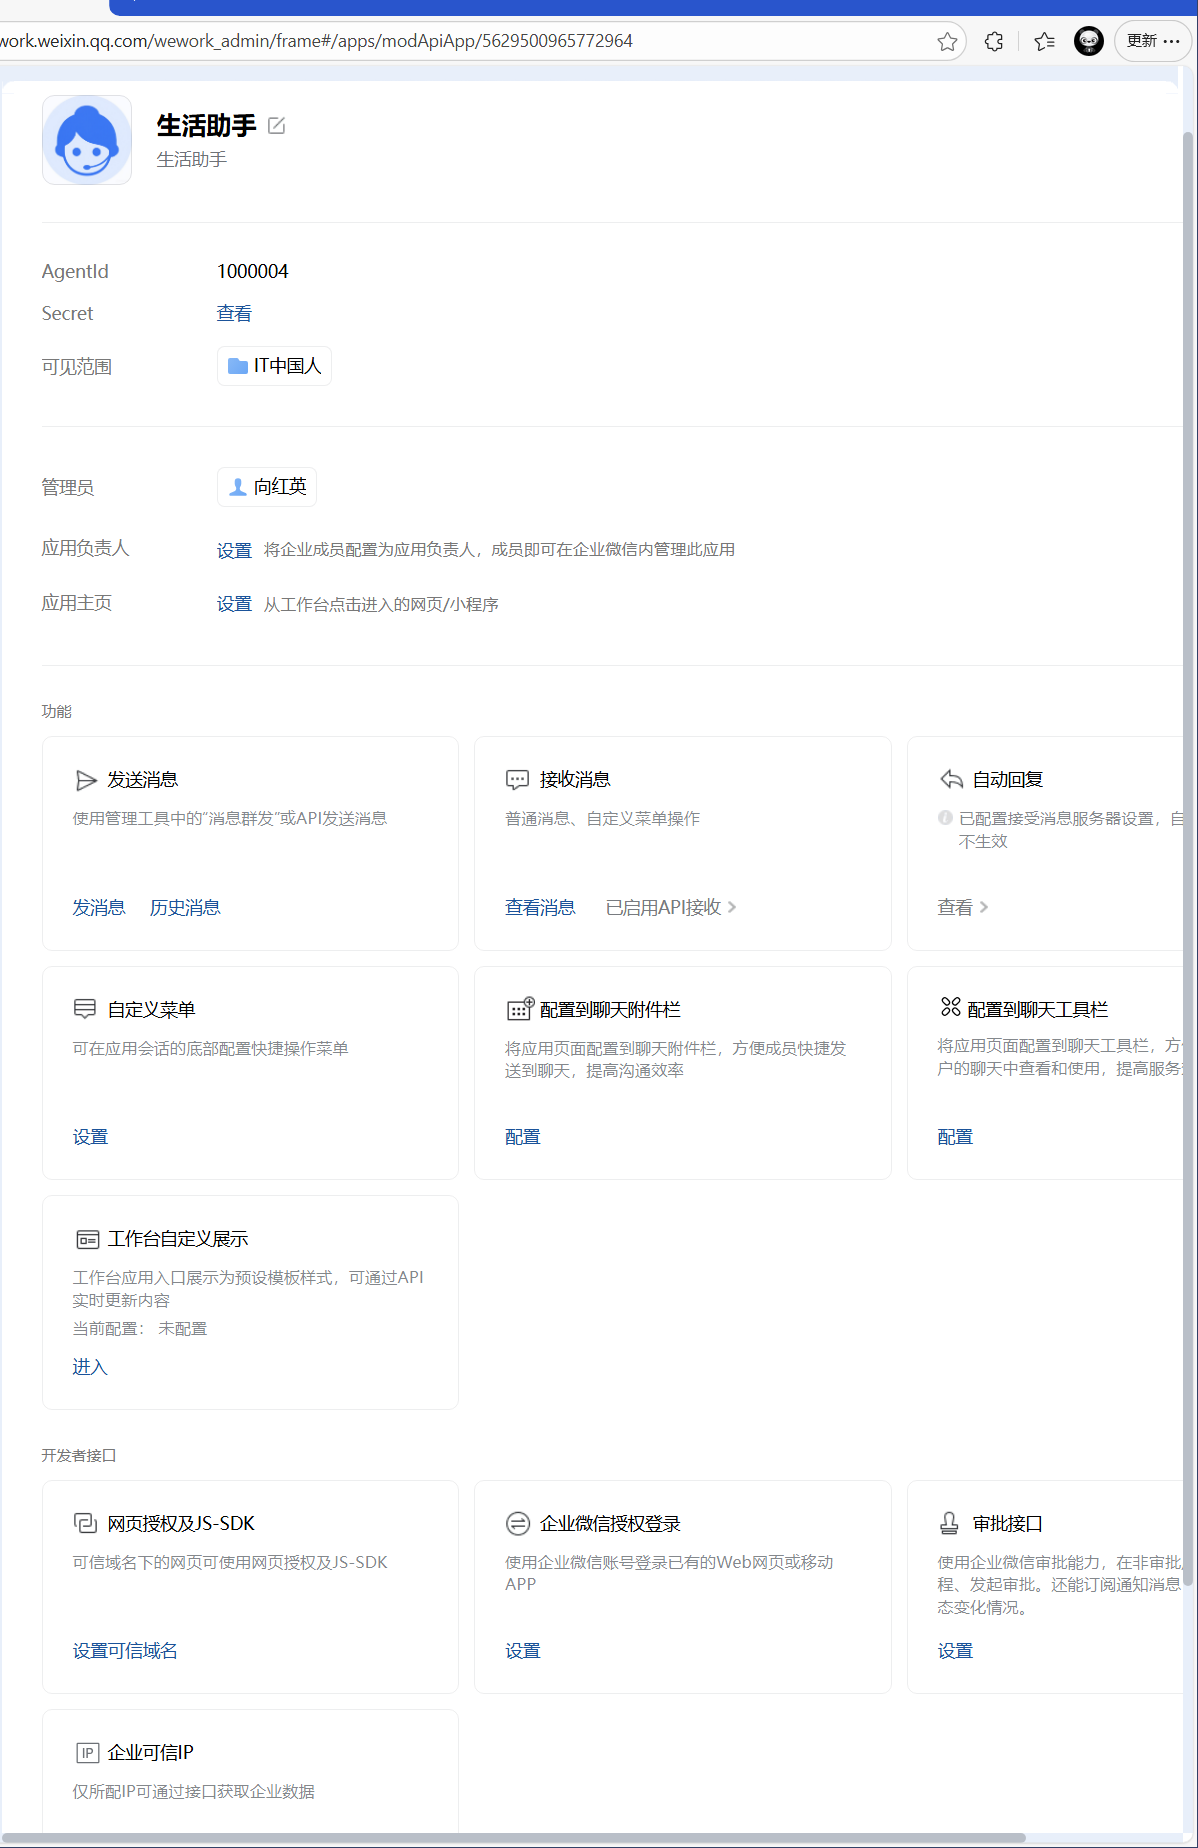
创建应用
- 应用管理,中创建应用
- 创建应用
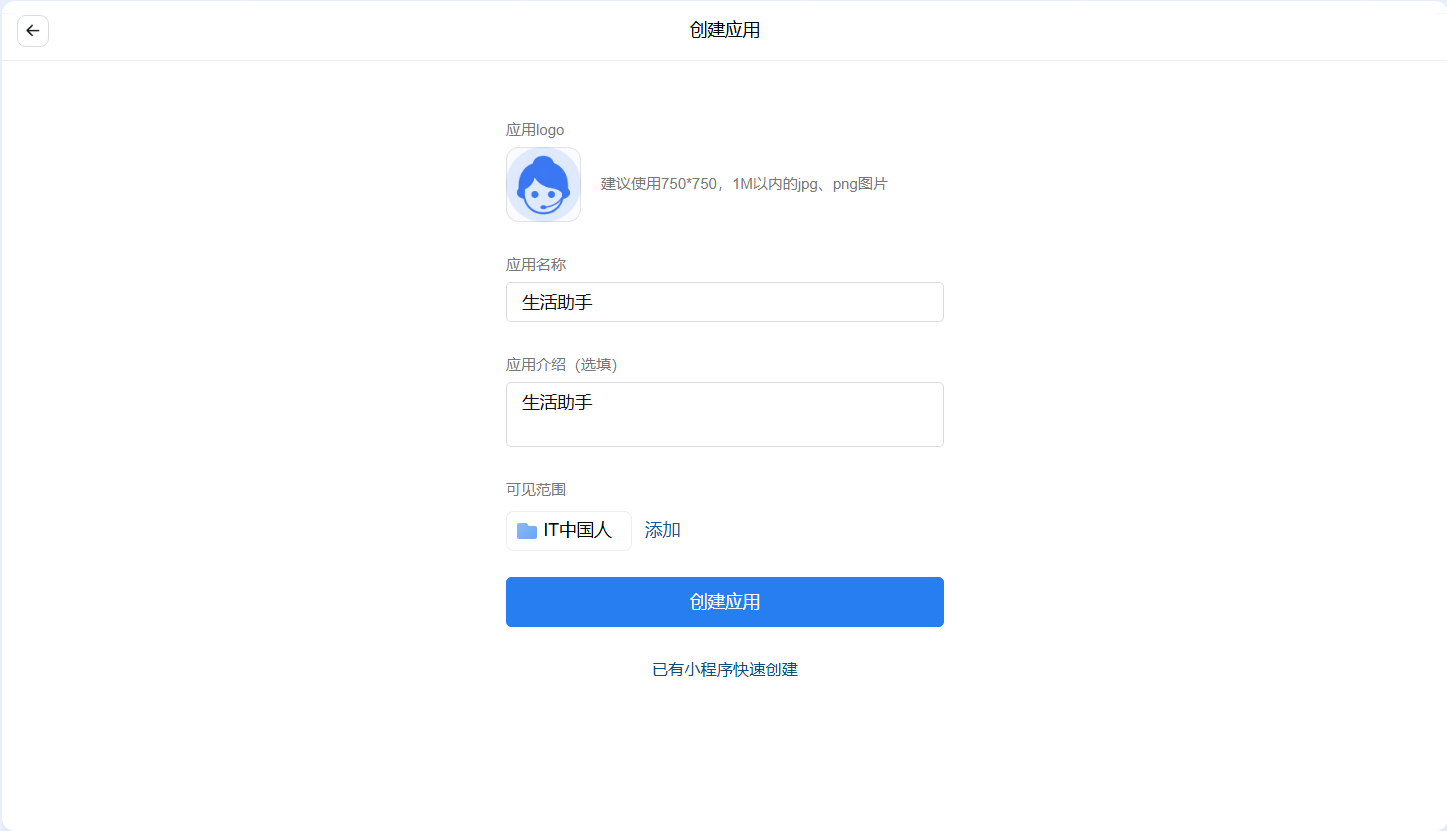
- 确认创建
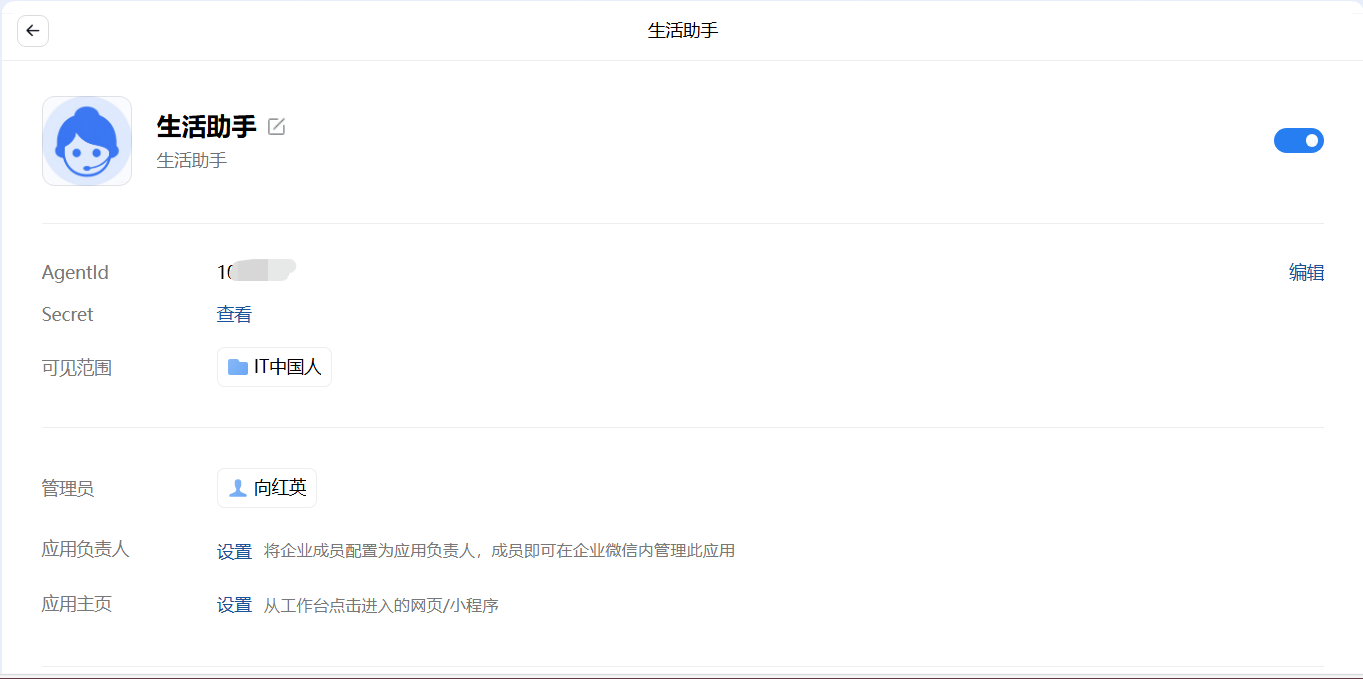
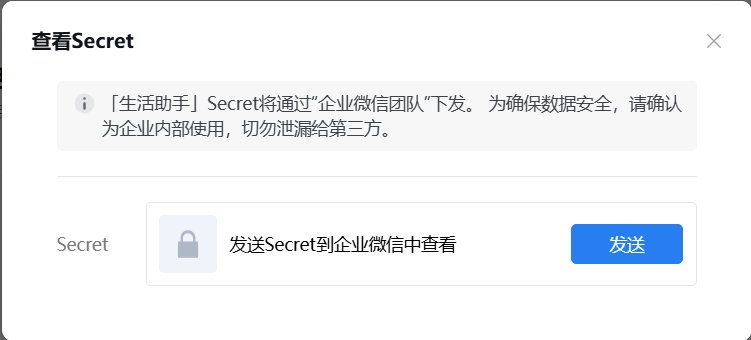
- 保存凭证
查看Secret,登录企业微信进行接受,然后保存。
- 查看企业ID
我的企业——企业ID。

提示:运维专家参考类似创建即可。
两个机器人创建完毕后,保存相关 AgentId 和 Secret :
| 序号 | 角色 | AgentId | Secret |
|---|---|---|---|
| 01 | 生活助手 | 1000004 | Gs0GZYRtfan0OG9AGiB3upVYp4bxxxxxxxxxxxxxxxxxxxx |
| 02 | 运维专家 | 1000005 | Mm51nZF4uD8NhZFsRq5ssM2-xxxxxxxxxxxxx |
企业ID:ww46ac95xxxxxxxxxx
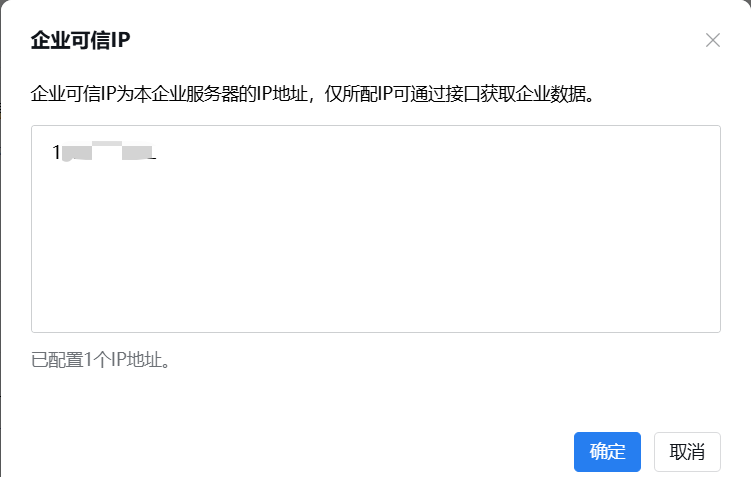
- 企业可信IP
配置企业可信IP,填写 OpenClaw 服务器IP。
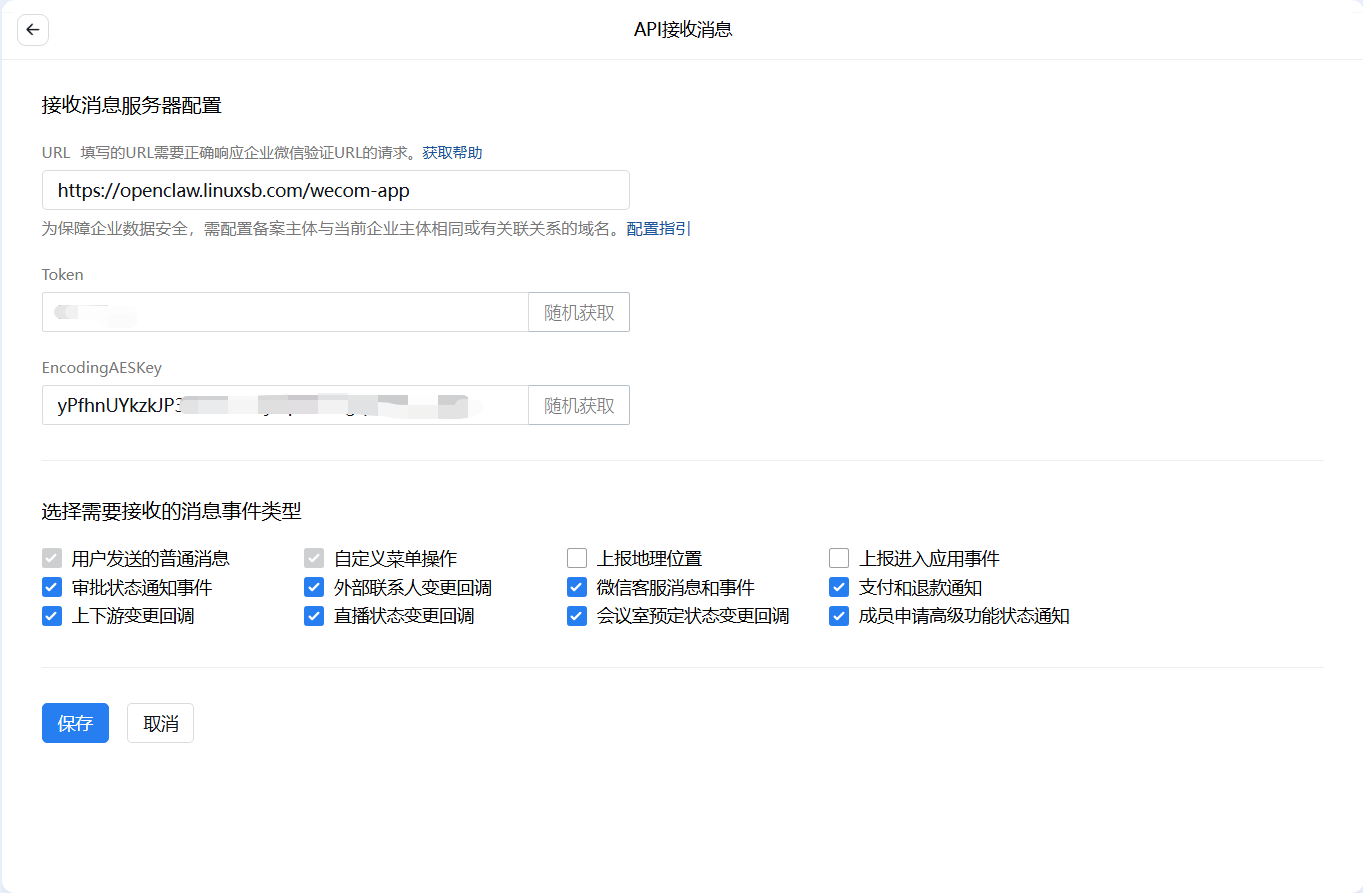
- 配置回调
这是对接成功的关键,用于企业微信向 OpenClaw 推送消息事件。
进入应用 → 消息接收 → 设置API接收 。

URL:https://openclaw.linuxsb.com/wecom/app
Token随机:xxxxx
EncodingAESKey随机:yPfhnUYkzkJP3JEA5FHEkjuqxxxxxxxxxxxxxxxxxxxx
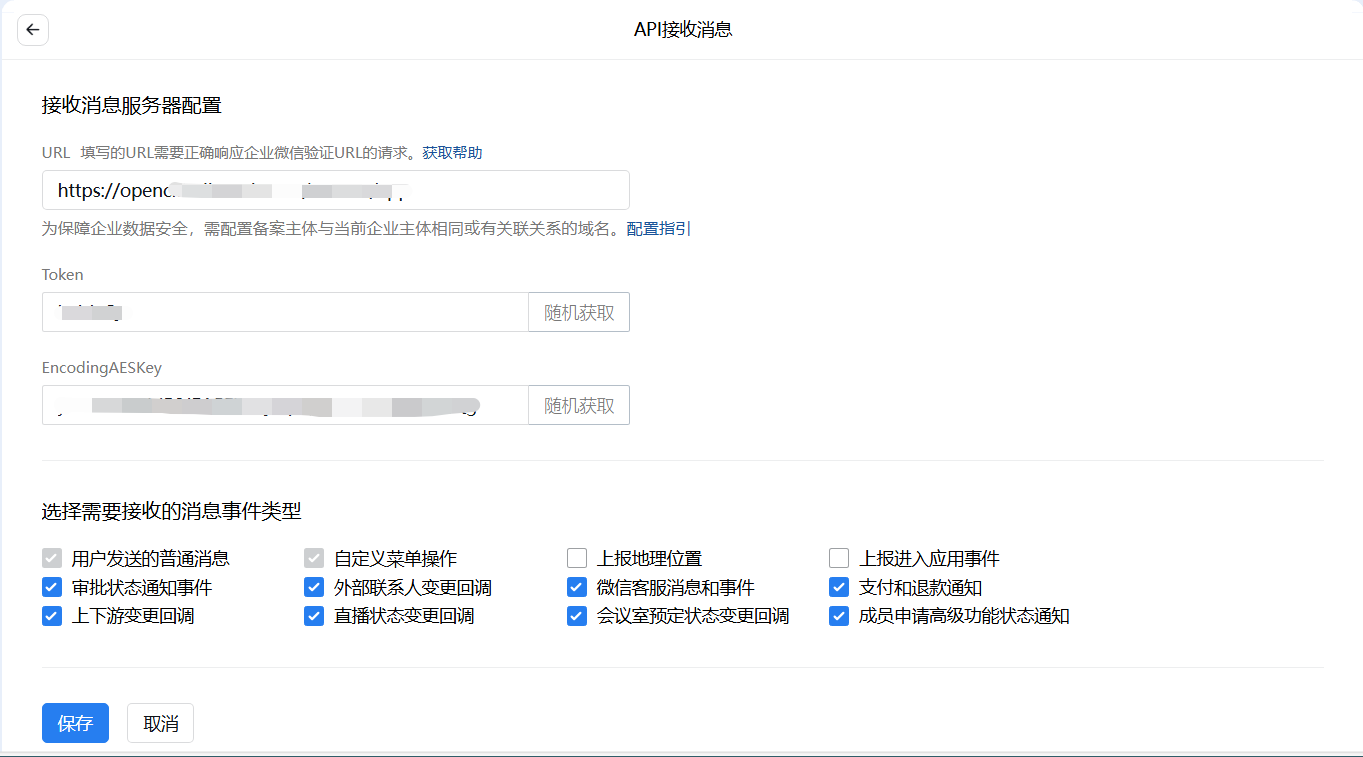
提示:点击“保存”按钮,企业微信会向该 URL 发送验证请求。因此需要 OpenClaw 能访问,当前 OpenClaw 未部署,因此可停留在此界面,等 OpenClaw 开启可再次保存。
注意:若使用服务器IP,则可直接配置 149.88.xx.yy:18789 。

飞书通道
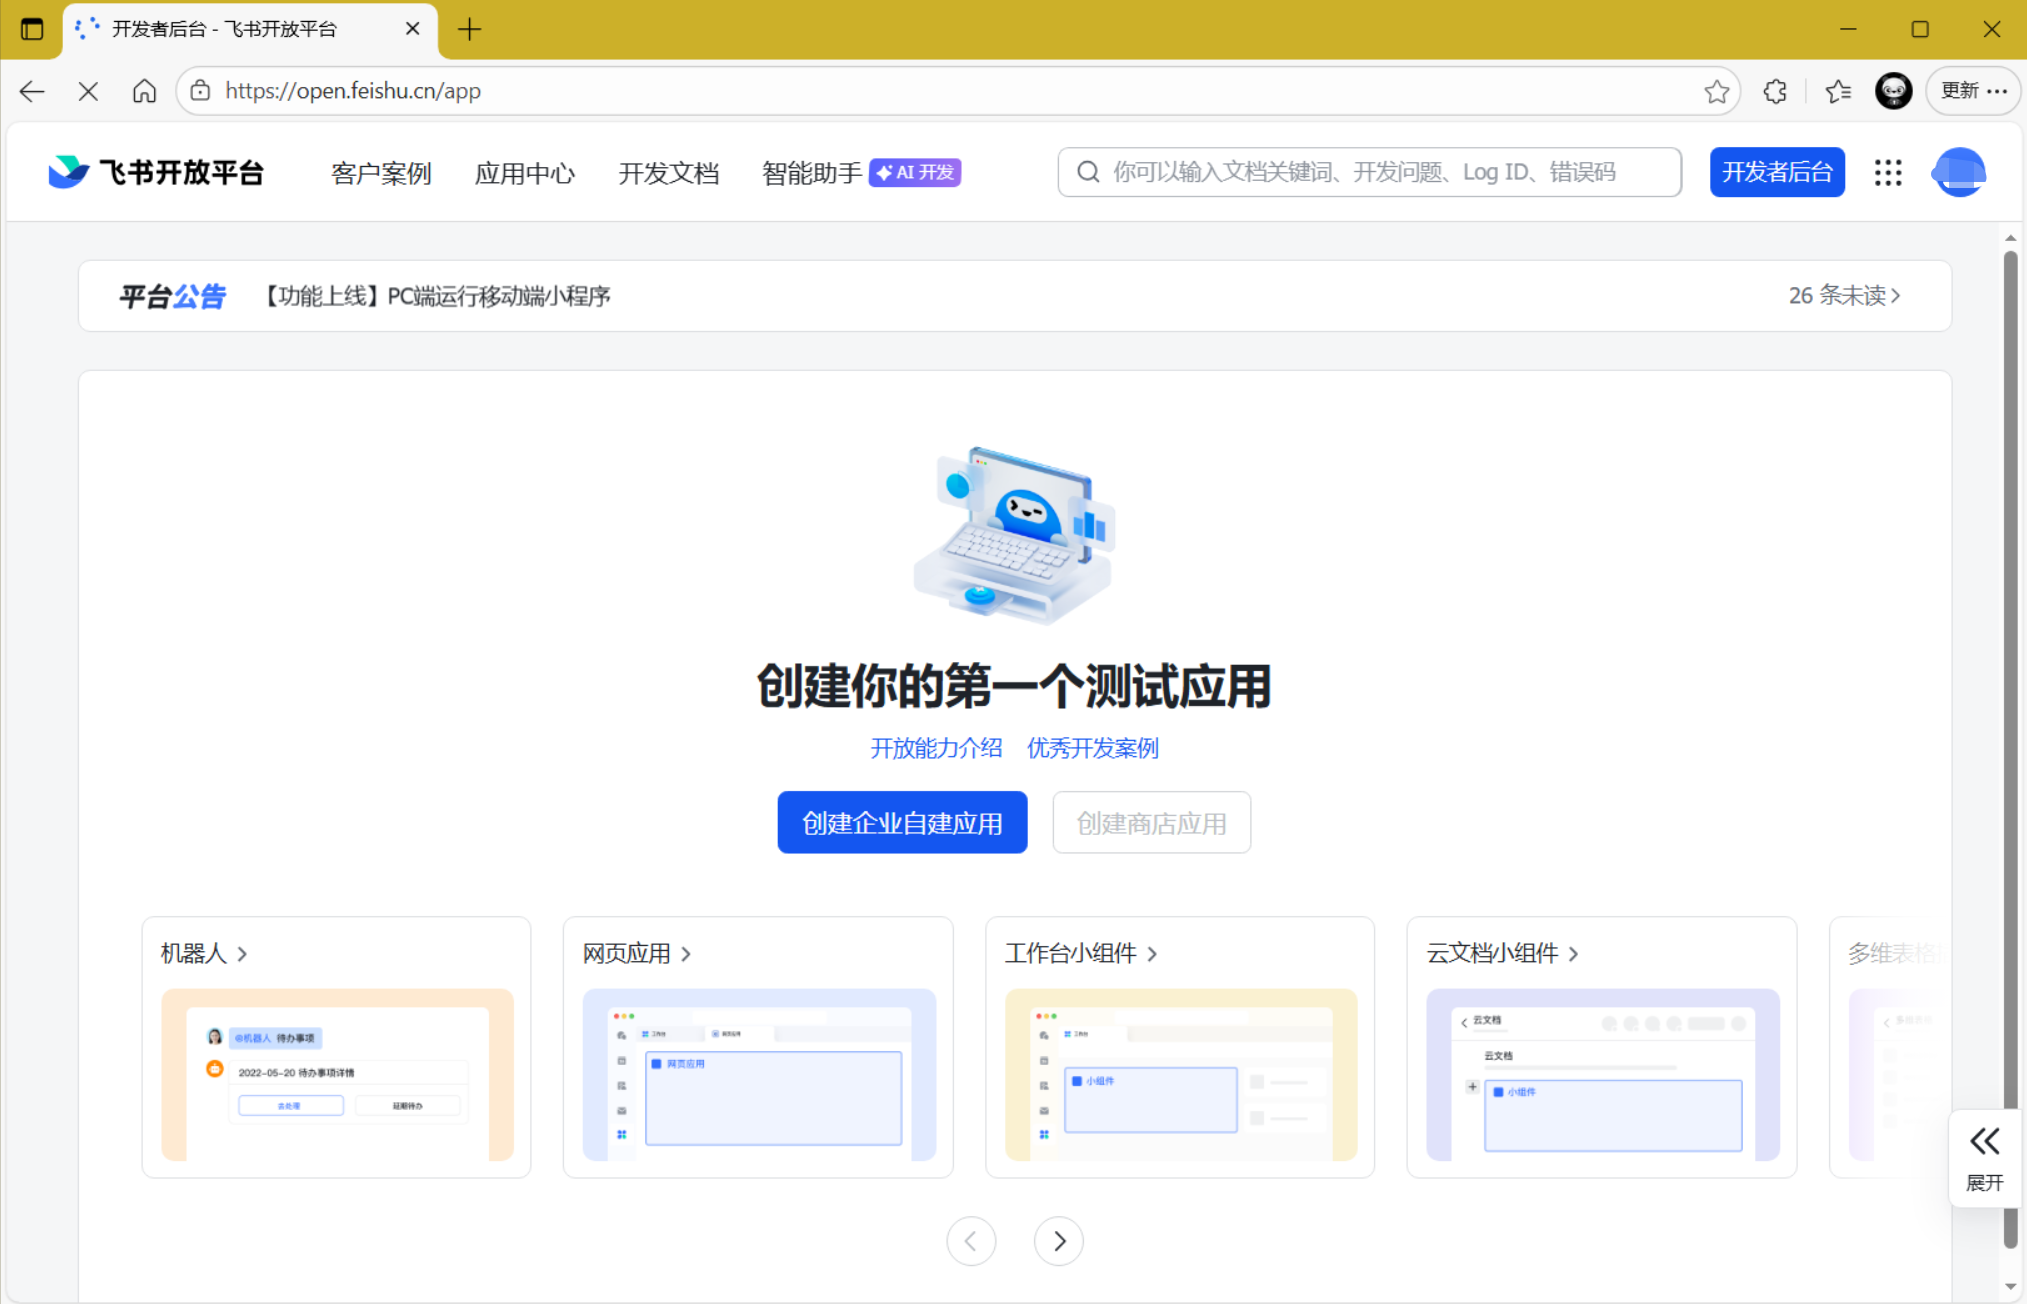
创建机器人
登录 飞书开发者后台 。
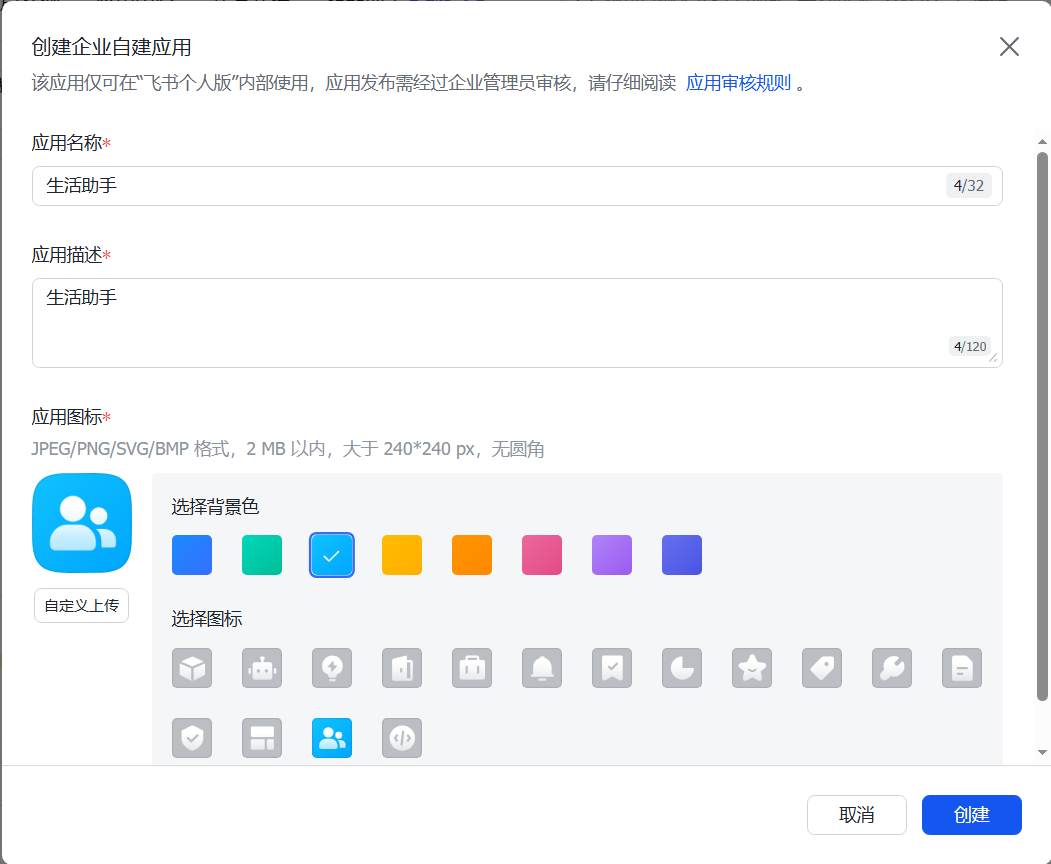
- 创建第一个测试应用
- 输入相关自建应用信息
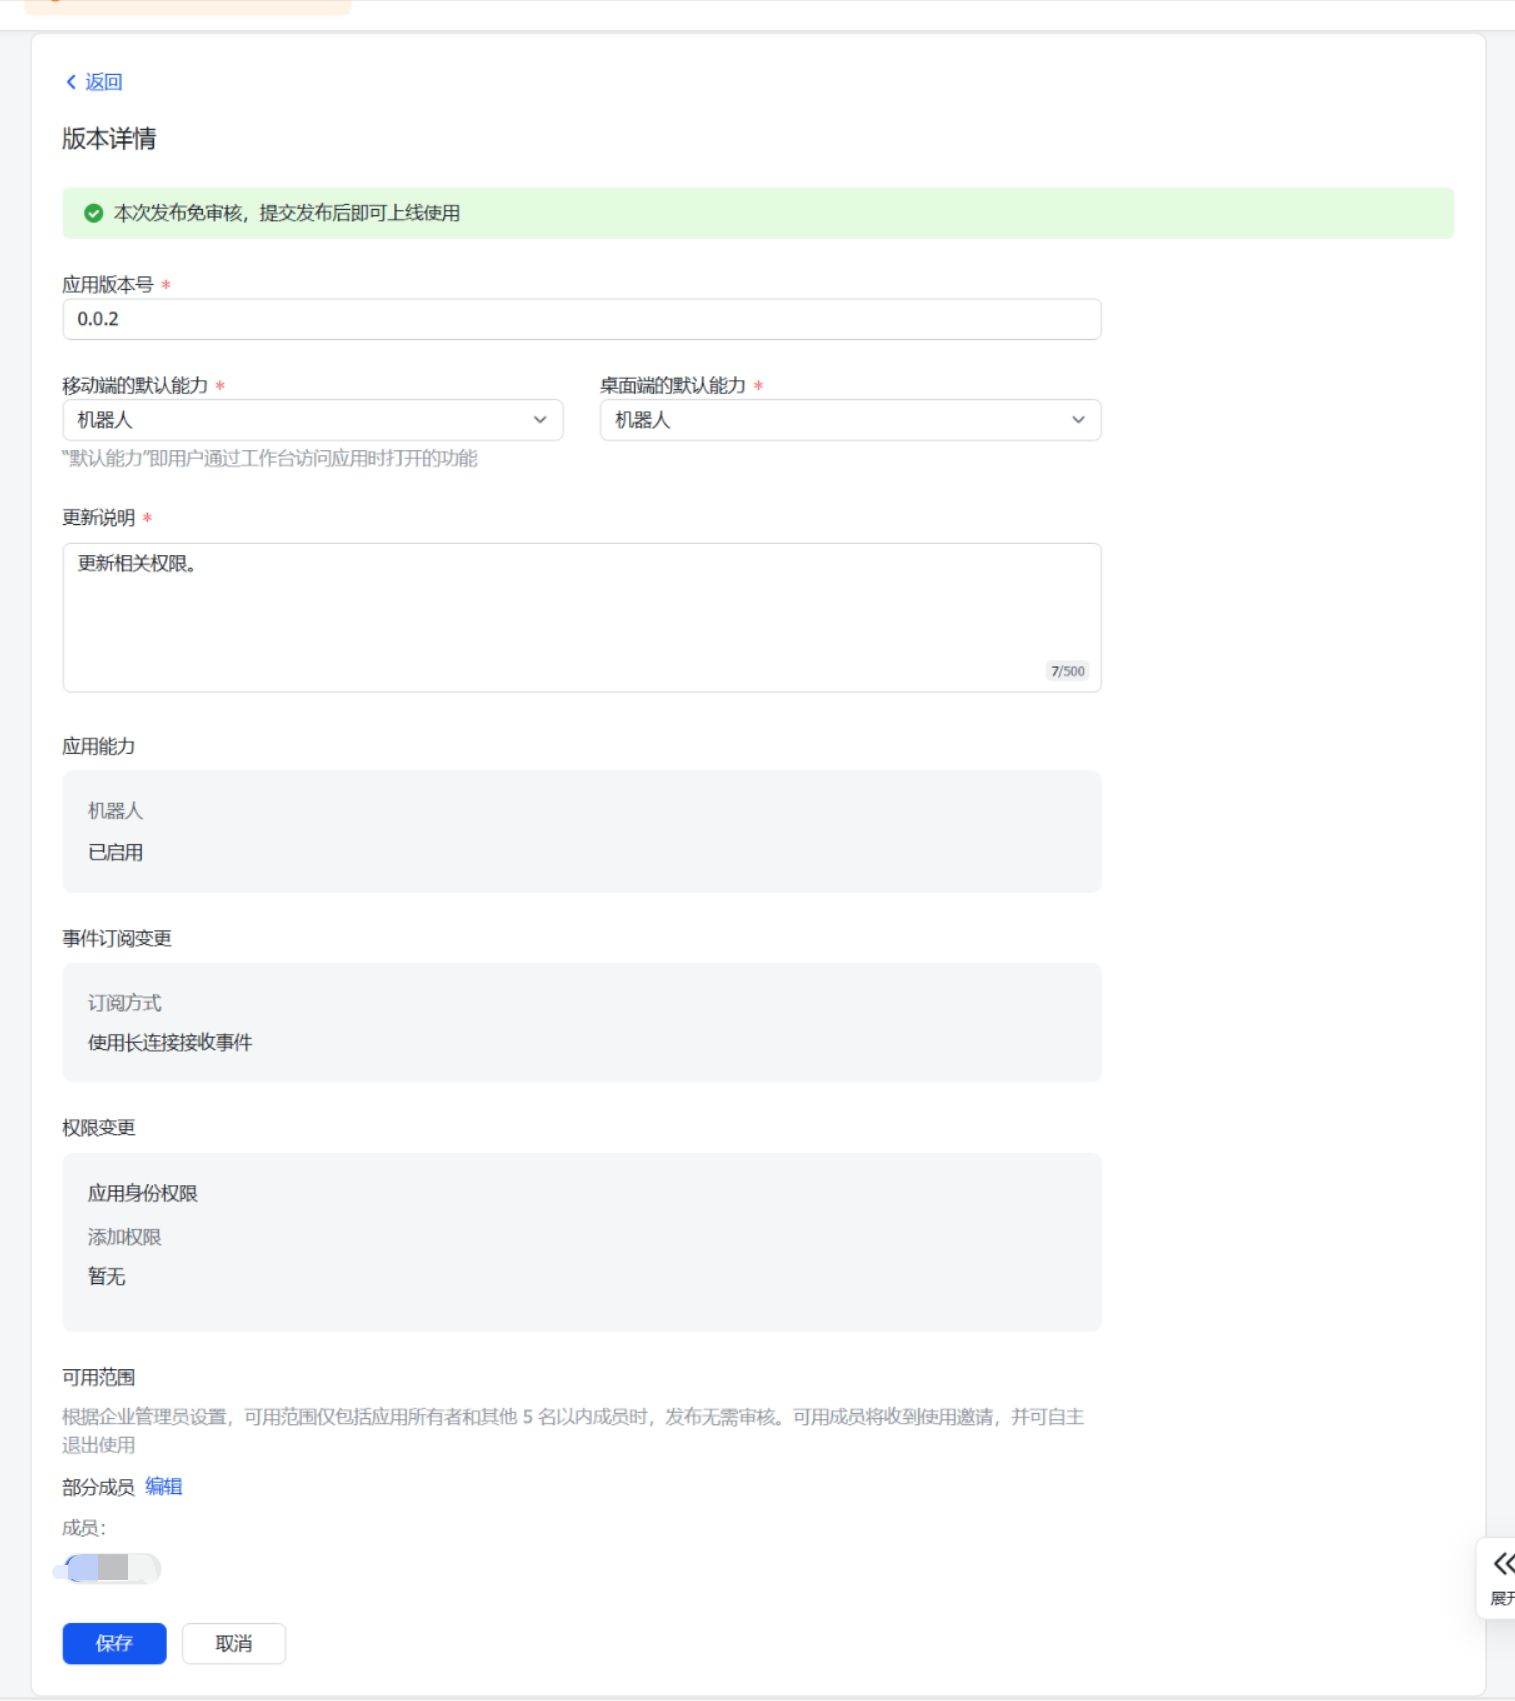
- 首次发布

- 创建第一个版本
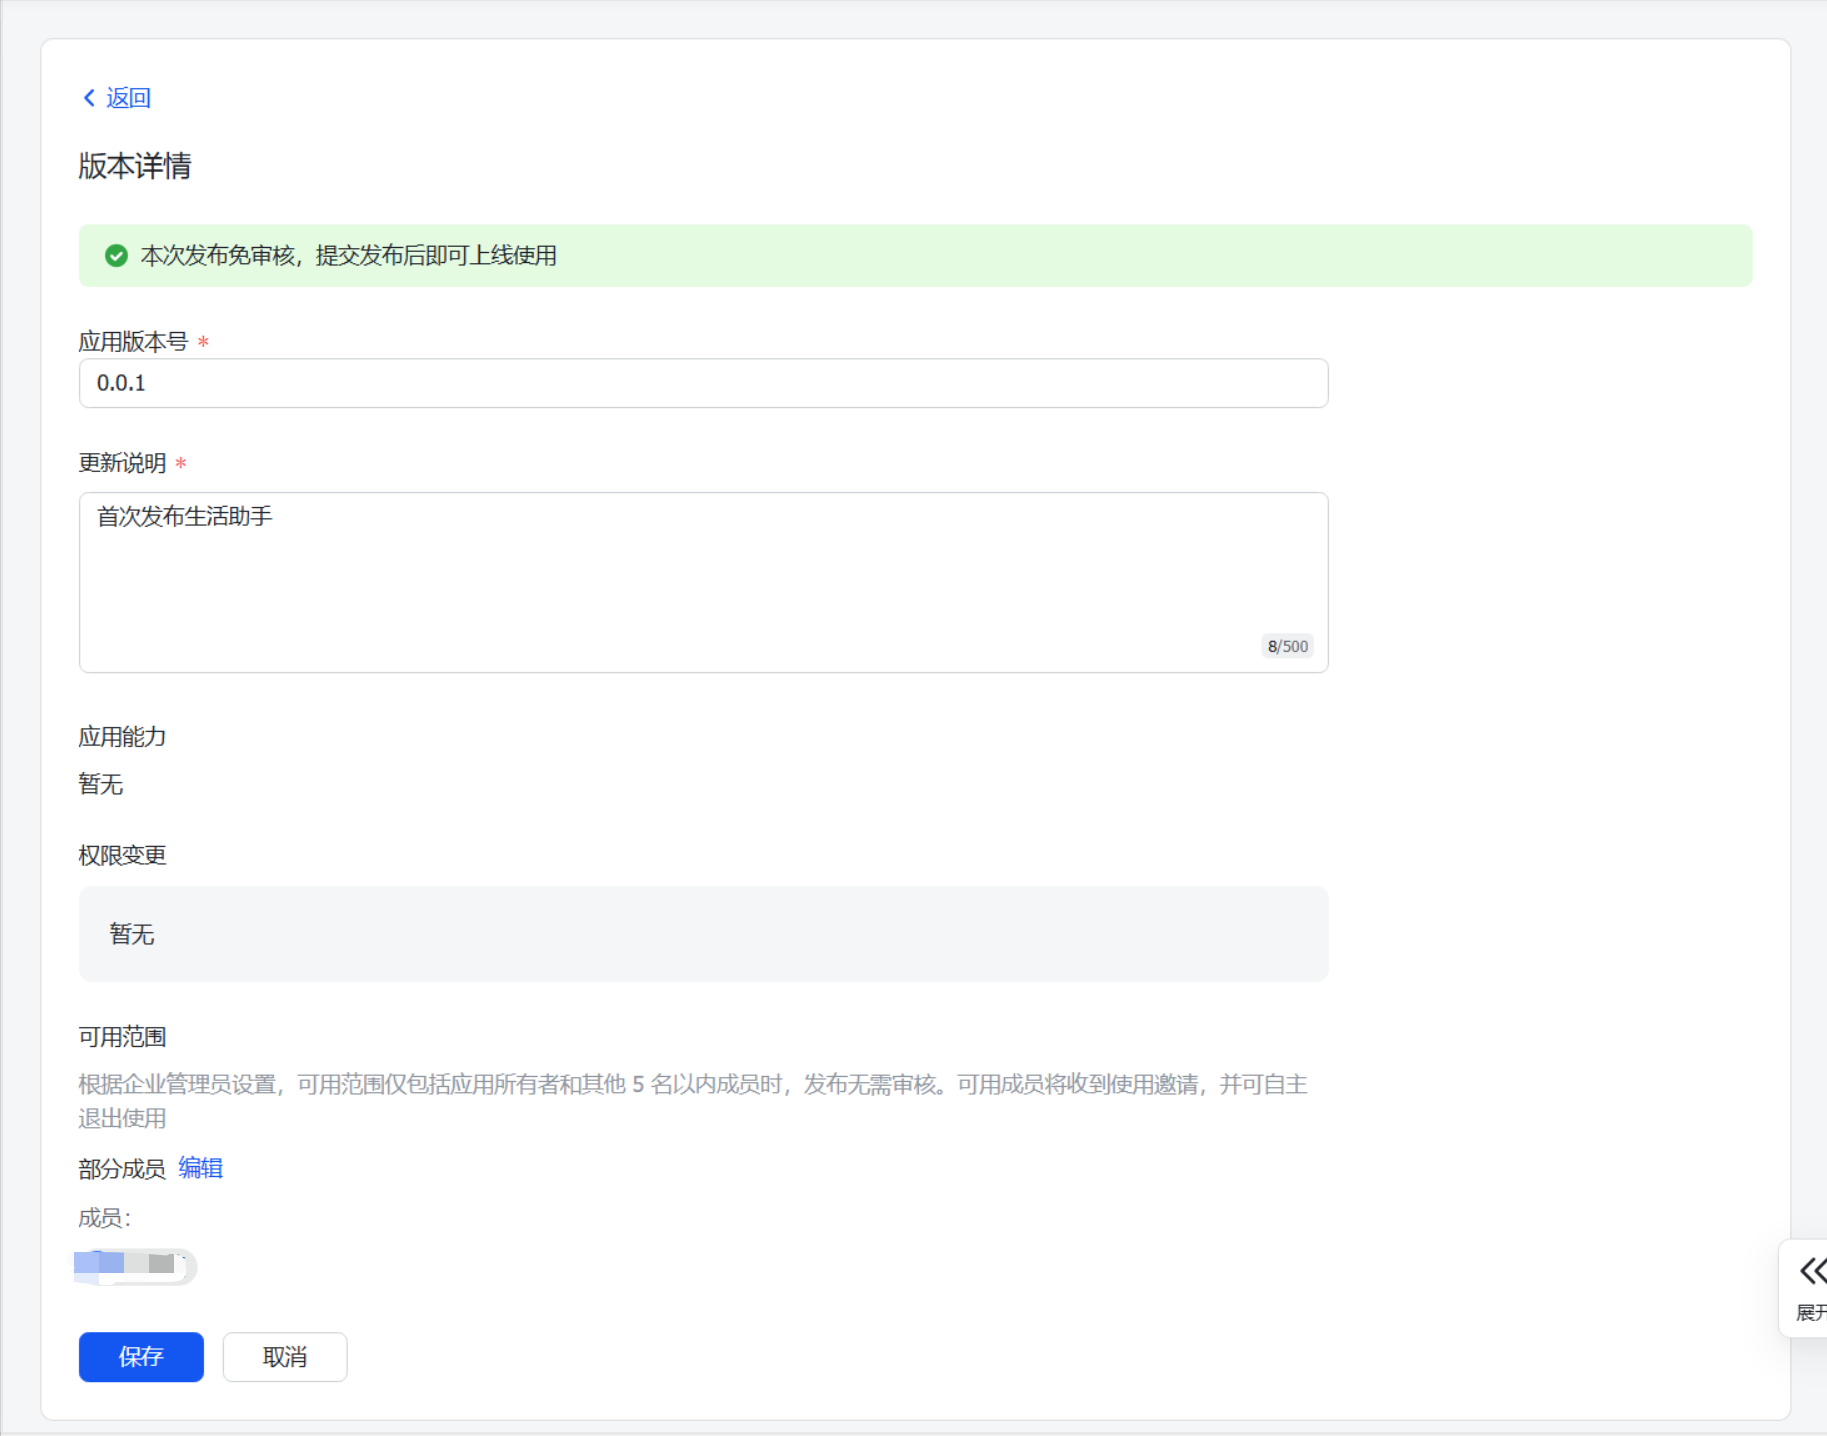
- 确认发布

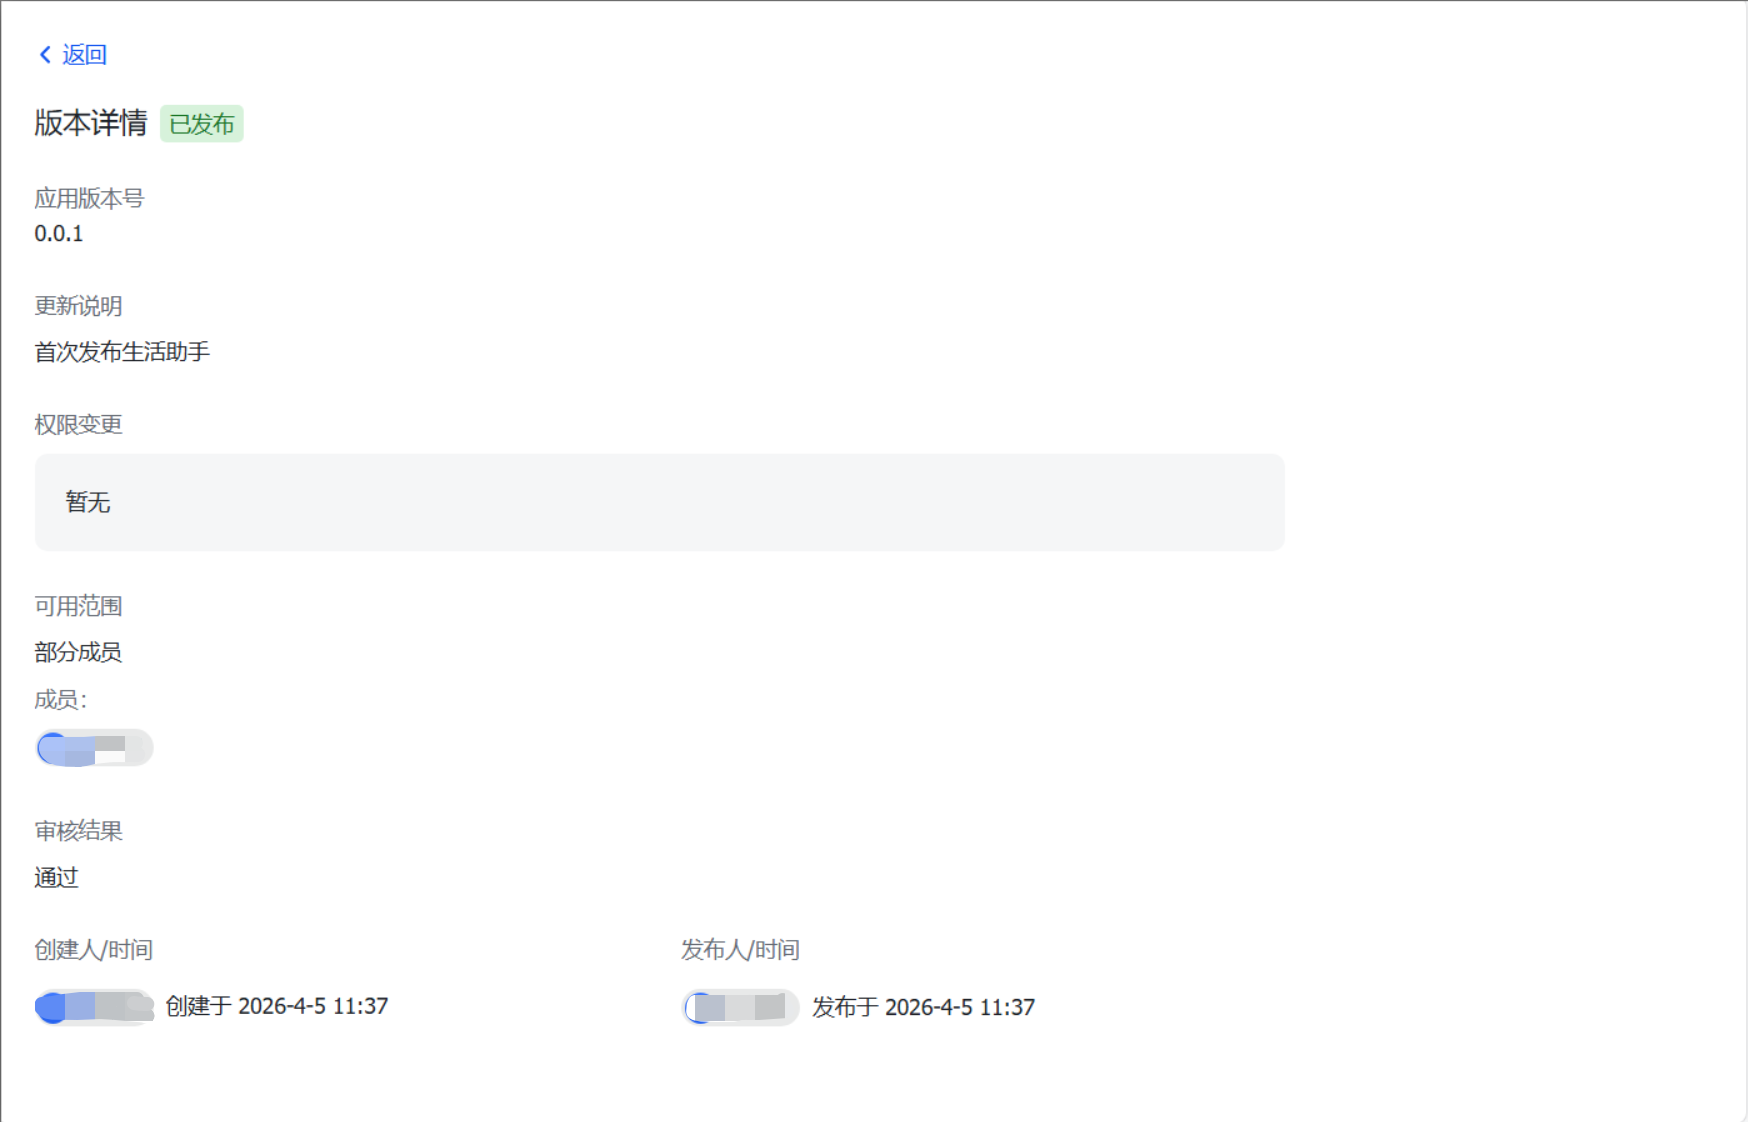
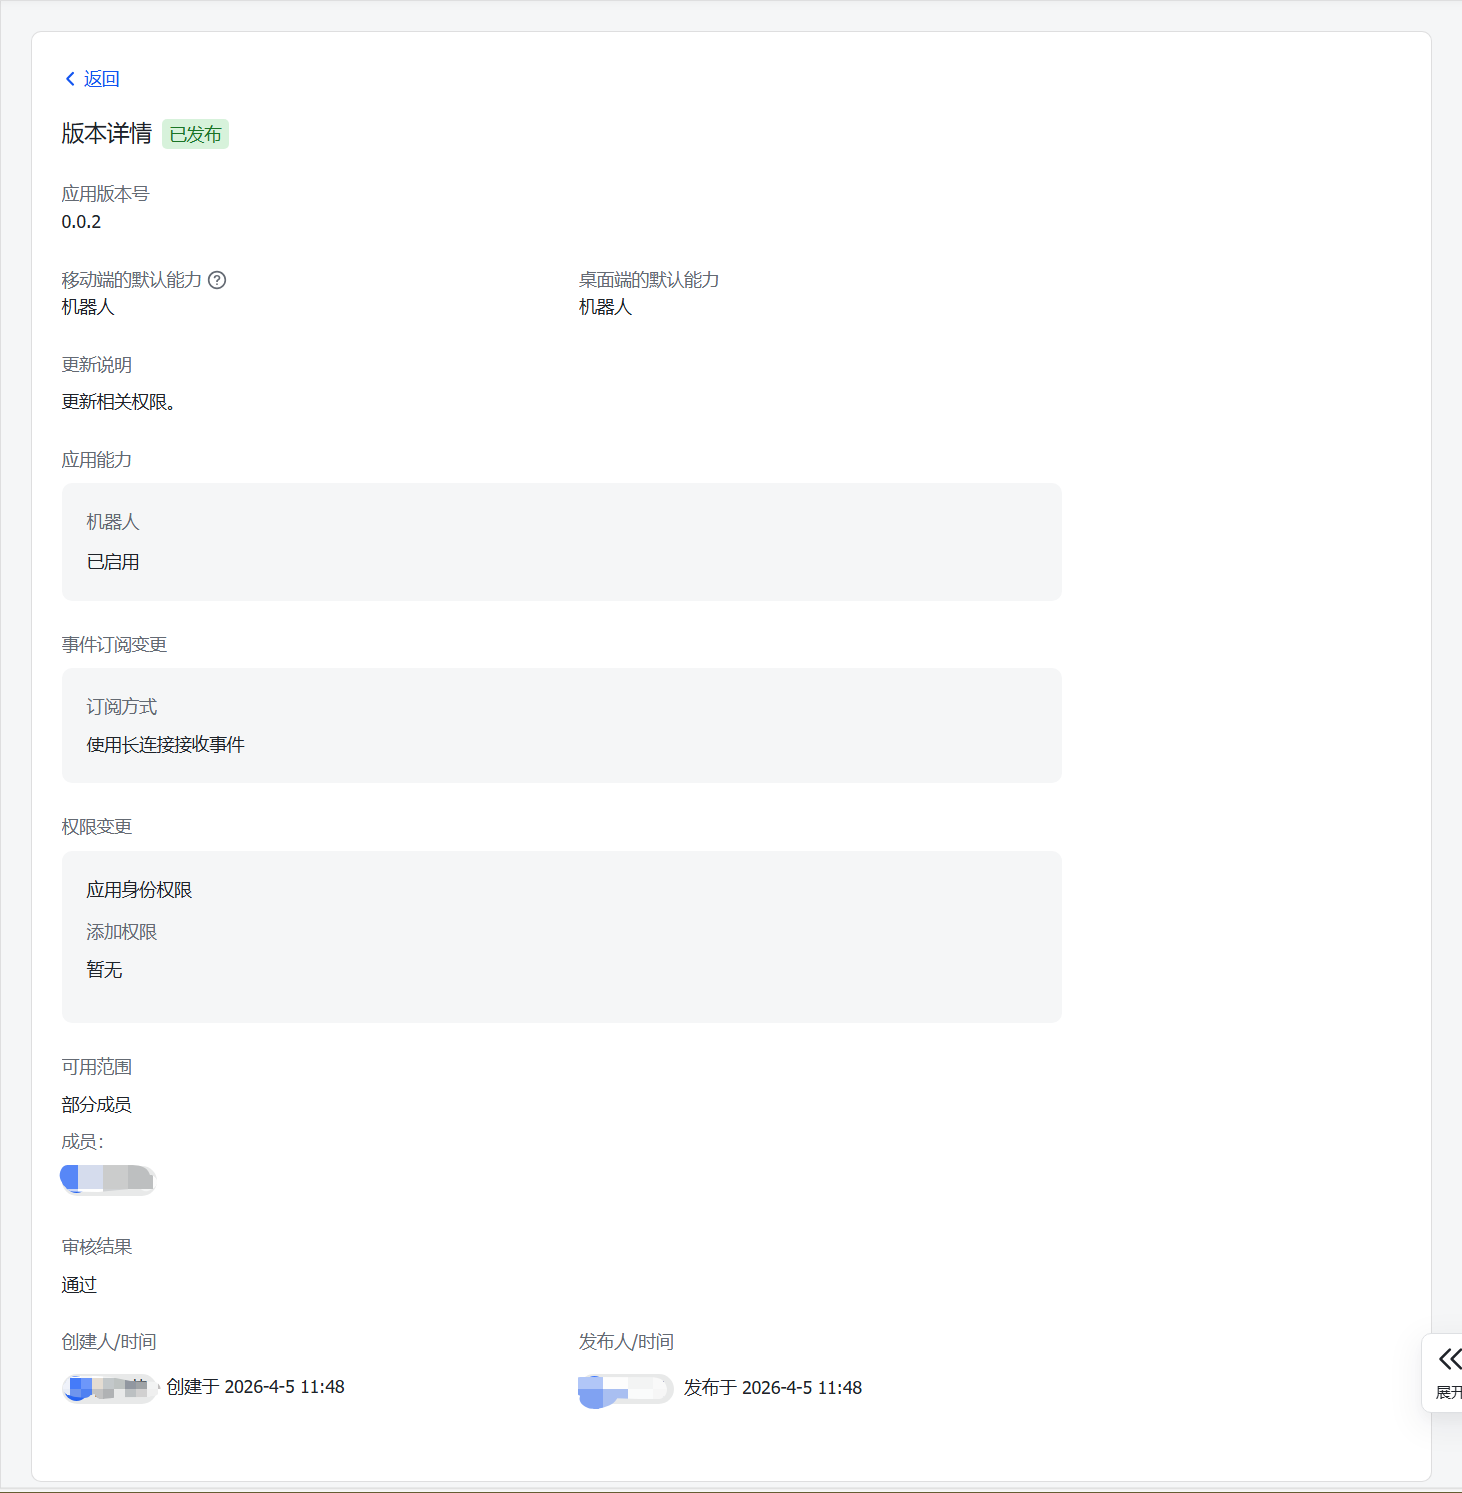
- 查看发布情况
- 查看权限
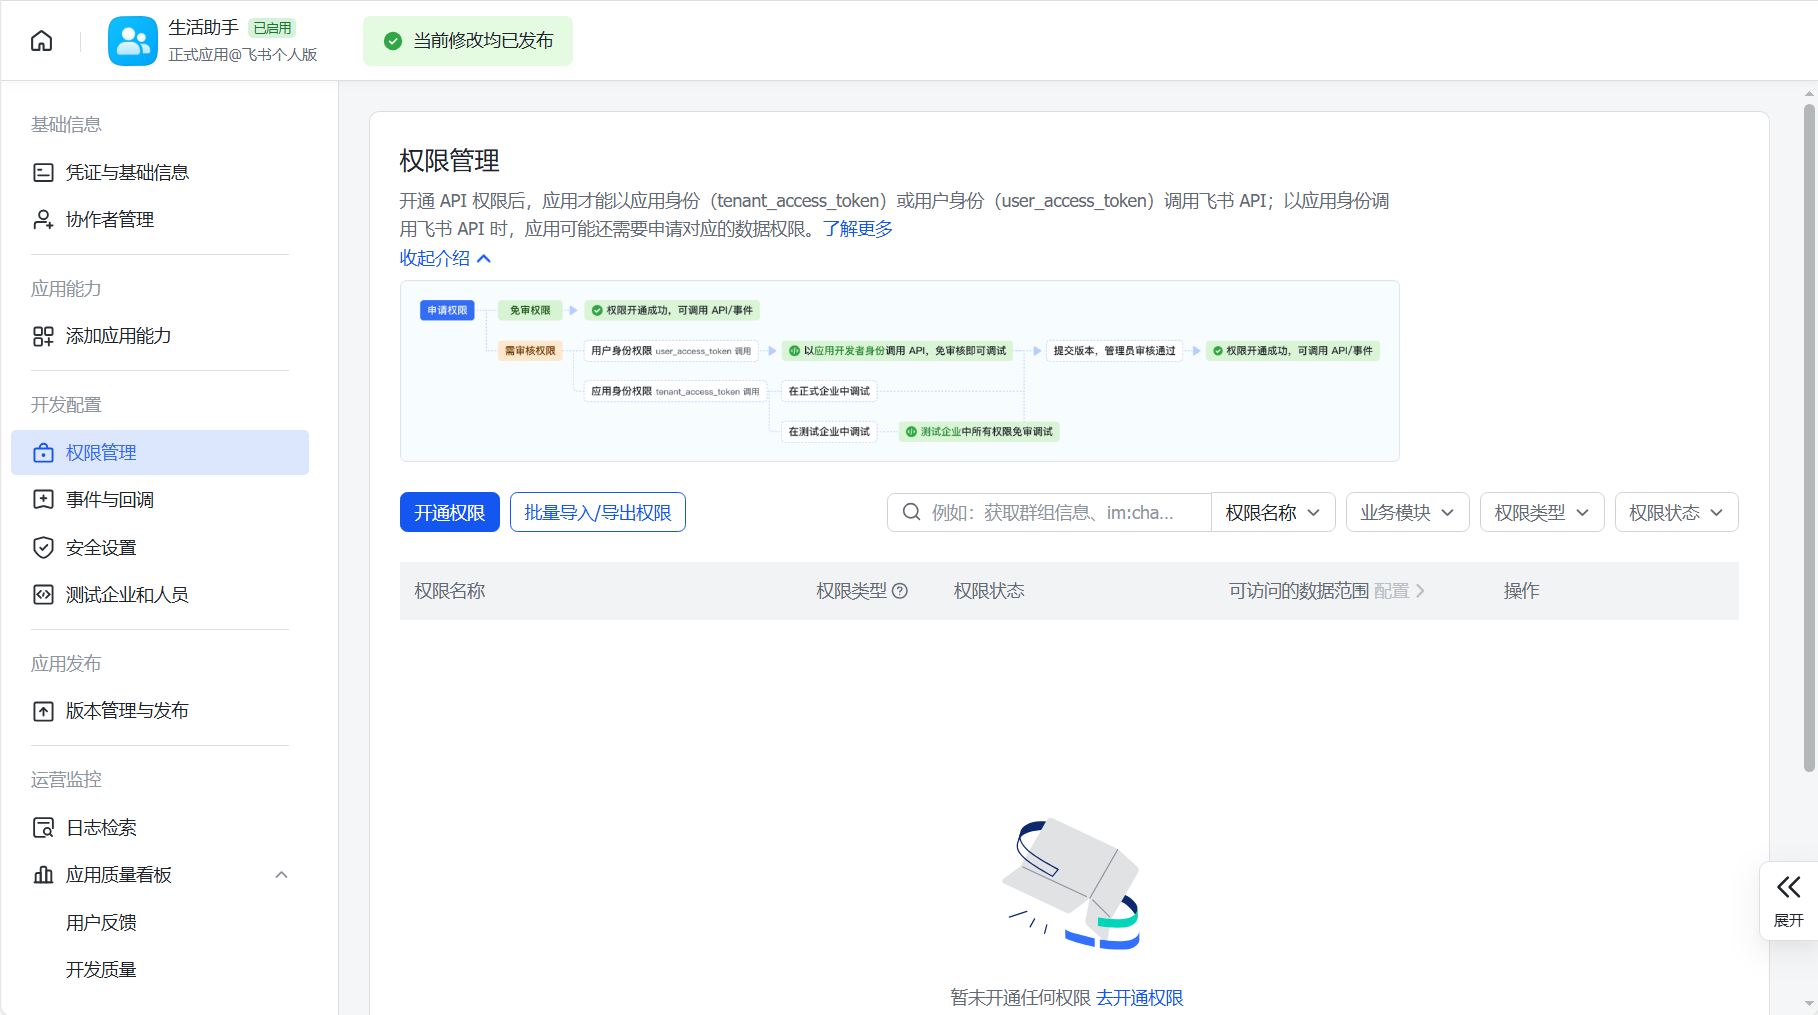
- 批量导入权限
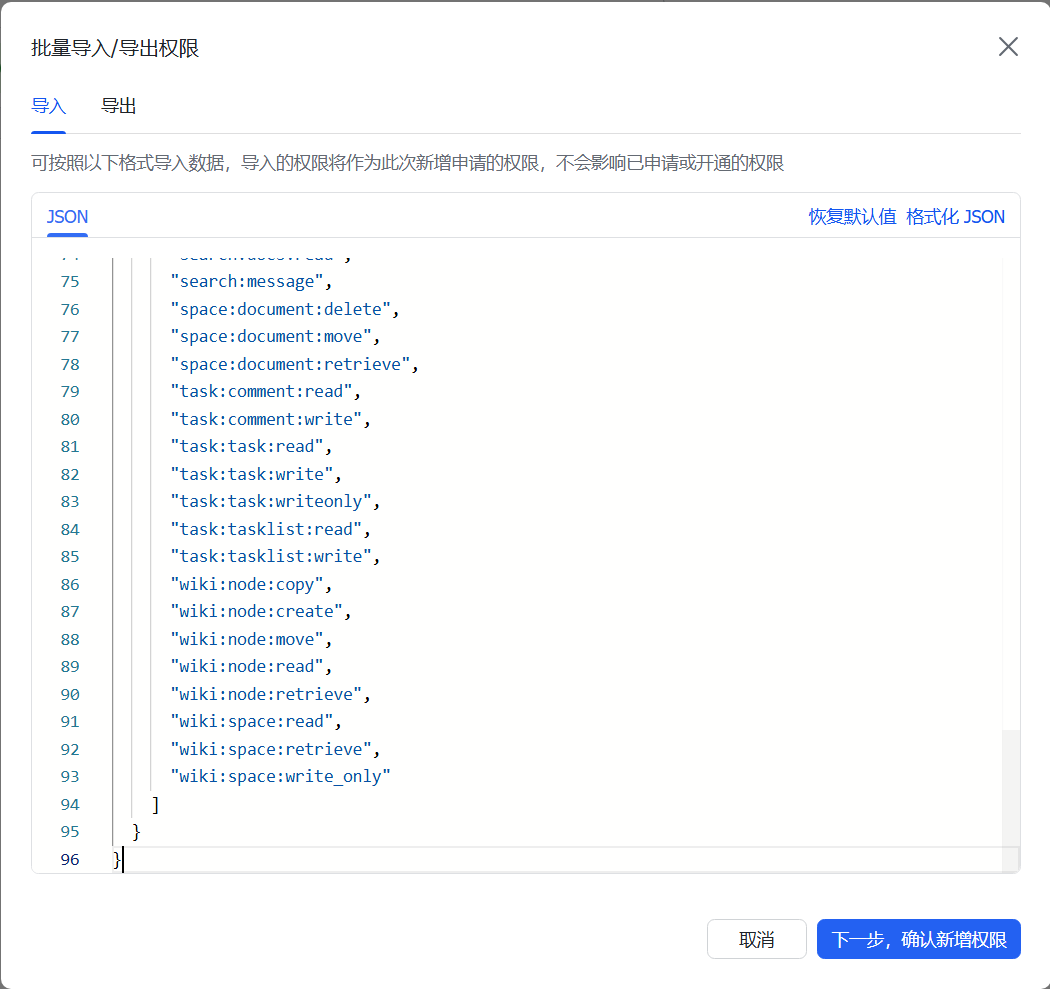
所需权限如下:
{
  "scopes": {
    "tenant": [
      "contact:contact.base:readonly",
      "docx:document:readonly",
      "im:chat:read",
      "im:chat:update",
      "im:message.group_at_msg:readonly",
      "im:message.p2p_msg:readonly",
      "im:message.pins:read",
      "im:message.pins:write_only",
      "im:message.reactions:read",
      "im:message.reactions:write_only",
      "im:message:readonly",
      "im:message:recall",
      "im:message:send_as_bot",
      "im:message:send_multi_users",
      "im:message:send_sys_msg",
      "im:message:update",
      "im:resource",
      "application:application:self_manage",
      "cardkit:card:write",
      "cardkit:card:read"
    ],
    "user": [
      "contact:user.employee_id:readonly",
      "offline_access","base:app:copy",
      "base:field:create",
      "base:field:delete",
      "base:field:read",
      "base:field:update",
      "base:record:create",
      "base:record:delete",
      "base:record:retrieve",
      "base:record:update",
      "base:table:create",
      "base:table:delete",
      "base:table:read",
      "base:table:update",
      "base:view:read",
      "base:view:write_only",
      "base:app:create",
      "base:app:update",
      "base:app:read",
      "board:whiteboard:node:create",
      "board:whiteboard:node:read",
      "calendar:calendar:read",
      "calendar:calendar.event:create",
      "calendar:calendar.event:delete",
      "calendar:calendar.event:read",
      "calendar:calendar.event:reply",
      "calendar:calendar.event:update",
      "calendar:calendar.free_busy:read",
      "contact:contact.base:readonly",
      "contact:user.base:readonly",
      "contact:user:search",
      "docs:document.comment:create",
      "docs:document.comment:read",
      "docs:document.comment:update",
      "docs:document.media:download",
      "docs:document:copy",
      "docx:document:create",
      "docx:document:readonly",
      "docx:document:write_only",
      "drive:drive.metadata:readonly",
      "drive:file:download",
      "drive:file:upload",
      "im:chat.members:read",
      "im:chat:read",
      "im:message",
      "im:message.group_msg:get_as_user",
      "im:message.p2p_msg:get_as_user",
      "im:message:readonly",
      "search:docs:read",
      "search:message",
      "space:document:delete",
      "space:document:move",
      "space:document:retrieve",
      "task:comment:read",
      "task:comment:write",
      "task:task:read",
      "task:task:write",
      "task:task:writeonly",
      "task:tasklist:read",
      "task:tasklist:write",
      "wiki:node:copy",
      "wiki:node:create",
      "wiki:node:move",
      "wiki:node:read",
      "wiki:node:retrieve",
      "wiki:space:read",
      "wiki:space:retrieve",
      "wiki:space:write_only"
    ]
  }
}
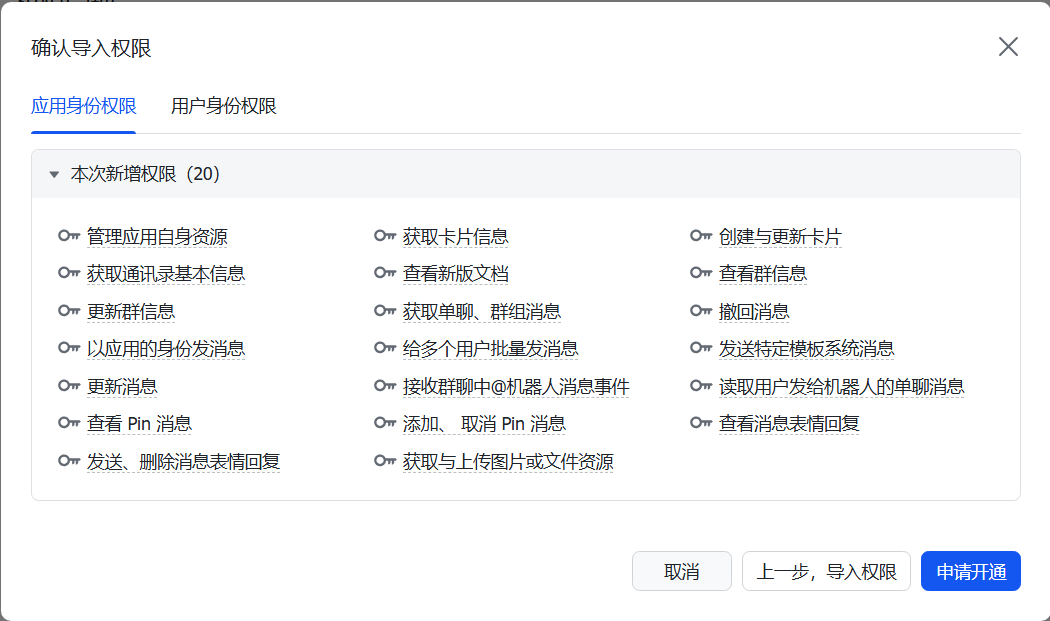
- 确认导入结果
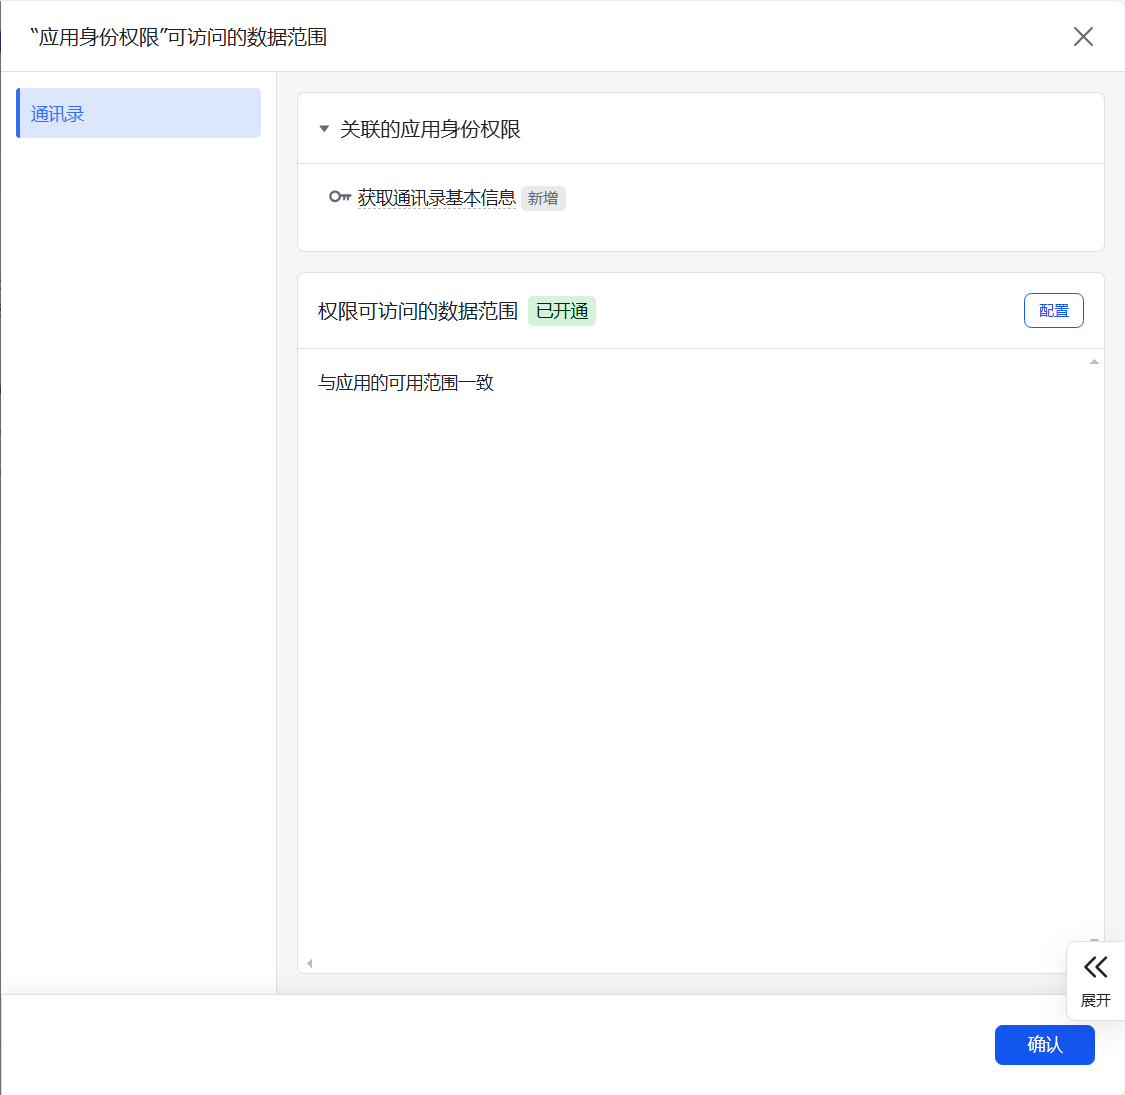
- 确认数据范围
- 修改后再次发布

- 事件配置
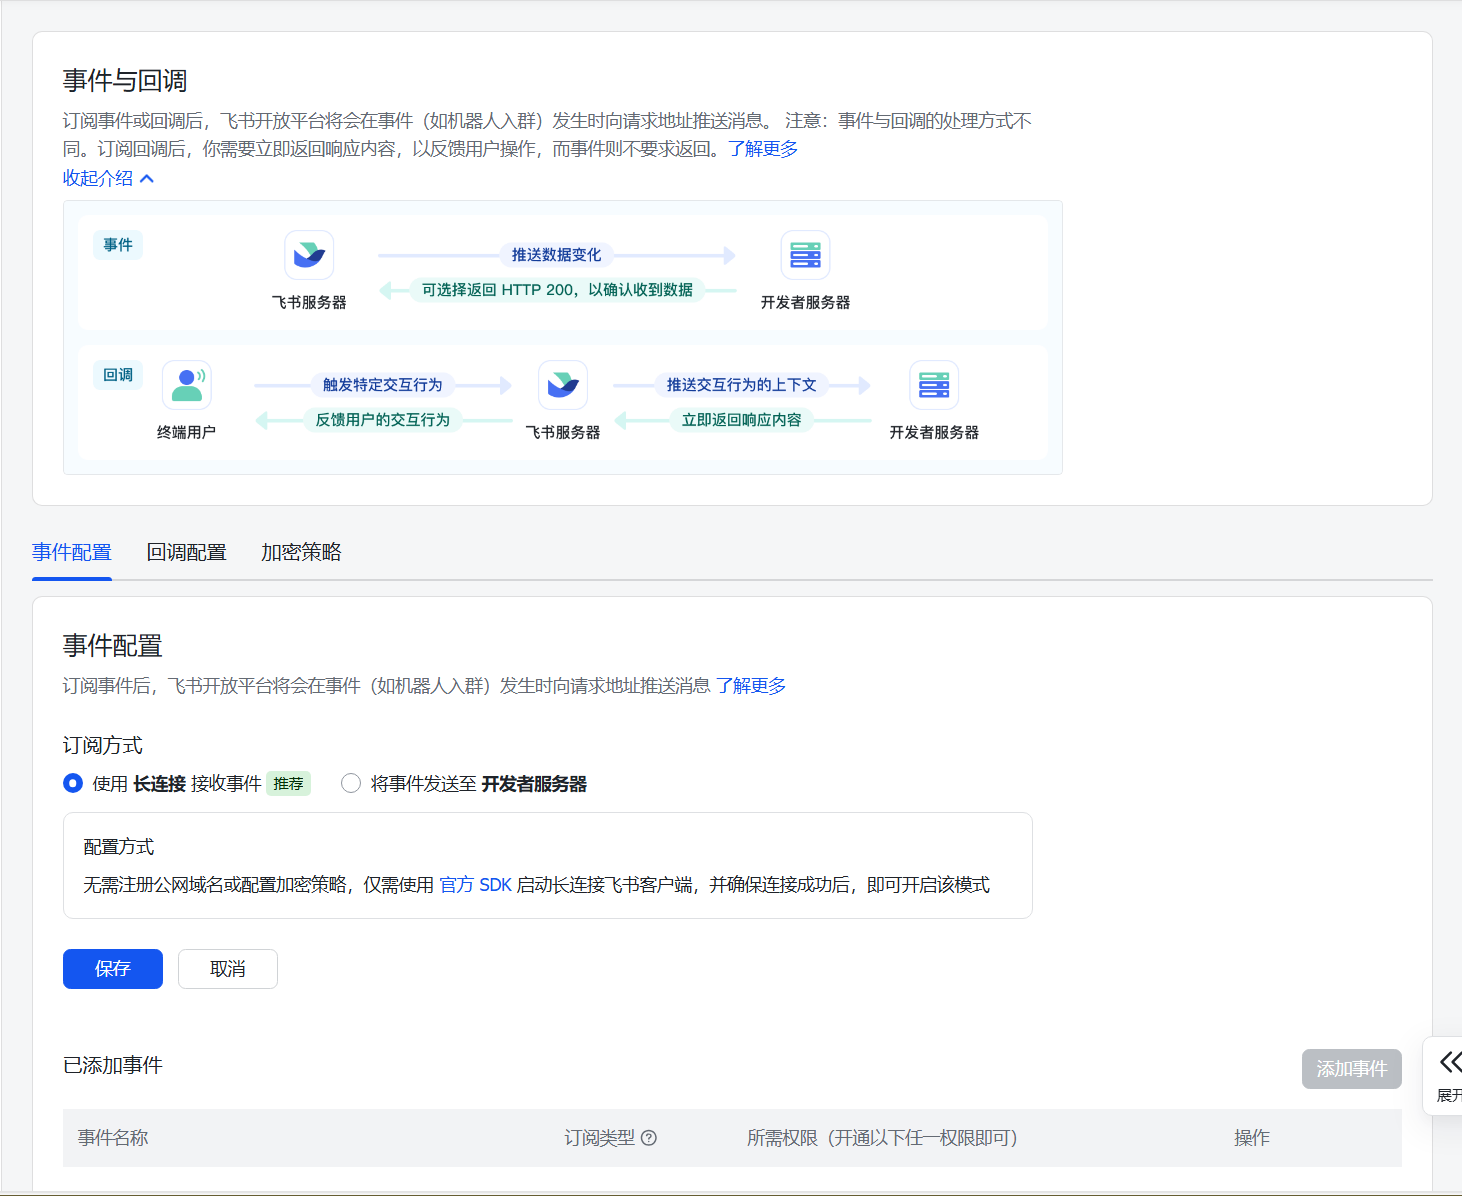
- 回调配置
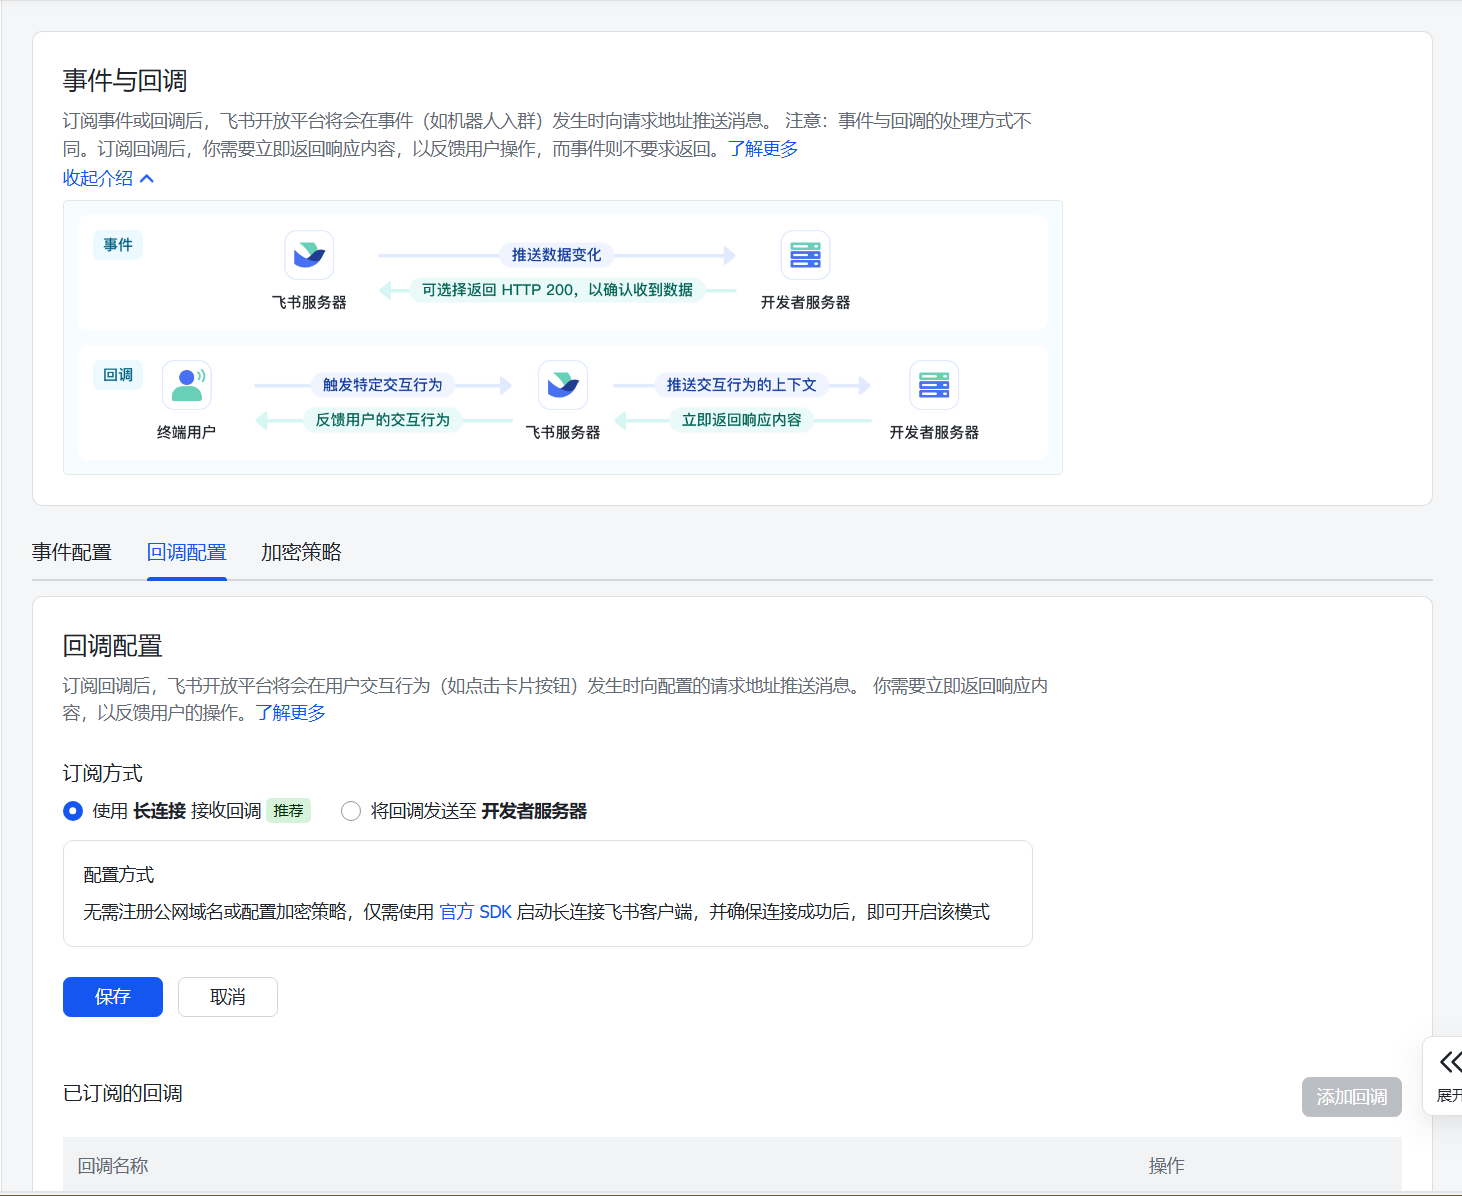
- 再次发布
- 确认发布情况
提示:运维专家参考类似创建即可。
两个机器人创建完毕后,保存相关App ID和App Secret:

| 序号 | 角色 | App ID | App Secret |
|---|---|---|---|
| 01 | 生活助手 | cli_a95b6xxxxxxxxxx | KyGI674vI7Xwkjxxxxxxxxxxxxxxxxxxxx |
| 02 | 运维专家 | cli_a95b6xxxxxxxxxx | b5U4FxtNQPpKloxxxxxxxxxxxxxxxxxxxx |
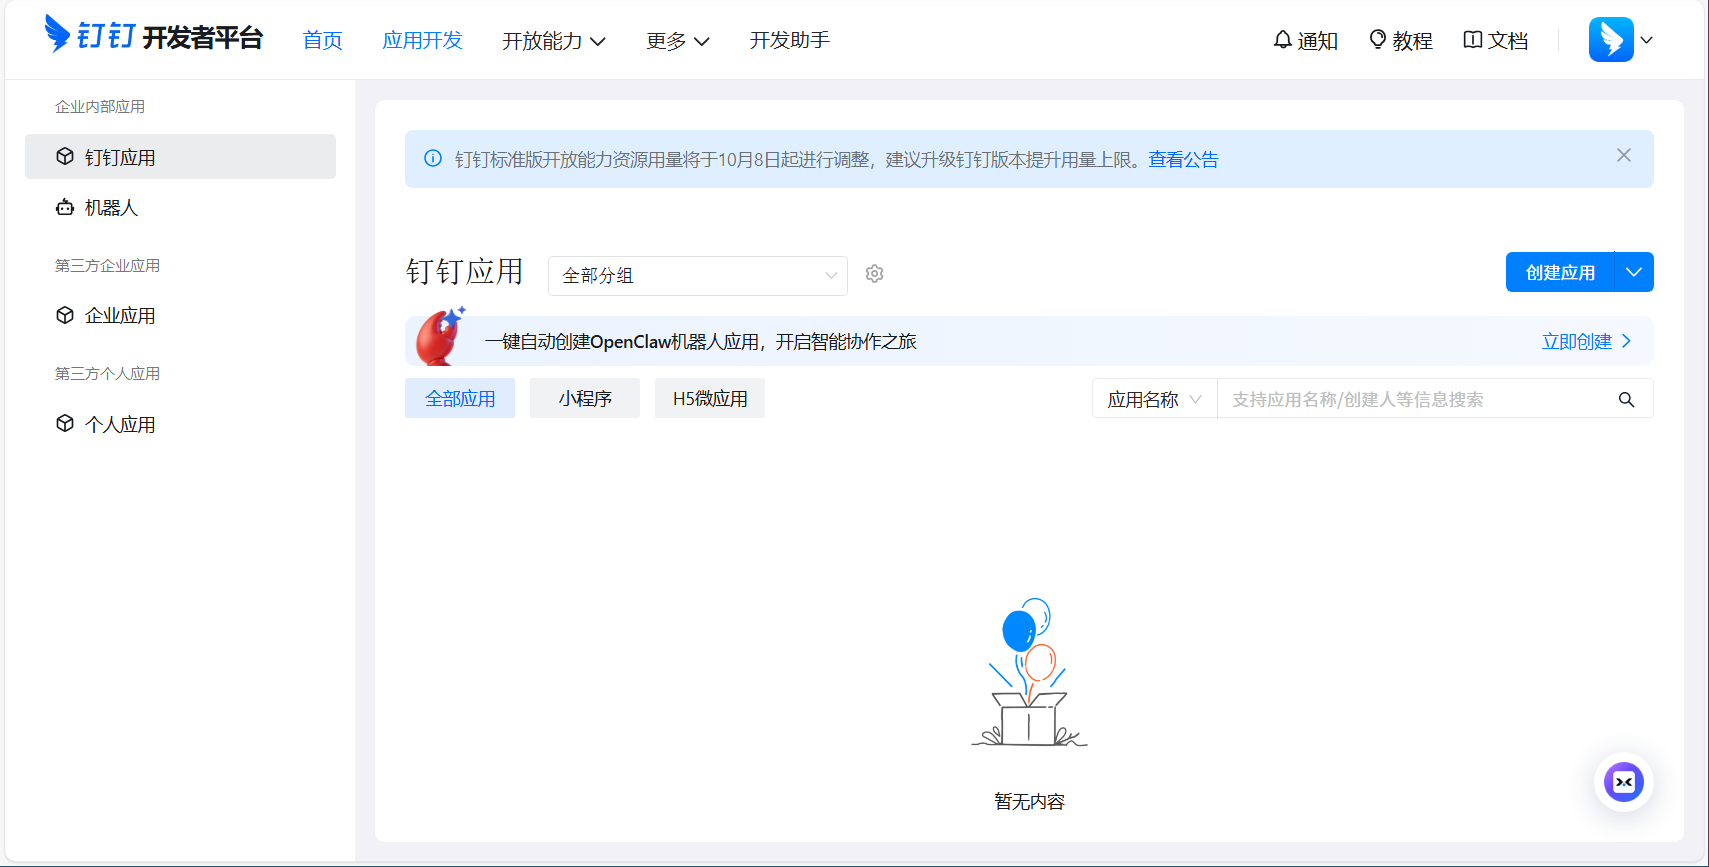
钉钉渠道
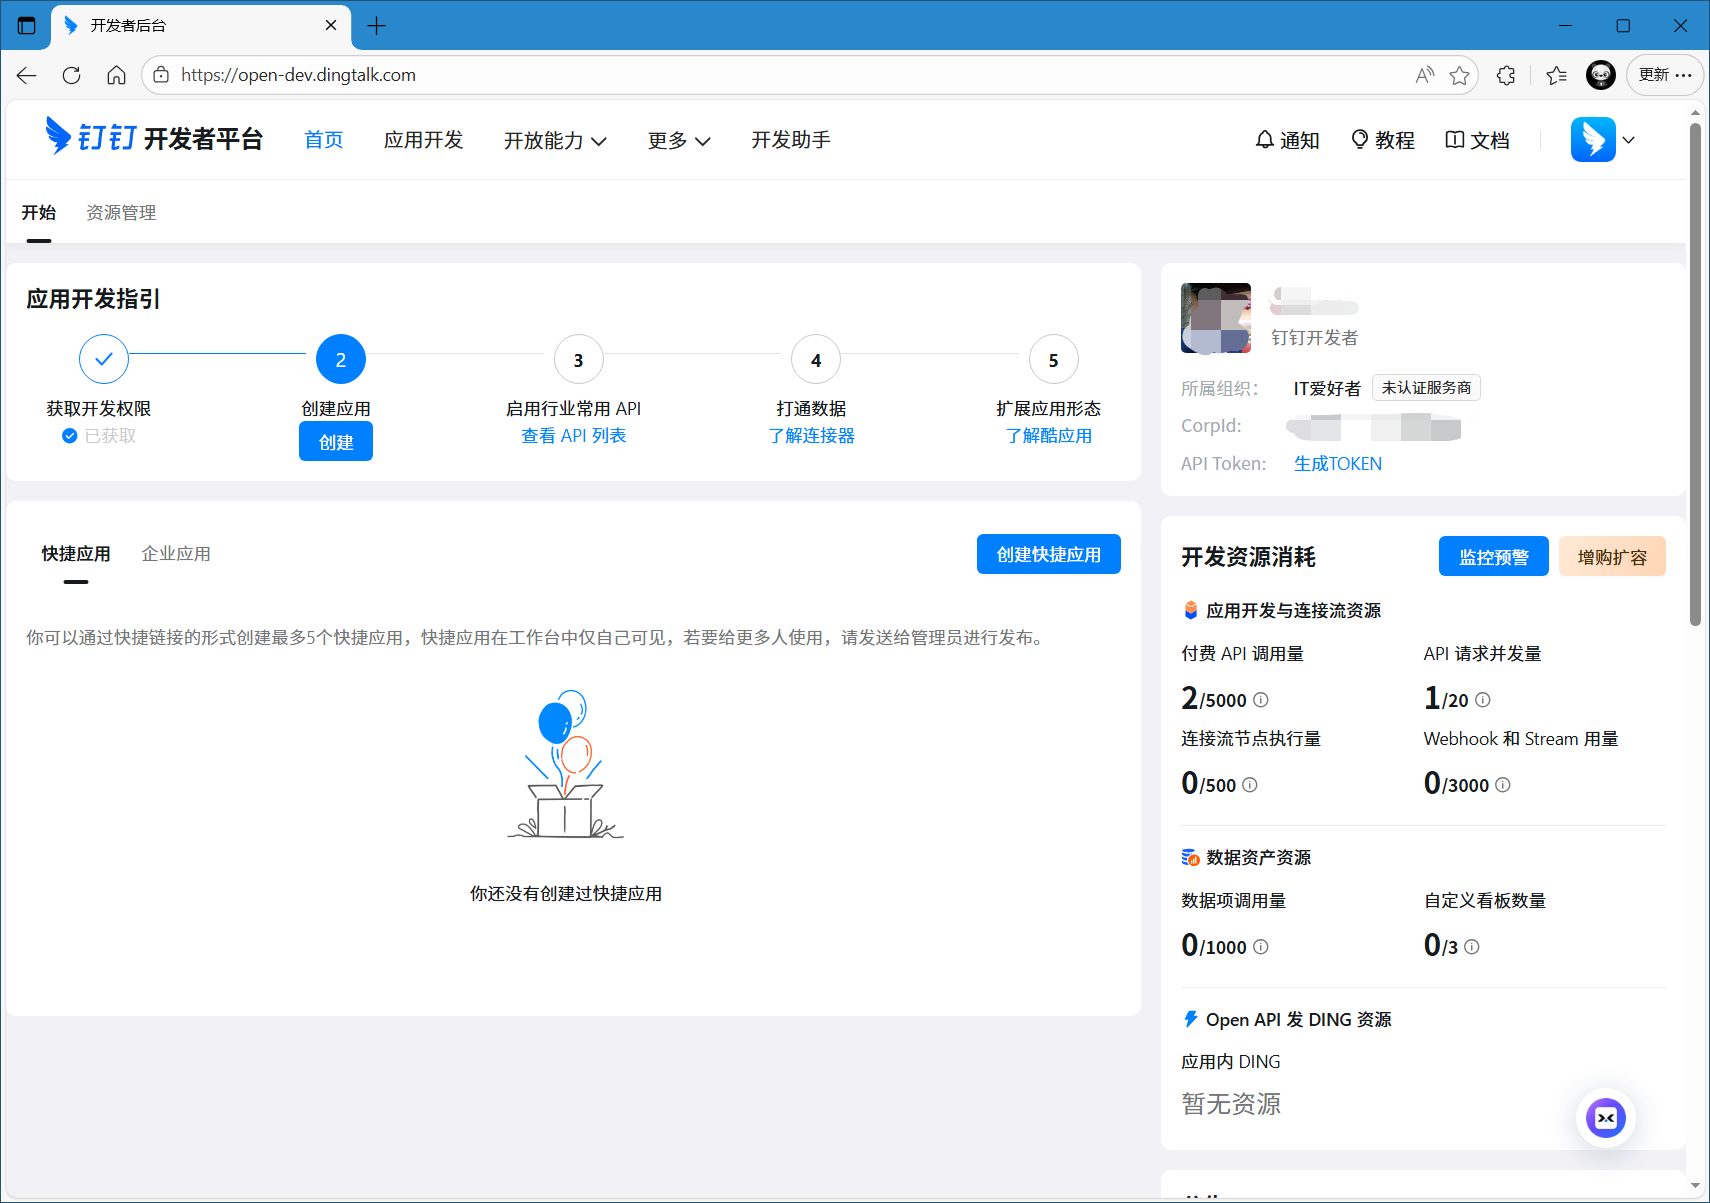
登录钉钉开放平台 。
创建企业
钉钉右上角点击「创建或加入企业」,创建企业/团队,填写企业信息完成创建。
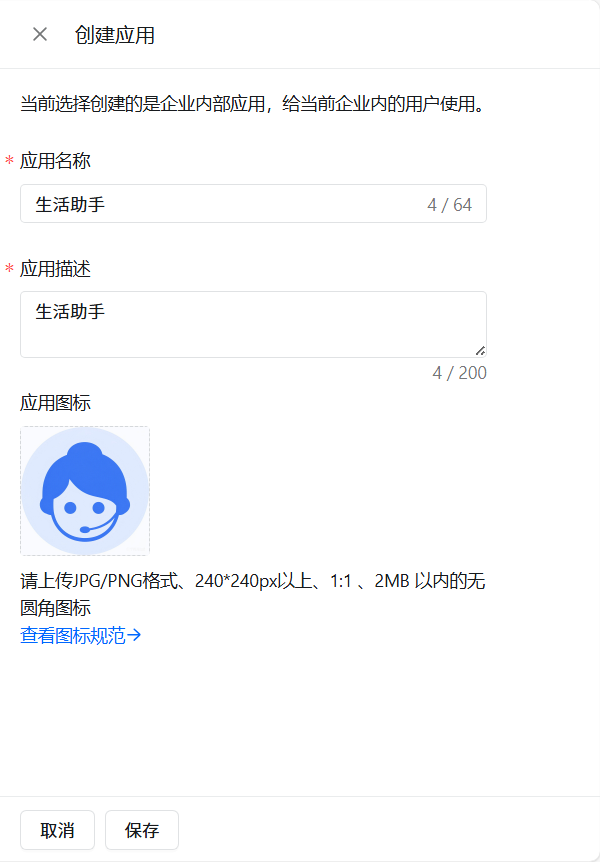
创建应用
- 创建应用
- 钉钉应用
- 设置应用
- 机器人
选择配置机器人
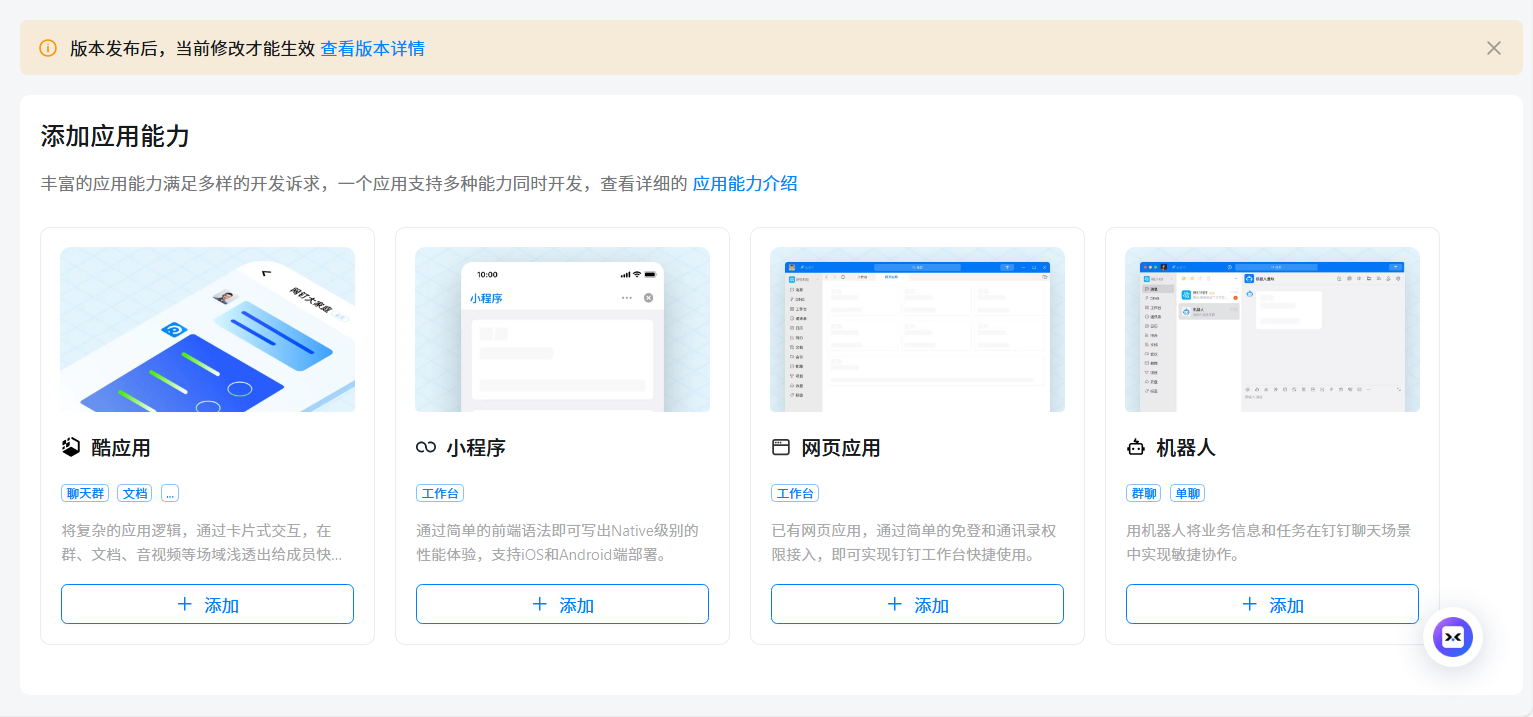
- 配置机器人
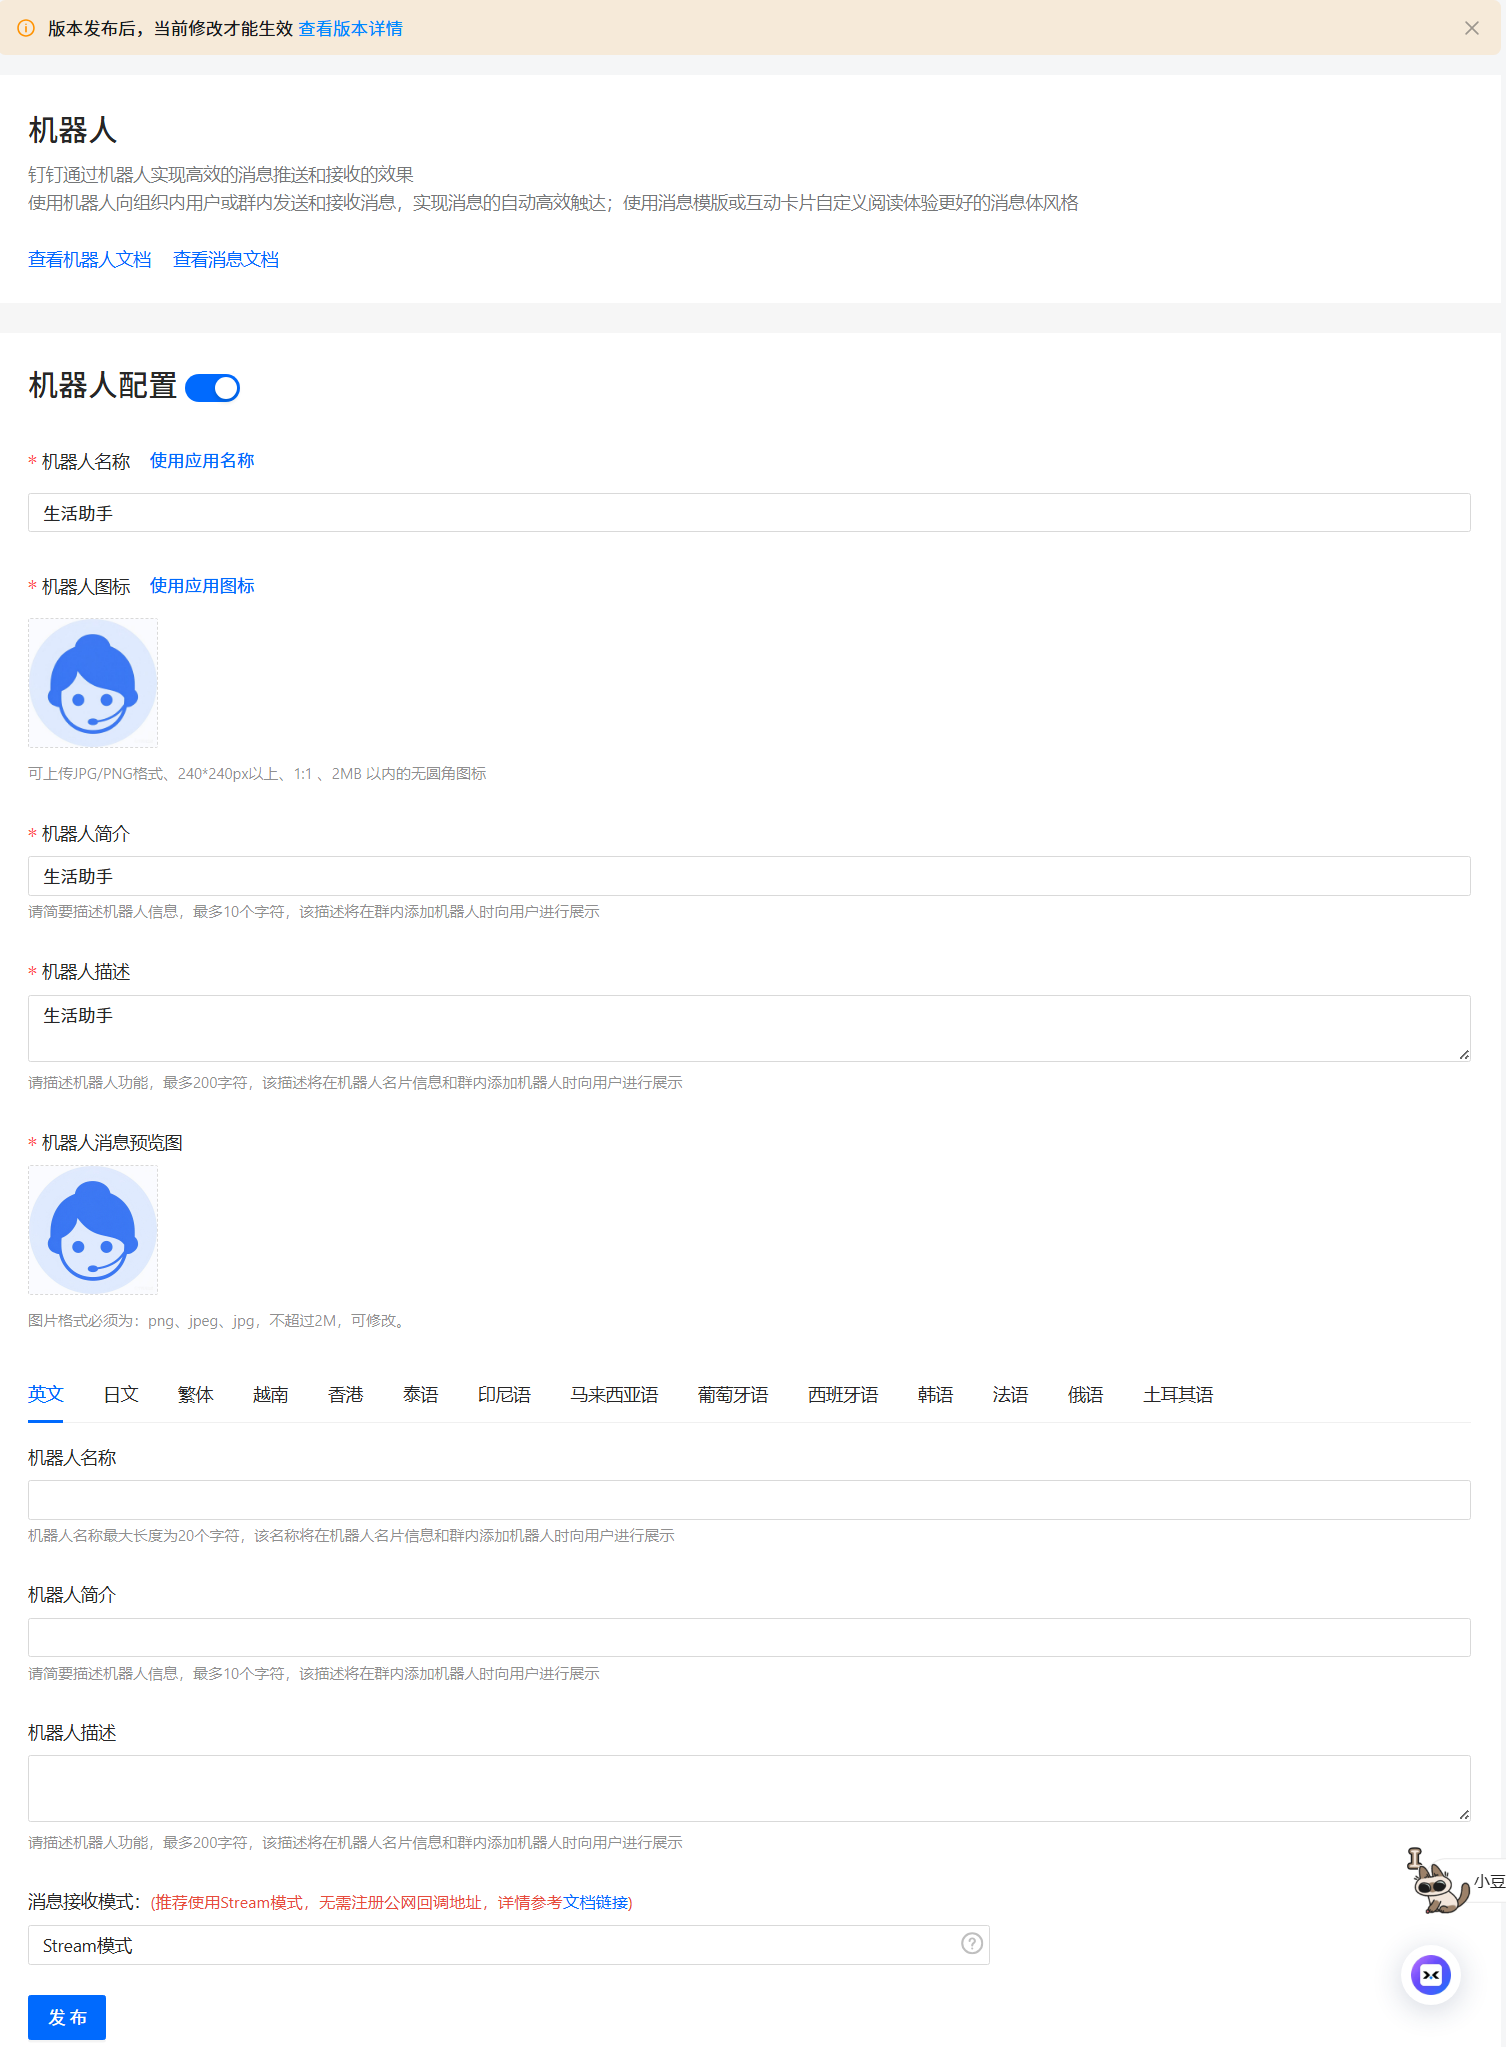
- 确认发布

- 查看版本

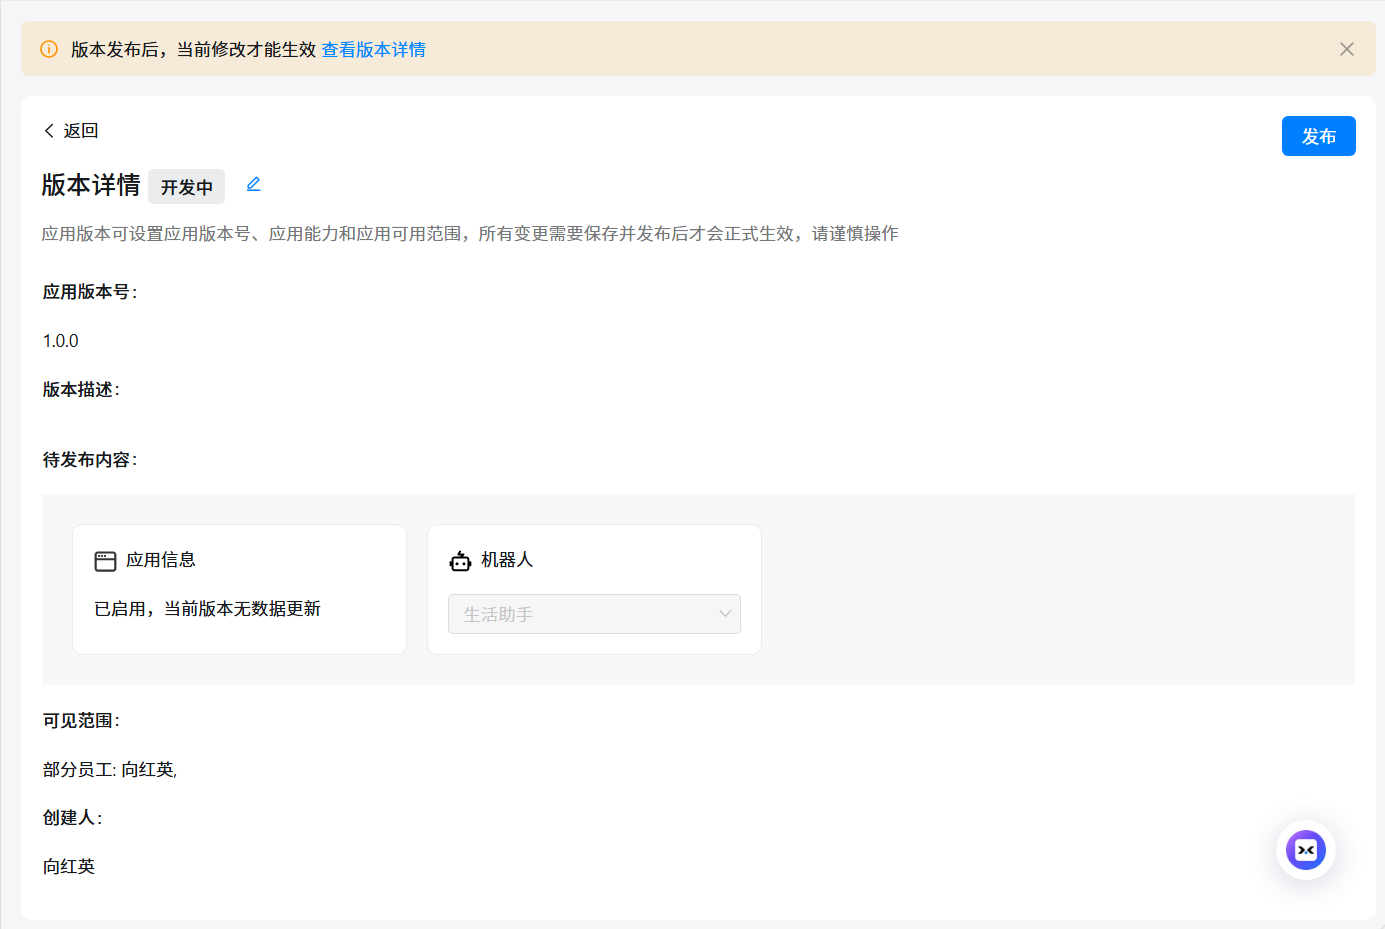
- 编辑版本
保存,可见范围根据需要可选择全部员工。
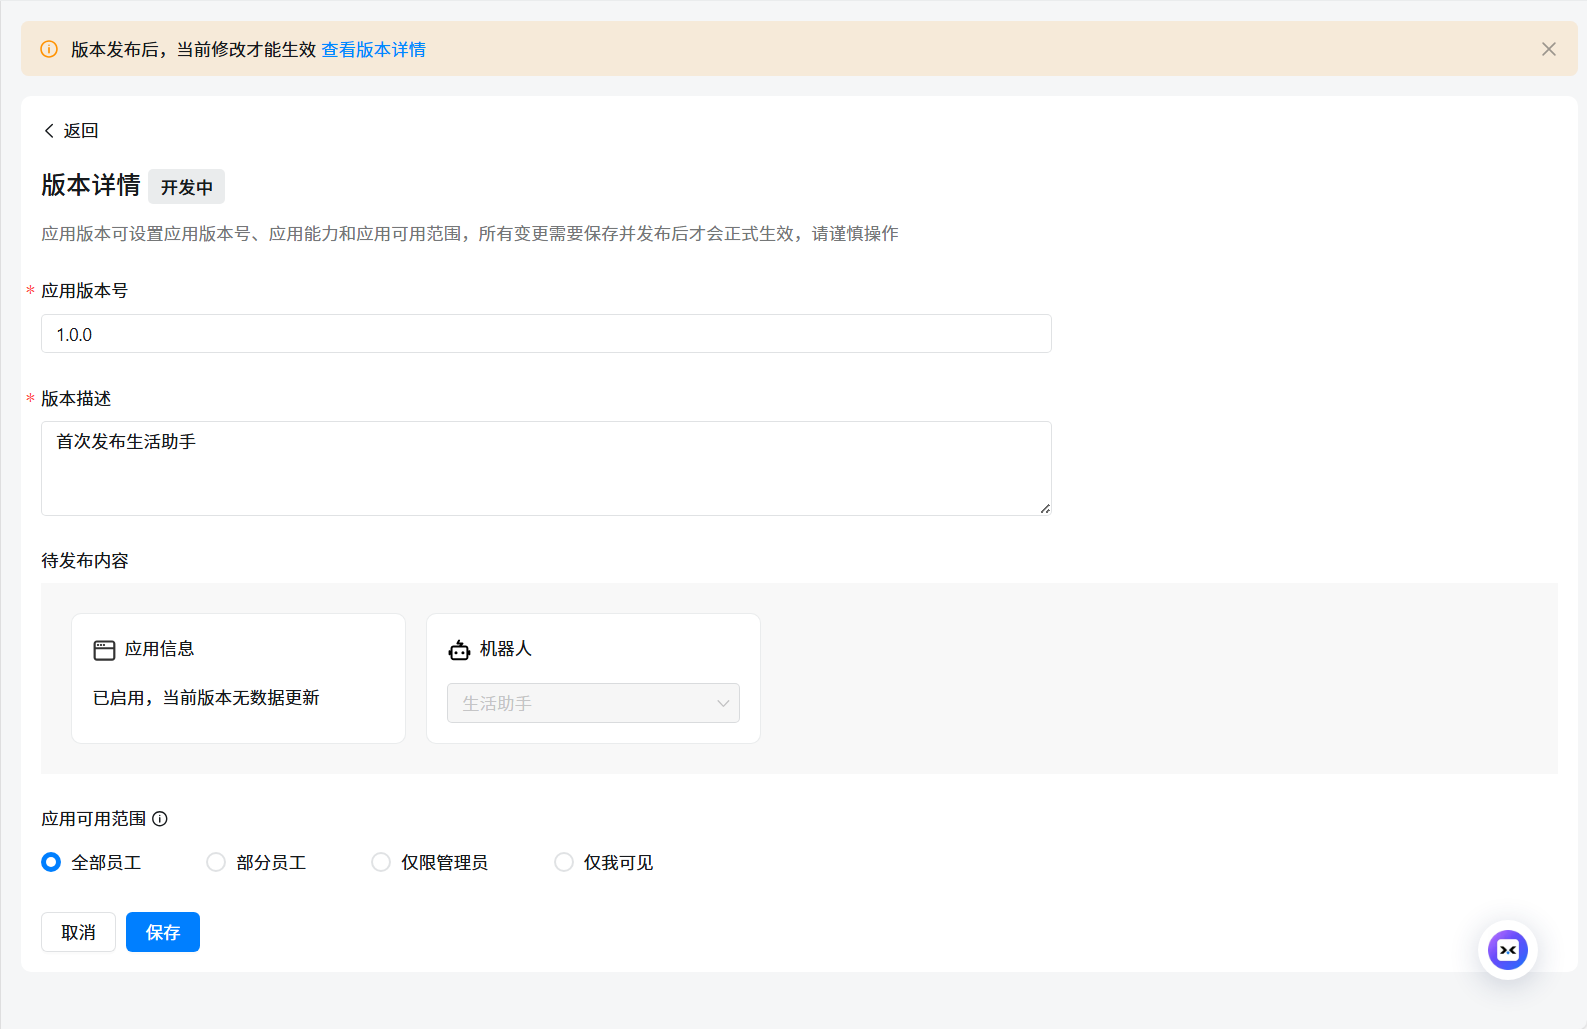
- 确认发布

- 确认上线
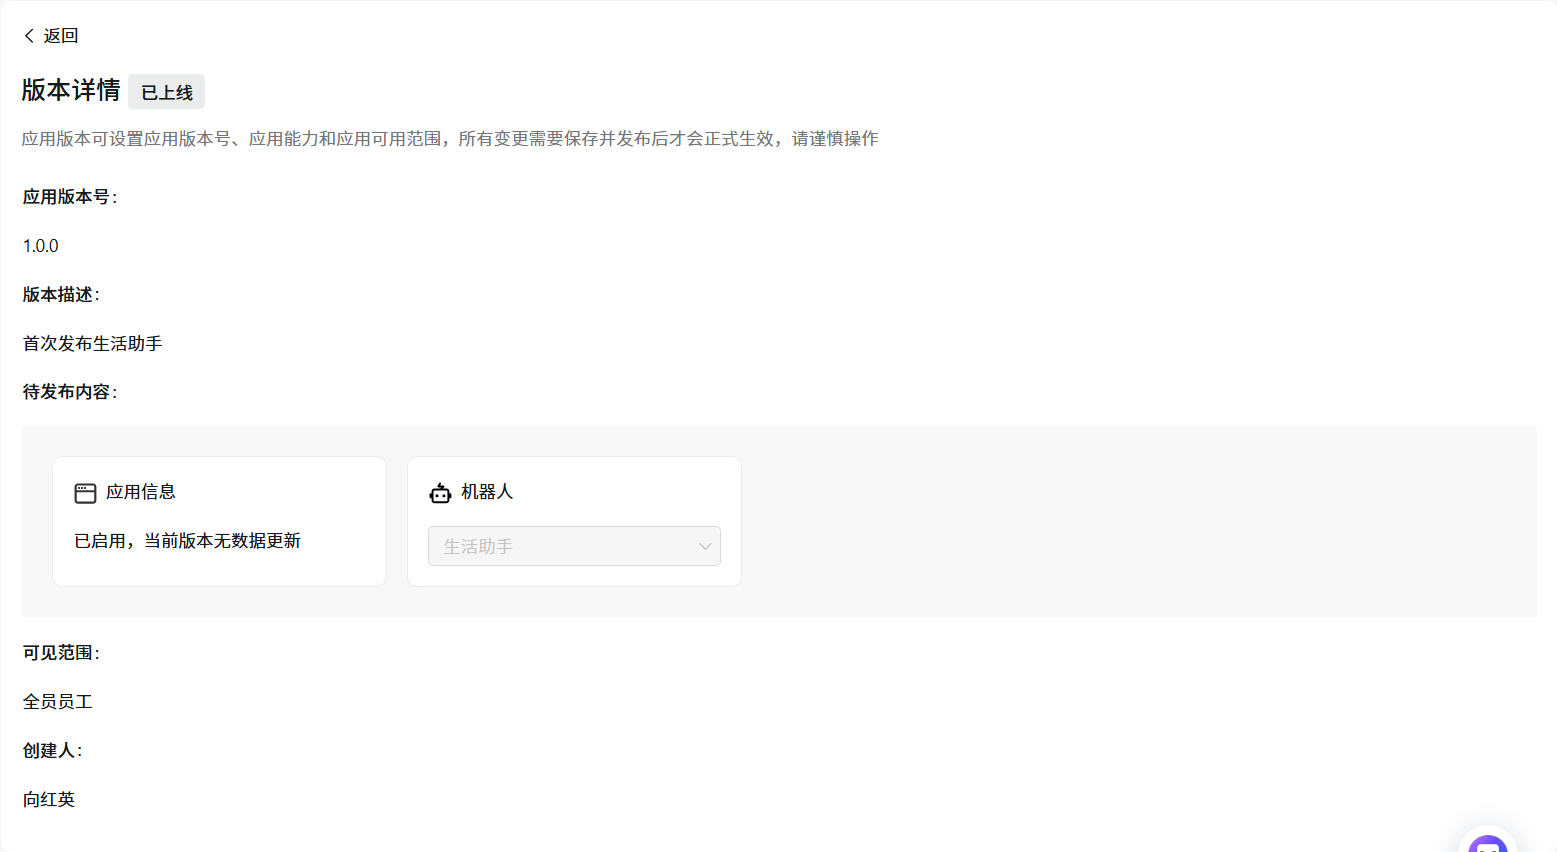
- 保存凭证
保存 Client ID (原 AppKey 和 SuiteKey)和 Client Secret (原 AppSecret 和 SuiteSecret)。
提示:运维专家参考类似创建即可。
两个机器人创建完毕后,保存相关App ID和App Secret:

| 序号 | 角色 | Client ID | Client Secret |
|---|---|---|---|
| 01 | 生活助手 | ding1ructxxxxxxxxxx | t-fxnM9DLaflo1akOl78AuhQdsTAPOFtxPW7RQxxxxxxxxxxxxxxxxxxxxxxxxxxxxxx |
| 02 | 运维专家 | dingcmelxxxxxxxxxx | 7WEXHtOZWihVta6auHMwL7e3Sa4cJx8PTAguqy\xxxxxxxxxxxxxxxxxxxxxxxxxxxxxx |
脚本安装
提示:更详细的安装参考《029.OpenClaw脚本部署-阿里百炼大模型对接》。
依赖安装
OpenClaw依赖于部分组件,如 Node/make/g++/cmake/python3 ,没有提前安装此类组件,直接执行 OpenClasw 的安装脚本,安装脚本会自动处理此要求,但由于在国内环境,通常自动处理过程会出现安装拉取失败,因此建议提前安装。
- node安装
nvm 是一个流行的工具,可以方便地安装和管理多个版本的 Node.js,适合需要切换不同版本的开发者。
root@myclaw:~# curl -o- https://raw.githubusercontent.com/nvm-sh/nvm/v0.40.4/install.sh | bash
root@myclaw:~# source ~/.bashrc
root@myclaw:~# nvm install 24               # 安装最新版,也可执行版本 `nvm install node` 安装
root@myclaw:~# npm --version
11.9.0
root@myclaw:~# node --version
v24.14.0
更多其他安装方式参考:在 Ubuntu 系统下安装 Node.js 有多种方法
- make/g++/cmake/python3安装
root@myclaw:~# apt -y install make g++ cmake git
正式安装
- 执行安装
若需要跳过新手引导,只安装二进制文件,等安装完成后再进行单独配置,可执行curl -fsSL https://openclaw.ai/install.sh | bash -s -- --no-onboard命令快速安装。
root@myclaw:~# curl -fsSL https://openclaw.ai/install.sh | bash
#……
+--------------------------------------------------------------------------------------------+
|
o  I understand this is personal-by-default and shared/multi-user use requires lock-down. Continue?
|  Yes
|
o  Setup mode
|  QuickStart
| 选项 | 含义 | 推荐场景 |
|---|---|---|
| QuickStart | 使用推荐的默认配置先跑起来,细节之后再用 openclaw configure调整 | 第一次使用 / 想快速体验 |
| Manual | 手动逐项配置所有选项 | 对配置和安全有经验的用户 |
Manual释义:此为 “手动模式” 引导,安装过程中会让你现在就配置关键项,例如:
- port:服务监听端口(对外提供服务的端口)
- network:绑定到哪个地址/网卡(只监听 127.0.0.1、本机+内网、还是 0.0.0.0 全部网卡)
- Tailscale:是否通过 Tailscale 私网访问(常见用于安全的远程访问/团队内网)
- auth options:认证方式(是否需要登录、token、密码等)
适合:打算长期运行、多人访问、服务器部署、对安全和网络暴露有明确要求。
+--------------------------------------+
|
o  Model/auth provider
|  Volcano Engine
|
o  Enter Volcano Engine API key
|  d7ac0990-cac1-4c91-xxxxxxxxxxxxxxxxxxxx
|
o  Model configured -------------------------------------+
|                                                        |
|  Default model set to volcengine-plan/ark-code-latest  |
|                                                        |
+--------------------------------------------------------+
| 选项 | 含义 |
|---|---|
| OpenAI/Anthropic/Google 等 | 使用国外官方模型服务 |
| MiniMax/Qwen/Moonshot/GLM | 国内模型厂商 |
| OpenRouter/Vercel AI Gateway | 多模型聚合/代理网关 |
| Copilot | 使用已有 Copilot 授权 |
| Synthetic | 本地或测试用的模拟模型 |
| Custom Provider | 用于接入任何兼容 OpenAI 或 Anthropic 格式的第三方 API 端点,可以自由设置 Base URL(例如 Qwen 的地址)、API Key 和模型名称 |
| Skip for now | 暂时跳过 |
若使用Custom Provider,则需要继续输入API Base URL、API Key、Endpoint compatibility、Model ID、Model alias等。
o  Model configured -------------------------------------+
|                                                        |
|  Default model set to volcengine-plan/ark-code-latest  |
|                                                        |
+--------------------------------------------------------+
|
o  Default model
|  Keep current (volcengine-plan/ark-code-latest)
默认 OpenClaw 的渠道通道大多数都是国外的,建议跳过,后续单独配置飞书/微信等。
+-------------------------------------------------------------------------------------------+
|
*  Select channel (QuickStart)
#……
|  > Skip for now (You can add channels later via `openclaw channels add`)          # 选择跳过
+-------------------------------------------------------------------------------------------+
| 选项 | 说明 | 推荐场景 |
|---|---|---|
| Perplexity Search | 提供结构化搜索结果,可以过滤域名、语言、更新鲜度 | 新手/个人用户推荐,功能全面 |
| Brave Search | 纯网页搜索,类似浏览器搜索 | 普通搜索需求 |
| Gemini (Google Search) / Grok / Kimi | 高级搜索或 AI 驱动搜索 | 高级用户 / 特定模型 |
| Skip for now | 不启用搜索功能 | 只用模型生成回答,不检索网页 |
本实验使用Kimi进行测试,也可跳过配置。
+------------------------------------------------------------------------------+
|
o  Search provider
|  Kimi (Moonshot)
|
*  Moonshot / Kimi API key
|  sk-xjYh2CUuyq2LU1TBszOQ3xxxxxxxxxxxxxxxxxxxxxxxxxxxxxx
若使用Tavily Search 也可使用如下:
+------------------------------------------------------------------------------+
|
o  Search provider
|  Tavily Search
|
o  Tavily API key
|  tvly-dev-1z55ih-YdkH5Fd01aMxxxxxxxxxxxxxxxxxxxxxxxxxxxxxx
技能配置,本安装过程先跳过技能安装,后续再添加。
安装部分技能需要brew命令,若环境未安装该命令,可跳过skill,待OpenClaw安装完毕再独立安装相关skill。
有关OpenClaw初始化默认给出的skill介绍如下:
| 技能名称 | 核心作用 | 前置条件 | 安全风险 |
|---|---|---|---|
| 1password | 对接 1Password 密码管理器,查询 / 获取密码、密钥 | 安装 1Password CLI 并登录账号 | ⚠️ 极高(可泄露所有密码) |
| blogwatcher | 监控博客 / 网站更新,推送新内容通知 | 配置目标站点 RSS / 网页地址 | 低(仅被动监控) |
| blucli | 控制本地蓝牙设备(连接、传输文件等) | 系统安装 bluez 等蓝牙工具,硬件可用 | ⚠️ 中(可访问 / 控制周边蓝牙设备) |
| camsnap | 调用系统摄像头拍摄照片 / 视频 | 系统存在可用摄像头并授权 | ⚠️ 极高(可偷拍,侵犯隐私) |
| clawhub | OpenClaw 协作同步中心,分享配置 / 技能 | 登录 Clawhub 账号 | 中(可能泄露配置到云端) |
| eightctl | 控制 Eight Sleep 智能睡眠设备 | 拥有 Eight Sleep 设备并绑定账号 | 低(仅控制智能家居) |
| gemini | 调用 Google Gemini 多模态模型(图文音视频处理) | 拥有 Gemini API Key | 低(仅模型调用,无系统权限) |
| gifgrep | 搜索本地 / 网络 GIF / 图片 | 可访问本地图片目录或图床 API | 低(仅读取图片文件) |
| github | 管理 GitHub 仓库、Issue、PR 等 | 拥有 GitHub PAT(个人访问令牌) | ⚠️ 高(PAT 权限过大可篡改代码) |
| gog | 控制 GOG Galaxy 游戏客户端(安装 / 启动游戏) | 安装 GOG Galaxy 并登录 | 低(仅控制游戏客户端) |
| goplaces | 地理位置服务(查路线、POI、天气) | 可访问定位 / 地图 API(如 Google Maps) | 低(仅查询位置信息) |
| himalaya | 邮件客户端工具,收发 / 管理邮件 | 配置邮箱账号(IMAP/SMTP) | 中(可读取 / 发送你的邮件) |
| mcporter | 迁移 / 备份各类应用数据 | 对应应用已安装并授权访问 | 中(可读取应用敏感数据) |
| nano-banana-pro | 文本 / 代码增强编辑工具 | 无特殊依赖(基础文本操作) | 低(仅读写文本文件) |
| nano-pdf | 读取 / 解析 PDF 内容 | 系统安装 PDF 处理库(如 poppler) | 低(仅读取 PDF 文本) |
| obsidian | 对接 Obsidian 笔记软件,读写 / 同步笔记 | 安装 Obsidian 并指定 vault 路径 | 中(可读写你的笔记文件) |
| openai-whisper | 语音转文字(音频 / 视频转文本) | 系统安装 FFmpeg,有可用音频输入 | 中(可读取麦克风 / 音频文件) |
| openhue | 控制 Philips Hue 智能灯 | 拥有 Hue 桥接器并完成配对 | 低(仅控制智能家居照明) |
| oracle | 对接 Oracle 数据库,执行查询 / 操作 | 拥有 Oracle 数据库连接凭证 | ⚠️ 高(可读写数据库敏感数据) |
| ordercli | 管理订单 / 电商平台订单(查询、创建) | 电商平台 API 凭证 | 中(可查看 / 操作你的订单) |
| sag | 系统管理工具(查看资源、进程、日志) | 运行用户拥有系统监控权限 | ⚠️ 中(可泄露系统敏感信息) |
| songsee | 音乐识别 / 播放控制(如识别歌曲) | 可访问音频输入 / 音乐服务 API | 低(仅音频识别与播放控制) |
| sonoscli | 控制 Sonos 智能音响(播放、音量) | 同一局域网内有 Sonos 设备 | 低(仅控制智能家居音响) |
| summarize | 文本 / 长文档 / 网页内容摘要生成 | 可访问目标文本 / 网页 | 低(仅读取并生成摘要) |
| video-frames | 提取视频帧为图片,分析视频内容 | 系统安装 FFmpeg 等视频处理库 | 中(可读取视频文件) |
| wacli | 控制 WhatsApp 客户端(收发消息) | 登录 WhatsApp 账号(如 whatsapp-web.js) | ⚠️ 高(可读取 / 发送你的聊天记录) |
| xurl | 抓取网页内容,提取信息 / 生成预览 | 可访问目标网页(网络连通) | 低(仅读取网页内容) |
| Skip for now | 跳过所有依赖安装,仅启动基础功能 | 无 | 无(最小权限启动) |
o  Skills status -------------+
|                             |
|  Eligible: 6                |             # 当前环境下,有 6 个技能满足条件,可以直接用
|  Missing requirements: 39   |             # 有 39 个技能因为缺依赖/没配置/权限不足,暂时不可用
|  Unsupported on this OS: 7  |             # 当前系统不支持的技能
|  Blocked by allowlist: 0    |             # 当前没有被白名单/策略限制掉的技能
|                             |
+-----------------------------+
|
*  Configure skills now? (recommended)      # 安装必要依赖,引导启用常用能力,建议选择Yes
|  > Yes /   No
*  Install missing skill dependencies
|  [+] Skip for now (Continue without installing dependencies)
|  [ ] 🔐 1password
|  [ ] 📰 blogwatcher
|  [ ] 🫐 blucli
|  [ ] 📸 camsnap
|  [ ] 🛌 eightctl
|  [ ] ✨ gemini
|  [ ] 🧲 gifgrep
|  [ ] 🐙 github
|  [ ] 🎮 gog
|  [ ] 📍 goplaces
|  [ ] 📧 himalaya
|  [ ] 📦 mcporter
|  [ ] 🍌 nano-banana-pro
|  [ ] 📄 nano-pdf
|  [ ] 💎 obsidian
|  [ ] 🎤 openai-whisper
|  [ ] 💡 openhue
|  [ ] 🧿 oracle
|  [ ] 🛵 ordercli
|  [ ] 🔊 sag
|  [ ] 🌊 songsee
|  [ ] 🔊 sonoscli
|  [ ] 🧾 summarize
|  [ ] 🎬 video-frames
|  [ ] 📱 wacli
|  [ ] 🐦 xurl
+---------------------------------------------------------------------------------+
对于新手而言,建议安装如下技能:
- file-manager(文件管理技能):支持自然语言操作本地/云端文件,如创建、删除、修改、移动文件,搭配千问大模型,可精准理解复杂文件操作指令;
- summarize(文本总结技能):支持URL、PDF、文本等多种格式的内容总结,千问大模型可优化总结精度,快速提取核心信息;
- agent-browser(浏览器自动化技能):实现浏览器自动打开、网页数据抓取、模拟点击等操作,千问大模型可规划抓取流程,提升自动化效率;
- todoist(任务管理技能):创建待办事项、设置提醒、跟踪进度,与千问大模型协同,可自动拆解复杂任务为可执行的待办项;
- nano-pdf(PDF处理技能):自然语言编辑PDF,如合并、拆分、提取内容,无需专业PDF工具,千问大模型可精准理解编辑需求。
设置 GOOGLE_PLACES_API_KEY,使用谷歌坐标定位相关能力,暂时可跳过。
+-----------------------------+
|
o  Configure skills now? (recommended)
|  Yes
|
o  Install missing skill dependencies
|  Skip for now
|
o  Set GOOGLE_PLACES_API_KEY for goplaces?
|  No
|
o  Set NOTION_API_KEY for notion?
|  No
|
o  Set OPENAI_API_KEY for openai-whisper-api?
|  No
|
o  Set ELEVENLABS_API_KEY for sag?
|  No
|
o  Hooks ------------------------------------------------------------------+
|                                                                          |
|  Hooks let you automate actions when agent commands are issued.          |
|  Example: Save session context to memory when you issue /new or /reset.  |
|                                                                          |
|  Learn more: https://docs.openclaw.ai/automation/hooks                   |
|                                                                          |
+--------------------------------------------------------------------------+
OpenClaw 配置扩展钩子的界面,Hooks 是在核心流程中插入的自定义功能,用于增强 OpenClaw 的扩展能力,说明如下:
| 选项 | 中文释义 | 核心作用 | 适用场景 | 风险 / 注意事项 |
|---|---|---|---|---|
| Skip for now | 暂时跳过 | 不启用任何钩子,仅保留核心功能 | 快速部署、时不需要扩展功能 | 无,最小化启动 |
| boot-md | 启动脚本增强 | 加载自定义 Markdown 格式的启动脚本 / 配置 | 定义启动流程、量配置初始化 | 低,仅加载配置文件 |
| bootstrap-extra-file | 额外文件引导 | 启动时自动加载指定目录的额外配置 / 脚本文件 | 扩展自定义工具、载第三方插件 | 中,若加载恶意文件可能有风险 |
| command-logger | 命令日志器 | 记录 OpenClaw 执行的所有命令 / 操作日志 | 审计 / 排查问题、控操作行为 | 低,仅记录日志(注意日志文件权限) |
| session-memory | 会话记忆 | 持久化存储对话会话,保留上下文记忆 | 长对话场景、多轮交互 | 低,仅存储对话内容(注意隐私) |
*  Enable hooks?
|  [+] kip for now
|  [ ] oot-md
|  [ ] bootstrap-extra-files
|  [ ] ommand-logger
|  [ ] ession-memory
OpenClaw 配置完成后,选择最终启动方式的界面,不同选项对应不同的交互形式。
| 选项 | 中文释义 | 核心特点 | 适用场景 | 操作难度 |
|---|---|---|---|---|
| Hatch in TUI (recommended) | 以终端交互界面启动(推荐) | 基于终端的图形化界面(TUI),无需浏览器、官方推荐,功能完整且轻量、直接在服务器终端操作,适配无图形界面环境 | 服务器 / 无桌面环境部署、新手快速上手、偏好终端操作 | 低(终端内可视化操作) |
| Open the Web UI | 启动 Web 界面 | 浏览器访问的图形化界面,操作更直观、支持多设备访问(需开放端口) | 有桌面环境 / 可访问浏览器、希望可视化操作、多设备管理 | 中(需配置端口 / 网络) |
| Do this later | 稍后启动 | 仅完成配置,不启动服务、后续可通过 openclaw hatch 命令手动启动 | 暂时不需要立即使用、需先配置其他环境(如端口、权限) | 无(仅跳过启动) |
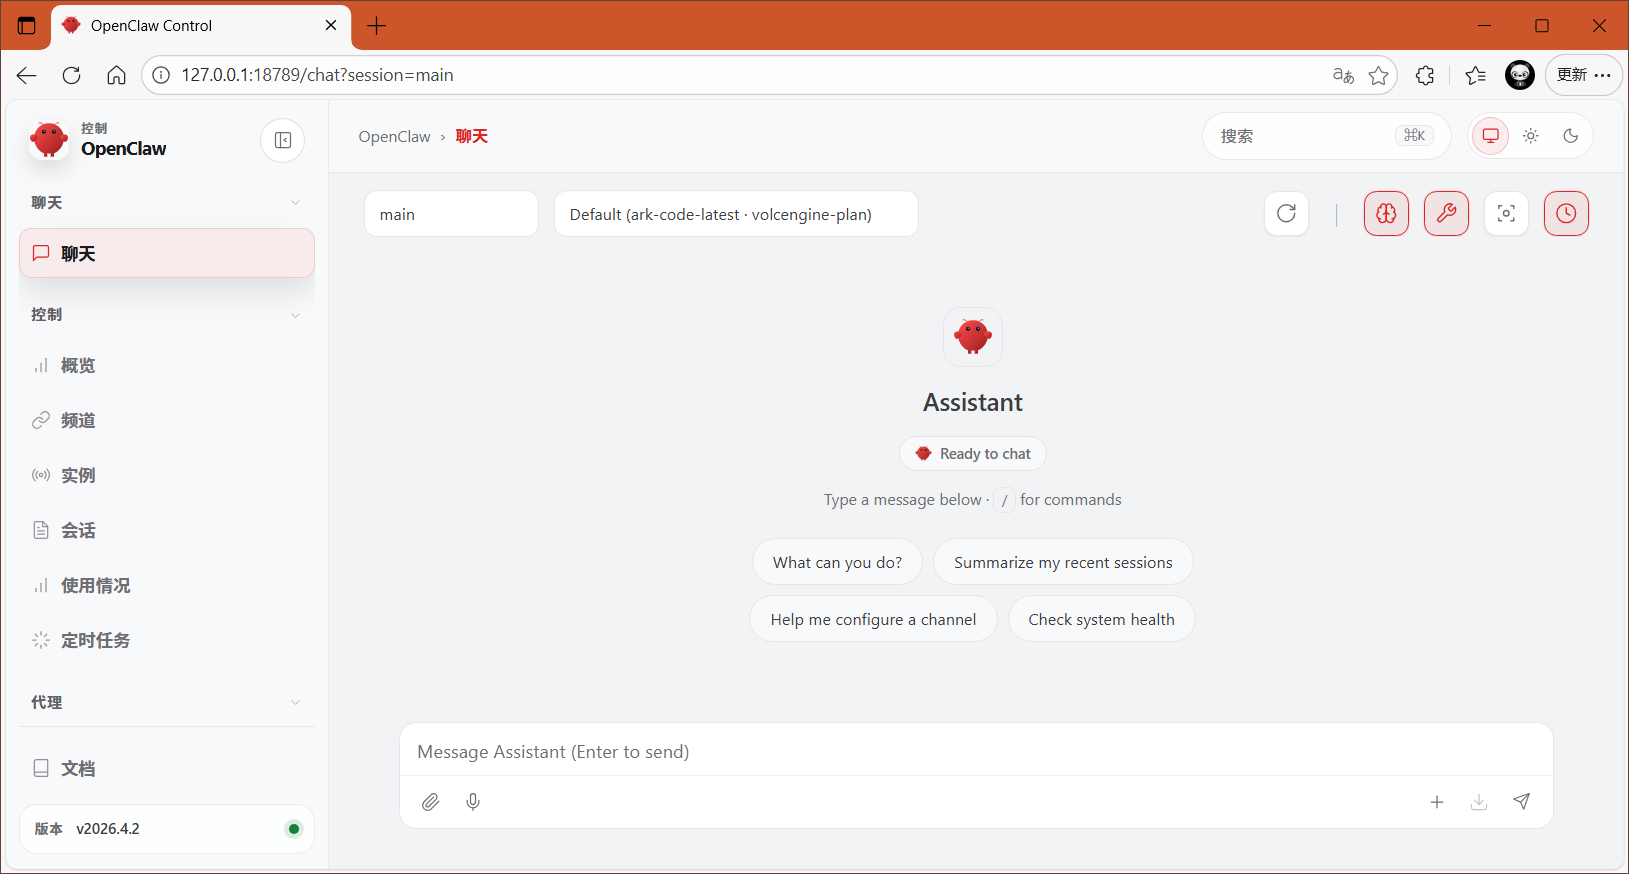
o  Control UI ---------------------------------------------------------------------+
|                                                                                  |
|  Web UI: http://127.0.0.1:18789/                                                 |
|  Web UI (with token):                                                            |
|  http://127.0.0.1:18789/#token=83fbe35423ad2a46658c507314xxxxxxxxxxxxxxxxxxxx  |
|  Gateway WS: ws://127.0.0.1:18789                                                |
|  Gateway: not detected (gateway timeout after 1500ms)                            |
|  Docs: https://docs.openclaw.ai/web/control-ui                                   |
|                                                                                  |
+----------------------------------------------------------------------------------+
|
o  Workspace backup ----------------------------------------+
|                                                           |
|  Back up your agent workspace.                            |
|  Docs: https://docs.openclaw.ai/concepts/agent-workspace  |
|                                                           |
+-----------------------------------------------------------+
|
o  Security ------------------------------------------------------+
|                                                                 |
|  Running agents on your computer is risky — harden your setup:  |
|  https://docs.openclaw.ai/security                              |
|                                                                 |
+-----------------------------------------------------------------+
|
o  Web search ------------------------------------------------------------------+
|                                                                               |
|  Web search is enabled, so your agent can look things up online when needed.  |
|                                                                               |
|  Provider: Kimi (Moonshot)                                                    |
|  API key: stored in config.                                                   |
|  Docs: https://docs.openclaw.ai/tools/web                                     |
|                                                                               |
+-------------------------------------------------------------------------------+
|
o  What now -------------------------------------------------------------+
|                                                                        |
|  What now: https://openclaw.ai/showcase ("What People Are Building").  |
|                                                                        |
+------------------------------------------------------------------------+
|
—  Onboarding complete. Use the dashboard link above to control OpenClaw.
完成安装,查看相关访问方式等。
root@openclaw:~# openclaw gateway status

🦞 OpenClaw 2026.4.2 (d74a122) — Ah, the fruit tree company! 🍎

|
o
Service: systemd (enabled)
File logs: /tmp/openclaw/openclaw-2026-04-05.log
Command: /root/.nvm/versions/node/v24.14.0/bin/node /root/.nvm/versions/node/v24.14.0/lib/node_modules/openclaw/dist/index.js gateway --port 18789
Service file: ~/.config/systemd/user/openclaw-gateway.service
Service env: OPENCLAW_GATEWAY_PORT=18789

Service config looks out of date or non-standard.
Service config issue: Gateway service PATH includes version managers or package managers; recommend a minimal PATH. (/root/.nvm/versions/node/v24.14.0/bin)
Service config issue: Gateway service uses Node from a version manager; it can break after upgrades. (/root/.nvm/versions/node/v24.14.0/bin/node)
Service config issue: System Node 22 LTS (22.14+) or Node 24 not found; install it before migrating away from version managers.
Recommendation: run "openclaw doctor" (or "openclaw doctor --repair").
Config (cli): ~/.openclaw/openclaw.json
Config (service): ~/.openclaw/openclaw.json

Gateway: bind=loopback (127.0.0.1), port=18789 (service args)
Probe target: ws://127.0.0.1:18789
Dashboard: http://127.0.0.1:18789/
Probe note: Loopback-only gateway; only local clients can connect.

Runtime: running (pid 389848, state active, sub running, last exit 0, reason 0)
RPC probe: ok

Listening: 127.0.0.1:18789
Troubles: run openclaw status
Troubleshooting: https://docs.openclaw.ai/troubleshooting
建议设置如下cache优化。
root@openclaw:~# mkdir -p /var/tmp/openclaw-compile-cache
root@openclaw:~# sudo vi /etc/profile.d/openclaw.sh
export NODE_COMPILE_CACHE=/var/tmp/openclaw-compile-cache
export OPENCLAW_NO_RESPAWN=1
确认验证
- 查看状态
查看gateway网关状态,会现职相关配置文件、绑定的IP端口、dashboard界面访问方式等信息。
提示:默认dashboard仅支持本地,即部署OpenClaw的节点通过localhost/127.0.0.1访问。
root@openclaw:~# openclaw --version             # 查看版本
OpenClaw 2026.4.2 (d74a122)
访问验证
代理访问
OpenClaw直接对公网暴露会非常危险,官方建议的方式是通过ssh建立隧道,然后在本地访问。
如上所示,在初始化完成后给出了命令示例,在任何需要访问的客户端,如Windows本机,执行如下命令。
PS C:\Windows\system32> ssh -N -L 18789:127.0.0.1:18789 root@149.88.xx.yy
然后浏览器直接访问: http://127.0.0.1:18789/#token=83fbe35423ad2a46658c5073xxxxxxxxxxxxxxxxxxxxxxxxxxxxxx 。
代理配置
部署在云端的OpenClaw服务器,不建议把图形界面相关服务或端口18789暴露到公网,建议前端安装代理,然后代理到OpenClaw。
本实验选择Nginx充当代理入口,若不需要使用域名访问,也可以直接通过 IP:Port 端口形式访问。
- 安装依赖
root@openclaw:~# apt -y install curl gnupg2 ca-certificates lsb-release ubuntu-keyring
- 导入密钥
root@openclaw:~# curl https://nginx.org/keys/nginx_signing.key | gpg --dearmor \
    | sudo tee /usr/share/keyrings/nginx-archive-keyring.gpg >/dev/null
- 导入仓库
基于国内中科大仓库,导入配置。
root@openclaw:~# echo "deb [signed-by=/usr/share/keyrings/nginx-archive-keyring.gpg] \
https://mirrors.ustc.edu.cn/nginx/ubuntu/ `lsb_release -cs` nginx" \
    | sudo tee /etc/apt/sources.list.d/nginx.list
- 正式安装
root@openclaw:~# apt update
root@openclaw:~# apt -y install nginx
root@openclaw:~# nginx -v
- 修改跨域
使用代理后,通过域名访问,会被判断来自一个非本机地址(如 IP 或域名)访问 Dashboard,但该来源不在白名单中,导致无法登录,因此需要先修改配置。
root@openclaw:~# openclaw config set gateway.controlUi.allowedOrigins '["http://127.0.0.1:18789", "http://localhost:18789", "https://openclaw.linuxsb.com", "http://openclaw.linuxsb.com"]'
root@openclaw:~# openclaw gateway restart
提示:也可通过修改配置文件追加controlUi实现,同时基于安全考虑,WebUI只能在部署OpenClaw本地通过127.0.0.1:18789访问,若不使用代理希望将端口暴露出来,也可将如下 "bind": "loopback", 修改为 "bind": "lan", 。
root@openclaw:~# vim /root/.openclaw/openclaw.json
# ……
  "gateway": {
# ……
    "controlUi": {
      "allowInsecureAuth": true,
      "allowedOrigins": [
        "http://127.0.0.1:18789",
        "http://localhost:18789",
        "https://openclaw.linuxsb.com",
        "http://openclaw.linuxsb.com"
      ]
    },
# ……
- 配置代理
将本机 OpenClaw UI 进行代理,本实验已获取免费一年的证书,且域名解析配置已完成,免费证书获取可参考:https://freessl.cn.
root@openclaw:~# mkdir -p /etc/nginx/tls                # 将证书上传至该目录
root@openclaw:~# ll /etc/nginx/tls/
total 16
drwxr-xr-x 2 root root 4096 Mar 23 22:43 ./
drwxr-xr-x 4 root root 4096 Mar 23 22:43 ../
-rw-r--r-- 1 root root 1679 Mar 23 22:41 openclaw.linuxsb.com.key
-rw-r--r-- 1 root root 3579 Mar 23 22:41 openclaw.linuxsb.com.pem

root@openclaw:~# vim /etc/nginx/conf.d/openclaw.conf
server {
    listen 443 ssl;
    http2 on;
    server_name  openclaw.linuxsb.com;

    ssl_certificate      /etc/nginx/tls/openclaw.linuxsb.com.pem;
    ssl_certificate_key  /etc/nginx/tls/openclaw.linuxsb.com.key;
    ssl_protocols TLSv1.2 TLSv1.3;
    ssl_ciphers ECDHE-RSA-AES128-GCM-SHA256:ECDHE:ECDH:AES:HIGH:!NULL:!aNULL:!MD5:!ADH:!RC4;
    ssl_prefer_server_ciphers on;
    ssl_session_timeout 10m;

    access_log  /var/log/nginx/openclaw.access.log  main;
    error_log   /var/log/nginx/openclaw.error.log  warn;

    location / {
        proxy_pass http://127.0.0.1:18789;
        proxy_http_version 1.1;
        proxy_set_header Host $host;
        proxy_set_header X-Real-IP $remote_addr;
        proxy_set_header X-Forwarded-For $proxy_add_x_forwarded_for;
        proxy_set_header X-Forwarded-Proto $scheme;
        proxy_connect_timeout 10s;
        proxy_read_timeout    60s;
        proxy_send_timeout    60s;
  }
}

server {
    listen       80;
    server_name  openclaw.linuxsb.com;
    return 301 https://$host$request_uri;
}

root@openclaw:~# systemctl enable nginx --now
访问验证
使用浏览器访问相关网页:https://openclaw.linuxsb.com ,通过 openclaw dashboard --no-open 查看 Token 并输入后,若出现如下页面:
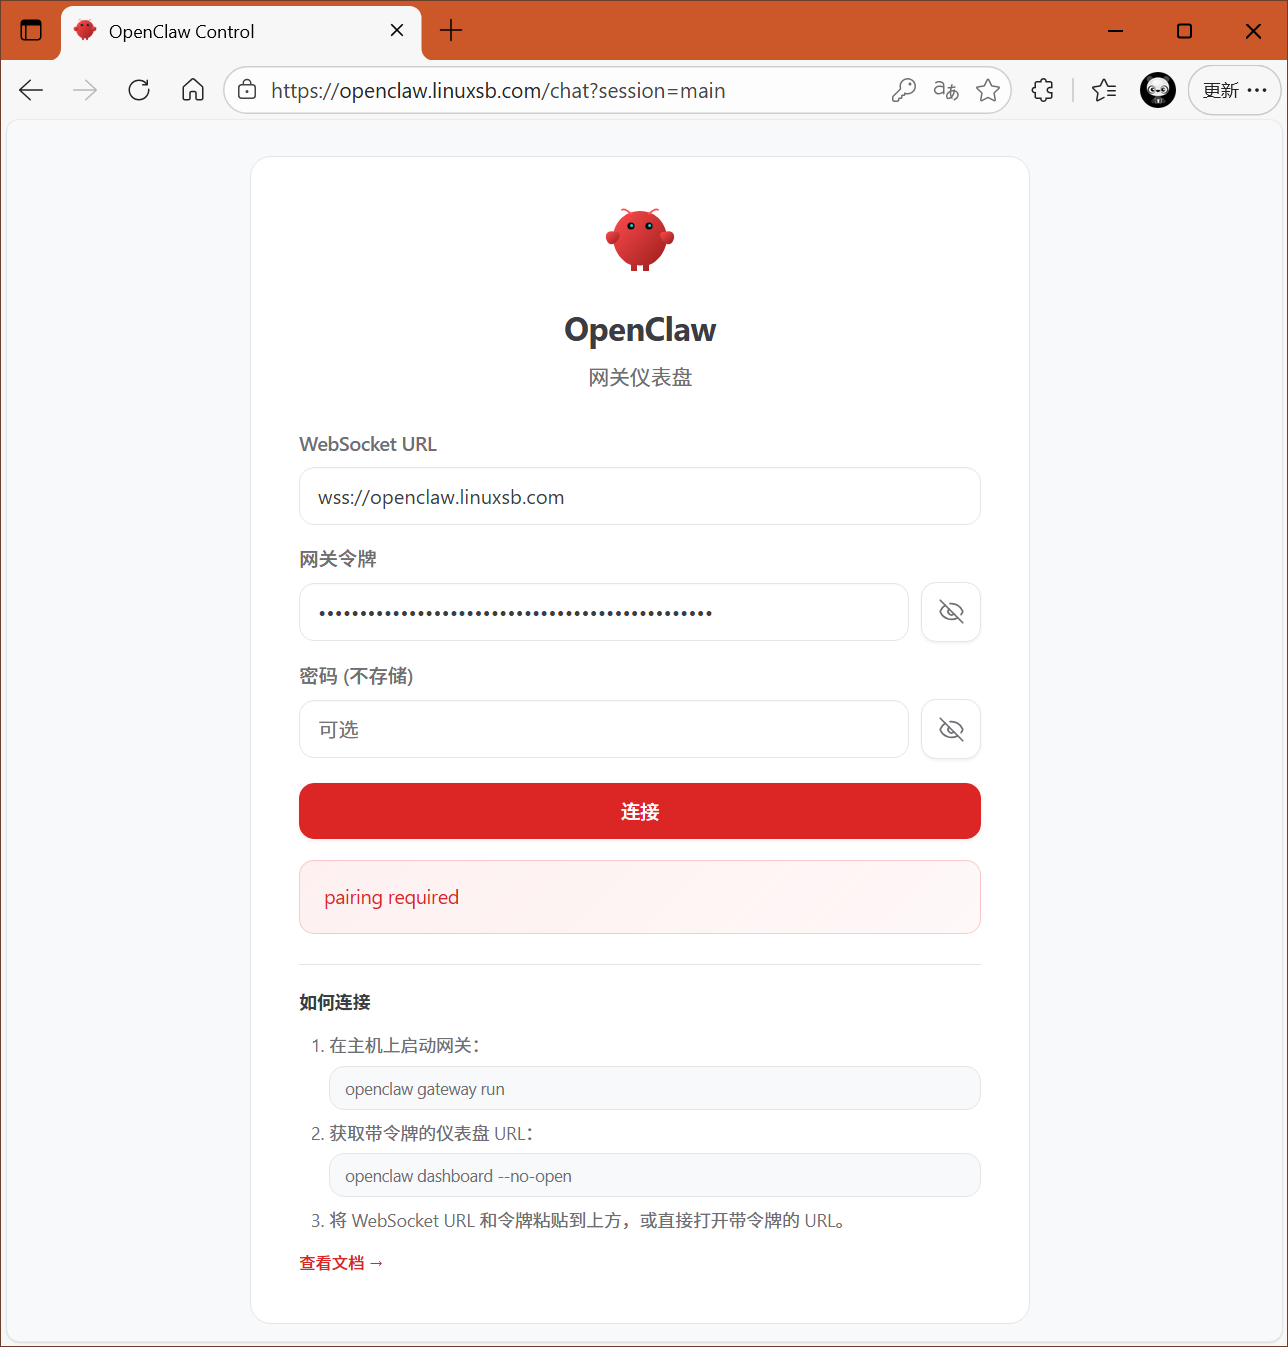
由于 OpenClaw 对安全验证极其严格,因此需要对通过公网访问的设备进行授权访问。
root@openclaw:~# openclaw devices list

🦞 OpenClaw 2026.4.2 (d74a122) — Your .zshrc wishes it could do what I do.

|
o
Pending (1)
┌──────────────────────────────────────┬───────────────────────────────────────────────────────────────────────────────────────┬──────────┬─────────────────────────────────────────────────────────────────────────────────────────────────────────┬────────────┬──────────┬────────┐
│ Request                              │ Device                                                                                │ Role     │ Scopes                                                                                                  │ IP         │ Age      │ Flags  │
├──────────────────────────────────────┼───────────────────────────────────────────────────────────────────────────────────────┼──────────┼─────────────────────────────────────────────────────────────────────────────────────────────────────────┼────────────┼──────────┼────────┤
│ bd6be186-f6cf-4fc2-8319-0a3a5c49771c │ 956cd228663b51b0192d62767d24eea28fd63ee9866a528f38e7da23164ec899                      │ operator │ operator.admin, operator.read, operator.write, operator.approvals, operator.pairing                     │            │ just now │        │
└──────────────────────────────────────┴───────────────────────────────────────────────────────────────────────────────────────┴──────────┴─────────────────────────────────────────────────────────────────────────────────────────────────────────┴────────────┴──────────┴────────┘
Paired (2)
┌────────────────────────────────────────────────────────────────────────────────────────┬─────────────────────────────────┬──────────────────────────────────────────────────────────────────────────────────────────────────────────┬─────────────────────────────────┬────────────┐
│ Device                                                                                 │ Roles                           │ Scopes                                                                                                   │ Tokens                          │ IP         │
├────────────────────────────────────────────────────────────────────────────────────────┼─────────────────────────────────┼──────────────────────────────────────────────────────────────────────────────────────────────────────────┼─────────────────────────────────┼────────────┤
│ eb387678cf03cf1e37d41af1c98cdcdb1705b64f5a352271b7643273032af271                       │ operator                        │ operator.read, operator.admin, operator.write, operator.approvals, operator.pairing                      │ operator                        │            │
│ 441c10ce7819c2a506cd103b8fb167aa34d0b9edbfa557f3384a7c2f6c2eb243                       │ operator                        │ operator.admin, operator.read, operator.write, operator.approvals, operator.pairing                      │ operator                        │            │
└────────────────────────────────────────────────────────────────────────────────────────┴─────────────────────────────────┴──────────────────────────────────────────────────────────────────────────────────────────────────────────┴─────────────────────────────────┴────────────┘

root@openclaw:~# openclaw devices approve bd6be186-f6cf-4fc2-8319-0a3a5c49771c              # 授权
root@openclaw:~# openclaw devices list                                                      # 再次查看
再次登录确认成功,并且对话验证正常。
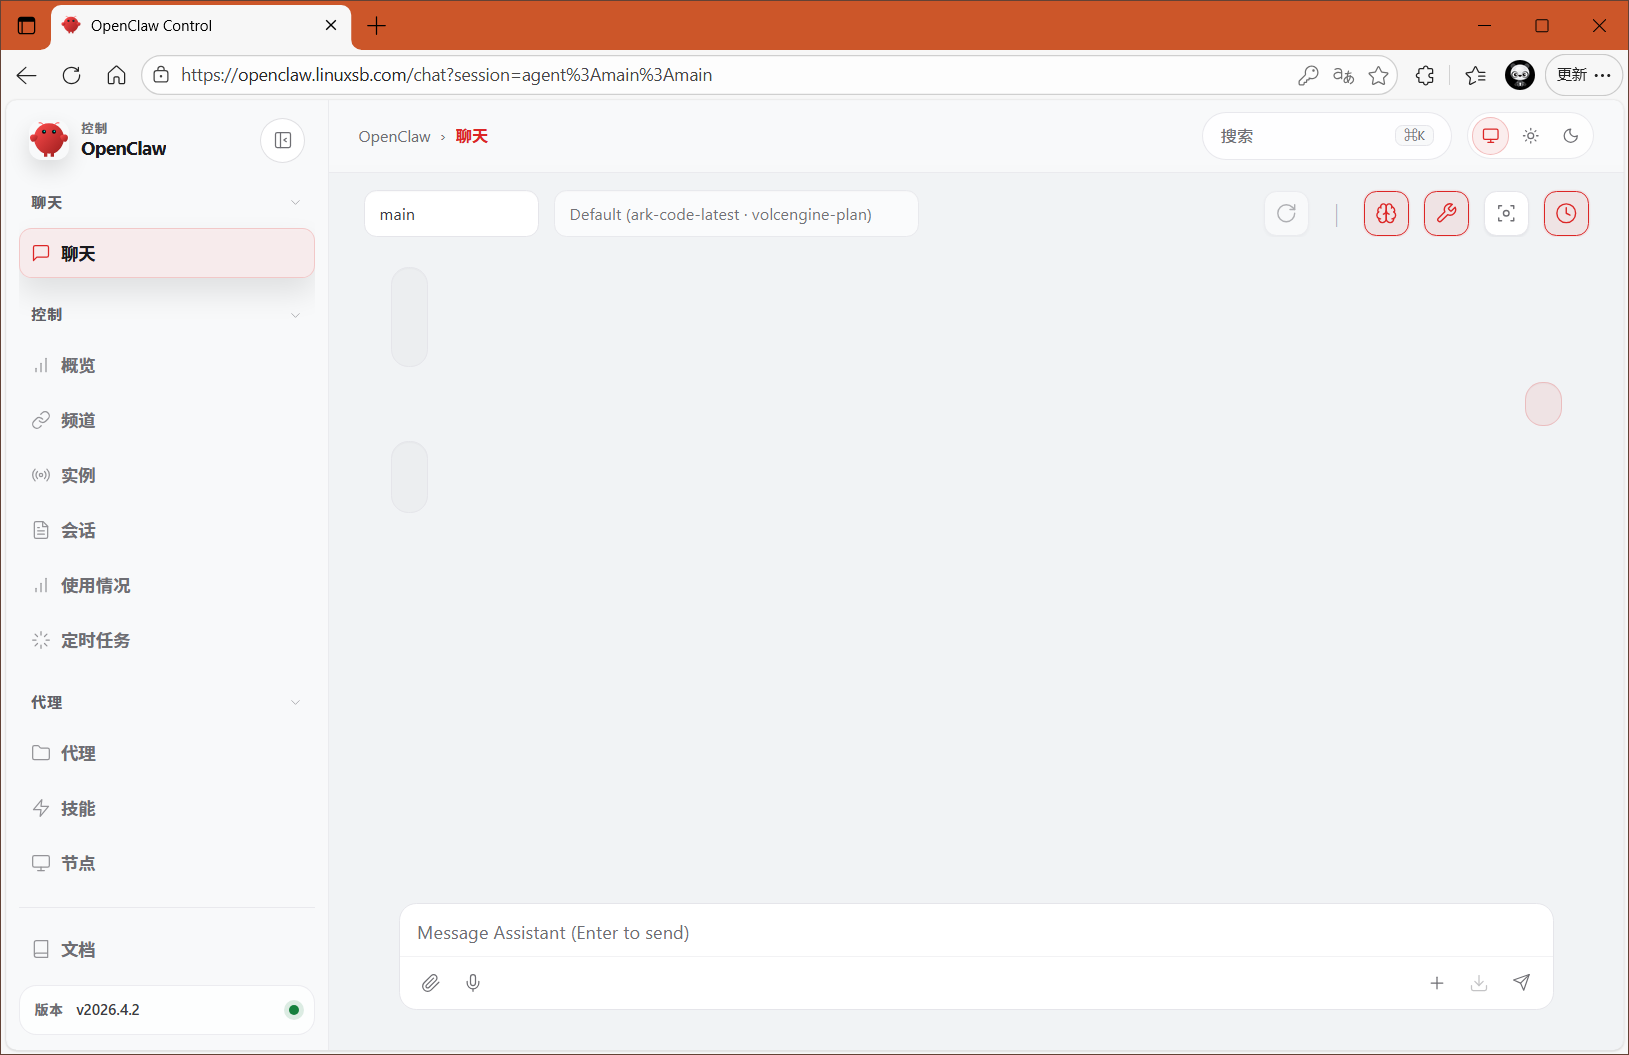
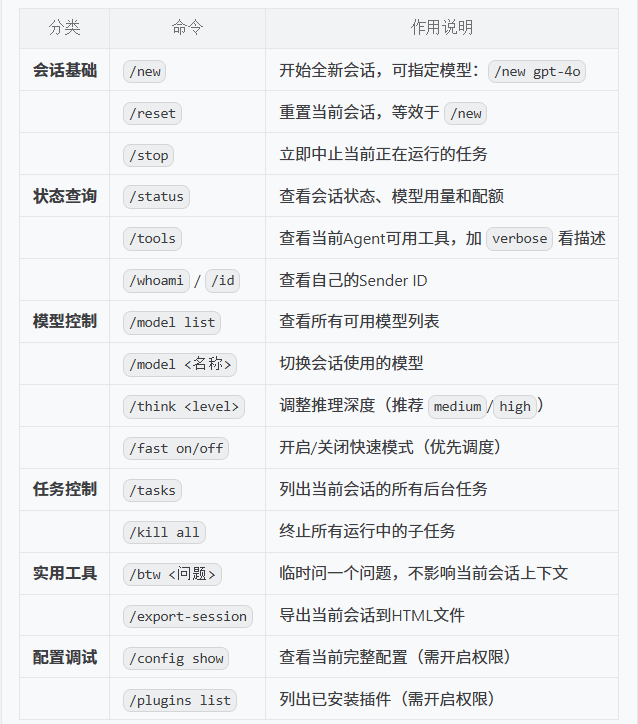
可通过openclaw对话框测试,默认对话框官方提供了许多斜杠基础命令,主要常用的有如下:
配置渠道
安装渠道
OpenClaw China 为 OpenClaw 提供面向中国常用通讯平台的渠道扩展,帮助你把 AI 助手接入钉钉、企业微信、企业微信自建应用、微信客服、微信公众号、QQ 和飞书等渠道。项目聚焦稳定的消息收发、统一的插件接入面,以及尽量低门槛的配置流程。
参考:OpenClaw China 。
root@openclaw:~# openclaw plugins install @openclaw-china/channels
提示:企业微信官方还推出另一个插件 openclaw-plugin-wecom ,可通过如下方式安装,但本指南为了对接多个渠道,安装 openclaw-china 。
openclaw plugins install openclaw-plugin-wecom
配置企业微信
- 信息准备
| 序号 | 角色 | AgentId | Secret |
|---|---|---|---|
| 01 | 生活助手 | 1000004 | Gs0GZYRtfan0OG9AGixxxxxxxxxxxxxxxxxxxx |
| 02 | 运维专家 | 1000005 | Mm51nZF4uD8NhZFsRq5ssM2-xxxxxxxxxxxxxxxxxxxx |
生活助手信息:
| 参数名 | 获取位置 | 示例值 |
|---|---|---|
| CorpID | 企业微信管理后台首页 | ww46ac95xxxxxxxxxxxxxxxxxxxx |
| AgentId | 应用详情页 | 1000004 |
| Secret | 应用详情页(点击查看) | Gs0GZYRtfan0OG9xxxxxxxxxxxxxxxxxxxxxxxxxxxxxx |
| Token | 企业微信自行设置 | xxxxxxxxxx |
| EncodingAESKey | 企业微信随机生成 | yPfhnUYkzkJP3JEA5FHxxxxxxxxxxxxxxxxxxxx |
| Webhook URL | 拼接域名与路径 | https://openclaw.linuxsb.com/wecom-app |
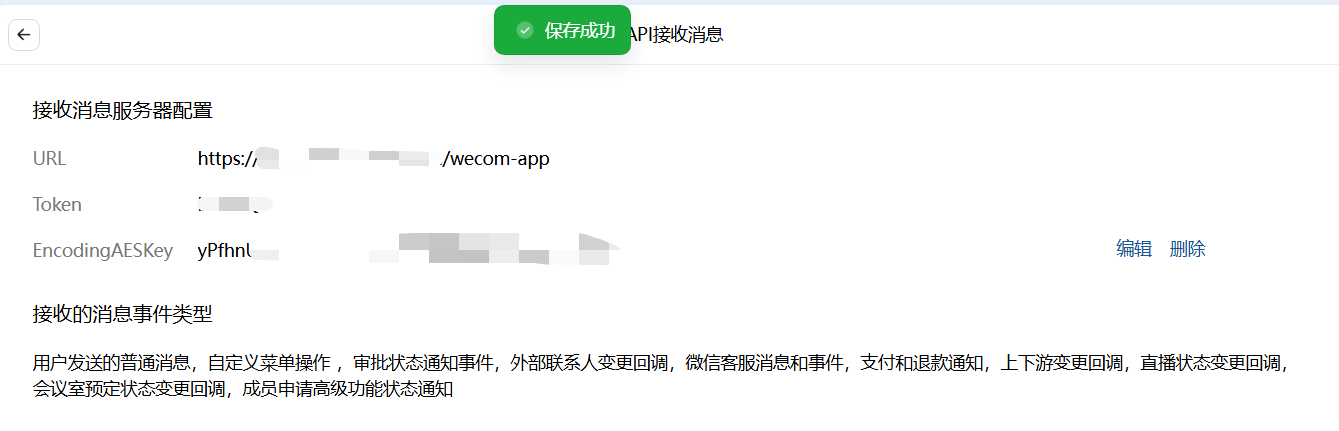
- 回调信息
URL:https://openclaw.linuxsb.com/wecom-app
Token随机:bcLJxQ
EncodingAESKey随机:yPfhnUYkzkJP3JEA5Fxxxxxxxxxxxxxxxxxxxx
- 交互配置
root@openclaw:~# openclaw china setup
# ……
*  请选择要配置的渠道
|    DingTalk(钉钉)
|    QQBot(QQ 机器人)
|    WeCom(企业微信-智能机器人)
|  > WeCom App(自建应用-可接入微信)
|    WeCom KF(微信客服)
|    WeChat MP(微信公众号)
|    Feishu(飞书)
|    保存并退出
|    不保存并退出
+--------------------------------------------------------------------------------------------------------------+
|
o  Webhook 路径(需与企业微信后台配置一致,默认 /wecom-app)
|  /wecom-app
|
o  WeCom App token
|  bcLJxQ
|
o  WeCom App encodingAESKey
|  yPfhnUYkzkJP3JEA5FHEkxxxxxxxxxxxxxxxxxxxx
|
o  corpId
|  ww46ac95ba04b0cf42
|
o  corpSecret
|  Gs0GZYRtfan0OG9AGiB3uxxxxxxxxxxxxxxxxxxxx
|
o  agentId
|  1000004
|
o  启用 ASR(支持入站语音自动转文字)
|  No
|
o  完成 -------------------------------------+
|                                            |
|  已完成:WeCom App(自建应用-可接入微信)  |
|                                            |
+--------------------------------------------+
|
o  继续配置其他渠道
|  No
|
+--------------------------------------------+
提示:
如上交互式配置也可使用命令直接配置:
openclaw config set channels.wecom-app.enabled true
openclaw config set channels.wecom-app.corpId ww46xxxxxxxxxx
openclaw config set channels.wecom-app.corpSecret Gs0GZYRtfaxxxxxxxxxxxxxxxxxxxxxxxxxxxxxx
openclaw config set channels.wecom-app.agentId 1000004
openclaw config set channels.wecom-app.token xxxxxxxx
openclaw config set channels.wecom-app.encodingAESKey yPfhnUYkzkJP3xxxxxxxxxxxxxxxxxxxxxxxxxxxxxx
- 保存接受信息
交互式配置保存并退出,然后回到企业微信后台,然后保存。
确认配置成功。
- 配置企业可信IP
在应用管理配置企业可信IP,将openclaw服务器的IP授信。
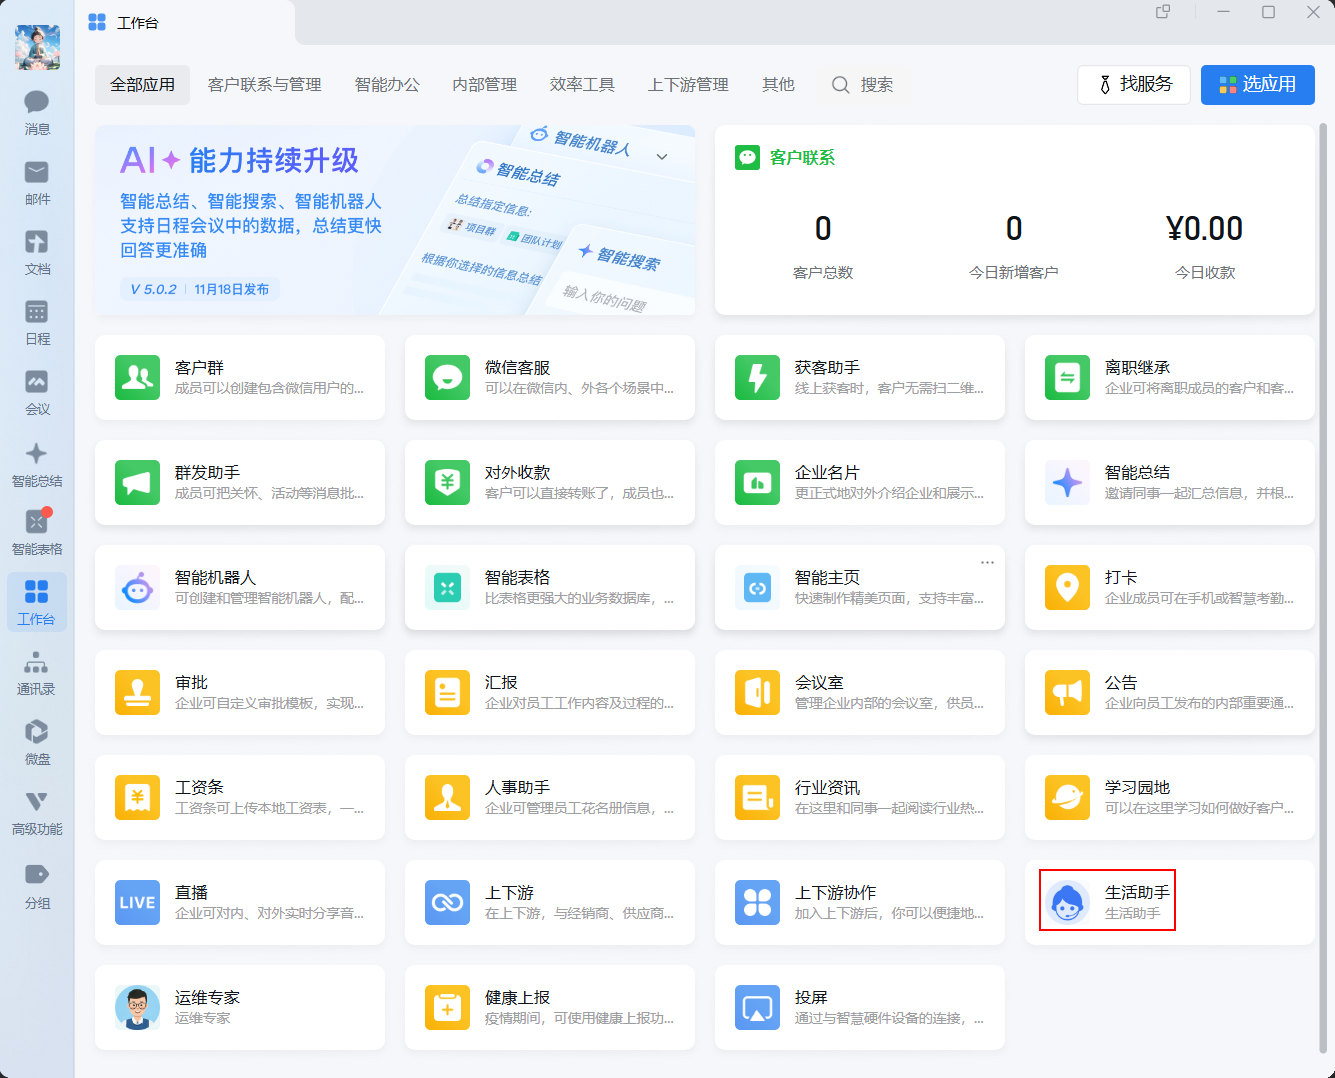
- 添加机器人
添加机器人到企业微信。
在应用详情页,找到“企业微信插件”或“机器人”入口,点击“添加机器人”。
选择群聊或个人:
群聊场景:将机器人邀请到测试群,在群中 @机器人名称 即可触发交互。
个人单聊:员工可在企业微信“工作台”找到该应用,直接进入对话框发送消息。
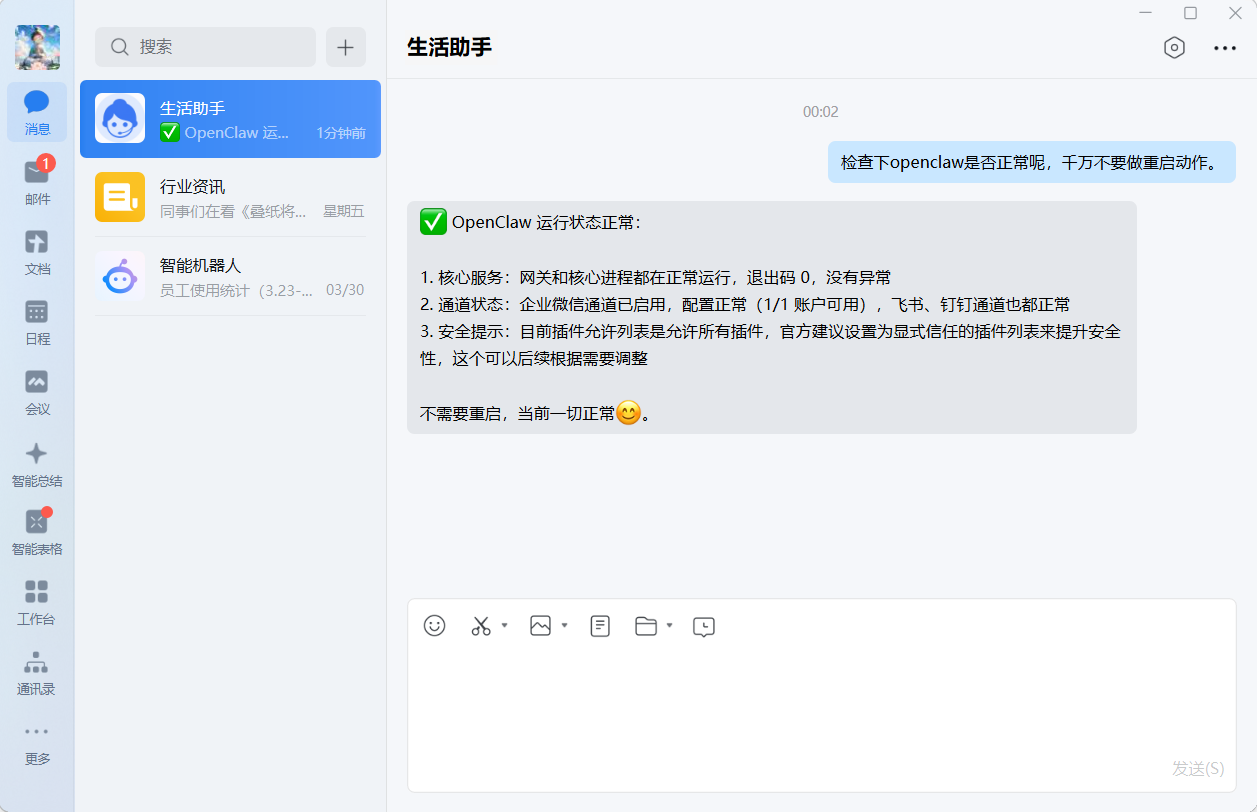
- 测试聊天
提示:企业微信自建应用也可参考:企业微信自建应用配置指南 。
配置飞书
openclaw-china 支持 飞书 通道,但目前字节跳动已退出官方飞书通道,因此 openclaw-china 已停止飞书通道维护,建议直接使用字节跳动官方的飞书通道。
- 信息准备
| 序号 | 角色 | App ID | App Secret |
|---|---|---|---|
| 01 | 生活助手 | cli_a95b6xxxxxxxxxx | KyGI674vI7xxxxxxxxxxxxxxxxxxxx |
| 02 | 运维专家 | cli_a95b6xxxxxxxxxx | b5U4FxtNQPpKlxxxxxxxxxxxxxxxxxxxx |
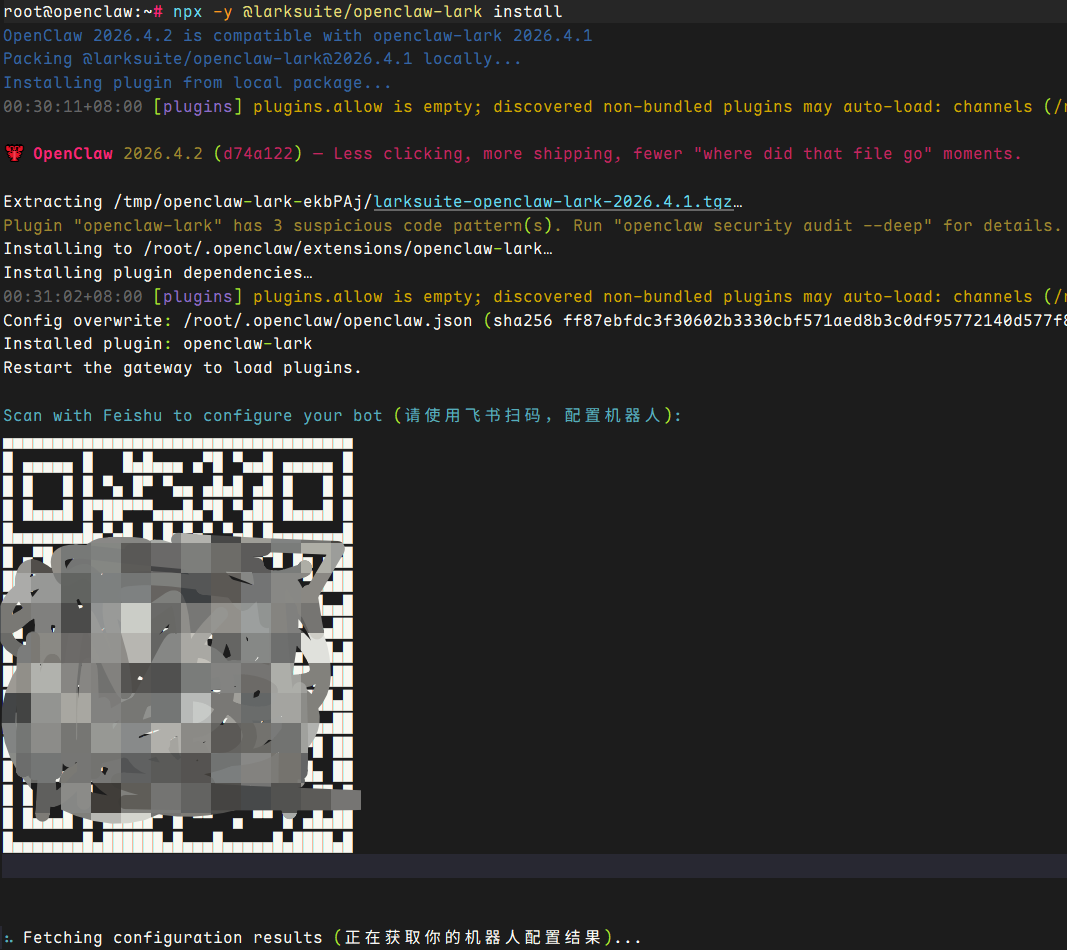
- 安装插件
安装官方飞书插件。
root@openclaw:~# npx -y @larksuite/openclaw-lark install
手机登录飞书后,扫描如下二维码:
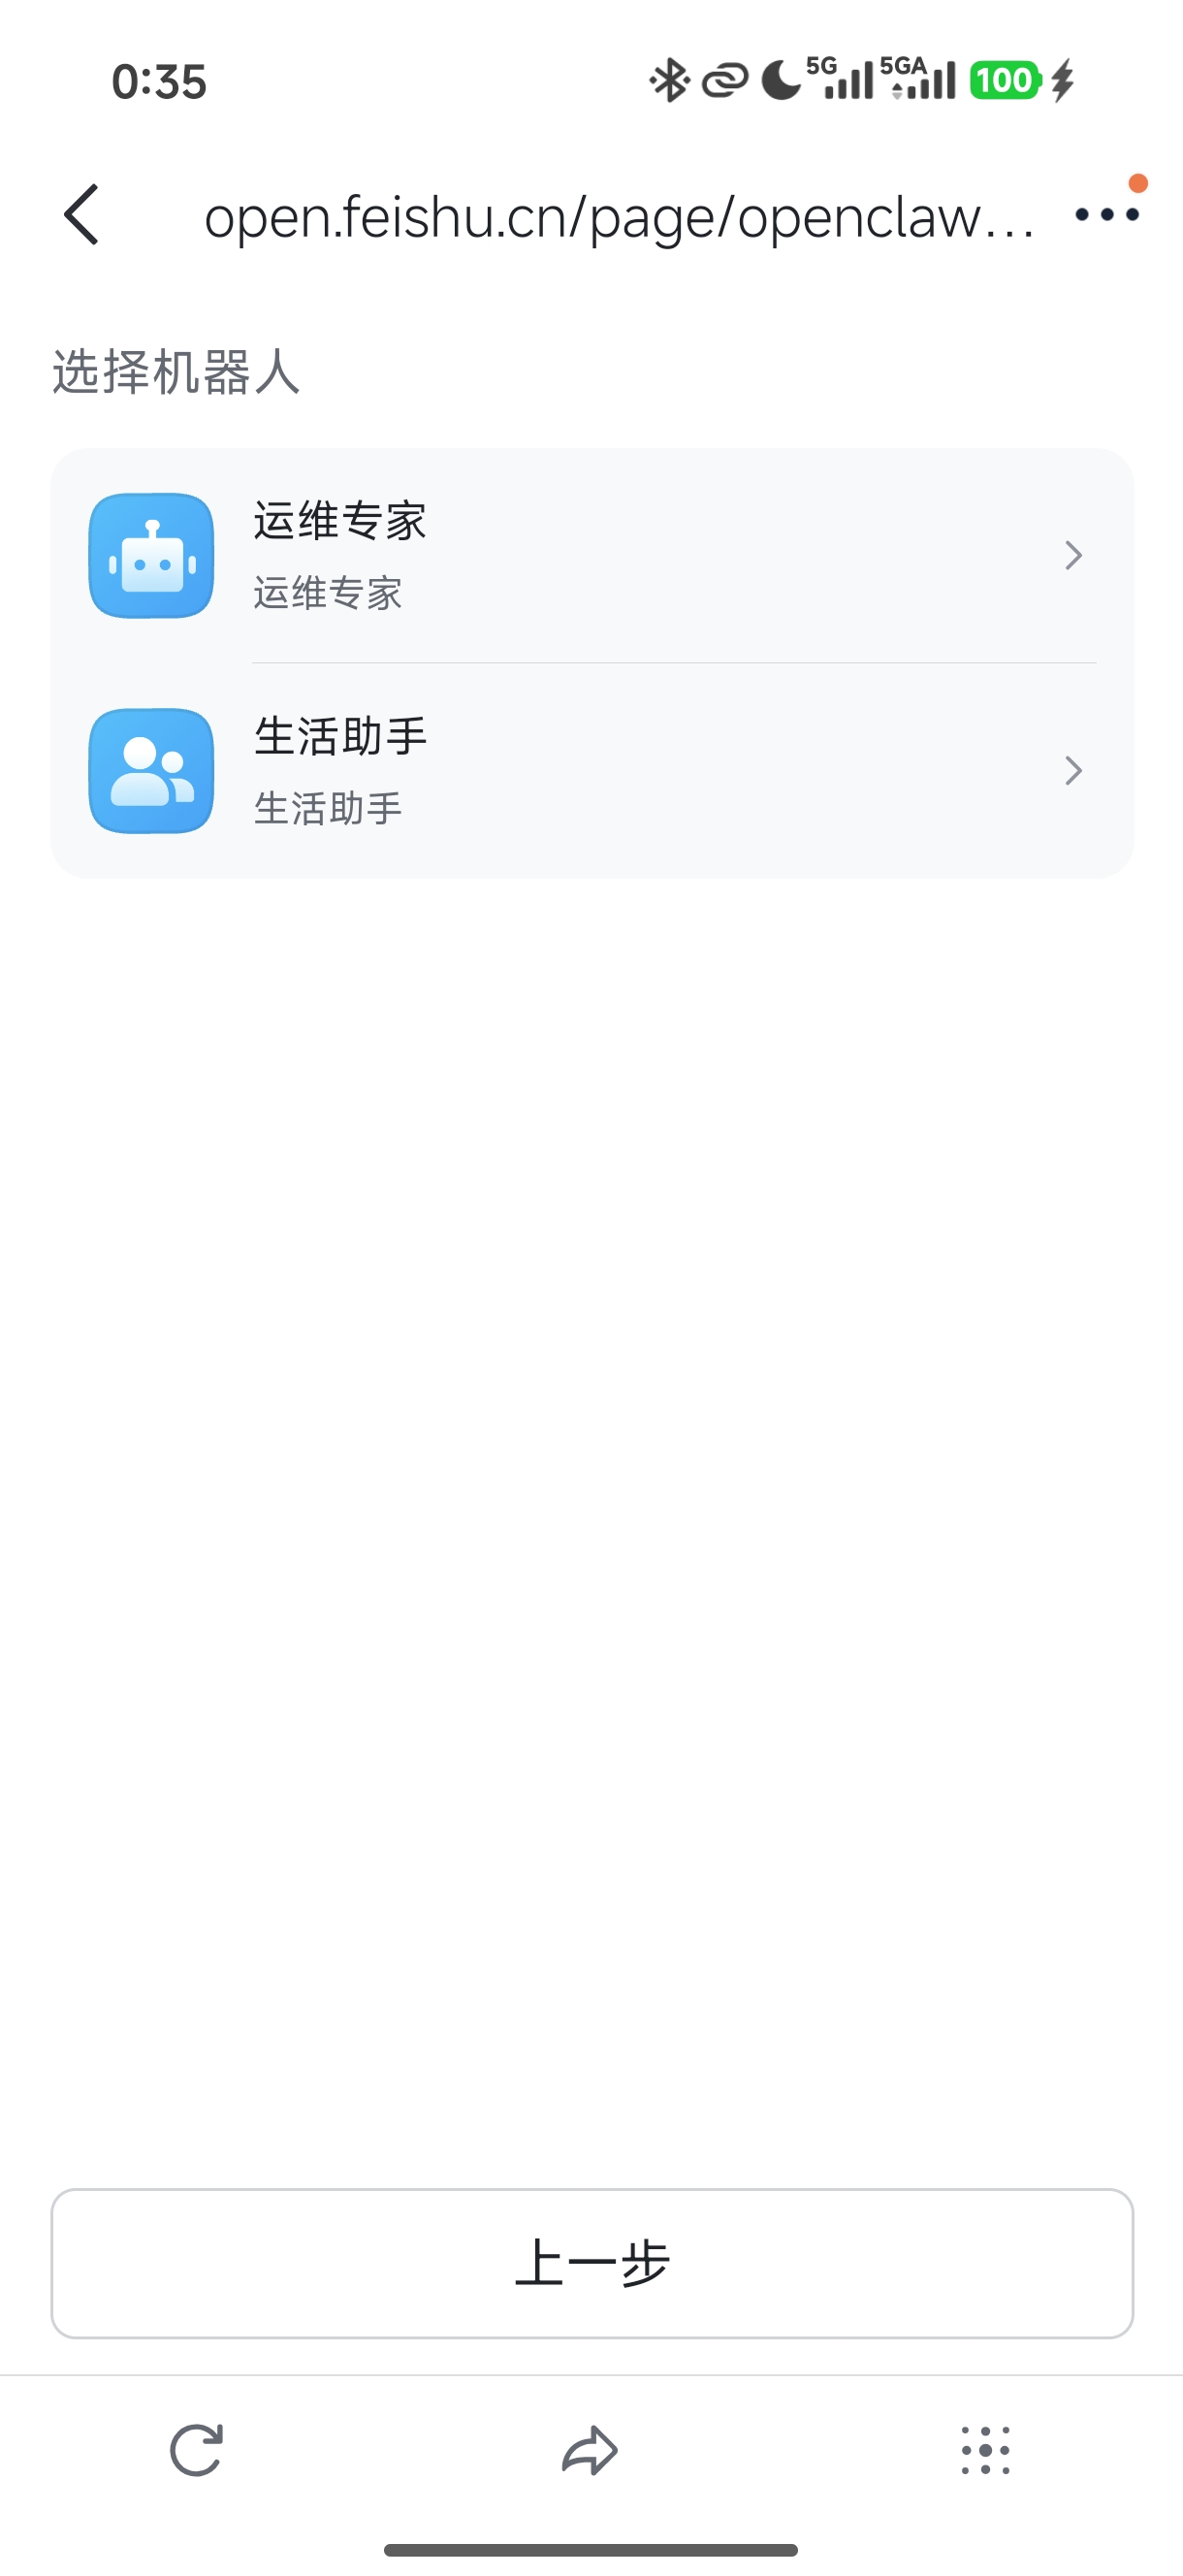
- 选择已有机器人
选择已有机器人——生活助手。
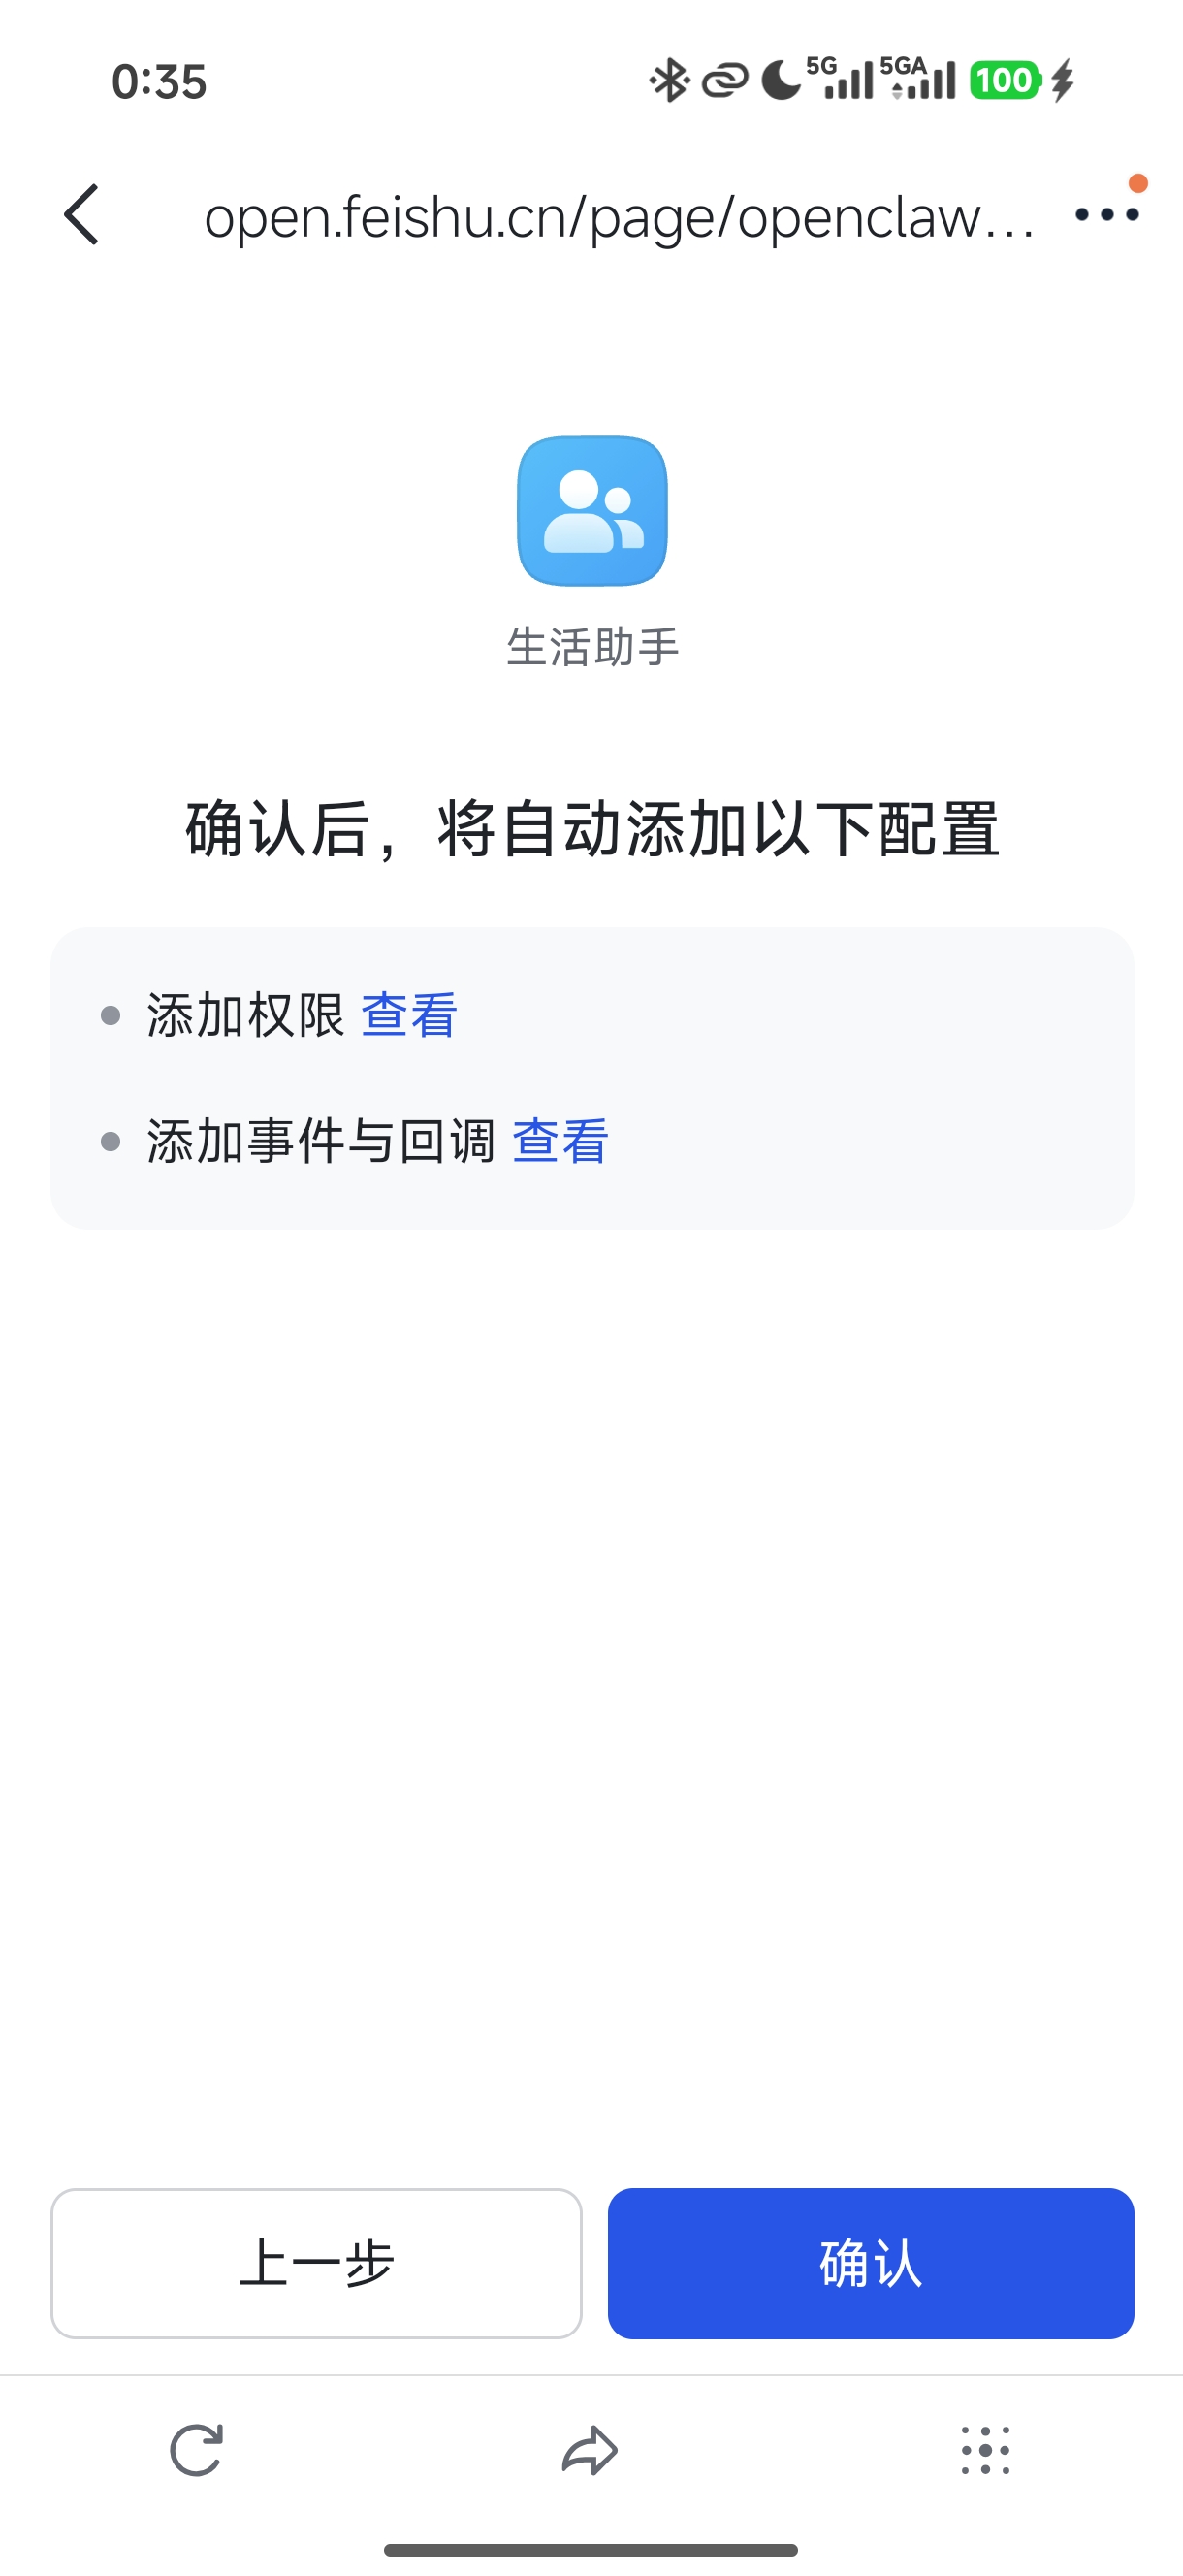
- 确认添加
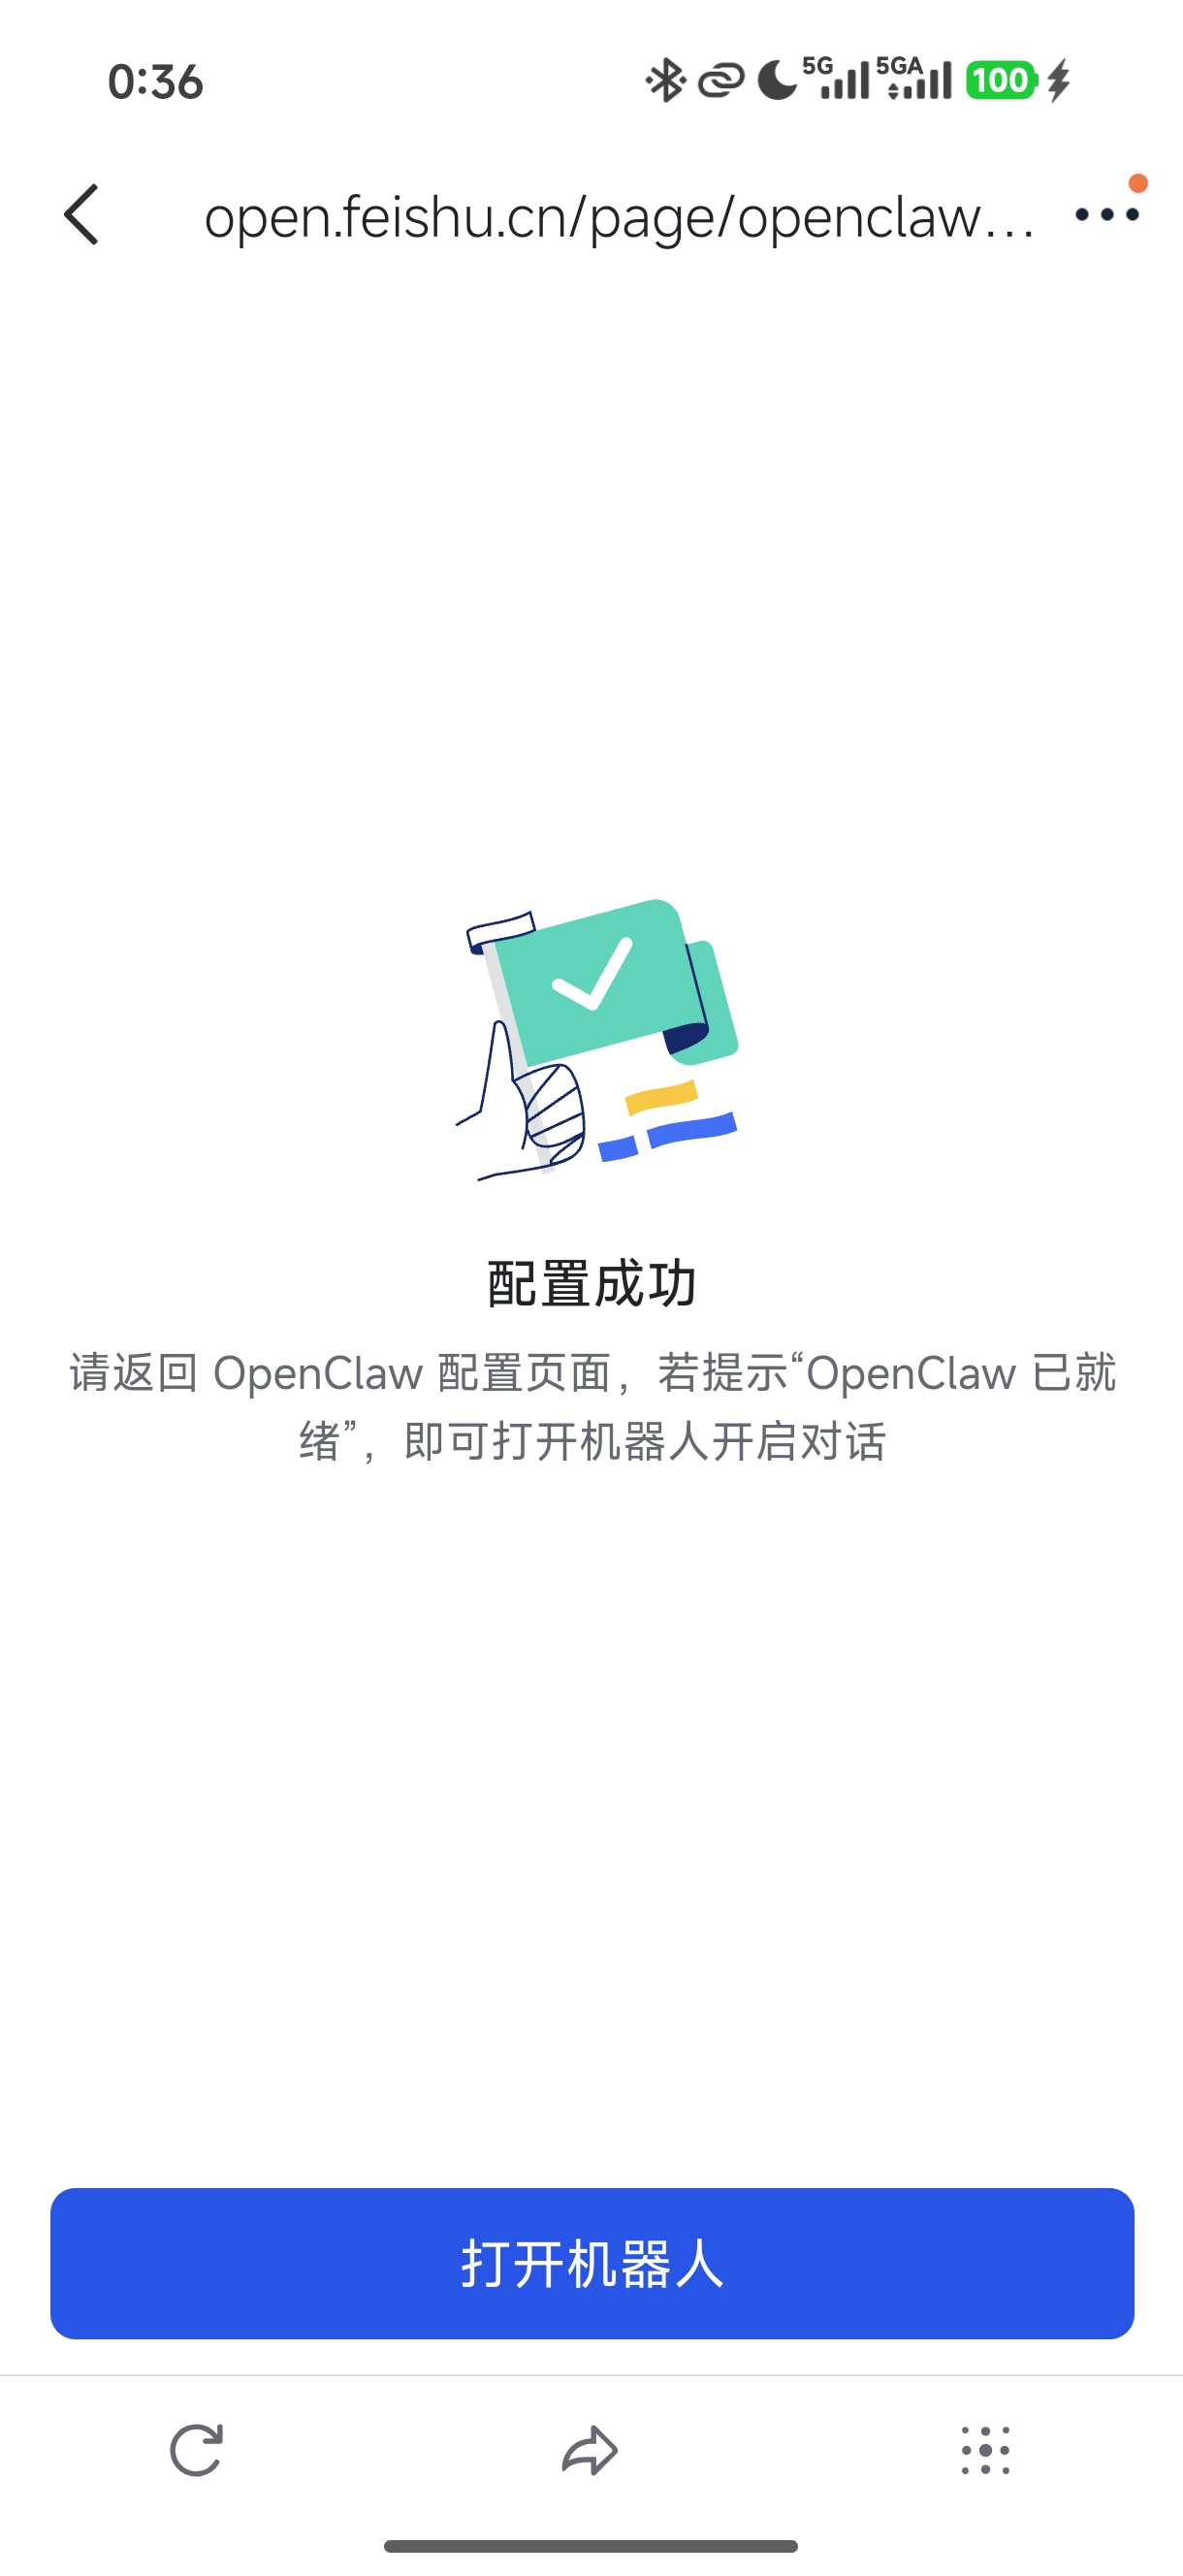
- 配置完成
配置完成,打开机器人进行聊天测试。
- 测试聊天

提示:飞书官方配置参考:OpenClaw 飞书官方插件使用指南
。
配置钉钉
- 信息准备
| 序号 | 角色 | Client ID | Client Secret |
|---|---|---|---|
| 01 | 生活助手 | dingxxxxxxxxxx | t-fxnM9DLaflo1akOl78AuhQdsTAPOFtxPW7RQuvxxxxxxxxxxxxxxxxxxxx |
| 02 | 运维专家 | dingcmxxxxxxxxxx | 7WEXHtOZWihVta6auHMwL7e3Sa4cJx8PTAguqy_Lbxxxxxxxxxxxxxxxxxxxx |
- 交互配置
root@openclaw:~# openclaw china setup
# ……
o  欢迎 -------------------------------------------------------+
|                                                              |
|  使用方向键选择,按 Enter 确认。                             |
|  项目仓库:https://github.com/BytePioneer-AI/openclaw-china  |
|                                                              |
+--------------------------------------------------------------+
|
o  请选择要配置的渠道
|  DingTalk(钉钉)

配置 DingTalk(钉钉)
|
o  Docs ------------------------------------------------------------------------------------------------------+
|                                                                                                             |
|  配置文档:https://github.com/BytePioneer-AI/openclaw-china/tree/main/doc/guides/dingtalk/configuration.md  |
|                                                                                                             |
+-------------------------------------------------------------------------------------------------------------+
|
o  DingTalk clientId(AppKey)
|  ding1rucxxxxxxxxxx
|
o  DingTalk clientSecret(AppSecret)
|  t-fxnM9DLaflo1akOl78AuhQxxxxxxxxxxxxxxxxxxxxxxxxxxxxxx
|
o  启用 AI Card 流式回复(推荐关闭,使用非流式)
|  No
|
o  完成 ---------------------+
|                            |
|  已完成:DingTalk(钉钉)  |
|                            |
+----------------------------+
|
o  继续配置其他渠道
|  No
|
o  摘要 -------------------------+
|                                |
|  已配置渠道:DingTalk(钉钉)  |
|                                |
+--------------------------------+
Config overwrite: /root/.openclaw/openclaw.json (sha256 c810b0630c6adfce1ae41f6b131afcef3e70a29ee20a561a5f02808bbd3160b6 -> 49a1909adacefeb76460a292d5089ee03c5d393eafe42e7e1568bff014fd2664, backup=/root/.openclaw/openclaw.json.bak)
|
—  配置已保存。


━━━━━━━━━━━━━━━━━━━━━━━━━━━━━━━━━━━━━━━━━━━━━━━━━━━━
  OpenClaw China Channels 已就绪!
━━━━━━━━━━━━━━━━━━━━━━━━━━━━━━━━━━━━━━━━━━━━━━━━━━━━

插件路径:
  /root/.openclaw/extensions

配置文件:
  /root/.openclaw/openclaw.json

更新插件:
  openclaw plugins update <plugin-id>

项目仓库:
  https://github.com/BytePioneer-AI/openclaw-china

⭐ 如果这个项目对你有帮助,请给我们一个 Star!⭐

下一步:
  openclaw gateway --port 18789 --verbose
提示:
如上交互式配置也可使用命令直接配置:
openclaw config set channels.dingtalk.enabled true
openclaw config set channels.dingtalk.clientId dingxxxxxxxx
openclaw config set channels.dingtalk.clientSecret your-app-secret
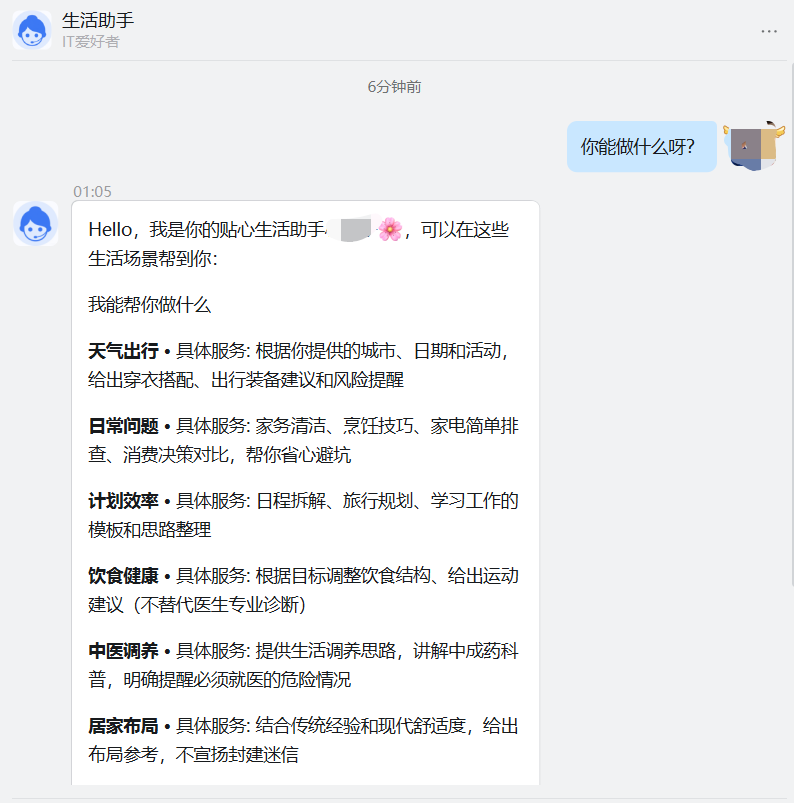
- 测试聊天
钉钉首页顶部搜素栏直接搜素:生活助手 ,然后测试对话。
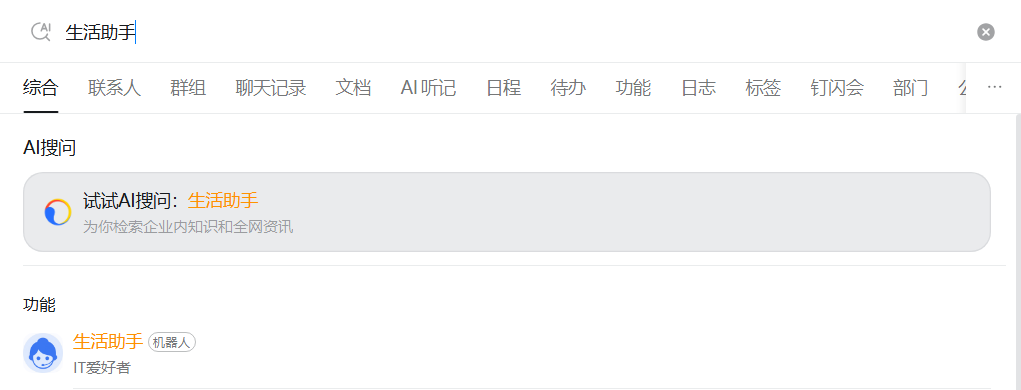
正常回复。
多Agent架构
方案说明
针对不同场景采用专属独立的 Agent ,是一个非常推荐的措施,比如写文章、查资料、改代码、发日报。
所有的任务都采用同一个 Agent ,通常会存在诸多问题,如:
- 上下文污染
写文章写到一半,突然问了个技术问题。它回答完技术问题,再回来写文章,语气都变了。上下文里混进了一堆代码讨论,"写作状态"直接被打断。 - 人设混乱
我给它设了个写作人设——口语化、有态度、像聊天。在调试代码的时候也用这个语气,会丧失专业感。 - 记忆爆炸
一个 Agent 干所有事,对话历史越来越长,token 消耗飙升。旧对话还会干扰新任务的判断。
多 Agent 隔离有多种方案,可直接参考: OpenClaw 多 Agent 架构配置指南 。
当前多 Agent 通常有两种方式,如下所示。本指南采用 范式二:多机器人+多Agent,同时基于软隔离实现。
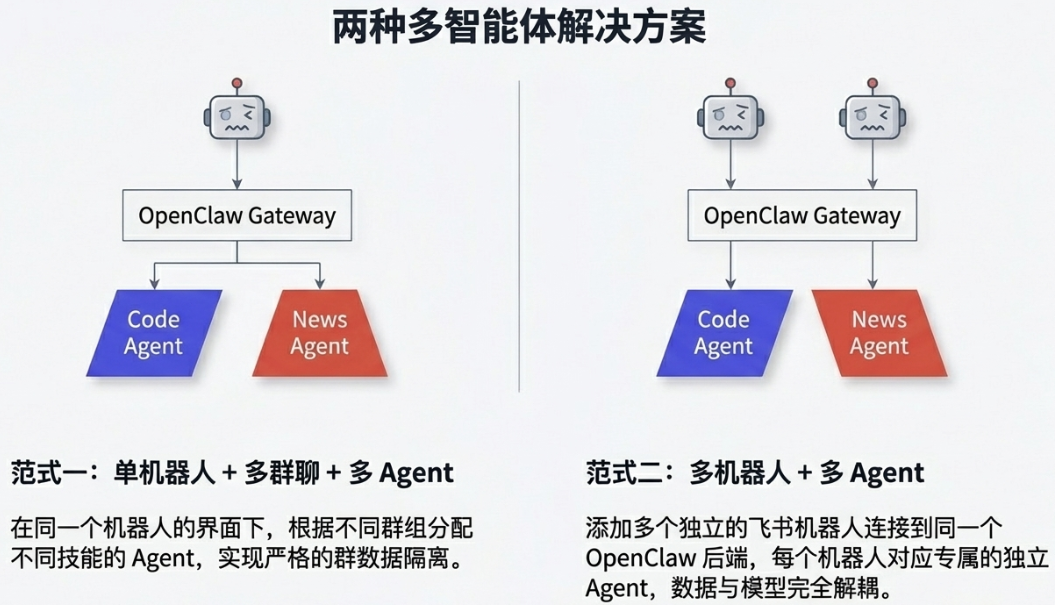
提示:范式一:单机器人+多群聊+多Agent的部署参考OpenClaw(龙虾) 进阶:多机器人、多 Agent 配置——AI团队协同的前提 。
备份配置
当前 openclaw 已支持备份操作。
root@openclaw:~# openclaw backup create --only-config

🦞 OpenClaw 2026.4.2 (d74a122) — Like having a senior engineer on call, except I don't bill hourly or sigh audibly.

Backup archive: /root/2026-04-06T05-53-04.129Z-openclaw-backup.tar.gz
Included 1 path:
- config: ~/.openclaw/openclaw.json
Created /root/2026-04-06T05-53-04.129Z-openclaw-backup.tar.gz
也可以通过 cp ~/.openclaw/openclaw.json ~/.openclaw/openclaw.json.backup.$(date +%Y%m%d) 进行备份。
新增agent
针对运维专家新增一个独立的 Agent 。
root@openclaw:~# openclaw agents add --workspace /root/.openclaw/workspace-ops ops
root@openclaw:~# openclaw agents list                                                   # 查看agent
配置飞书密钥
由于飞书密钥是采用密钥文件引入的secret,因此需要需要先在 secrets.providers.lark-secrets 中更新路径,然后创建新的secrets文件,然后主配置文件引用。
- 查看配置
通过查看原配置,确认当前飞书密钥文件所在位置。
root@openclaw:~# cat .openclaw/openclaw.json.backup.20260406 | tail -n 10
  "secrets": {
    "providers": {
      "lark-secrets": {
        "source": "file",
        "path": "~/.openclaw/credentials/lark.secrets.json"
      }
    }
  }
}

root@openclaw:~# cat ~/.openclaw/credentials/lark.secrets.json
{
  "lark": {
    "appSecret": "KyGI674vIxxxxxxxxxxxxxxxxxxxx"
  }
}
- 新增密钥
在原来的 lark.secrets.json 里新增多个 appSecret,用不同 id 引用。
root@openclaw:~# cat > ~/.openclaw/credentials/lark.secrets.json << 'EOF'
{
  "cli_a95b64d78c38dcba": {
    "appSecret": "KyGI674vxxxxxxxxxxxxxxxxxxxx"
  },
  "cli_a95b630104f8dbd7": {
    "appSecret": "b5U4FxtNQPpxxxxxxxxxxxxxxxxxxxx"
  }
}
EOF

root@openclaw:~# chmod 600 ~/.openclaw/credentials/lark-ops.secrets.json
配置渠道
为运维专家的企业微信自建应用、飞书机器人、钉钉机器人三个渠道。
- 企业微信
| 序号 | 角色名称 | 角色定位 | AgentId | Secret |
|---|---|---|---|---|
| 01 | 生活助手 | 日常生活使用 | 1000004 | Gs0GZYRtfxxxxxxxxxxxxxxxxxxxxxxxxxxxxxx |
| 02 | 运维专家 | 日常运维使用 | 1000005 | Mm51nZF4uD8xxxxxxxxxxxxxxxxxxxxxxxxxxxxxxxxxxxxxxxx |
Token: xxxxxxxxxx 企业ID: ww46axxxxxxxxxxEncodingAESKey:yPfhnUYkzkJP3Jxxxxxxxxxxxxxxxxxxxx`
- 飞书
| 序号 | 角色名称 | 角色定位 | App ID | App Secret |
|---|---|---|---|---|
| 01 | 生活助手 | 日常生活使用 | cli_a95xxxxxxxxxx | Kyxxxxxxxxxxxxxxxxxxxx |
| 02 | 运维专家 | 日常运维使用 | cli_a95xxxxxxxxxx | b5U4FxtNxxxxxxxxxxxxxxxxxxxx |
- 钉钉
| 序号 | 角色名称 | 角色定位 | Client ID | Client Secret |
|---|---|---|---|---|
| 01 | 生活助手 | 日常生活使用 | ding1rxxxxxxxxxx | t-fxnM9DLaflo1akOl78xxxxxxxxxxxxxxxxxxxxxxxxxxxxxxxxxxxxxxxxxxxxxxxxxx |
| 02 | 运维专家 | 日常运维使用 | dingcmelaxxxxxxxxxx | 7WEXHtOZWihVta6auHMxxxxxxxxxxxxxxxxxxxxxxxxxxxxxxxxxxxxxxxxxxxxxxx |
提示:运维专家需要参考生活助手在企业微信后台配置回调。
root@openclaw:~# vi .openclaw/openclaw.json
root@openclaw:~# cat .openclaw/openclaw.json
# ……
    "list": [
      {
        "id": "main",
        "default": true,
        "name": "life",
        "workspace": "/root/.openclaw/workspace",
        "agentDir": "/root/.openclaw/agents/main/agent",
      },
      {
        "id": "ops",
        "name": "ops",
        "workspace": "/root/.openclaw/workspace-ops",
        "agentDir": "/root/.openclaw/agents/ops/agent",
      }
    ]
  },
  "gateway": {
# ……
    "controlUi": {
      "allowInsecureAuth": true,
      "allowedOrigins": [
        "http://127.0.0.1:18789",
        "http://localhost:18789",
        "https://openclaw.linuxsb.com",
        "http://openclaw.linuxsb.com"
      ]
    },
# ……
  "tools": {
    "profile": "coding",
    "sessions": {
      "visibility": "all"
      },
      "agentToAgent": {
        "enabled": true,
        "allow": ["main", "ops"]
      },
# ……
  "channels": {
    "wecom-app": {
      "accounts": {
        "wecom-life": {
          "id": "wecom-life",
          "corpId": "ww46acxxxxxxxxxx",
          "corpSecret": "Gs0GZYRtfan0OGxxxxxxxxxxxxxxxxxxxxxxxxxxxxxx",
          "agentId": 1000004,
          "token": "xxxxxxxxxx",
          "encodingAESKey": "yPfhnUYkzkJP3JExxxxxxxxxxxxxxxxxxxxxxxxxxxxxx"
        },
        "wecom-ops": {
          "id": "wecom-ops",
          "corpId": "ww46axxxxxxxxxx",
          "corpSecret": "Mm51nZF4uD8NhZFsRq5ssM2-xxxxxxxxxxxxxxxxxxxxx",
          "agentId": 1000005,
          "token": "xxxxxxxxxx",
          "encodingAESKey": "yPfhnUYkzkJP3JEA5FHEkjuqxxxxxxxxxxxxxxxxxxxxxxxxxxxxxx"
        }
      },
      "webhookPath": "/wecom-app",
      "asr": {
        "enabled": false
      },
      "enabled": true
    },
    "dingtalk": {
      "accounts": {
        "dingtalk-life": {
          "id": "dingtalk-life",
          "clientId": "ding1rxxxxxxxxxx",
          "clientSecret": "t-fxnM9DLaflo1akOl78AuhQdsTAPOFtxxxxxxxxxxxxxxxxxxxxxxxxxxxxxxxz"
        },
        "dingtalk-ops": {
          "id": "dingtalk-ops",
          "clientId": "dingcmelxxxxxxxxxx",
          "clientSecret": "7WEXHtOZWihVta6auHMwL7e3Sa4cJx8PTAguqyxxxxxxxxxxxxxxxxxxxxxxxxxxxxxx"
        }
      },
      "enableAICard": false,
      "enabled": true
    },
    "feishu": {
      "enabled": true,
      "domain": "feishu",
      "connectionMode": "websocket",
      "requireMention": true,
      "dmPolicy": "open",
      "groupPolicy": "open",
      "accounts": {
        "feishu-life": {
          "id": "feishu-life",
          "appId": "cli_xxxxxxxxxx",
          "appSecret": {
            "source": "file",
            "provider": "lark-secrets",
            "id": "/cli_xxxxxxxxxxa/appSecret"
          }
        },
        "feishu-ops": {
          "id": "feishu-ops",
          "appId": "cli_a95b630104f8dbd7",
          "appSecret": {
            "source": "file",
            "provider": "lark-secrets",
            "id": "/cli_a95b630104f8dbd7/appSecret"
          }
        }
      },
      "allowFrom": [
        "ou_b8d32a7f4f944axxxxxxxxxxxxxxxxxxxx",
        "ou_33e5bc6dd1bc4a3xxxxxxxxxxxxxxxxxxxx"
      ],
      "groupAllowFrom": [
        "ou_b8d32a7f4f944a8a7xxxxxxxxxxxxxxxxxxxx",
        "ou_33e5bc6dd1bc4a3f4xxxxxxxxxxxxxxxxxxxx"
      ],
      "groups": {
        "*": {
          "enabled": true
        }
      }
    }
  },
  "bindings": [
    {
      "agentId": "main",
      "match": {
        "channel": "wecom-app",
        "accountId": "wecom-life"
      }
    },
    {
      "agentId": "ops",
      "match": {
        "channel": "wecom-app",
        "accountId": "wecom-ops"
      }
    },
    {
      "agentId": "main",
      "match": {
        "channel": "dingtalk",
        "accountId": "dingtalk-life"
      }
    },
    {
      "agentId": "ops",
      "match": {
        "channel": "dingtalk",
        "accountId": "dingtalk-ops"
      }
    },
    {
      "agentId": "main",
      "match": {
        "channel": "feishu",
        "accountId": "feishu-life"
      }
    },
    {
      "agentId": "ops",
      "match": {
        "channel": "feishu",
        "accountId": "feishu-ops"
      }
    }
  ],
  "secrets": {
    "providers": {
      "lark-secrets": {
        "source": "file",
        "path": "~/.openclaw/credentials/lark.secrets.json"
      }
    }
  }
}
重启服务。
root@openclaw:~# openclaw gateway restart

root@openclaw:~# openclaw agents list --bindings        # 检查 bindings 是否生效

🦞 OpenClaw 2026.4.2 (d74a122) — You had me at 'openclaw gateway start.'

Agents:
- main (default)
  Workspace: ~/.openclaw/workspace
  Agent dir: ~/.openclaw/agents/main/agent
  Model: volcengine-plan/ark-code-latest
  Routing rules: 3
  Routing: default (no explicit rules)
  Routing rules:
    - wecom-app accountId=wecom-life
    - dingtalk accountId=dingtalk-life
    - feishu accountId=feishu-life
- ops
  Workspace: ~/.openclaw/workspace-ops
  Agent dir: ~/.openclaw/agents/ops/agent
  Model: volcengine-plan/ark-code-latest
  Routing rules: 3
  Routing rules:
    - wecom-app accountId=wecom-ops
    - dingtalk accountId=dingtalk-ops
    - feishu accountId=feishu-ops
Routing rules map channel/account/peer to an agent. Use --bindings for full rules.
Channel status reflects local config/creds. For live health: openclaw channels status --probe.
对接微信
ClawBot方案
腾讯微信官方退出的 ClawBot 方案。
微信——>我——>设置——>插件。
根据提示在 openclaw 上安装插件。
root@openclaw:~# npx -y @tencent-weixin/openclaw-weixin-cli@latest install
安装过程进行扫码绑定。

测试沟通。
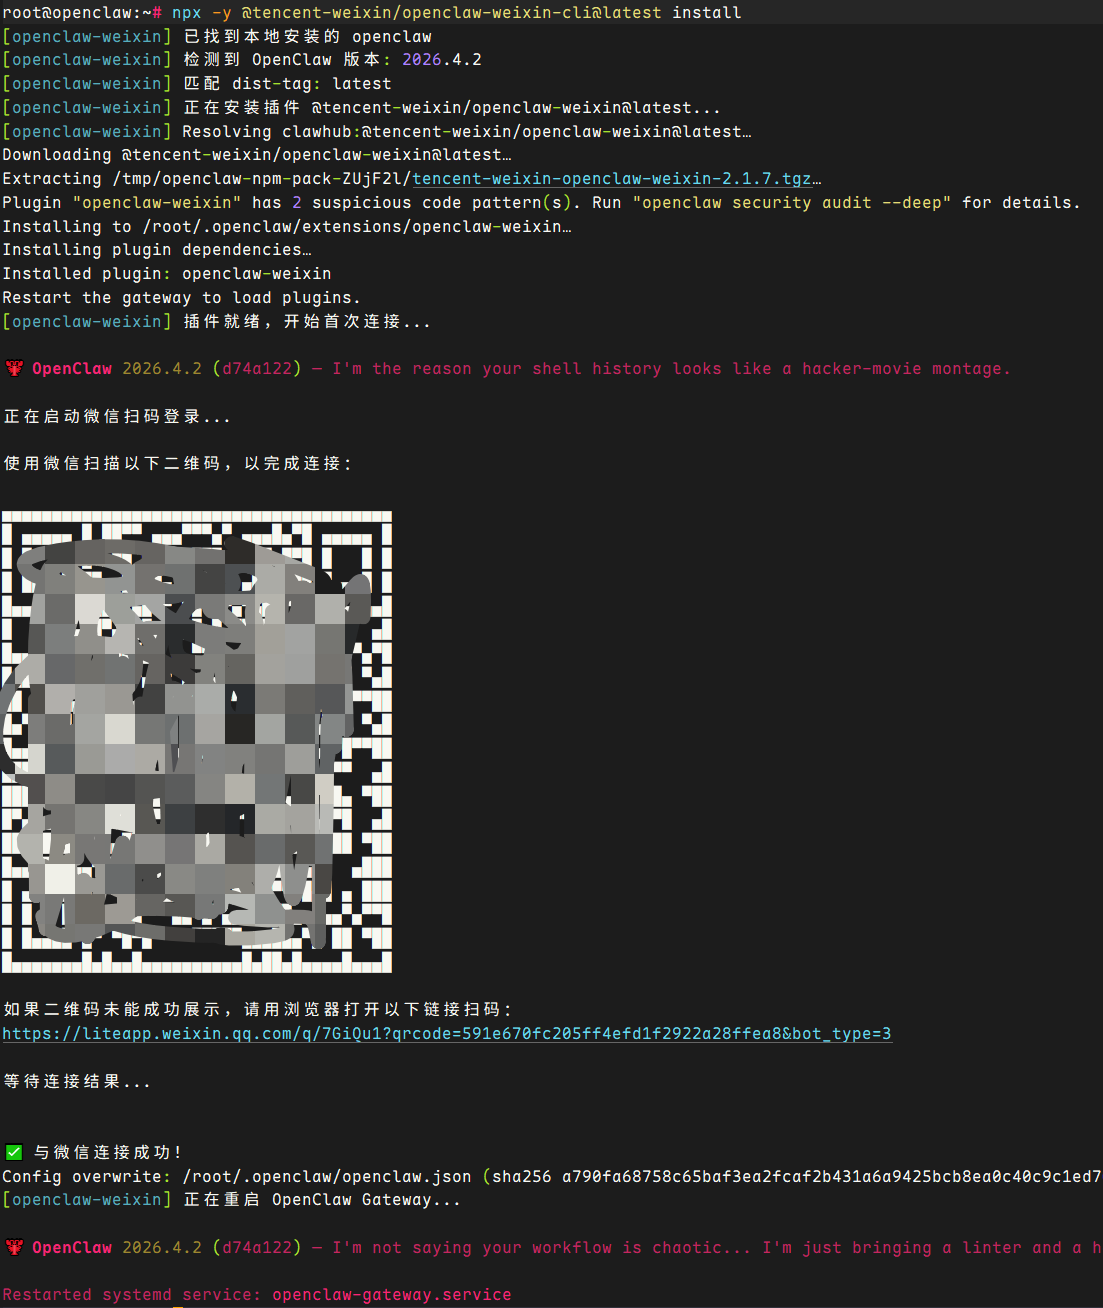
注意:当前官方 clawbot 仅支持对接一个agent,需要类似钉钉和企业微信、飞书的多个机器人对接,建议使用微信公众号的方案
workspace详解
workspace概述
每一个agent具备专属的workspace,默认agent的路径位于 ~/.openclaw/workspace/ ,该路径是 OpenClaw 主 Agent 的工作区根目录,相当于 Agent 的“长期记忆与行为规范存储库”。
它的核心意义在于:
状态持久化:Agent 重启后能记住自己的身份、用户偏好、行为风格等。
行为约束:通过 SOUL.md、AGENTS.md 等文件定义 Agent 的“人格”与操作优先级。
用户协同:用户可直接编辑这些文件来调整 Agent 行为,无需改代码。
记忆分层:memory/ 目录用于记录对话或任务日志,支持长期上下文。
工具约定:TOOLS.md 记录本机可用工具的说明,便于 Agent 合理调用。
一句话总结:
Workspace 理解成 Agent 的 “个人档案 + 工作手册 + 日记本”。
核心文件
workspace下 核心文件说明如下:
| 件名 | 作用说明 | 是否必需 | 典型内容示例 / 示例内容 | 更新频率 |
|---|---|---|---|---|
| AGENTS.md | 操作说明与优先级指导定义 Agent 身份、行为准备,以及如何处理任务、使用记忆的策略、决策优先级。相当于 Agent 的“工作手册” | 推荐 | 任务处理优先级1. 优先使用已有记忆2. 不确定时询问用户(“优先读取 USER.md,再执行任务;重要信息写入 memory/”) | 较少修改 |
| SOUL.md | 风格、边界与原则定义 Agent 的灵魂、人格、性格特征、回答风格、伦理边界。决定“Agent 是什么性格” | 推荐 | 性格特征:友好但专业,不提供医疗建议回答风格:使用礼貌用语,语气专业但不生硬边界:拒绝执行危险命令或提供违法建议 | 很少修改 |
| USER.md | 用户画像与偏好存储用户的个人信息、称呼偏好、常用命令习惯等,实现个性化交互 | 推荐 | - 称呼:王工 / 小克- 偏好:技术方案优先,喜欢简洁回答- 职业:SRE- 时区:Asia/Shanghai | 随用户反馈更新 |
| IDENTITY.md | Agent 身份标识定义 Agent 的名称、角色定位、服务范围。首次引导时自动生成 | 引导时生成 | - 名称:OpenClaw / 生活助手- 角色:智能运维助手 / 个人 AI 助理- 服务范围:日常事务- 偏好:偏好使用 shell 命令 | 很少修改 |
| TOOLS.md | 工具使用约定说明说明本机可用工具的使用方法,但不控制工具的实际可用性(仅作指导) | 可选 | 文件操作:使用 read_file执行命令:使用 exec可用工具示例:grep, awk, docker, kubectl限制:不支持 python3 | 工具变更时 |
| HEARTBEAT.md | 心跳检查清单用于定期健康检查,验证 Agent 核心功能是否正常。尽量保持简短 | 可选 | 心跳检查- [ ] 记忆系统正常- [ ] 工具调用正常- [ ] 网络连接正常- [ ] 磁盘空间充足- [ ] memory/ 有最新日志 | 定期更新 |
| BOOT.md | 网关启动清单网关重启时自动执行的初始化任务清单。需要内部 hooks 支持 | 高级 | 启动任务1. 加载用户偏好2. 检查新 Skills3. 清理临时文件4. 重新加载 SOUL.md | 很少修改 |
| BOOTSTRAP.md | 一次性引导文件首次运行时执行,完成后可删除。用于初始配置和引导流程 | 一次性 | 首次引导- 请设置你的称呼- 选择专业领域- 创建 USER.md- 生成 SSH 密钥 | 仅首次使用 |
| memory/ | 记忆存储目录存放会话记忆、用户偏好等持久化数据。建议按天写入,支持长期记忆 | 推荐 | memory/2025-04-06.md 记录今日关键交互或 memory/2026-04-06.json 结构化存储 | 持续更新 |
| memory/skills/ | 工作区专属 Skills存放仅当前 Agent 可用的 Skills,优先级高于全局 Skills | 高级 | skills/deploy.md 描述自动部署流程包含 SKILL.md 定义文件及配套脚本 | Skill 变更时 |
提示:
- .git/ 目录表示整个 workspace 可被版本管理,便于回溯 Agent 行为变更。
- .openclaw/ 子目录通常用于存放内部状态或缓存,不建议手动修改。
- 大部分文件使用 Markdown 格式,便于人类阅读和 Agent 解析。
- 删除 BOOTSTRAP.md 不会影响 Agent 运行,它只在初始化阶段生效。
最佳实践
通常首次安装后,建议先检查 IDENTITY.md 和 USER.md,按需修改。
定期归档 memory/,避免日志过大影响 Agent 性能。
修改 SOUL.md 后,建议重启 Agent 或触发一次 HEARTBEAT 检查。
不要在 TOOLS.md 中写敏感信息(如密码),它可能被 Agent 记录到日志。
技能Skills
skill介绍
Skill 是 OpenClaw 的插件扩展机制,每个 Skill 封装特定领域的能力。所以在 OpenClaw 里,Skill 可以理解为一种“插件能力”。
它的作用是给 OpenClaw 增加额外功能,比如:
- 总结内容
- 查询天气
- 浏览网页
- 调用外部工具
- 增强 Agent 能力
总结:模型负责理解和生成内容,Skill负责提供具体能力,所以,装好 Skill 后,OpenClaw 的可用功能会更丰富。Skill 不是模型本身,而是“教 OpenClaw 在某类任务里怎么更专业地做事”的一份操作手册。
skill的特点:
- 包含工具定义 + 使用指南 (SKILL.md)
- 由 agent 在对话中自动调用,无需用户记忆复杂命令
- 支持第三方分发(ClawHub),也可本地自定义开发
OpenClaw的Skill有三个来源,按优先级从高到低排列:
| 优先级 | 位置 | 说明 |
|---|---|---|
| 最高 | <workspace>/skills/ | 项目级Skills,只对当前工作区生效。适合针对特定项目定制的能力。 |
| 中 | ~/.openclaw/skills/ | 用户级Skills,全局生效。通过ClawHub安装或手动放置的Skills都在这里。 |
| 最低 | bundled skills | 内置的55个Skills,随OpenClaw版本发布。不需要安装,开箱即用。 |
提示:如果同名Skill存在于多个层级,高优先级会覆盖低优先级。这意味着你可以在workspace级别「重写」一个内
置Skill的行为,而不影响其他项目。
Skill优先级
官方文档给出的加载位置有三个:
- 内置 Skills
- ~/.openclaw/skills
- <workspace>/skills
优先级是:<workspace>/skills 最高,~/.openclaw/skills 其次,内置 Skills 最低。
即:
- 在当前工作区自己放一个同名 Skill,可以覆盖全局的
- 在 ~/.openclaw/skills 里放的 Skill,可以给同机多个智能体共用
- 如果同名冲突,工作区版本优先
<workspace>/skills 最高,~/.openclaw/skills 其次,内置 Skills 最低。
更多Skill参考:OpenClaw Skills 是什么 。
skill与plugin
skill和plugin主要区别:
-
Skill
更偏“说明书”和“工作流”
核心是 SKILL.md
主要告诉智能体:什么时候该用、该怎么用 -
Plugin
更偏“代码扩展”
可以给 OpenClaw 增加新的工具、命令和能力
官方文档也明确提到:插件本身也可以顺带发布自己的 Skills
总结:Plugin 更像“新增功能模块”,Skill 更像“教你怎么把已有功能用好”。
ClawHub
ClaswHub 是一个官方主推的 Skill 技能平台。
建议先安装 ClawHub CLI 工具,从而实现从 ClaswHub 上快速安装相关 Skill。
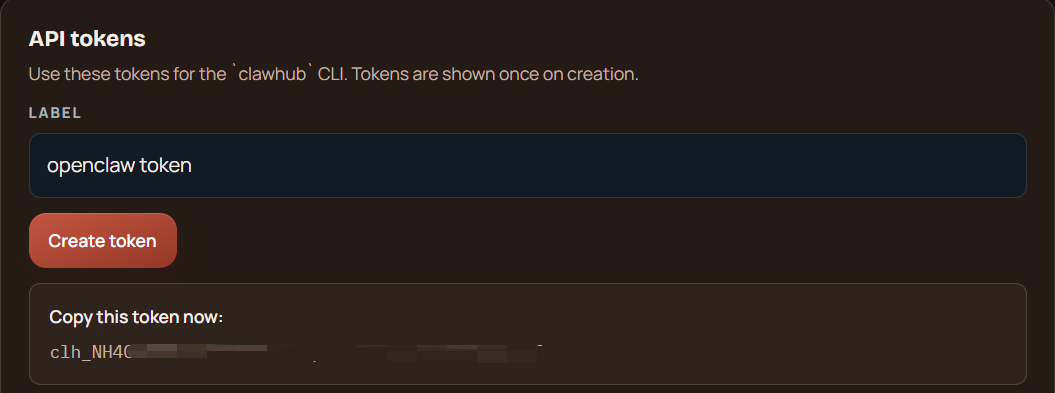
安装后需要对接 ClawHub Token,登录 ClawHub 网站,获取 Token 。
claswhub token:clh_NH4CfEolVi1Sxxxxxxxxxxxxxxxxxxxxxxxxxxxxxx
root@openclaw:~# npm install -g clawhub            # 或者 pnpm add -g clawhub
root@openclaw:~# clawhub -V
0.9.0
中国官方 clawhub 镜像站点: ClawHub镜像站 。
安装技能
skill安装方式非常多,常见有如下几种。
clawhub安装
通过clawhub安装技能
root@openclaw:~# clawhub search github                      # 搜素技能

root@openclaw:~# clawhub install liang-tavily-search        # 安装联网搜素,默认main agent可用


root@openclaw:~# mkdir -p ~/.openclaw/skills                # 创建全局skill目录
root@openclaw:~# clawhub install liang-tavily-search --dir /root/.openclaw/skills   # 安装为全局可用skill
root@openclaw:~# clawhub install liang-tavily-search --workdir /root/.openclaw      # 安装为全局可用skill

root@openclaw:~# clawhub update --all                       # 升级所有
root@openclaw:~# clawhub list                               # 列出所有
注意:
- 使用clawhub那种kill,需要先安装clawhub,如果临时使用可使用
npx clawhub@latest install "liang-tavily-search"。 - clawhub install 路径的逻辑是如果 --workdir 没指定,且当前目录不是 OpenClaw 任何一个agent的工作区(没有 AGENTS.md / openclaw.json),它会 fallback 到配置里的 defaults.workspace
- 安装完 Skill 之后,要开一个新的 OpenClaw 会话(
/new),它才会稳定识别到新 Skill。
或者重启网关:openclaw gateway restart
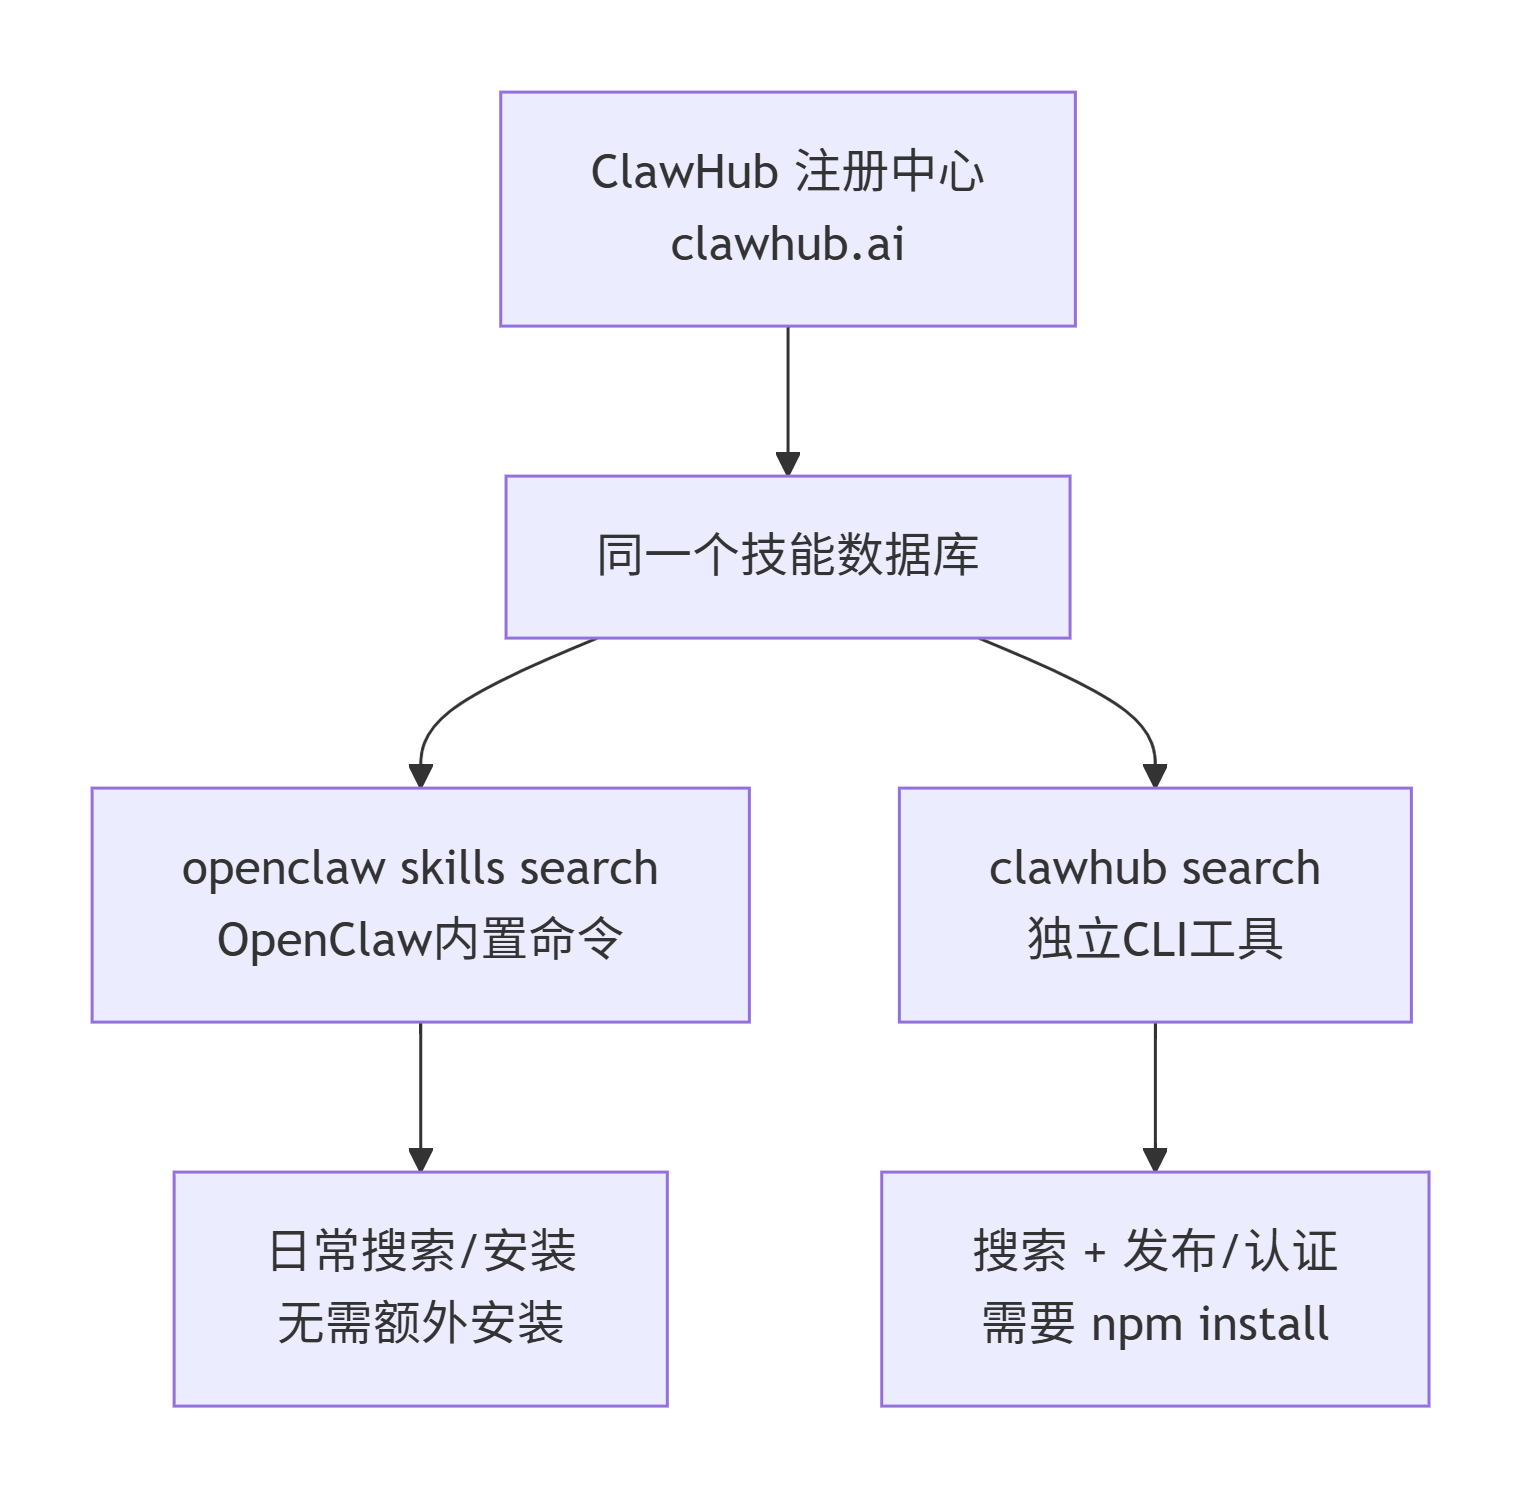
openclaw skill内置命令
OpenClaw 自身也集成了技能管理命令,与clawhub效果相同。openclaw skills 和 clawhub 两者都是连接到 ClawHub 公共注册中心(https://clawhub.ai),搜索的是同一个技能数据库.
主要差异如下:
openclaw命令:
- 零配置,装好 OpenClaw 就能用
- 适合日常的搜索、安装、更新操作
- 会自动将技能安装到当前工作区的 ./skills 目录
clawhub命令:
- 需要单独安装的 CLI 工具,面向需要高级功能的用户
- 具备丰富的额外能力:
- clawhub login / logout —— 身份认证
- clawhub publish —— 发布自己的技能
- clawhub sync —— 批量同步和备份本地技能
- clawhub package publish —— 从 GitHub 发布插件
提示:openclaw skills install 安装默认会安装到默认的 workspace 空间下。
root@openclaw:~# openclaw skills search "summarize"                 # 查询技能

root@openclaw:~# openclaw skills install "summarize-pro"            # 安装至默认workspace下
提示:openclaw 自带skill命令安装全局可通过如下方式移动至全局:
root@openclaw:~# openclaw skills install summarize-pro              # 正常安装到当前默认工作区
root@openclaw:~# mv /root/.openclaw/workspace/skills/summarize-pro ~/.openclaw/skills/          # 移动到全局

root@openclaw:~# openclaw skills list                               # 列出 skill
root@openclaw:~# openclaw skills info summarize-pro                 # 查看技能详情
openclaw WebUI安装
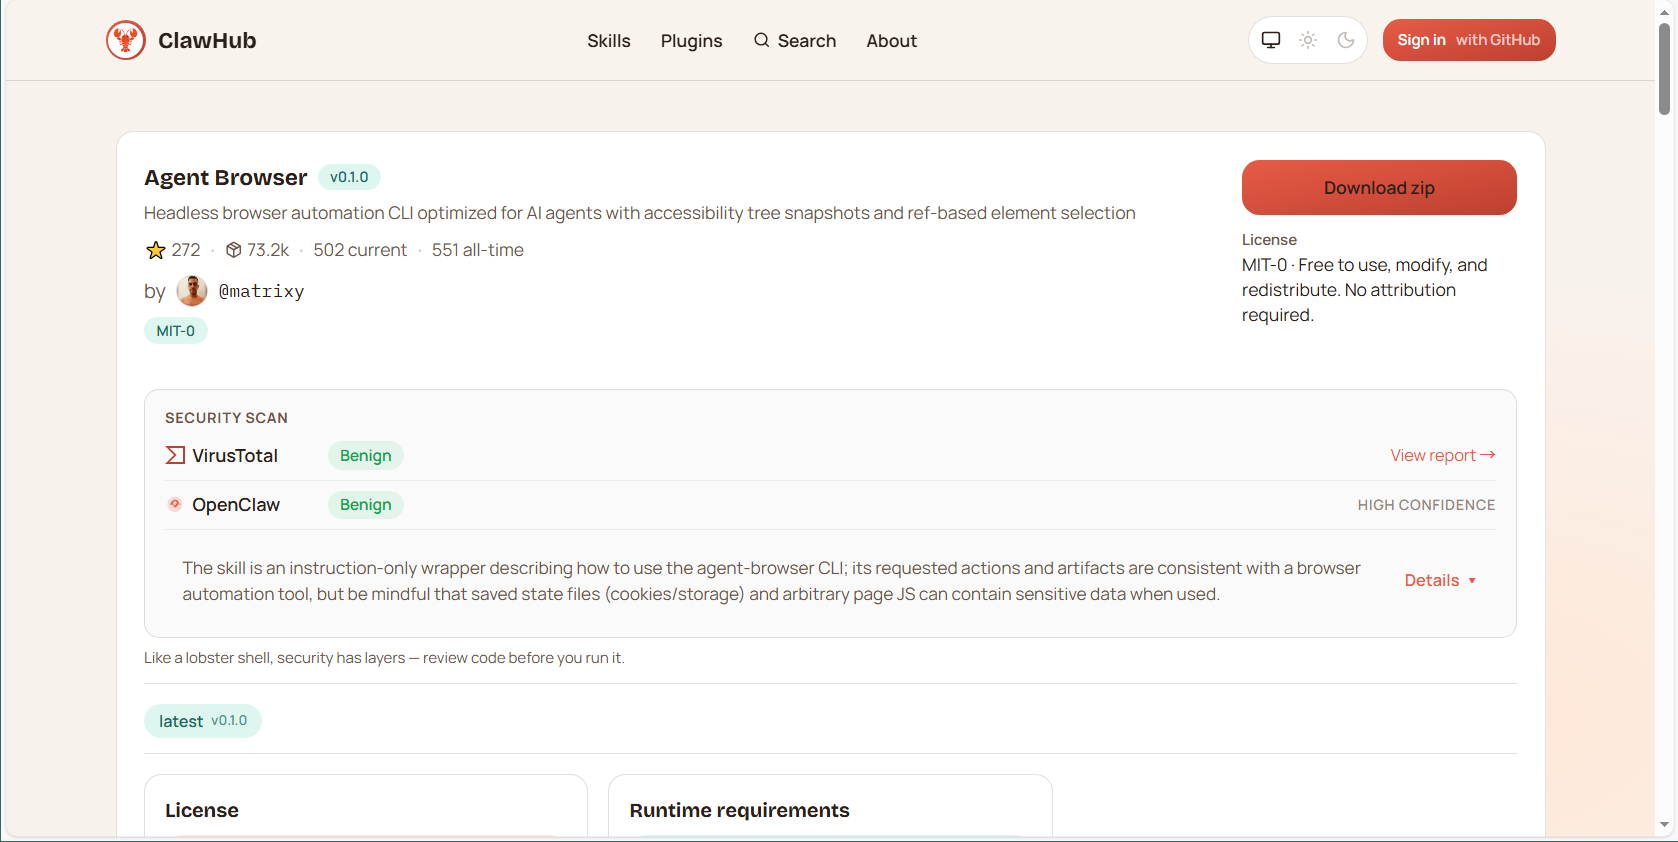
登录 OpenClaw 后,技能,Browse Sill Store ,可以进入 ClawHub 浏览和搜素技能。
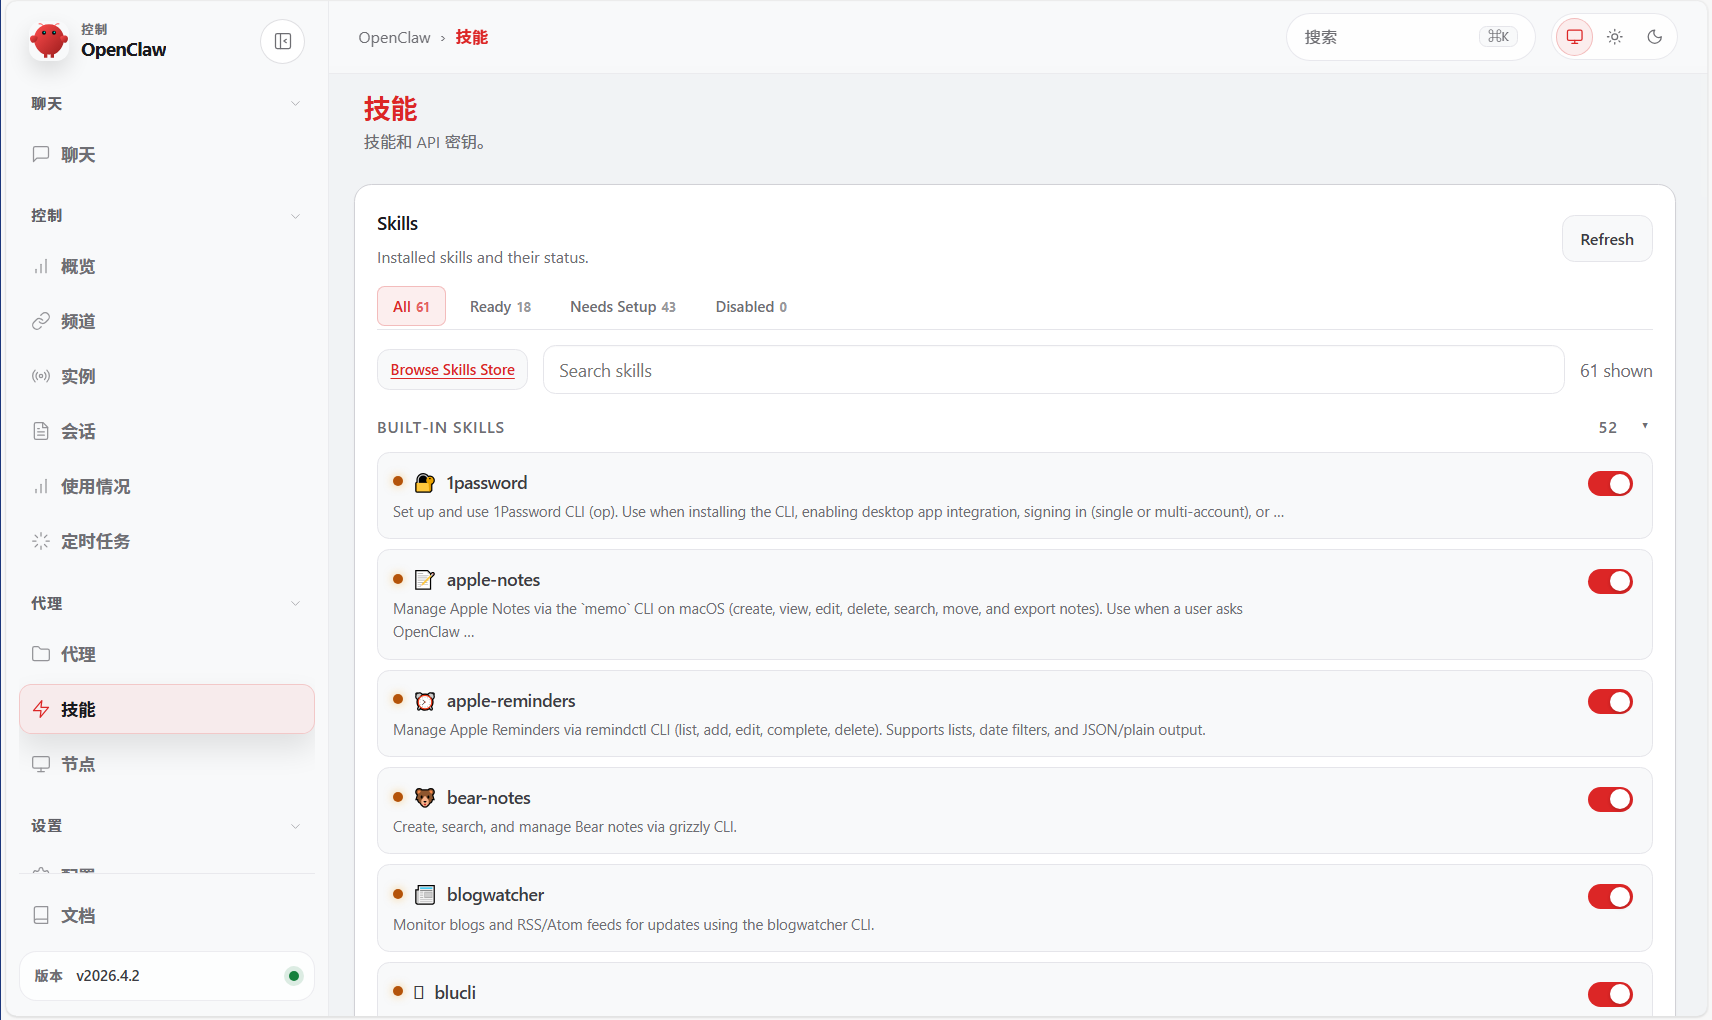
进入后可搜素相关技能,如 agent-browser 。
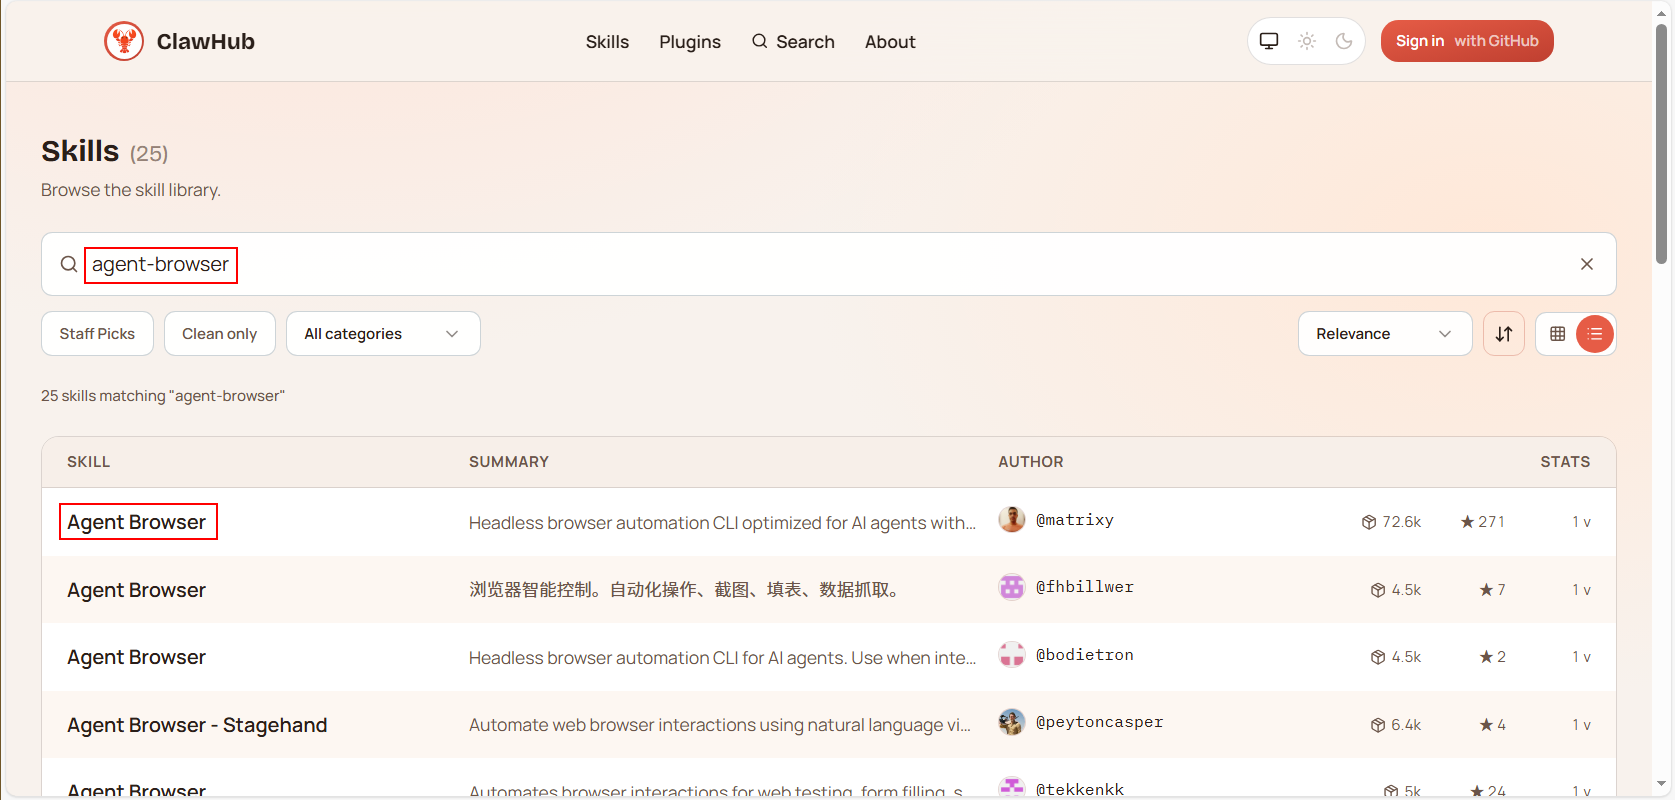
Download zip,将压缩包进行下载,然后至服务器,根据需要放置对应目录,如全局skill目录 ~/.openclaw/skills 。
root@openclaw:~# cd .openclaw/skills/
root@openclaw:~/.openclaw/skills# ll
total 12
drwxr-xr-x  2 root root 4096 Apr  7 15:26 ./
drwx------ 16 root root 4096 Apr  7 15:26 ../
-rw-r--r--  1 root root 2319 Mar 30 20:29 agent-browser-clawdbot-0.1.0.zip

root@openclaw:~/.openclaw/skills# unzip agent-browser-clawdbot-0.1.0.zip -d agent-browser-clawdbot

root@openclaw:~/.openclaw/skills# ll
total 16
drwxr-xr-x  3 root root 4096 Apr  7 15:28 ./
drwx------ 16 root root 4096 Apr  7 15:26 ../
drwxr-xr-x  2 root root 4096 Apr  7 15:28 agent-browser-clawdbot/
-rw-r--r--  1 root root 2319 Mar 30 20:29 agent-browser-clawdbot-0.1.0.zip

root@openclaw:~/.openclaw/skills# rm -rf agent-browser-clawdbot-0.1.0.zip
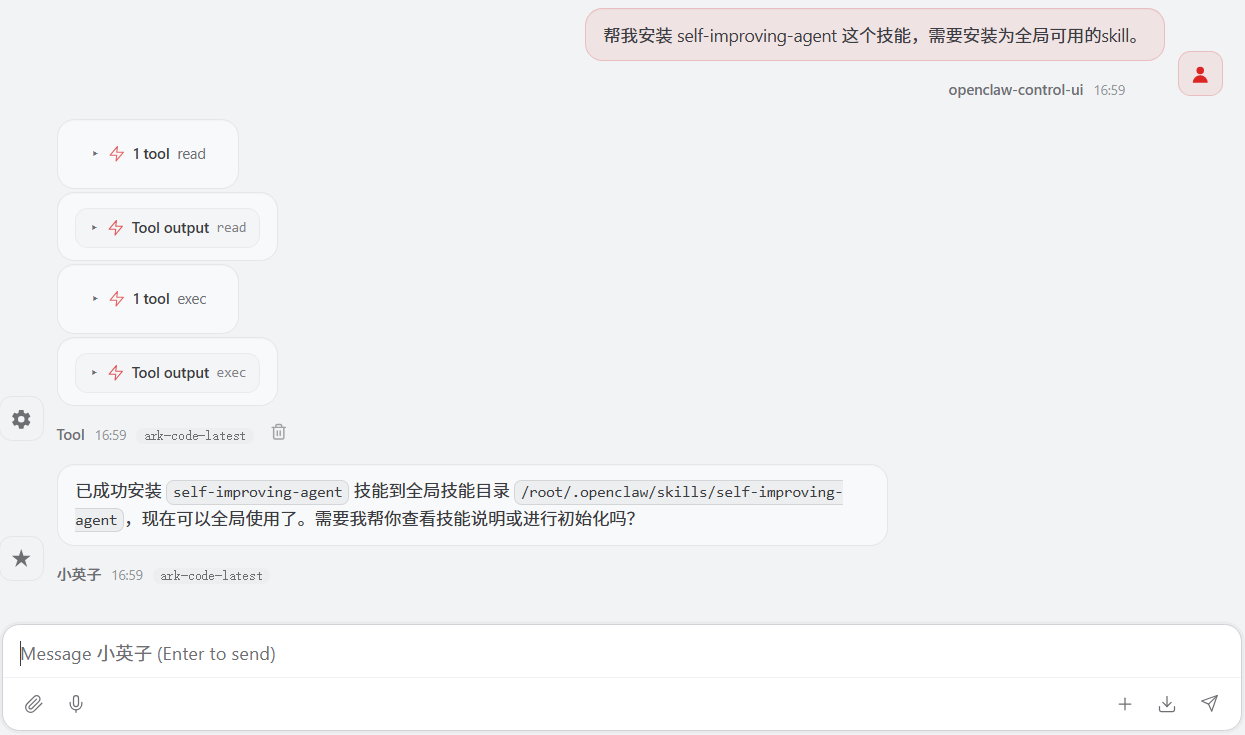
自然语言安装
任何和openclaw的对话框中用自然语言描述安装即可。
文档收集
OpenClaw相关文档收集和汇总:
Linux部署文档
Linux安装参考:
OpenClaw(Clawdbot)阿里云及本地部署喂饭级流程
Windows部署文档
Windows部署参考:
Windows 11 指南:完整安装 OpenClaw 并快速上手
部署过程错误处理可参考:
OpenClaw Pairing required 错误解决方案详解 常见问题排查手册
脚本部署、容器部署、Kubernetes部署、OpenClaw优化参考:本地部署OpenClaw安装配置使用
版本:v1
初稿:向红英
邮箱:xhy@itzgr.cn
整理日期:2026年03月27日

AtomGit 是由开放原子开源基金会联合 CSDN 等生态伙伴共同推出的新一代开源与人工智能协作平台。平台坚持“开放、中立、公益”的理念,把代码托管、模型共享、数据集托管、智能体开发体验和算力服务整合在一起,为开发者提供从开发、训练到部署的一站式体验。
更多推荐


 6
6 0
0- 0


 已为社区贡献1条内容

所有评论(0)