Spring AI Alibaba 1.x 系列【3】入门案例
文章目录
1. 环境搭建
1.1 创建项目
环境要求:
JDK 17+Maven 3.8+Spring Boot 3.5.11- 选择
LLM提供商并获取API-KEY - 使用
IDEA创建一个Spring Boot项目
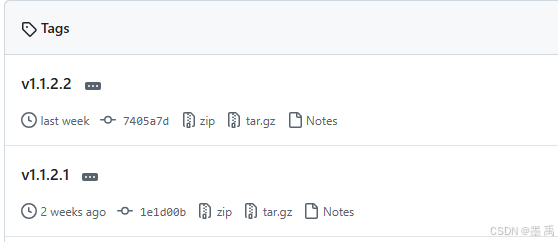
1.2 版本说明
版本兼容表:
| SAA 版本 | Spring AI | Spring AI Extensions | Spring Boot | 说明 |
|---|---|---|---|---|
| 1.1.2.2(当前推荐) | 1.1.2 | 1.1.2.1 或 1.1.2.0 | 3.5.x | 支持 Agent Skills,提供 Supervisor、Routing 等 Multi-agent 能力。 |
| 1.1.0.0 | 1.1.0 | 1.1.0.0 | 3.4.x | 1.1.0 首个正式版 |
| 1.1.0.0-RC2 | 1.1.0-RC2 | 1.1.0.0-RC2 | 3.4.x | 1.1.0 候选版,请使用 1.1.0.0 或 1.1.2.0 版本 |
| 1.1.0.0-RC1 | 1.1.0-RC1 | 1.1.0.0-RC1 | 3.4.x | 1.1.0 候选版,请使用 1.1.0.0 或 1.1.2.0 版本 |
| 1.0.x | 1.0.0 | — | 3.4.x | 1.0 系列 |
这里选最新的 SAA 1.1.2.2 版本:
1.3 依赖管理
通过 BOM 统一版本,避免冲突:
<dependencyManagement>
    <dependencies>
        <!--Spring Boot-->
        <dependency>
            <groupId>org.springframework.boot</groupId>
            <artifactId>spring-boot-dependencies</artifactId>
            <version>3.5.11</version>
            <type>pom</type>
            <scope>import</scope>
        </dependency>
        <!--Spring AI-->
        <dependency>
            <groupId>org.springframework.ai</groupId>
            <artifactId>spring-ai-bom</artifactId>
            <version>1.1.2</version>
            <type>pom</type>
            <scope>import</scope>
        </dependency>
        <!--Spring AI Alibaba-->
        <dependency>
            <groupId>com.alibaba.cloud.ai</groupId>
            <artifactId>spring-ai-alibaba-bom</artifactId>
            <version>1.1.2.2</version>
            <type>pom</type>
            <scope>import</scope>
        </dependency>
        <!--Spring AI Alibaba Extensions-->
        <dependency>
            <groupId>com.alibaba.cloud.ai</groupId>
            <artifactId>spring-ai-alibaba-extensions-bom</artifactId>
            <version>1.1.2.1</version>
            <type>pom</type>
            <scope>import</scope>
        </dependency>
    </dependencies>
</dependencyManagement>
注意:务必按照案例中的版本来,否则很容易出现其他问题。
1.4 添加依赖
添加 SSA 依赖:
<dependencies>
  <!-- Spring AI Alibaba Agent Framework -->
  <dependency>
    <groupId>com.alibaba.cloud.ai</groupId>
    <artifactId>spring-ai-alibaba-agent-framework</artifactId>
    <version>1.1.2.0</version>
  </dependency>
</dependencies>
添加智谱 AI 对话模型依赖:
<!--智谱 AI -->
<dependency>
    <groupId>org.springframework.ai</groupId>
    <artifactId>spring-ai-starter-model-zhipuai</artifactId>
</dependency>
如果使用百炼平台,添加 DashScope 依赖:
  <!-- DashScope ChatModel 支持(如果使用其他模型,请跳转 Spring AI 文档选择对应的 starter) -->
  <dependency>
    <groupId>com.alibaba.cloud.ai</groupId>
    <artifactId>spring-ai-alibaba-starter-dashscope</artifactId>
    <version>1.1.2.0</version>
  </dependency>
1.5 配置 API Key
application.yml 配置你的 API Key 推荐通过环境变量设置:
spring:
  ai:
    zhipuai:
      #  api-key: ${AI_DEEPSEEK_API_KEY}
      api-key: f9d9e7c26bd24406ad03dc6fe21c4
2. 基础用法
2.1 创建 ReactAgent
Spring AI 帮我们已经自动配置了对话模型的 ChatModel :
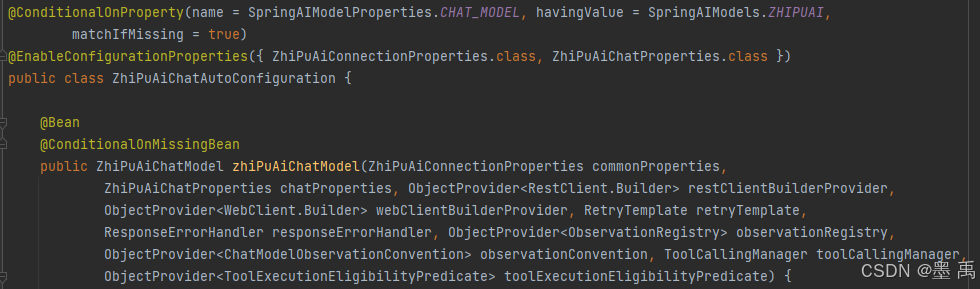
创建 ReactAgent 智能体对象,并配置一个 ChatModel :
@Configuration
class ChatClientConfig {

    @Bean("chatAgent")
    public ReactAgent chatAgent(ZhiPuAiChatModel zhiPuAiChatModel) {
        // 创建 agent
        return ReactAgent.builder()
                .name("chat_agent") // 指定名称
                .model(zhiPuAiChatModel) // 指定 ChatModel
                .build();
    }

}
2.2 同步调用
写一个测试类,调用call 方法:
@SpringBootTest
class Demo01ApplicationTests {

    @Autowired
    ReactAgent chatAgent;

    @Test
    public void test01() throws GraphRunnerException {
        String text = chatAgent.call("Hello AI").getText();
        System.out.println(text);
    }

}
运行并查看模型输出结果:
2.3 invoke 执行
可以使用 invoke 方法获取执行完成后的 Agent 的完整状态。
示例:
// 字符串输入
String userInput="几点了,我吃什么比较好,我还有多久可以休息?";
Optional<OverAllState> result = chatAgent.invoke(userInput);
if (result.isPresent()) {
    OverAllState state = result.get();
    // 访问消息历史
    List<Message> messages = state.value("messages", new ArrayList<>());
    // 访问其他状态信息
    System.out.println(state);
}
返回的整体结构如下:
{
  "OverAllState": {
    "data": {
      "_graph_execution_id_": "61787f5b-...",   // Graph 执行 ID
      "input": "几点了,我吃什么比较好,我还有多久可以休息?",  // 用户原始输入
      "messages": [...]                          // 对话历史(核心)
    }
  }
}
messages 数组中包含了所有的 USER、ASSISTANT、TOOL 消息:
┌─────────────────────────────────────────────────────────────────────────────┐
│  [0] USER Message                                                            │
│  "几点了,我吃什么比较好,我还有多久可以休息?"                                 │
├─────────────────────────────────────────────────────────────────────────────┤
│  [1] ASSISTANT Message (模型推理 - 第1次)                                     │
│  toolCalls: get_current_time                                                 │
│  text: "我来帮您查询一下当前的时间..."                                         │
├─────────────────────────────────────────────────────────────────────────────┤
│  [2] TOOL Message (工具执行结果)                                              │
│  name: get_current_time                                                      │
│  responseData: "15:29:57"                                                    │
├─────────────────────────────────────────────────────────────────────────────┤
│  [3] ASSISTANT Message (模型推理 - 第2次)                                     │
│  toolCalls: get_current_weekday                                              │
├─────────────────────────────────────────────────────────────────────────────┤
│  [4] TOOL Message (工具执行结果)                                              │
│  name: get_current_weekday                                                   │
│  responseData: "星期一"                                                       │
├─────────────────────────────────────────────────────────────────────────────┤
│  [5] ASSISTANT Message (最终回答)                                            │
│  finishReason: "STOP"                                                        │
│  text: "根据当前时间,现在是**星期一 15:29**..."                               │
└─────────────────────────────────────────────────────────────────────────────┘
2.4 流式响应
使用 stream 方法执行流式响应,和 Spring AI 不同的是返回的类型是 Flux<NodeOutput> ,需要根据输出类型进行判断,然后获取对应信息。
示例:
String userInput = "几点了,我吃什么比较好,我还有多久可以休息?";
Flux<NodeOutput> stream = chatAgent.stream(userInput);
stream.doOnNext(output -> {
            // 检查是否为 StreamingOutput 类型
            if (output instanceof StreamingOutput streamingOutput) {
                OutputType type = streamingOutput.getOutputType();
                // 处理模型推理的流式输出
                if (type == OutputType.AGENT_MODEL_STREAMING) {
                    // 流式增量内容,逐步显示
                    System.out.print(streamingOutput.message().getText());
                } else if (type == OutputType.AGENT_TOOL_FINISHED) {
                    // 工具执行完成
                    System.out.println("\n[工具执行完成]");
                }
            }
        })
        .doOnError(error -> System.err.println("\n错误: " + error.getMessage()))
        .doOnComplete(() -> System.out.println("\n\n===== Agent 执行完成 ====="))
        .blockLast();  // 关键:阻塞等待流完成
2.5 系统提示词
创建 ReactAgent 对象时,可以配置全局默认的系统提示词:
@Bean
public ReactAgent chatAgent(ChatModel zhiPuAiChatModel) {
    ReactAgent chatAgent = ReactAgent.builder()
            .name("chat-agent")
            .model(zhiPuAiChatModel)
            .systemPrompt("""
    你是一个智能助手,使用 ReAct (Reasoning + Acting) 模式解决问题。
    """)
            .build();
    return chatAgent;
}
也提供了 setSystemPrompt 方法在运行时动态设置系统提示词:
String userInput = "你好";
chatAgent.setSystemPrompt("你是一个智能助手,三句话回复。");
Flux<NodeOutput> stream = chatAgent
        .stream(userInput);
2.6 工具调用
和 Spring AI 一样支持多种方式创建工具,比如方法型、函数型工具。
示例,定义一个当前时间工具:
@Component
public class DateTimeTools {

    private static final DateTimeFormatter DATE_FORMATTER = DateTimeFormatter.ofPattern("yyyy-MM-dd");
    private static final DateTimeFormatter TIME_FORMATTER = DateTimeFormatter.ofPattern("HH:mm:ss");
    private static final DateTimeFormatter DATETIME_FORMATTER = DateTimeFormatter.ofPattern("yyyy-MM-dd HH:mm:ss");

    @Tool(name = "get_current_date_time", description = "获取用户时区下的当前日期和时间,格式为 yyyy-MM-dd HH:mm:ss")
    public String getCurrentDateTime() {
        LocalDateTime now = LocalDateTime.now(LocaleContextHolder.getTimeZone().toZoneId());
        return now.format(DATETIME_FORMATTER);
    }

    @Tool(name = "get_current_date", description = "获取当前日期,格式为 yyyy-MM-dd")
    public String getCurrentDate() {
        LocalDateTime now = LocalDateTime.now(LocaleContextHolder.getTimeZone().toZoneId());
        return now.format(DATE_FORMATTER);
    }

    @Tool(name = "get_current_time", description = "获取当前时间,格式为 HH:mm:ss")
    public String getCurrentTime() {
        LocalDateTime now = LocalDateTime.now(LocaleContextHolder.getTimeZone().toZoneId());
        return now.format(TIME_FORMATTER);
    }

    @Tool(name = "get_current_weekday", description = "获取当前是星期几")
    public String getCurrentWeekday() {
        LocalDateTime now = LocalDateTime.now(LocaleContextHolder.getTimeZone().toZoneId());
        String[] weekdays = {"星期一", "星期二", "星期三", "星期四", "星期五", "星期六", "星期日"};
        return weekdays[now.getDayOfWeek().getValue() - 1];
    }
配置全局默认工具:
  @Bean
    public ReactAgent chatAgent(ChatModel zhiPuAiChatModel, DateTimeTools dateTimeTools) {
        ReactAgent chatAgent = ReactAgent.builder()
                .name("chat-agent")
                .model(zhiPuAiChatModel)
                .methodTools(dateTimeTools)
                .build();
        return chatAgent;
    }
注意:不同的是,ReactAgent 不直接支持在运行时动态添加/移除工具,需要其他方式实现。
2.7 模型参数
和 Spring AI 一样支持配置 ChatOptions 模型参数。
示例,全局默认:
        ZhiPuAiChatOptions chatOptions = ZhiPuAiChatOptions.builder()
                .temperature(0.7D)
                .model("glm-4.7")
                .maxTokens(1000)
                .build();
        ReactAgent chatAgent = ReactAgent.builder()
                .name("chat-agent")
                .chatOptions(chatOptions)
                .build();
注意:ReactAgent 不直接支持在运行时动态设置,需要其他方式实现。

AtomGit 是由开放原子开源基金会联合 CSDN 等生态伙伴共同推出的新一代开源与人工智能协作平台。平台坚持“开放、中立、公益”的理念,把代码托管、模型共享、数据集托管、智能体开发体验和算力服务整合在一起,为开发者提供从开发、训练到部署的一站式体验。
更多推荐


 6
6 0
0- 0


 已为社区贡献6条内容

所有评论(0)