【妙招系列】Harbor 镜像私有仓库搭建手册
Harbor 镜像私有仓库搭建手册
1.Harbor相关内容
官方网站:https://goharbor.cn/
开源网站:https://github.com/goharbor/harbor/tags
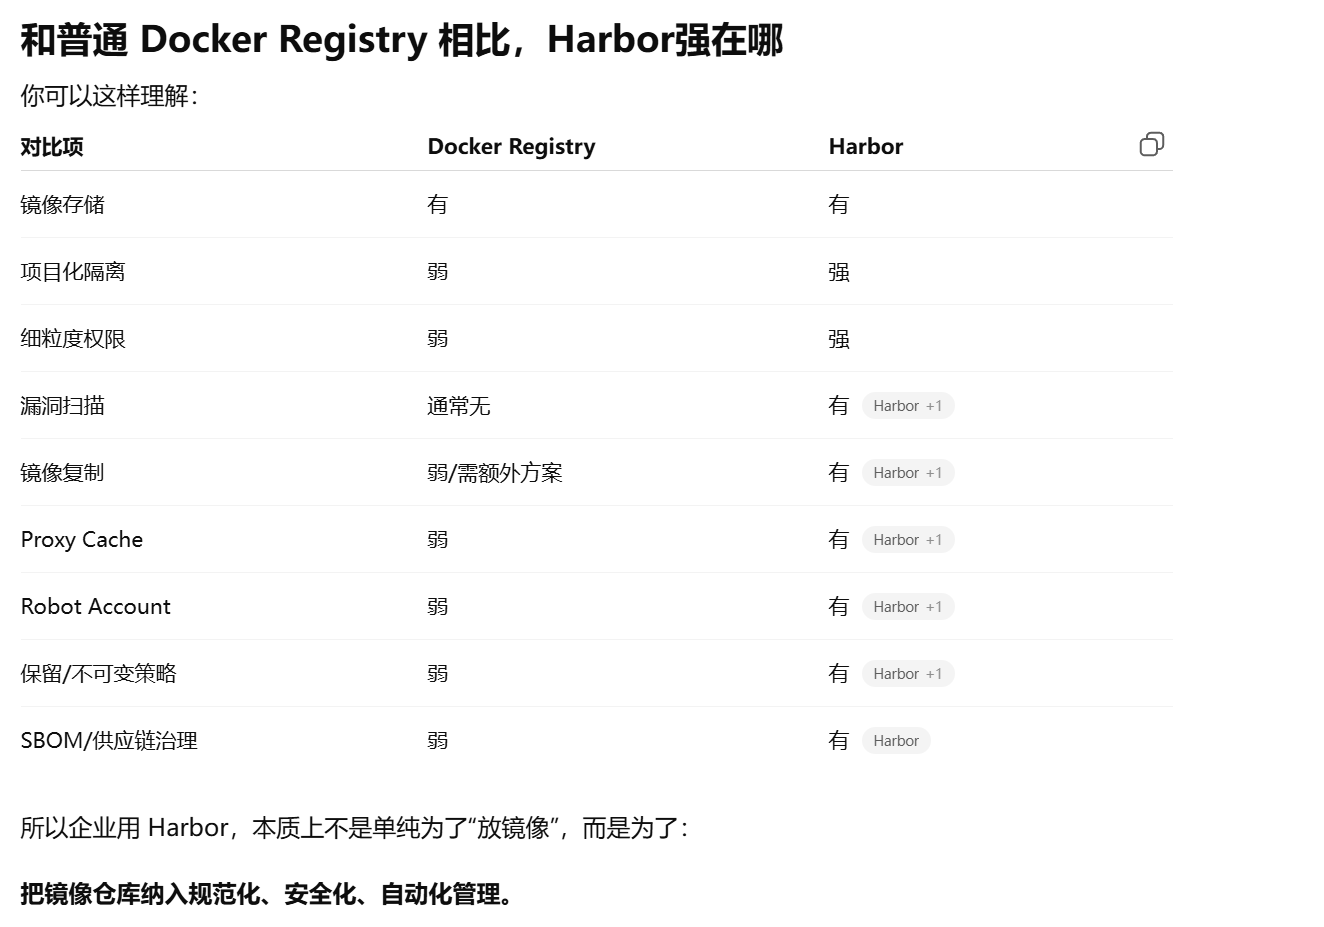
1.1 Harbor是什么?Harbor优势?
1.1.1 含义
Harbor 是 VMware 开源的企业级 Registry,核心作用是为企业提供私有镜像仓库能力。它不仅能存储和分发镜像,还支持权限控制、漏洞扫描、镜像复制、审计和标签管理,因此比普通 Docker Registry 更适合企业生产环境。
1.1.2 Harbor优势
- 权限管理更细,适合企业多团队协作
- Harbor 的优势之一是权限模型比普通 Registry 完整,支持按项目隔离、按角色授权,更适合企业多团队协作和生产环境治理。
- 自带漏洞扫描,能提前发现风险镜像
- Harbor 不只是存镜像,还能做漏洞扫描,帮助企业在镜像入库阶段就发现安全风险,把问题拦在发布之前。
- 支持镜像复制,适合多机房、多环境部署
- Harbor 支持跨仓库复制,适合企业多环境、多机房、多集群场景,便于镜像统一分发和灾备。
- 支持 Proxy Cache,减少对外部仓库依赖
- Harbor 的 Proxy Cache 对企业很实用,能够缓存公共仓库镜像,降低外网依赖,提升镜像拉取稳定性和速度。
- 支持 Robot Accounts,方便 CI/CD 自动化
- Harbor 支持 Robot Account,适合 CI/CD 自动化接入,能避免个人账号混用,也更方便做权限隔离和凭证管理。
- 支持镜像保留策略和不可变标签,防止误删误覆盖
- Harbor 提供 tag 保留和不可变策略,既能控制存储成本,也能防止关键镜像版本被误删或误覆盖。
- 支持 SBOM,有利于合规和供应链治理
- Harbor 支持 SBOM,这让它不只是镜像仓库,还能承担一定的软件供应链治理能力,适合更规范的企业环境。
相比普通 Docker Registry,Harbor 更适合企业使用。第一,它支持按项目和角色做权限隔离,方便多团队协作;第二,它支持漏洞扫描,能在镜像入库阶段发现安全问题;第三,它支持复制和代理缓存,适合多环境、多机房和离线场景;第四,它支持 Robot Account,便于 Jenkins、GitLab CI 这类自动化系统接入;另外还有标签保留、不可变和 SBOM 等能力,适合企业做镜像治理和供应链管理。
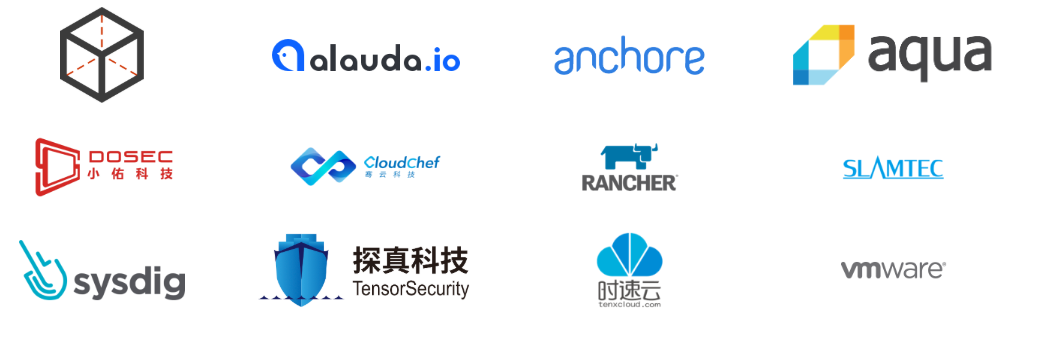
1.1.3 Harbor用户及合作伙伴

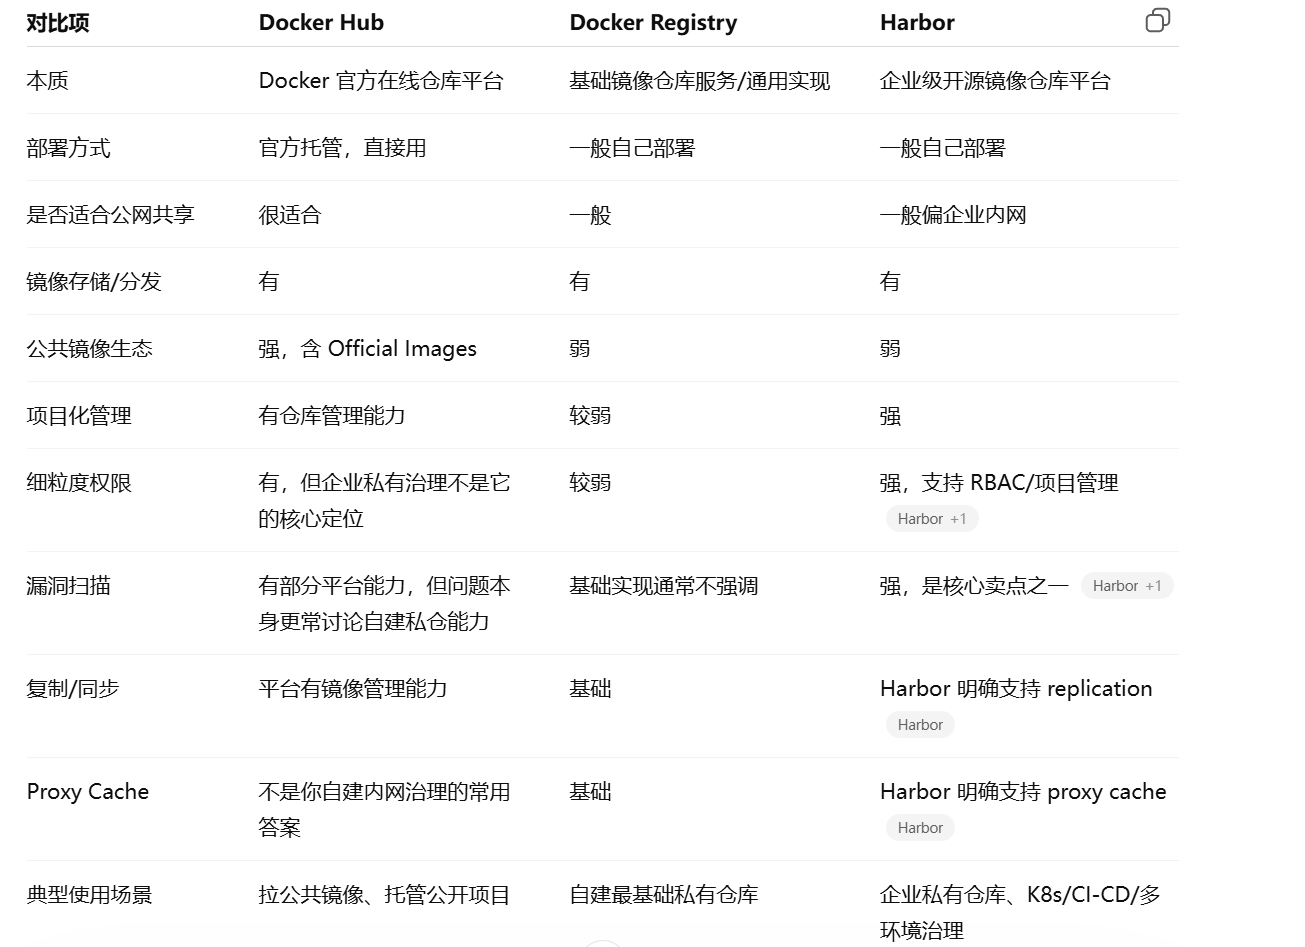
1.1.4 Docker Hub,Docker Registry,Harbor三者区别
2.搭建手册
我们选择离线安装(安装步骤都是一样的)!
2.1 基础环境配置
2.1.0更改完整主机名,网卡配置及/etc/hosts文件
[root@localhost ~]# vim /etc/bashrc
# 提示符一般显示短主机名,因此需要修改为完整主机名( \h -> \H)
 43     [ "$PS1" = "\\s-\\v\\\$ " ] && PS1="[\u@\H \W]\\$ "

[root@localhost ~]# source /etc/bashrc

[root@localhost ~]# hostnamectl set-hostname www.harbor.org
[root@localhost ~]# bash
[root@www.harbor.org ~]# hostname
www.harbor.org

# 第一种方法
]# nmcli c m xxx ipv4.method manual ipv4.addresses x.x.x.x ipv4.gateway x.x.x.x ipv4.dns x.x.x.x autoconnect yes
]# nmcli c reload
]# nmcli c up xxx

----
# 第二种方法
]# vi /etc/sysconfig/network-scripts/ifcfg-ens160
TYPE=Ethernet
PROXY_METHOD=none
BROWSER_ONLY=no
BOOTPROTO=none		# 静态配置(none/static);动态(dhcp)
DEFROUTE=yes		# 默认路由出口
IPV4_FAILURE_FATAL=no
IPV6INIT=yes
IPV6_AUTOCONF=yes
IPV6_DEFROUTE=yes
IPV6_FAILURE_FATAL=no
IPV6_ADDR_GEN_MODE=eui64
NAME=ens160				# 连接名称(NetworkManager 管理的连接名)
UUID=90d5a60b-bef3-4264-a395-ee6903b7863f
DEVICE=ens160			# 内核识别的网卡设备名
ONBOOT=yes				# 开机自启
IPADDR=172.25.254.5		# IP
PREFIX=24				# 子网掩码前缀长度
GATEWAY=172.25.254.2	# 网关
DNS1=114.114.114.114	# DNS

nmcli c reload
nmcli c up xxxx

[root@www.harbor.org ~]# vim /etc/hosts
...省略...
172.25.254.5    www.harbor.org
2.1.1 Firewalld及SELinux设置
]# systemctl disable --now firewalld
]# vi /etc/selinux/config
SELINUX=disabled

]# reboot
2.1.2 软件网络源仓库的配置
]# rm -f * /etc/yum.repos.d/
[root@www.harbor.org yum.repos.d]# vim /etc/yum.repos.d/aliyun.repo
[AppStream]
name=AppStream
baseurl=https://mirrors.aliyun.com/rockylinux/8/AppStream/x86_64/os/
gpgcheck=1
gpgkey=https://mirrors.aliyun.com/rockylinux/8/AppStream/x86_64/os/RPM-GPG-KEY-rockyofficial

[BaseOS]
name=BaseOS
baseurl=https://mirrors.aliyun.com/rockylinux/8/BaseOS/x86_64/os/
gpgcheck=1
gpgkey=https://mirrors.aliyun.com/rockylinux/8/AppStream/x86_64/os/RPM-GPG-KEY-rockyofficial

[Epel]
name=epel
baseurl=https://mirrors.aliyun.com/epel/8/Everything/x86_64/
gpgcheck=1
gpgkey=https://mirrors.aliyun.com/epel/RPM-GPG-KEY-EPEL-8

[docker-ce]
name=docker-ce
baseurl=https://mirrors.aliyun.com/docker-ce/linux/centos/8.9/x86_64/stable/
gpgcheck=1
gpgkey=https://mirrors.aliyun.com/docker-ce/linux/centos/gpg

[root@www.harbor.org yum.repos.d]# yum clean all && yum makecache
[root@www.harbor.org yum.repos.d]# yum install -y vim device-mapper-persistent-data lvm2 wget net-tools socat nfs-utils lrzsz gcc gcc-c++ make cmake libxml2-devel openssl-devel curl curl-devel unzip sudo chrony libaio-devel wget vim ncurses-devel autoconf  ipvsadm conntrack telnet ipvsadm
2.1.3 时间同步的配置
[root@www.harbor.org ~]# cat /etc/chrony.conf
server ntp.aliyun.com iburst
stratumweight 0
driftfile /var/lib/chrony/drift
rtcsync
makestep 10 3
bindcmdaddress 127.0.0.1
bindcmdaddress ::1
keyfile /etc/chrony.keys
commandkey 1
generatecommandkey
logchange 0.5
logdir /var/log/chrony

[root@www.harbor.org ~]# systemctl enable --now chronyd.service
[root@www.harbor.org ~]# systemctl restart chronyd.service

]# chronyc sources		# 查看同步状态
]# chronyc makestep		# 手动同步
2.1.4 Docker部署及配置
[root@www.harbor.org ~]# yum install -y docker-ce-24.0.6
[root@www.harbor.org ~]# docker --version

[root@www.harbor.org ~]# sysctl -a | grep ip_forward
...
net.ipv4.ip_forward = 1
...

[root@www.harbor.org ~]# sysctl -a | grep bridge
...
net.bridge.bridge-nf-call-ip6tables = 1
net.bridge.bridge-nf-call-iptables = 1
...

[root@www.harbor.org ~]# vim /etc/sysctl.d/docker.conf
net.ipv4.ip_forward = 1						# 启用IP转发
net.bridge.bridge-nf-call-ip6tables = 1		# 桥接网络使用`iptables`
net.bridge.bridge-nf-call-iptables = 1

[root@www.harbor.org ~]# sysctl -p /etc/sysctl.d/docker.conf

[root@www.harbor.org ~]# vim /usr/lib/systemd/system/docker.service
[root@www.harbor.org ~]# cat /usr/lib/systemd/system/docker.service | grep iptables
ExecStart=/usr/bin/dockerd -H fd:// --containerd=/run/containerd/containerd.sock --iptables=true
`--iptables=true`	# 启用Docker的iptables管理

]# systemctl daemon-reload
]# systemctl restart docker.service
2.1.5 创建证书与密钥
# `-nodes`
# 不加密私钥(No DES),即私钥文件不设置密码保护,方便服务自动启动时加载

[root@www.harbor.org ~]# openssl req -newkey rsa:4096 \
> -nodes -sha256 -keyout /data/certs/www.harbor.org.key \
> -addext "subjectAltName = DNS: www.harbor.org" \
> -x509 -days 365 -out /data/certs/www.harbor.org.crt

---注意(写成本机主机名即可)---
Common Name (eg, your name or your server's hostname) []:www.harbor.org
---注意(写成本机主机名即可)---

##########################
快速粘贴版本################
openssl req -newkey rsa:4096 -nodes -sha256 -keyout /data/certs/www.harbor.org.key -addext "subjectAltName = DNS: www.harbor.org" -x509 -days 365 -out /data/certs/www.harbor.org.crt
##########################
# 创建证书目录并部署信任证书(使 Docker 客户端信任私有仓库的 HTTPS 证书)
[root@www.harbor.org ~]# mkdir -p /etc/docker/certs.d/www.harbor.org
[root@www.harbor.org ~]# cp /data/certs/www.harbor.org.crt /etc/docker/certs.d/www.harbor.org/ca.crt

[root@www.harbor.org ~]# systemctl daemon-reload
[root@www.harbor.org ~]# systemctl restart docker
2.2 部署Harbor仓库
离线安装:https://github.com/goharbor/harbor/releases/download/v2.13.4/harbor-offline-installer-v2.13.4.tgz
在线安装:https://github.com/goharbor/harbor/releases/download/v2.13.4/harbor-offline-installer-v2.13.4.tgz
2.2.1 上传软件包并修改具体参数
[root@www.harbor.org ~]# tar zxf harbor-offline-installer-v2.13.4.tgz
[root@www.harbor.org ~]# cd harbor/
[root@www.harbor.org harbor]# cp harbor.yml.tmpl harbor.yml
[root@www.harbor.org harbor]# vim harbor.yml
 5 hostname: www.harbor.org		# 域名
 17   certificate: /data/certs/www.harbor.org.crt	# crt路径
 18   private_key: /data/certs/www.harbor.org.key	# key路径
 47 harbor_admin_password: admin			# 初始密码(admin)
 66 data_volume: /data						# 挂载目录(需要跟上面证书与密钥在一个目录下)
2.2.2 Harbor安装脚本运行及附加参数说明
[root@www.harbor.org harbor]# ./install.sh --help
--with-trivy (推荐)启用Trivy漏洞扫描器,用于扫描镜像安全漏洞
--with-chartmuseum (不推荐,已弃用并移除)启用ChartMuseum,用于托管Helm Charts
--with-notary (不推荐,已弃用并移除)启用Notary,用于镜像签名验证
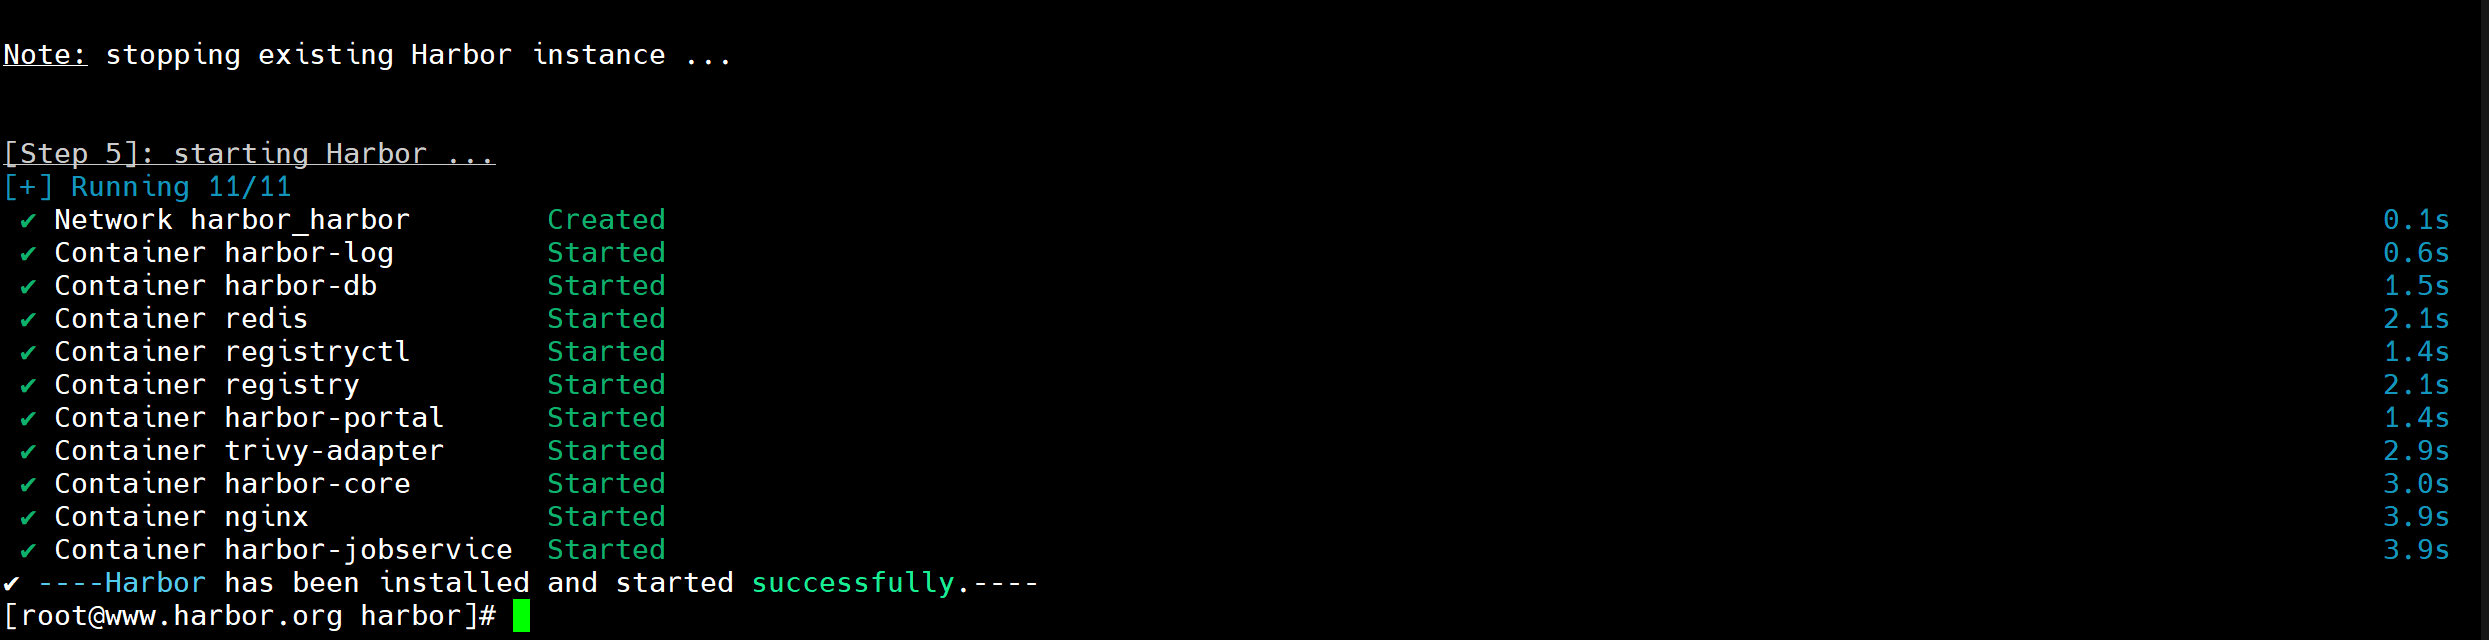
[root@www.harbor.org harbor]# ./install.sh --with-trivy
2.2.3 测试
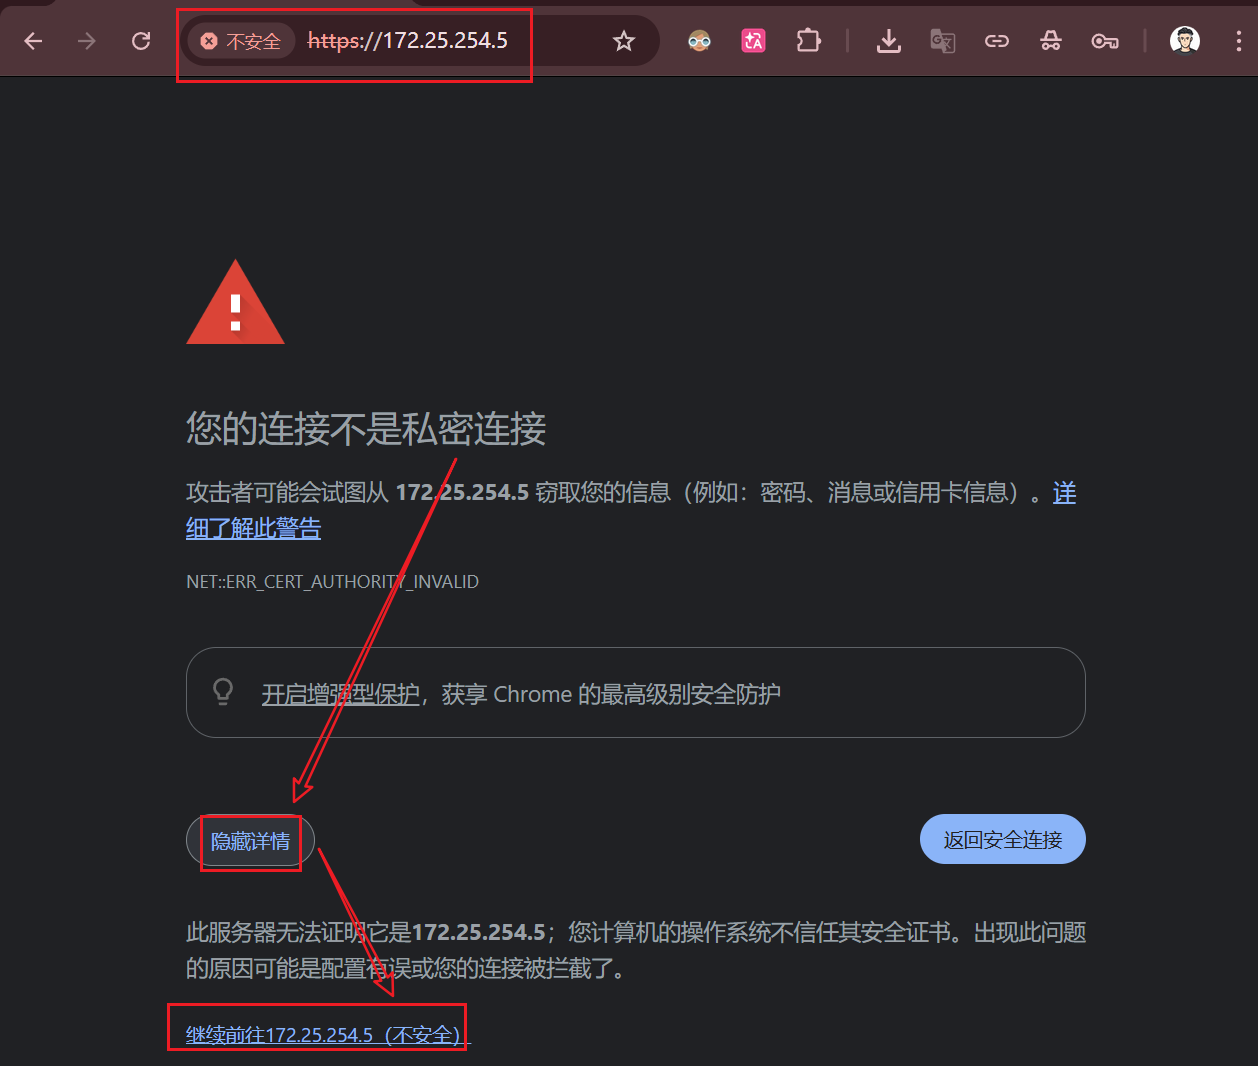
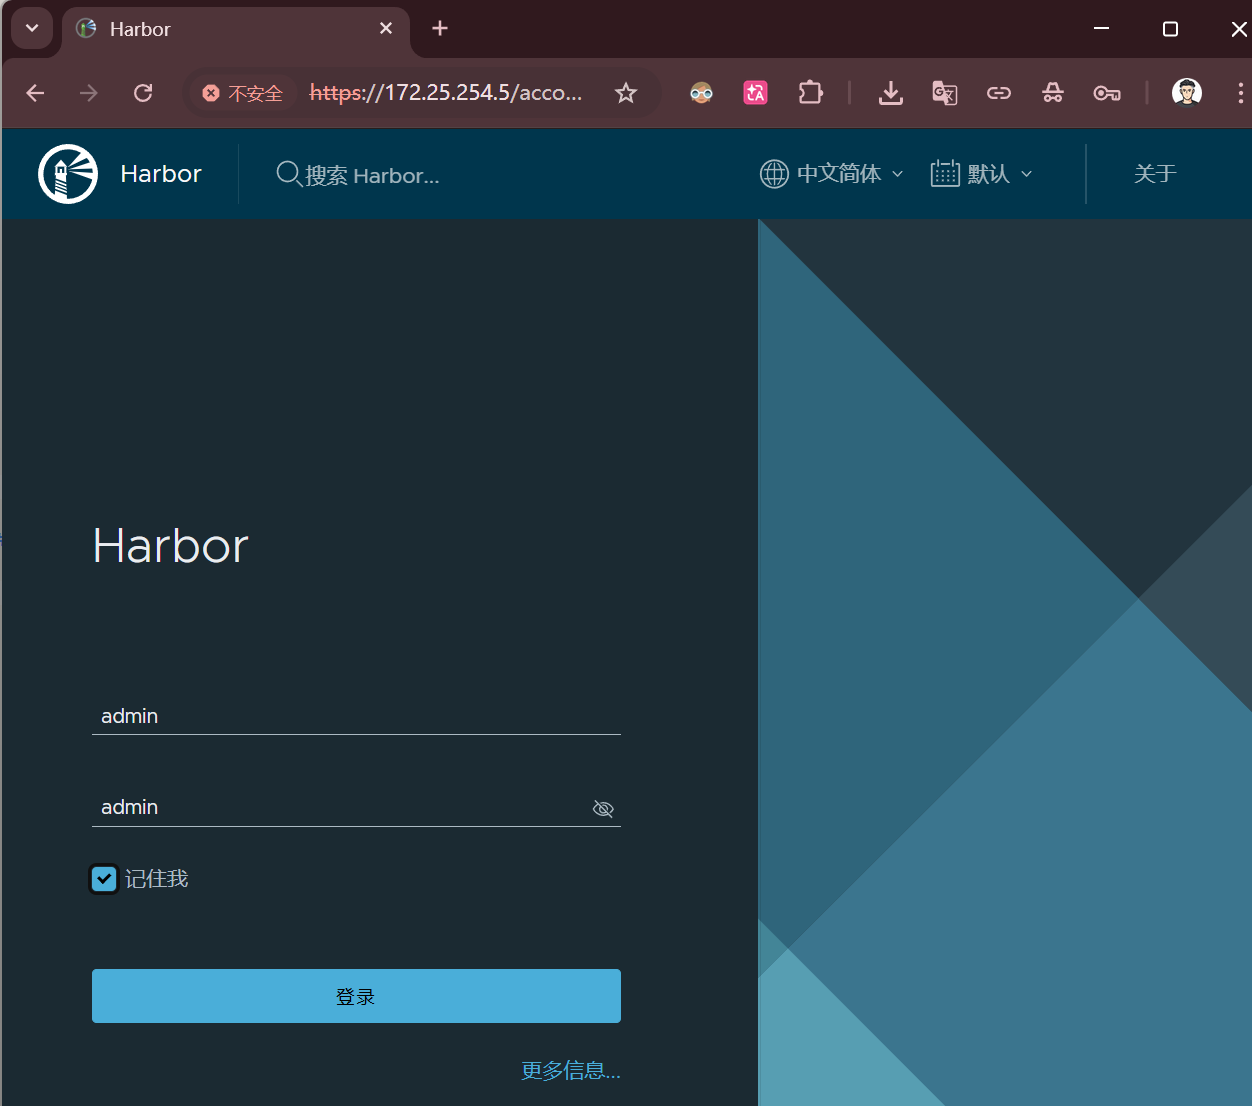
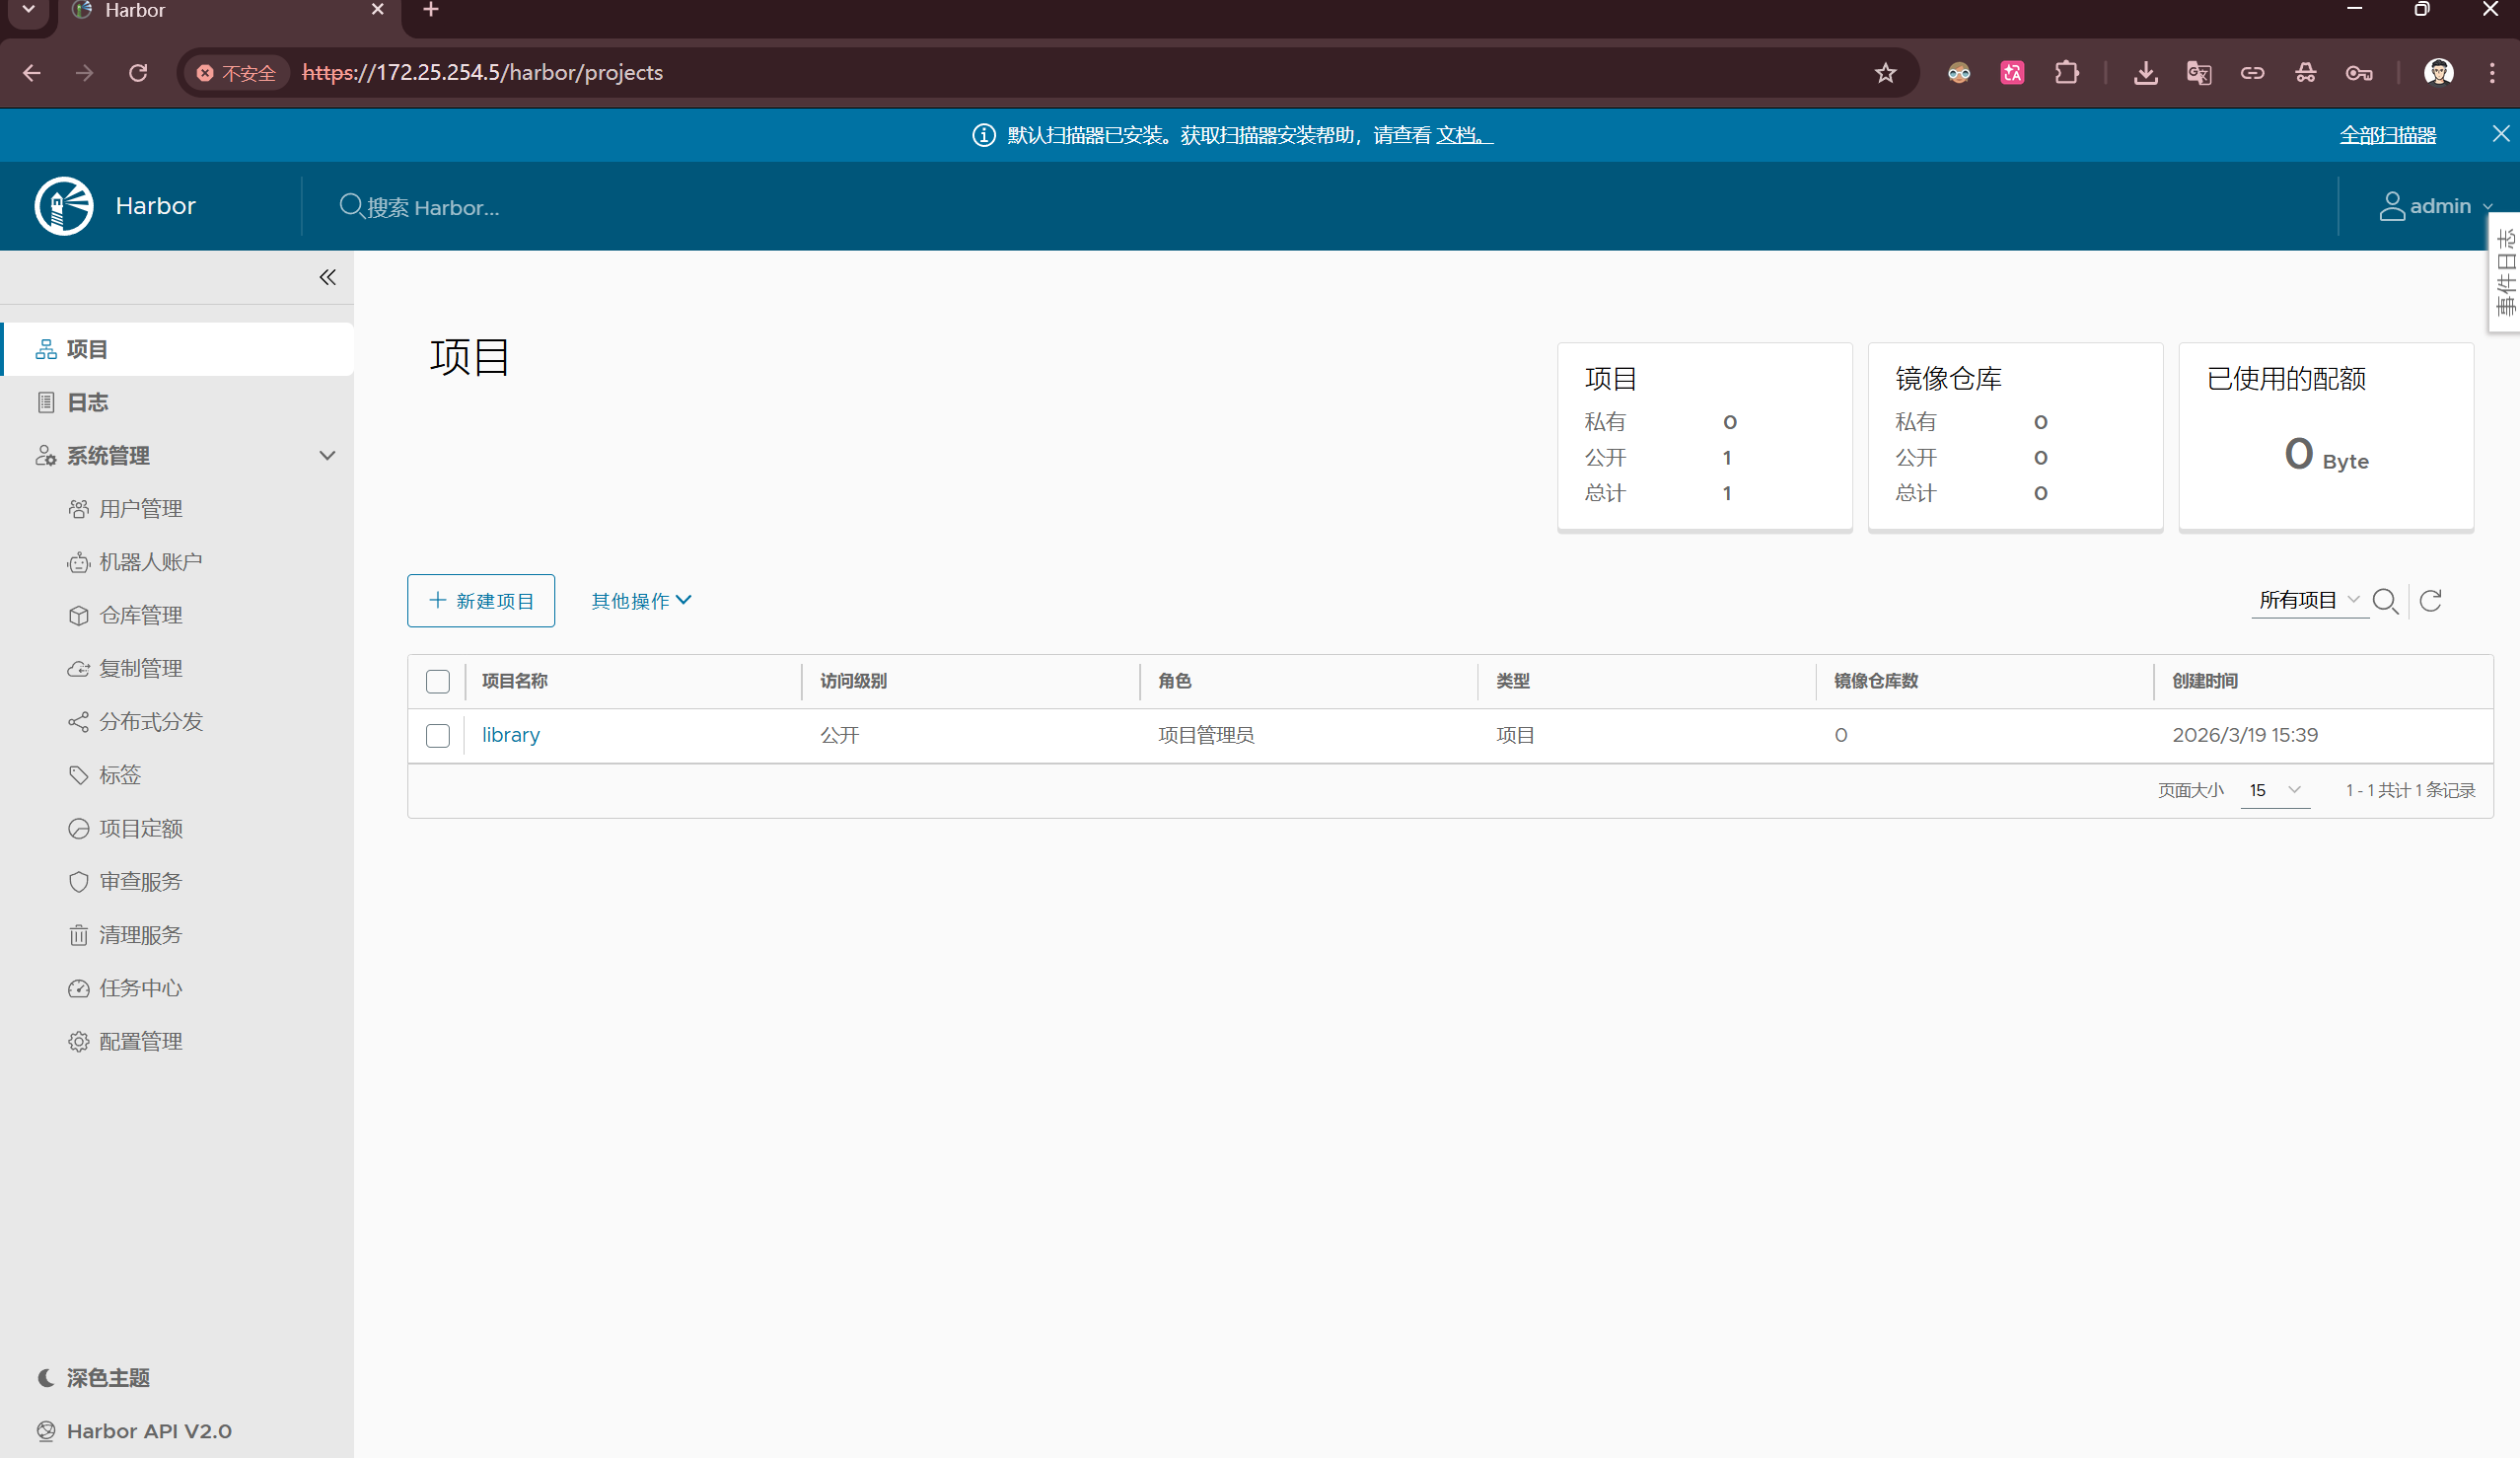
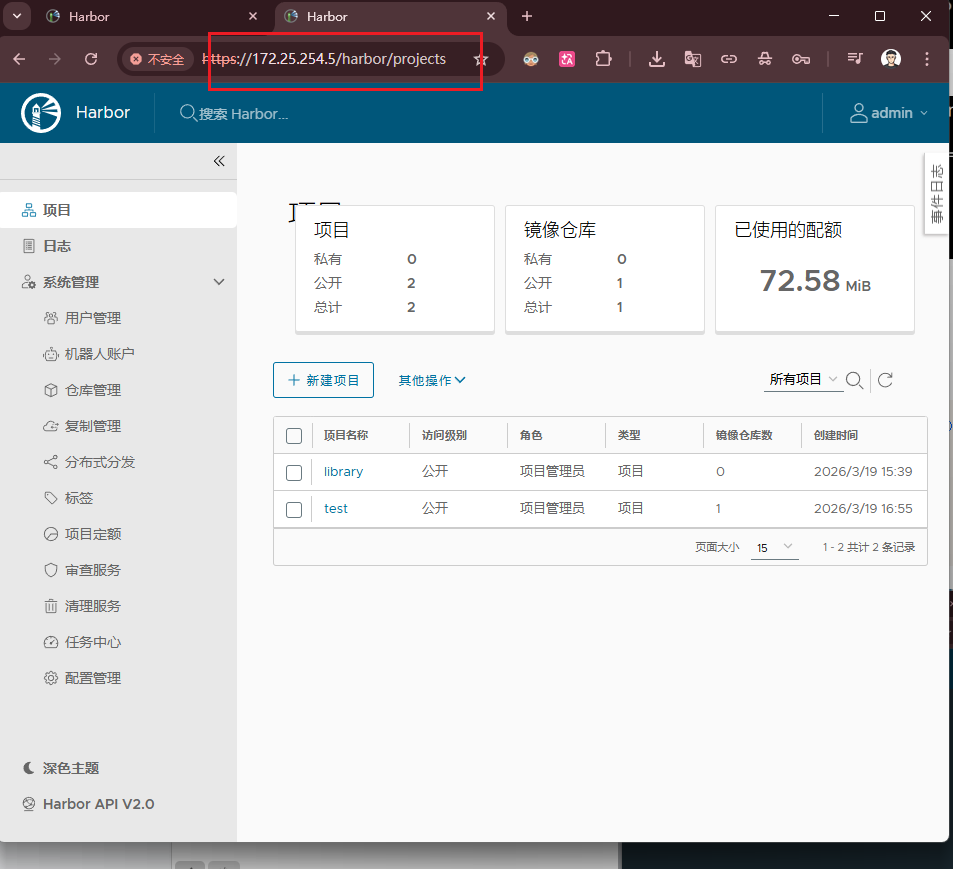
浏览器测试:172.25.254.5
2.2.4 Docker的全局配置文件
# registry-mirrors		镜像加速地址
# insecure-registries	信任的非 HTTPS 私有仓库
# 部署 Harbor 时,如果 Harbor 使用 HTTP(非 HTTPS)
# 必须在此文件中添加 "insecure-registries": ["www.harbor.org"],否则 Docker 客户端会拒绝推送镜像。

[root@www.harbor.org ~]# vim /etc/docker/daemon.json
{
  "registry-mirrors": [
    "https://www.harbor.org"
 ]
}

[root@www.harbor.org ~]# systemctl daemon-reload
[root@www.harbor.org ~]# systemctl restart docker.service

[root@www.harbor.org ~]# cd harbor/
[root@www.harbor.org harbor]# docker compose down
[root@www.harbor.org harbor]# docker compose up -d

[root@www.harbor.org harbor]# docker login www.harbor.org -u admin -p admin
Login Succeeded
2.2.5 进行push/pull测试Harbor仓库可用性
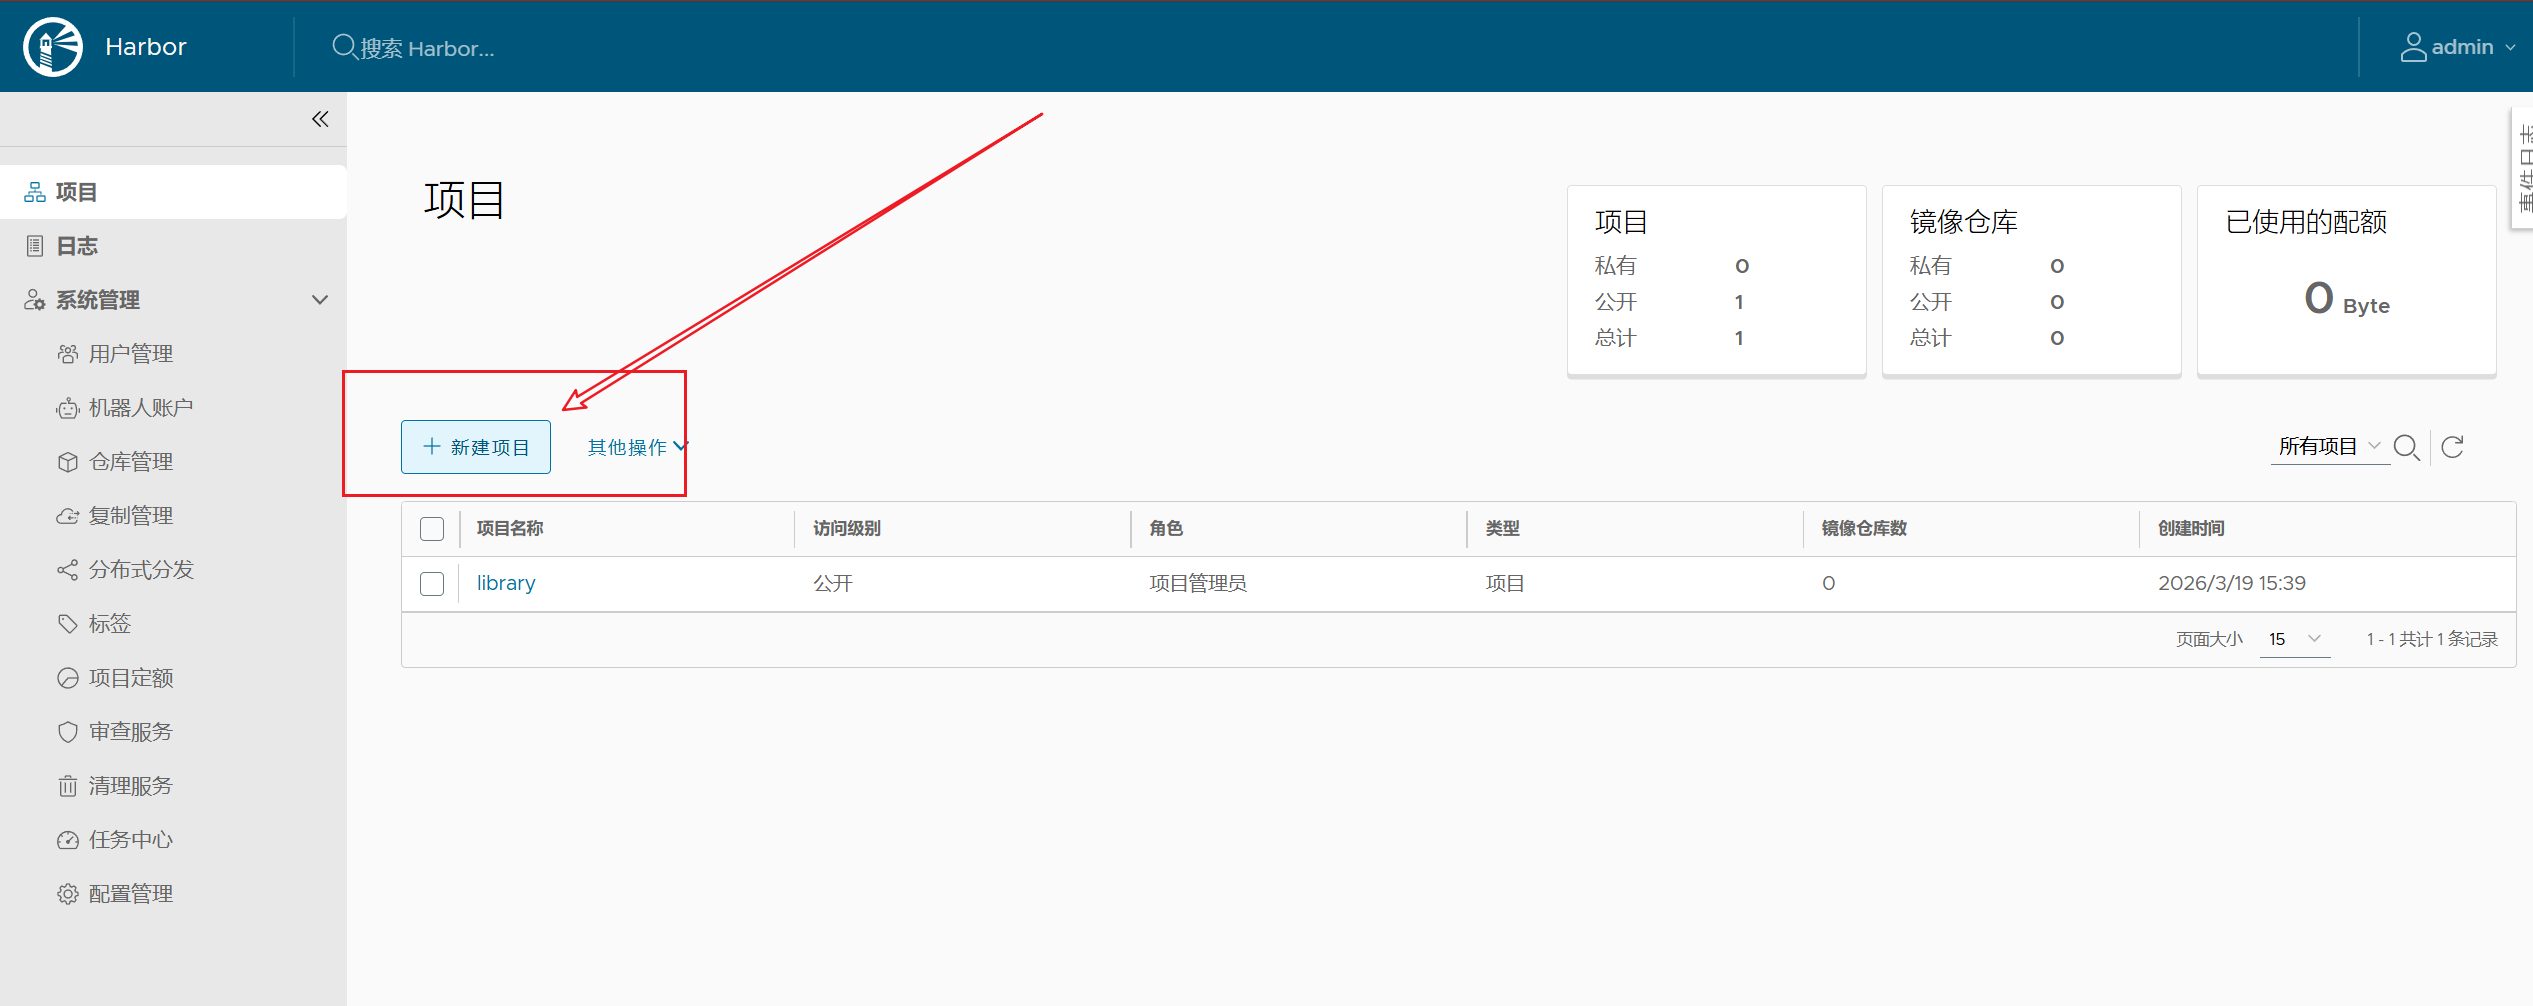
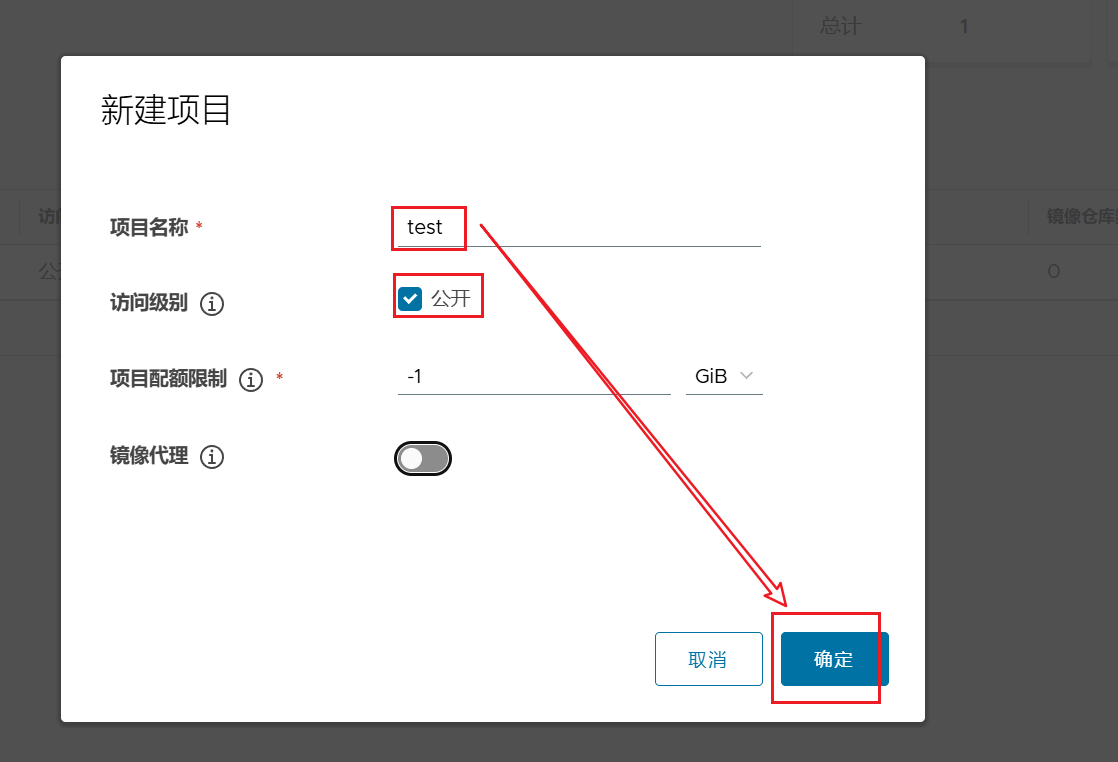
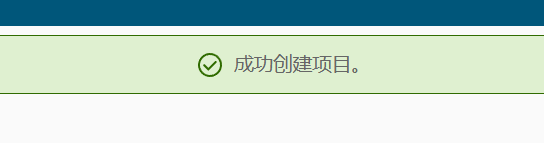
1.准备镜像资源包并在Harbor页面建立新项目test
# 拉取/上传 测试镜像tar包
[root@www.harbor.org harbor]# docker pull library/centos:centos7
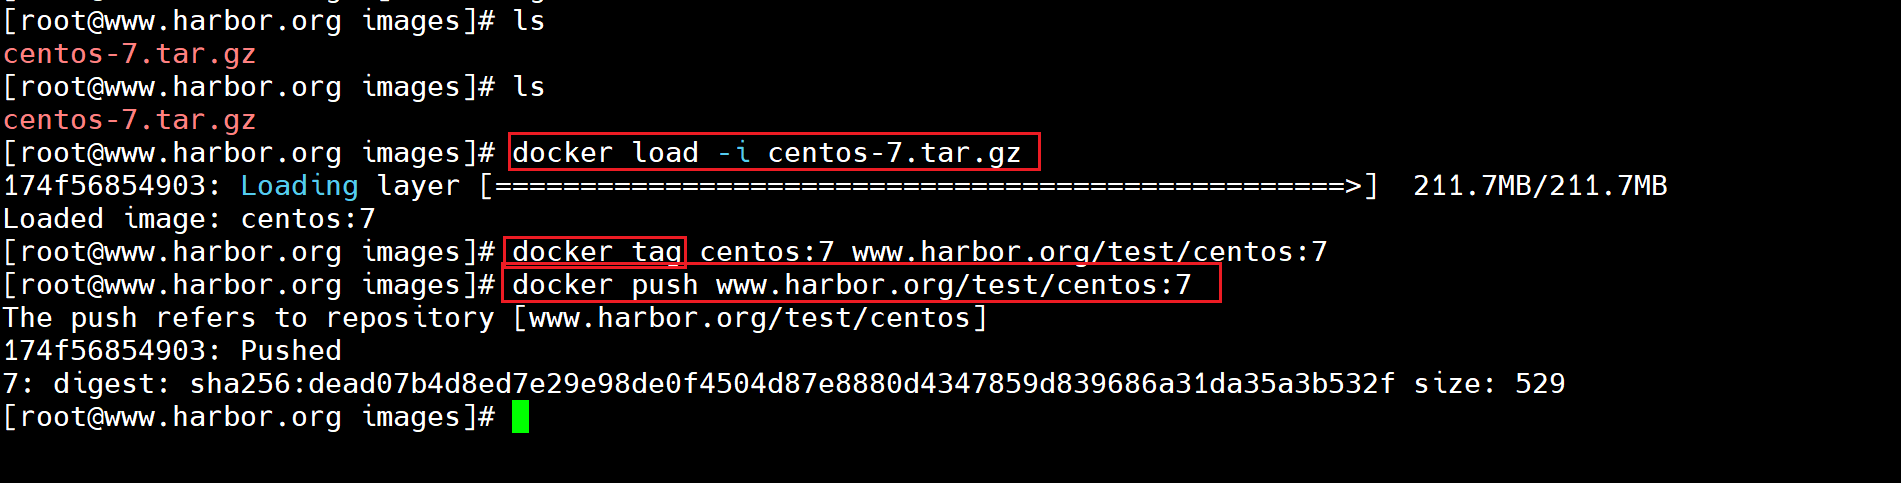
2.测试Harbor的push功能
[root@www.harbor.org images]# docker load -i centos-7.tar.gz

[root@www.harbor.org images]# docker tag centos:7 www.harbor.org/test/centos:7
[root@www.harbor.org images]# docker push www.harbor.org/test/centos:7

# `v2/_catalog` 是 Docker Registry API v2 版本中的一个特定端点(endpoint)
# 用于列出私有镜像仓库(Registry)中所有可用的镜像仓库名称。
# 成功即为部署完成!
[root@www.harbor.org images]# curl -k https://www.harbor.org/v2/_catalog -uadmin
Enter host password for user 'admin':admin
{"repositories":["test/centos"]}
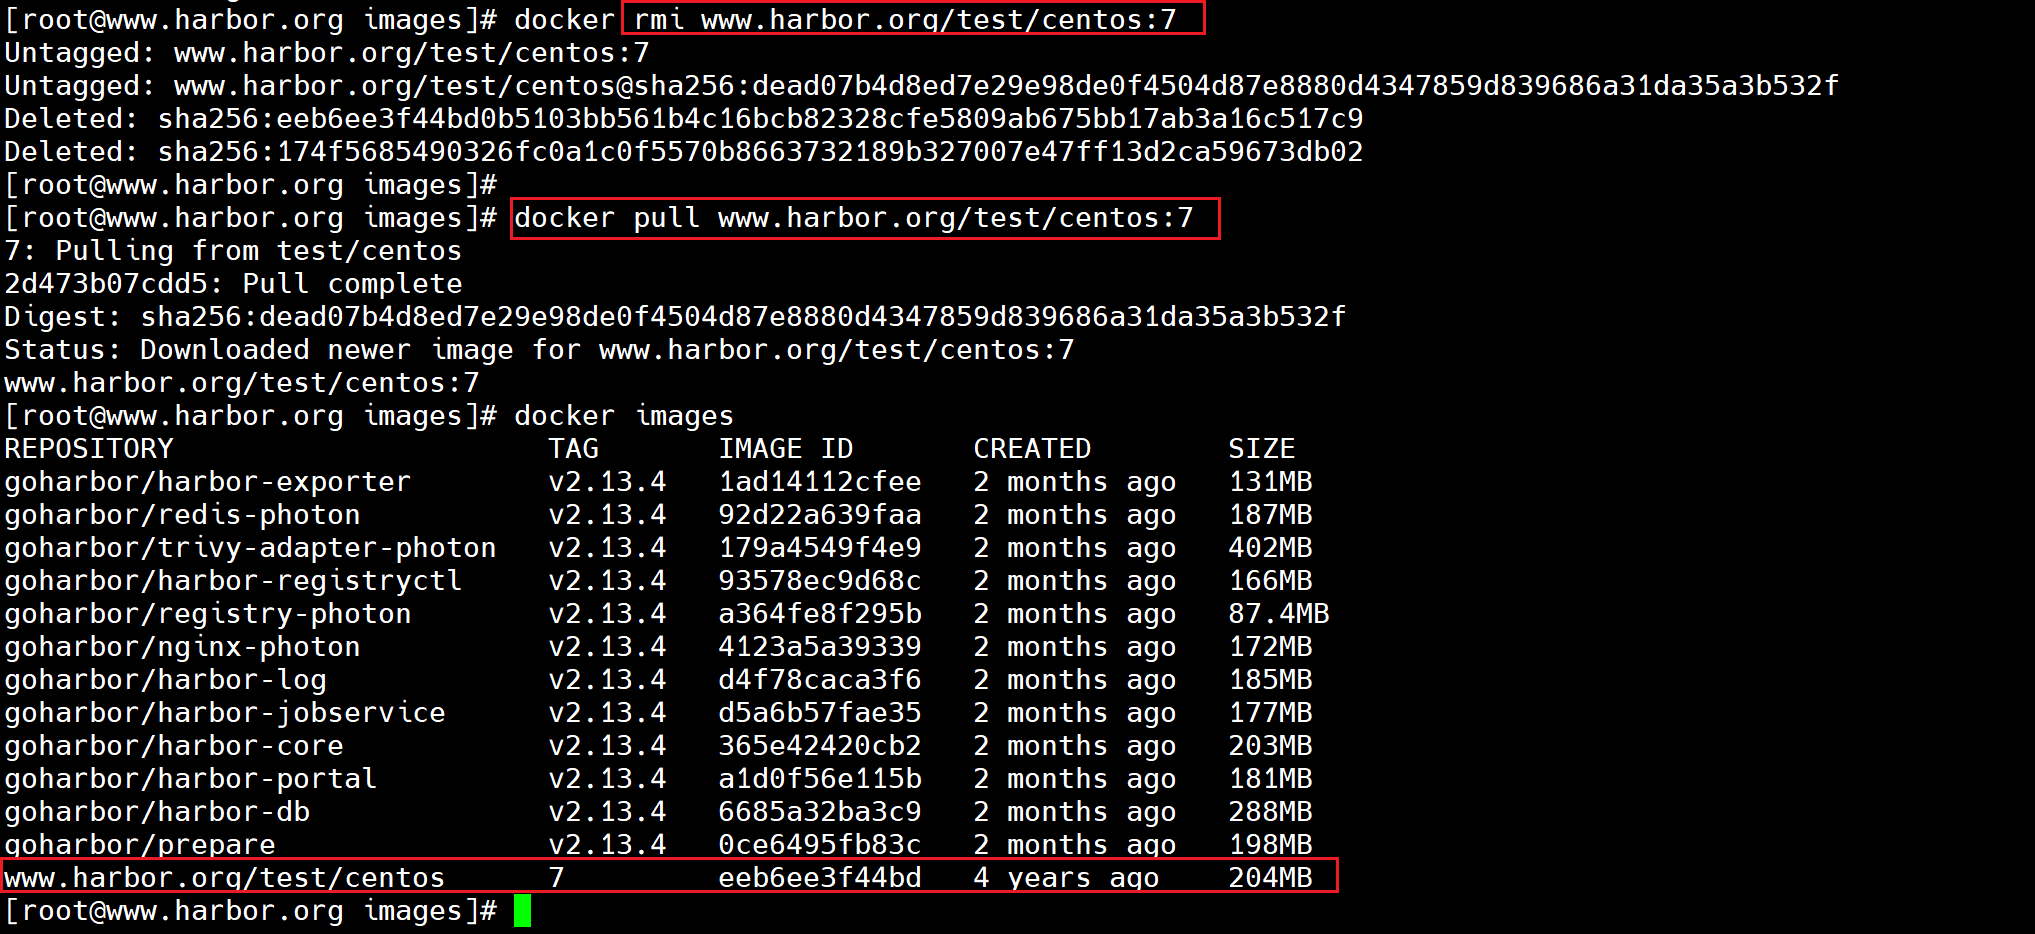
3.测试Harbor的pull功能
# 将刚刚 load -i 的镜像删除并从 harbor 上拉取
# 第一种方法:直接写命令
# 第二种方法:去harbor仓库复制pull命令


]# docker images | grep centos
]# docker rmi centos:7
]# docker rmi www.harbor.org/test/centos:7

]# docker pull www.harbor.org/test/centos:7
]# docker images
2.2.6.注意事项
# 每次开机/重启,进入harbor目录下进行(生产环境下不要将密码写到明面上)
[root@www.harbor.org ~]# cd harbor/
[root@www.harbor.org harbor]# docker compose up -d
[root@www.harbor.org harbor]# docker login www.harbor.org -uadmin -padmin
2.3 联动到其余主机
2.3.1 联动主机创建Docker证书目录
需要联动的集群主机]# mkdir -p /etc/docker/certs.d/www.harbor.org/
2.3.2 分发Harbor的ca.crt到各联动主机
[root@www.harbor.org ~]# scp /etc/docker/certs.d/www.harbor.org/ca.crt x.x.x.x:/etc/docker/certs.d/www.harbor.org/
2.3.3 联动主机配置Docker镜像仓库加速
# 如果有自己的加速镜像地址,则将"https://www.harbor.org"添加到后面即可
需要联动的集群主机]# vim /etc/docker/daemon.json
{
        "registry-mirrors": [
                "https://xxxxxx",
                "https://www.harbor.org"
        ]
}

需要联动的集群主机]# systemctl daemon-reload
需要联动的集群主机]# systemctl restart docker.service
需要联动的集群主机]# scp /etc/docker/daemon.json x.x.x.x:/etc/docker/daemon.json
2.3.4 更新/etc/hosts文件
[root@www.harbor.org ~]# vim /etc/hosts
...省略...
172.25.254.5  www.harbor.org
172.25.254.50 k8s-master1
172.25.254.10 k8s-node1

# scp hosts文件到需要联动的k8s主机
[root@www.harbor.org ~]# scp /etc/hosts x.x.x.x:/etc/hosts
2.3.5 将Harbor的ca.crt安装到联动主机的系统信任链
# scp 证书文件到需要联动的k8s主机
[root@www.harbor.org ~]# scp /etc/docker/certs.d/www.harbor.org/ca.crt x.x.x.x:/tmp/ca.crt
需要联动的集群主机]# cp /tmp/ca.crt /etc/pki/ca-trust/source/anchors/www.harbor.org.crt
需要联动的集群主机]# update-ca-trust
需要联动的集群主机]# openssl s_client -connect www.harbor.org:443 -CAfile /etc/pki/tls/certs/ca-bundle.crt </dev/null 2>&1 | grep "Verify return code"
Verify return code: 0 (ok)
#########################
出现`return code: 9`则是系统时间不对,`date`检测,`systemctl restart chronyd`恢复
#########################
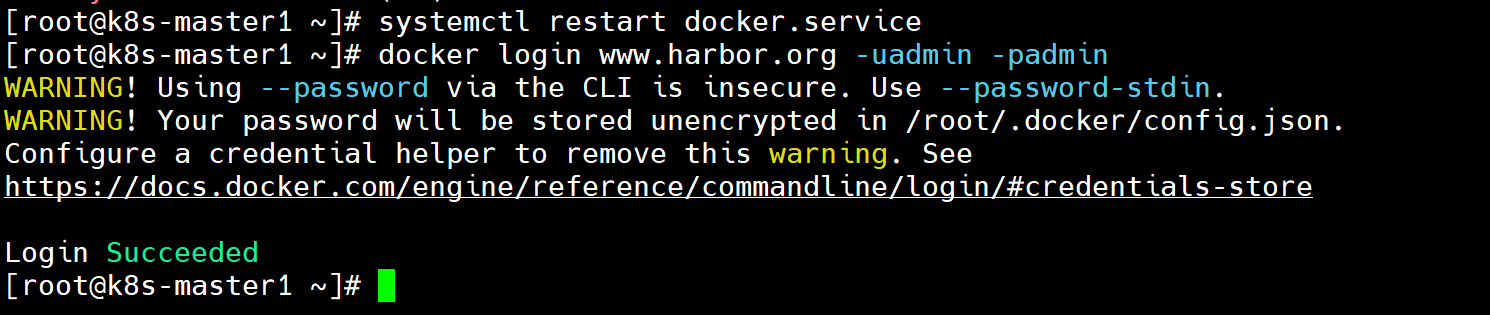
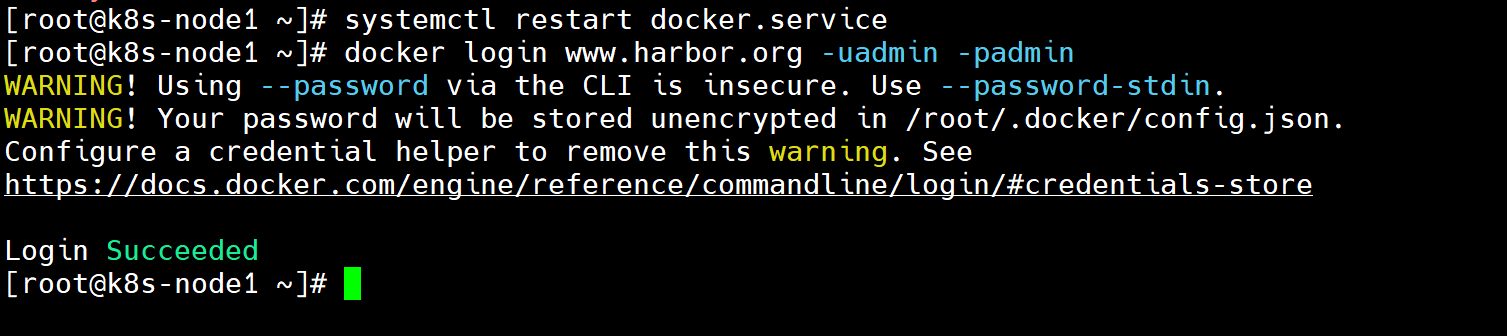
[root@k8s-master1 ~]# systemctl restart docker.service
[root@k8s-master1 ~]# docker login www.harbor.org -uadmin -padmin
2.3.6 联动主机进行pull测试
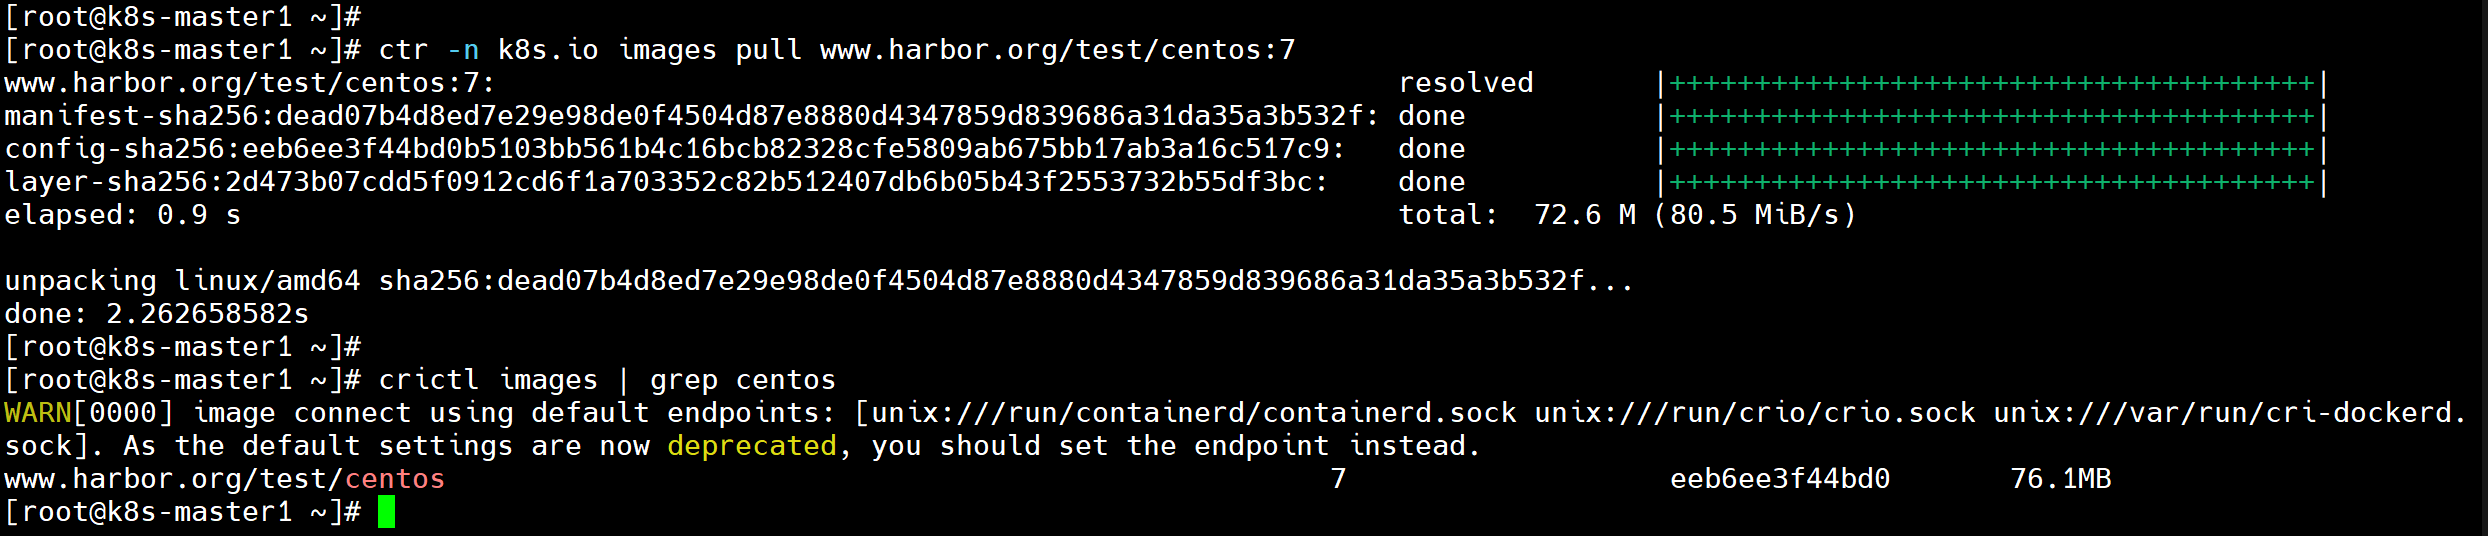
# 如果是k8s集群(看其版本,k8s版本1.24之后containerd,之前docker)
# 1.24 ->
需要联动的集群主机]# ctr -n k8s.io images pull www.harbor.org/test/centos:7
需要联动的集群主机]# crictl images | grep centos

# <- 1.24
需要联动的集群主机]# docker pull www.harbor.org/test/centos:7
需要联动的集群主机]# docker images | grep centos
www.harbor.org/test/centos   7         eeb6ee3f44bd   4 years ago   204MB

!!!Harbor私有镜像部署完成!!!
2.4 编写Windows的hosts文件
# 如果编辑不了,查看自己是否为管理员、或者文件是否为“只读”(需要将其选项去掉)
"C:\Windows\System32\drivers\etc\hosts"
172.25.254.5 www.harbor.org
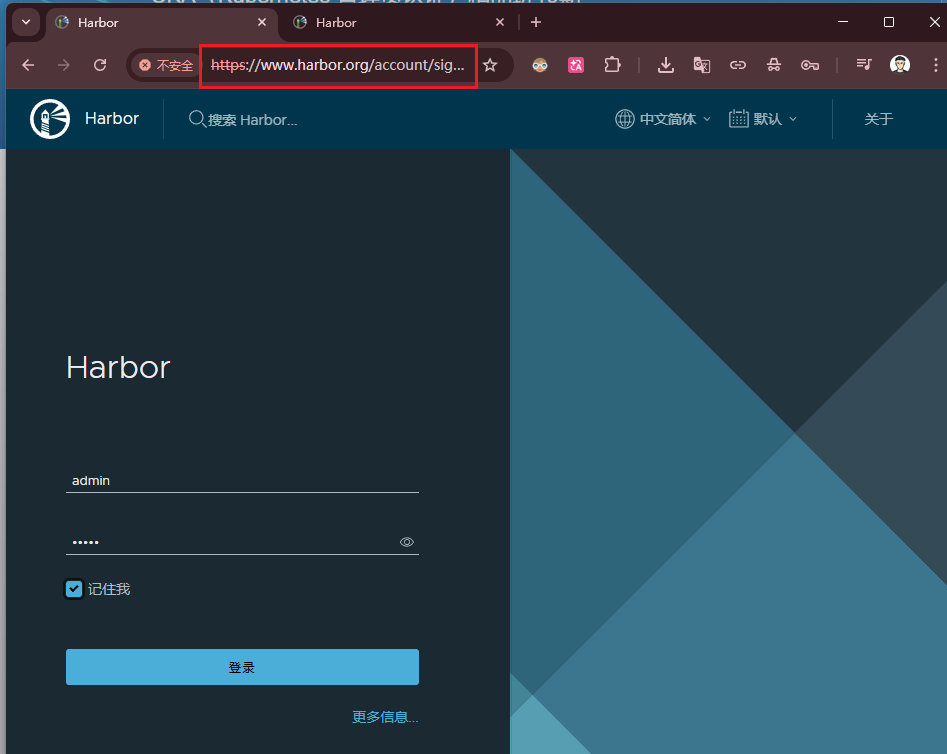
# 浏览器访问 www.harbor.org 172.25.254.5 分别测试

AtomGit 是由开放原子开源基金会联合 CSDN 等生态伙伴共同推出的新一代开源与人工智能协作平台。平台坚持“开放、中立、公益”的理念,把代码托管、模型共享、数据集托管、智能体开发体验和算力服务整合在一起,为开发者提供从开发、训练到部署的一站式体验。
更多推荐
 42
42 0
0- 0


 已为社区贡献2条内容

所有评论(0)