【实战】A549 CpG 甲基化数据集接入 Genos 基因组大模型 Benchmark 评测全流程——含 V100 兼容、pydantic 降级、CuBLAS 报错三大踩坑解决
·
@[TOC](目录)

# 将 A549 CpG 甲基化数据集接入 Genos 基因组基础模型 Benchmark 评测全流程

> **摘要:** 本文记录了将外部 A549 CpG 甲基化预测数据集接入 Genos Benchmark 评测管线的完整过程,包括数据发现、格式分析、格式转换(CSV→JSONL)、配置注册,以及运行评测时遇到的 pydantic 版本冲突、PyTorch V100 兼容性、CuBLAS 确定性模式三个典型问题及解决方案。

---

## 一、环境信息

| 项目 | 版本/说明 |
|------|----------|
| 操作系统 | Ubuntu 22.04 |
| GPU | Tesla V100-PCIE-32GB × 2 |
| CUDA 驱动 | 535.230.02 |
| Conda 环境 | `1genos`(Python 3.10) |
| 模型 | Genos-1.2B(BGI-HangzhouAI) |

---

## 二、查找 A549 数据集

```bash
find ***/projects -path "*A549*" -type d
找到以下 A549 相关目录:
| 路径 | 说明 |
|---|---|
***/genomix/data/CpG/A549/ |
原始 CSV 数据(核心数据源) |
***/genomix/data/CPG_dataset-token/A549/ |
Tokenized 版本(HuggingFace Arrow 格式) |
***/genomix/downstream/new_CPG/A549/ |
下游任务训练 checkpoints |
***/genomix/downstream/test_output/A549/ |
测试输出结果 |
三、A549 数据集格式分析
3.1 原始 CSV 格式
head -3 ***/genomix/data/CpG/A549/A549.csv
CSV 列结构(7 列):
| 列名 | 类型 | 说明 | 示例 |
|---|---|---|---|
chromosome |
str | 染色体编号 | chr1, chr16 |
start |
int | 基因组起始位置 | 134583 |
end |
int | 基因组终止位置 | 135607 |
strand |
str | 链方向 | + 或 - |
sequence |
str | DNA 序列 | 长度固定 1024 bp |
split |
str | 数据划分 | train/test/valid/空 |
label |
int | CpG 甲基化标签 | 0 或 1(二分类) |
数据统计:
- 总样本数:959,039
- 序列长度:固定 1024 bp
- 标签分布:
1(甲基化)= 800,118,0(非甲基化)= 158,921 - 文件:
A549.csv(完整)、A549_train.csv、A549_test.csv、A549_val.csv
3.2 兼容性分析
Genos Benchmark 管线(benchmarks/embedding_extract.py)的 JSONLDataset 类期望如下格式:
# 期望的文件路径格式
file_path = f"{config['dataset_path']}/{dataset_name}/{split}.jsonl"

# 期望的每行数据格式
{"seq": "ATCG...", "label": 0}
三种数据格式的兼容性对比:
| 对比项 | Genos 期望 | A549 原始 CSV | A549 Tokenized (Arrow) |
|---|---|---|---|
| 文件格式 | .jsonl |
.csv ❌ |
HuggingFace Arrow ❌ |
| 序列字段 | seq |
sequence ❌ |
仅 input_ids,无原始序列 ❌ |
| 标签字段 | label |
label ✅ |
label ✅ |
| 是否已注册 | 需在 yaml 注册 | 未注册 ❌ | 未注册 ❌ |
结论: 两种现有格式均不兼容,需将原始 CSV 转换为 JSONL 格式。
四、数据格式转换(CSV → JSONL)
import csv
import json
import os

src_dir = "***/genomix/data/CpG/A549"
dst_dir = "***/Genos/data/A549"
os.makedirs(dst_dir, exist_ok=True)

# Genos benchmark 使用 eval 而非 val
mapping = {
    "A549_train.csv": "train.jsonl",
    "A549_test.csv":  "test.jsonl",
    "A549_val.csv":   "eval.jsonl",
}

for csv_file, jsonl_file in mapping.items():
    src_path = os.path.join(src_dir, csv_file)
    dst_path = os.path.join(dst_dir, jsonl_file)
    count = 0
    with open(src_path, 'r', encoding='utf-8') as fin, \
         open(dst_path, 'w', encoding='utf-8') as fout:
        reader = csv.DictReader(fin)
        for row in reader:
            label_val = row.get('label', '').strip()
            if label_val == '' or label_val == 'nan':
                continue  # 跳过无标签样本
            record = {"seq": row["sequence"], "label": int(label_val)}
            fout.write(json.dumps(record, ensure_ascii=False) + "\n")
            count += 1
    print(f"{csv_file} -> {jsonl_file}: {count} samples")
转换结果:
| 文件 | 样本数 | 大小 |
|---|---|---|
train.jsonl |
671,327 | 671M |
test.jsonl |
191,808 | 192M |
eval.jsonl |
95,904 | 96M |
| 合计 | 959,039 | 960M |
每行示例:
{"seq": "CTTCGCCTTACAGGACGGAAGGTGGCCTCCGTCCCTGGCC...", "label": 1}
五、配置注册
5.1 修改 datasets_info.yaml
① 在 support_dataset 中添加:
  # Self Datasets
  - A549
② 在 dataset_feature 末尾追加:
  A549:
    seq_for_item: 1
    seq_key: seq
    label_key: label
    eval_task: classification
    data_split: ['train', 'test', 'eval']
    sample_num: 959039
    min_length: 1024
    max_length: 1024
    dataset_ratio: [0.7, 0.2, 0.1]
    label_train_counter: [(0, 111245), (1, 560082)]
    label_test_counter: [(0, 31784), (1, 160024)]
    label_eval_counter: [(0, 15892), (1, 80012)]
5.2 修改 config.yaml
# 模型路径(Genos-1.2B)
model_path: "***/models/BGI-HangzhouAI/Genos-1___2B"

# 只评测 A549
eval_datasets:
  - A549

# GPU 与分层配置
gpu_list: [0]
layer_to_eval: [12]
batch_size: 8

# 路径配置
dataset_path:         "***/Genos/data"
embedding_output_dir: "***/Genos/Technical_Notes/benchmarks-code/embeddings"
eval_result_path:     "***/Genos/Technical_Notes/benchmarks-code/results"

# 分类器
classifer_type: MLP
mlp_epochs: 100
六、运行评测与问题排查
6.1 运行命令
cd ***/Genos/Technical_Notes/benchmarks-code
python benchmarks.py --config config.yaml
6.2 问题一:wandb + pydantic 版本不兼容
报错信息:
TypeError: __init__() got an unexpected keyword argument 'regex'
原因: wandb==0.25.1 不兼容 pydantic>=2.11。
解决方案:
pip install "pydantic>=2.0,<2.10"
验证:
python -c "import wandb; print('wandb OK')"
# wandb OK
6.3 问题二:PyTorch 版本不支持 V100(CUDA 7.0)
报错信息:
UserWarning: Found GPU0 Tesla V100-PCIE-32GB which is of cuda capability 7.0.
    PyTorch no longer supports this GPU because it is too old.
    The minimum cuda capability supported by this library is 7.5.

RuntimeError: CUDA error: no kernel image is available for execution on the device
原因: PyTorch 从 2.6 版本起移除了对 CUDA Compute Capability 7.0(V100)的支持。
| 项目 | 值 |
|---|---|
| GPU | Tesla V100(CUDA Cap 7.0) |
| CUDA 驱动 | 535.230.02(支持 CUDA ≤ 12.2) |
| 原 PyTorch | 2.7.1+cu128 ❌(最低要求 7.5) |
解决方案: 降级到最后支持 V100 的版本 PyTorch 2.5.1:
pip install torch==2.5.1 torchvision==0.20.1 torchaudio==2.5.1 \
    --index-url https://download.pytorch.org/whl/cu121
验证:
python -c "import torch; print(torch.__version__)"
# 2.5.1+cu121
6.4 问题三:CuBLAS 确定性模式缺少环境变量
报错信息:
RuntimeError: Deterministic behavior was enabled with either
`torch.use_deterministic_algorithms(True)` or
`at::Context::setDeterministicAlgorithms(true)`,
but this operation is not deterministic because it uses CuBLAS
and you have CUDA >= 10.2. To enable deterministic behavior in this case,
you must set an environment variable before running your PyTorch application:
CUBLAS_WORKSPACE_CONFIG=:4096:8 or CUBLAS_WORKSPACE_CONFIG=:16:8.
原因: 代码中设置了 torch.use_deterministic_algorithms(True),而 CuBLAS 矩阵乘法在 CUDA ≥ 10.2 下默认非确定性,需通过环境变量显式启用。
解决方案:
CUBLAS_WORKSPACE_CONFIG=:4096:8 python benchmarks.py --config config.yaml
七、完整流程总结
A549 原始 CSV
    │
    ├─ 格式分析:7列 CSV(sequence + label 为核心字段)
    │
    ├─ 兼容性检查:与 Genos JSONL 格式不匹配
    │
    ├─ 格式转换:CSV → JSONL(seq + label)
    │   ├── train.jsonl  671,327 samples
    │   ├── test.jsonl   191,808 samples
    │   └── eval.jsonl    95,904 samples
    │
    ├─ 配置注册
    │   ├── datasets_info.yaml(support_dataset + dataset_feature)
    │   └── config.yaml(model_path / dataset_path / eval_datasets)
    │
    └─ 运行评测(三个环境问题修复后成功)
        ├── pydantic 降级 < 2.10(wandb 兼容)
        ├── PyTorch 降级到 2.5.1+cu121(V100 兼容)
        └── CUBLAS_WORKSPACE_CONFIG=:4096:8(确定性模式)
关键命令速查
# 1. 修复依赖
pip install "pydantic>=2.0,<2.10"
pip install torch==2.5.1 torchvision torchaudio \
    --index-url https://download.pytorch.org/whl/cu121

# 2. 运行评测
cd ***/Genos/Technical_Notes/benchmarks-code
CUBLAS_WORKSPACE_CONFIG=:4096:8 python benchmarks.py --config config.yaml
Note: 路径中的
***为脱敏处理,请替换为实际项目路径后使用。

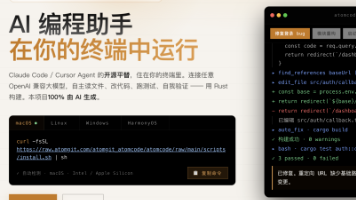
AtomGit 是由开放原子开源基金会联合 CSDN 等生态伙伴共同推出的新一代开源与人工智能协作平台。平台坚持“开放、中立、公益”的理念,把代码托管、模型共享、数据集托管、智能体开发体验和算力服务整合在一起,为开发者提供从开发、训练到部署的一站式体验。
更多推荐

 7
7 0
0- 0


 已为社区贡献2条内容

所有评论(0)