DevUI 组件生态:从入门到实践的完整指南
目录
Q2: 组件导入报错 "Module not found"?
一、前言
随着云原生开发的深入发展,前端开发者面临着越来越复杂的界面构建需求。华为云推出的 DevUI 企业级前端解决方案,为开发者提供了一套完整、高效、美观的组件库,大大提升了开发效率。本文将带你从零开始,快速上手 DevUI 组件生态!
该文章相关github链接如下:https://github.com/Cybing521/dev-ui-start
二、环境搭建
2.1 前置准备
在开始之前,请确保你的开发环境已安装以下工具:
| 工具 | 最低版本要求 | 推荐版本 |
|---|---|---|
| Node.js | 14.x | 18.x LTS |
| npm / yarn / pnpm | npm 6.x | pnpm 8.x |
| Angular CLI | 15.x | 17.x |
2.2 创建 Angular 项目
# 全局安装 Angular CLI
npm install -g @angular/cli

# 创建新项目
ng new my-devui-app

# 进入项目目录
cd my-devui-app
2.3 安装 DevUI 组件库
# 安装 ng-devui 核心包
npm install ng-devui --save

# 安装必要的依赖
npm install @devui-design/icons --save
2.4 配置样式文件
在 angular.json 中添加 DevUI 的样式文件:
{
  "styles": [
    "node_modules/ng-devui/devui.min.css",
    "src/styles.css"
  ]
}
2.5 导入模块
在 app.module.ts 中按需导入组件:
import { NgModule } from '@angular/core';
import { BrowserModule } from '@angular/platform-browser';
import { BrowserAnimationsModule } from '@angular/platform-browser/animations';

// 按需导入 DevUI 组件
import { ButtonModule } from 'ng-devui/button';
import { FormModule } from 'ng-devui/form';
import { InputModule } from 'ng-devui/input';

import { AppComponent } from './app.component';

@NgModule({
  declarations: [AppComponent],
  imports: [
    BrowserModule,
    BrowserAnimationsModule,
    ButtonModule,
    FormModule,
    InputModule
  ],
  bootstrap: [AppComponent]
})
export class AppModule { }
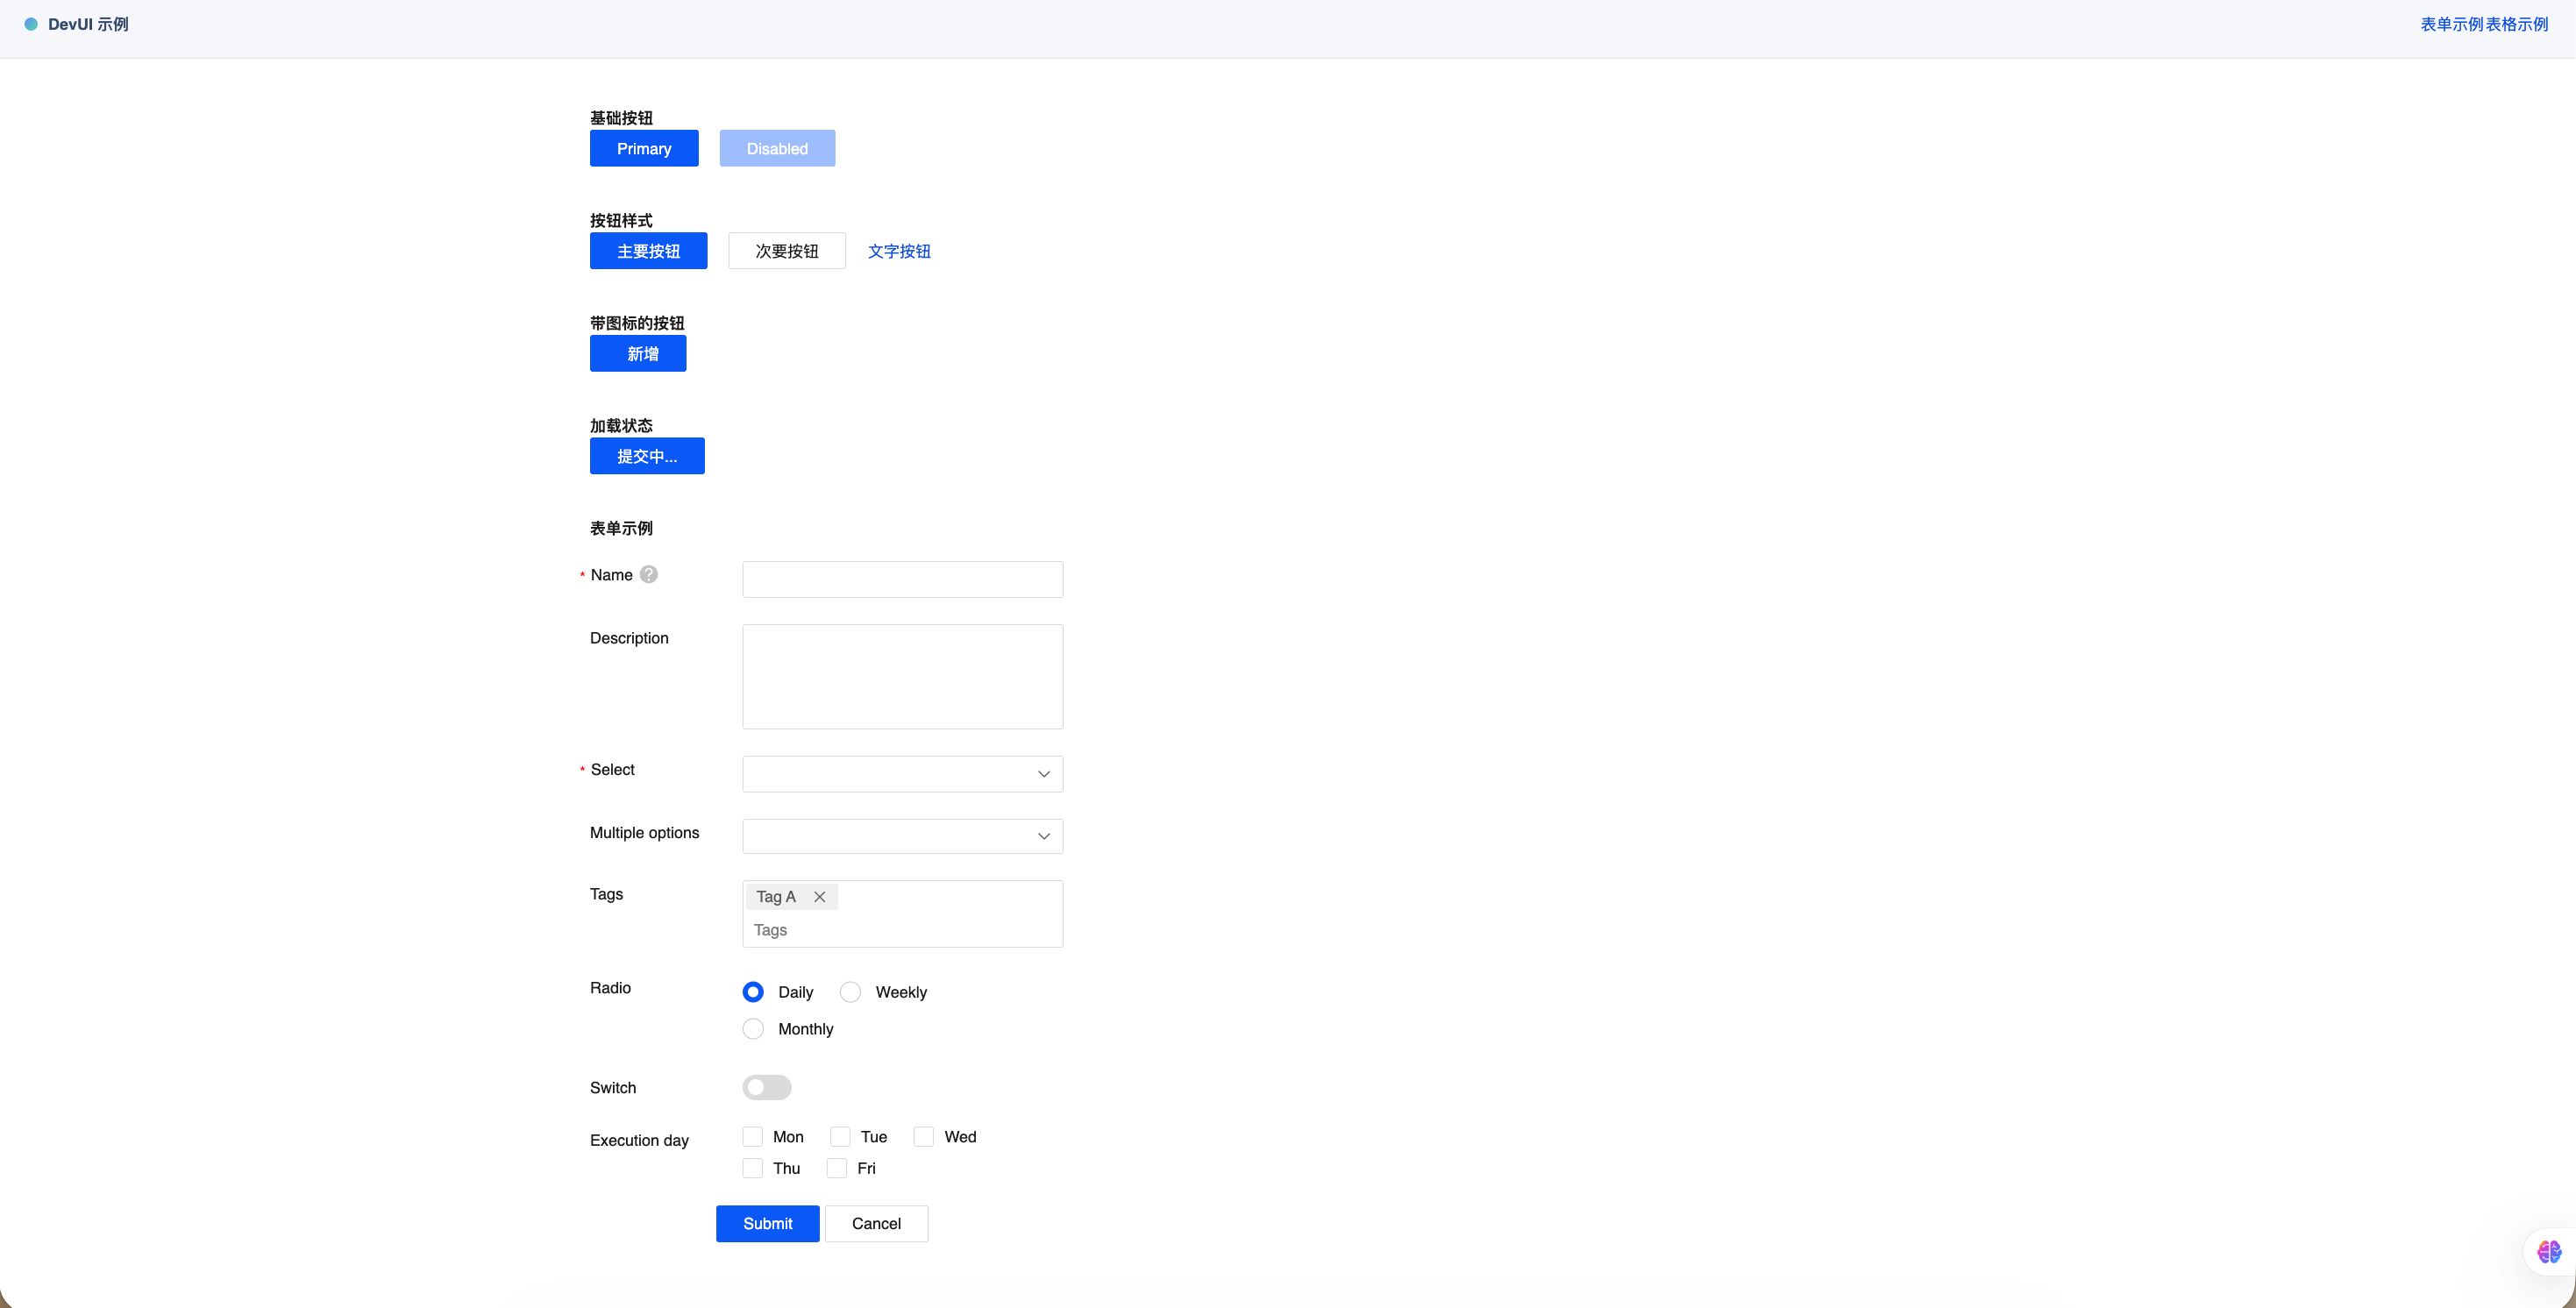
三、基础功能使用
3.1 Button 按钮组件
DevUI 提供了丰富的按钮样式,满足不同场景需求:
<!-- 基础按钮 -->
<d-button bsStyle="primary">主要按钮</d-button>
<d-button bsStyle="common">次要按钮</d-button>
<d-button bsStyle="text">文字按钮</d-button>

<!-- 带图标的按钮 -->
<d-button bsStyle="primary" icon="icon-add">新增</d-button>

<!-- 加载状态 -->
<d-button bsStyle="primary" [showLoading]="isLoading">
  提交中...
</d-button>

<!-- 禁用状态 -->
<d-button bsStyle="primary" [disabled]="true">禁用按钮</d-button>
3.2 Form 表单组件
构建一个完整的登录表单:
<form dForm [formGroup]="loginForm" (ngSubmit)="onSubmit()">
  <d-form-item>
    <d-form-label required>用户名</d-form-label>
    <d-form-control>
      <d-input
        formControlName="username"
        placeholder="请输入用户名">
      </d-input>
    </d-form-control>
  </d-form-item>

  <d-form-item>
    <d-form-label required>密码</d-form-label>
    <d-form-control>
      <d-input
        formControlName="password"
        type="password"
        placeholder="请输入密码">
      </d-input>
    </d-form-control>
  </d-form-item>

  <d-form-operation>
    <d-button bsStyle="primary" type="submit">登录</d-button>
    <d-button bsStyle="common">重置</d-button>
  </d-form-operation>
</form>
对应的组件逻辑:
import { Component, OnInit } from '@angular/core';
import { FormBuilder, FormGroup, Validators } from '@angular/forms';

@Component({
  selector: 'app-login',
  templateUrl: './login.component.html'
})
export class LoginComponent implements OnInit {
  loginForm: FormGroup;

  constructor(private fb: FormBuilder) {}

  ngOnInit() {
    this.loginForm = this.fb.group({
      username: ['', [Validators.required, Validators.minLength(3)]],
      password: ['', [Validators.required, Validators.minLength(6)]]
    });
  }

  onSubmit() {
    if (this.loginForm.valid) {
      console.log('表单提交:', this.loginForm.value);
    }
  }
}
3.3 Table 数据表格
展示数据列表是企业应用的核心场景:
<d-data-table
  [dataSource]="dataSource"
  [columns]="columns"
  [showPagination]="true"
  [pageSize]="10">
</d-data-table>
export class TableDemoComponent {
  columns = [
    { field: 'id', header: 'ID', width: '80px' },
    { field: 'name', header: '姓名', width: '150px' },
    { field: 'email', header: '邮箱', width: '200px' },
    { field: 'status', header: '状态', width: '100px' }
  ];

  dataSource = [
    { id: 1, name: '张三', email: 'zhangsan@example.com', status: '激活' },
    { id: 2, name: '李四', email: 'lisi@example.com', status: '禁用' },
    { id: 3, name: '王五', email: 'wangwu@example.com', status: '激活' }
  ];
}
四、新手常见问题解答
Q1: 样式未生效怎么办?
解决方案:
-
确认
angular.json中正确引入了devui.min.css -
检查是否安装了
@angular/animations并在模块中导入BrowserAnimationsModule -
清除缓存后重新编译:
npm cache clean --force && ng serve
Q2: 组件导入报错 "Module not found"?
解决方案:
# 确保安装了正确版本
npm ls ng-devui

# 如有问题,重新安装
rm -rf node_modules package-lock.json
npm install
Q3: 如何自定义主题颜色?
DevUI 支持通过 CSS 变量进行主题定制:
/* 在全局样式文件中覆盖变量 */
:root {
  --devui-brand: #5e7ce0;
  --devui-brand-hover: #7693f5;
  --devui-brand-active: #344899;
  --devui-base-bg: #ffffff;
  --devui-text: #252b3a;
}
Q4: 如何实现按需加载优化打包体积?
推荐使用独立模块导入方式:
// ✅ 推荐:按需导入
import { ButtonModule } from 'ng-devui/button';
import { InputModule } from 'ng-devui/input';

// ❌ 避免:全量导入
// import { DevUIModule } from 'ng-devui';
五、与 MateChat 的集成
MateChat 是华为云推出的智能交互平台,可以与 DevUI 完美结合,为应用增加 AI 能力:
// 在 DevUI 应用中集成 MateChat 对话能力
import { MateChatService } from '@matechat/core';

export class AIChatComponent {
  constructor(private matechat: MateChatService) {}

  async sendMessage(content: string) {
    const response = await this.matechat.chat({
      message: content,
      context: 'devui-assistant'
    });
    return response;
  }
}
六、实用资源链接
| 资源 | 链接 |
|---|---|
| DevUI 官网 | https://devui.design/home |
| MateChat 官网 | https://matechat.gitcode.com |
| MateChat GitHub | https://gitcode.com/DevCloudFE/MateChat |
| DevUI GitHub | https://github.com/DevCloudFE/ng-devui |
七、总结
通过本文的学习,你已经掌握了:
-
环境搭建 - 从零开始配置 DevUI 开发环境
-
基础组件 - Button、Form、Table 等核心组件的使用方法
-
常见问题 - 新手容易遇到的坑和解决方案
-
进阶集成 - DevUI 与 MateChat 的智能化结合
DevUI 作为华为云的企业级前端解决方案,不仅提供了丰富的组件库,更融入了华为多年的企业级应用开发经验。结合 MateChat 的 AI 能力,开发者可以快速构建智能化的云原生应用!💪
🌟 小贴士:建议收藏 DevUI 官网,定期关注组件更新和最佳实践分享哦!如果在使用过程中遇到任何问题,欢迎随时交流讨论~ 加油!💖
- MateChat:https://gitcode.com/DevCloudFE/MateChat
- MateChat官网:https://matechat.gitcode.com
- DevUI官网:https://devui.design/home

AtomGit 是由开放原子开源基金会联合 CSDN 等生态伙伴共同推出的新一代开源与人工智能协作平台。平台坚持“开放、中立、公益”的理念,把代码托管、模型共享、数据集托管、智能体开发体验和算力服务整合在一起,为开发者提供从开发、训练到部署的一站式体验。
更多推荐
 19
19 0
0- 0


 已为社区贡献13条内容

所有评论(0)