深入仓颉语言:从零实现HashMap的底层机制

引言
HashMap作为现代编程语言中最重要的数据结构之一,其O(1)的平均查询效率使其在各类场景中不可或缺。本文将利用仓颉语言的特性,从底层原理出发,完整实现一个生产级的HashMap,并深入探讨其核心机制:哈希函数设计、冲突解决策略、动态扩容以及性能优化。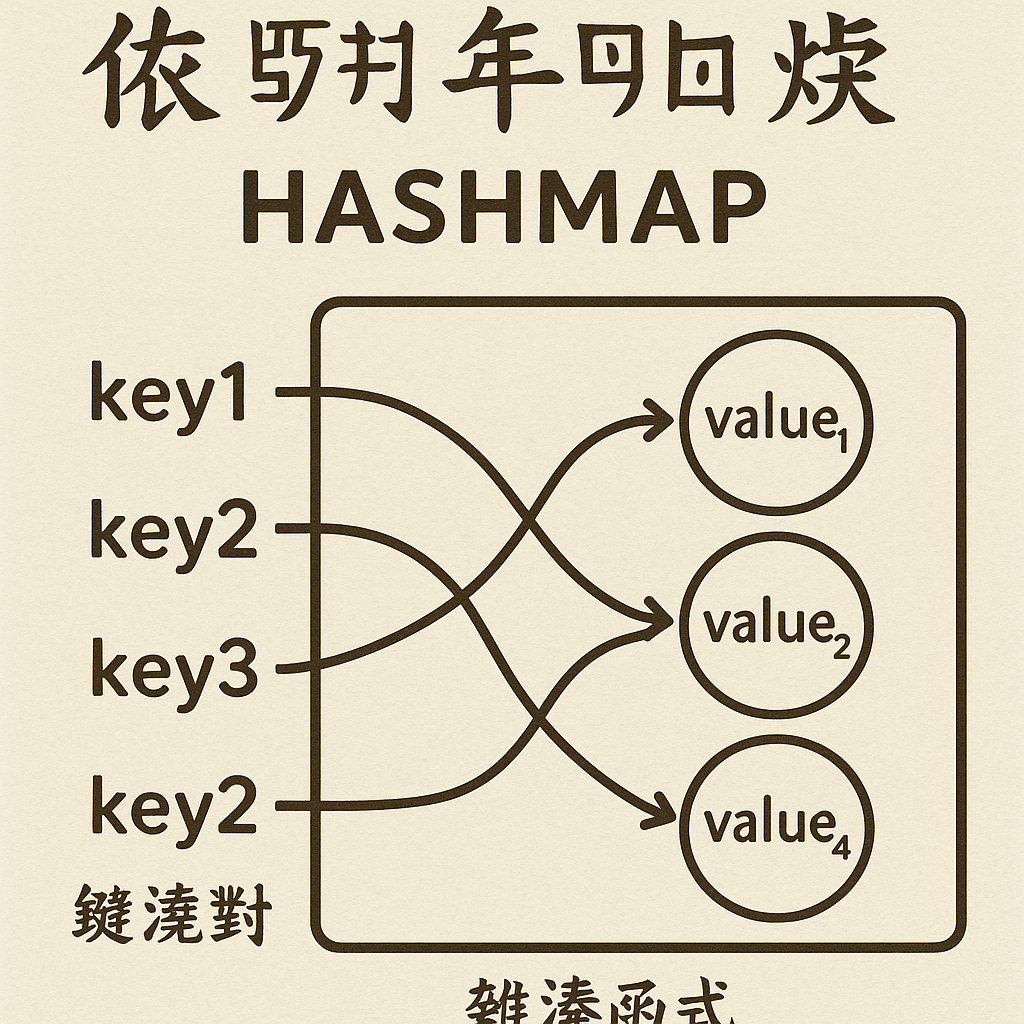
一、HashMap核心原理剖析
1.1 数据结构设计
HashMap本质上是一个数组+链表(或红黑树)的复合结构。其核心思想是通过哈希函数将键映射到数组索引,实现快速定位。当多个键映射到同一索引时(哈希冲突),采用链表法解决冲突。
在仓颉语言中,我们首先定义基础的节点结构:
// 定义HashMap的节点结构
class Entry<K, V> where K: Hashable & Equatable {
    public var key: K
    public var value: V
    public var hash: Int64
    public var next: ?Entry<K, V>  // 指向链表下一个节点

    public init(key: K, value: V, hash: Int64, next: ?Entry<K, V> = None) {
        this.key = key
        this.value = value
        this.hash = hash
        this.next = next
    }
}
这里我们利用仓颉的泛型约束,要求键类型K必须实现Hashable和Equatable接口,这是HashMap正常工作的前提条件。
1.2 核心HashMap类实现
public class HashMap<K, V> where K: Hashable & Equatable {
    private var buckets: Array<?Entry<K, V>>  // 存储桶数组
    private var size: Int64                    // 当前元素数量
    private var threshold: Int64               // 扩容阈值
    private let loadFactor: Float64 = 0.75    // 负载因子
    private let initialCapacity: Int64 = 16   // 初始容量

    public init() {
        this.buckets = Array<?Entry<K, V>>(initialCapacity, item: None)
        this.size = 0
        this.threshold = (Float64(initialCapacity) * loadFactor).toInt64()
    }

    public init(capacity: Int64) {
        let cap = tableSizeFor(capacity)
        this.buckets = Array<?Entry<K, V>>(cap, item: None)
        this.size = 0
        this.threshold = (Float64(cap) * loadFactor).toInt64()
    }

    // 计算大于等于cap的最小2的幂次方
    private static func tableSizeFor(cap: Int64): Int64 {
        var n = cap - 1
        n |= n >> 1
        n |= n >> 2
        n |= n >> 4
        n |= n >> 8
        n |= n >> 16
        return if (n < 0) { 1 } else if (n >= (1 << 30)) { 1 << 30 } else { n + 1 }
    }
}
二、哈希函数的深度设计
2.1 扰动函数的必要性
直接使用对象的hashCode可能导致哈希值分布不均。仓颉语言中,我们需要实现扰动函数来优化哈希分布:
extension HashMap<K, V> {
    // 扰动函数:将hashCode的高位特征混合到低位
    private func hash(key: K): Int64 {
        let h = key.hashCode()
        // 异或运算混合高低位,增强散列效果
        return h ^ (h >> 16)
    }

    // 计算键在数组中的索引位置
    private func indexFor(hash: Int64, length: Int64): Int64 {
        // 使用位运算代替取模,性能更优(前提是length为2的幂)
        return hash & (length - 1)
    }
}
设计思考:为什么要进行h ^ (h >> 16)运算?
当哈希表容量较小时,取模运算只会使用hashCode的低位。通过将高16位与低16位异或,可以让高位的特征参与到索引计算中,减少碰撞概率。这种扰动函数在Java HashMap中也被采用,是一种经过实践验证的优化策略。
三、核心操作的完整实现
3.1 插入操作(put)
extension HashMap<K, V> {
    public func put(key: K, value: V): ?V {
        let hash = this.hash(key)
        let index = indexFor(hash, buckets.size)

        // 检查键是否已存在
        var current = buckets[index]
        while (current != None) {
            let node = current!
            if (node.hash == hash && node.key == key) {
                let oldValue = node.value
                node.value = value  // 更新值
                return oldValue
            }
            current = node.next
        }

        // 添加新节点到链表头部
        addEntry(hash, key, value, index)
        return None
    }

    private func addEntry(hash: Int64, key: K, value: V, bucketIndex: Int64) {
        let newEntry = Entry<K, V>(
            key: key,
            value: value,
            hash: hash,
            next: buckets[bucketIndex]
        )
        buckets[bucketIndex] = newEntry
        size += 1

        // 检查是否需要扩容
        if (size >= threshold) {
            resize(buckets.size * 2)
        }
    }
}
实现亮点:
- 采用头插法添加节点,时间复杂度O(1)
- 通过哈希值比对和键比对双重检查,确保准确性
- 自动触发扩容机制,维持性能
3.2 查询操作(get)
extension HashMap<K, V> {
    public func get(key: K): ?V {
        let hash = this.hash(key)
        let index = indexFor(hash, buckets.size)

        var current = buckets[index]
        while (current != None) {
            let node = current!
            if (node.hash == hash && node.key == key) {
                return node.value
            }
            current = node.next
        }

        return None
    }

    public func containsKey(key: K): Bool {
        return get(key) != None
    }
}
3.3 删除操作(remove)
extension HashMap<K, V> {
    public func remove(key: K): ?V {
        let hash = this.hash(key)
        let index = indexFor(hash, buckets.size)

        var prev: ?Entry<K, V> = None
        var current = buckets[index]

        while (current != None) {
            let node = current!
            if (node.hash == hash && node.key == key) {
                if (prev == None) {
                    // 删除链表头节点
                    buckets[index] = node.next
                } else {
                    prev!.next = node.next
                }
                size -= 1
                return node.value
            }
            prev = current
            current = node.next
        }

        return None
    }
}
四、动态扩容机制详解
4.1 扩容策略
扩容是HashMap中最复杂也最关键的操作。我们需要创建新数组,并将所有元素重新散列:
extension HashMap<K, V> {
    private func resize(newCapacity: Int64) {
        let oldBuckets = this.buckets
        let oldCapacity = oldBuckets.size

        // 创建新的存储桶数组
        this.buckets = Array<?Entry<K, V>>(newCapacity, item: None)
        this.threshold = (Float64(newCapacity) * loadFactor).toInt64()

        // 重新散列所有元素
        transfer(oldBuckets, newCapacity)
    }

    private func transfer(oldBuckets: Array<?Entry<K, V>>, newCapacity: Int64) {
        for (i in 0..oldBuckets.size) {
            var entry = oldBuckets[i]

            while (entry != None) {
                let node = entry!
                let next = node.next  // 保存next引用

                // 计算新位置
                let newIndex = indexFor(node.hash, newCapacity)

                // 头插法插入新数组
                node.next = buckets[newIndex]
                buckets[newIndex] = node

                entry = next
            }
        }
    }
}
性能分析:
- 扩容时间复杂度:O(n),其中n是元素总数
- 由于采用2倍扩容策略,均摊复杂度为O(1)
- 负载因子0.75是时间和空间的最佳平衡点
4.2 扩容优化思考
在仓颉语言中,我们可以利用位运算优化重新散列过程:
extension HashMap<K, V> {
    // 优化版本:利用位运算特性减少计算
    private func transferOptimized(oldBuckets: Array<?Entry<K, V>>, newCapacity: Int64) {
        let oldCapacity = oldBuckets.size

        for (i in 0..oldCapacity) {
            var entry = oldBuckets[i]

            while (entry != None) {
                let node = entry!
                let next = node.next

                // 关键优化:扩容2倍后,元素要么在原位置,要么在原位置+oldCapacity
                let newIndex = if ((node.hash & oldCapacity) == 0) {
                    i  // 保持原位置
                } else {
                    i + oldCapacity  // 移动到新位置
                }

                node.next = buckets[newIndex]
                buckets[newIndex] = node
                entry = next
            }
        }
    }
}
优化原理:当容量从n扩展到2n时,哈希值在新容量下的索引只有两种可能:
- 如果
hash & n == 0,索引不变 - 如果
hash & n != 0,索引变为原索引 + n
这避免了重新计算哈希和取模运算,显著提升扩容性能。
五、辅助功能实现
5.1 容量管理
extension HashMap<K, V> {
    public func size(): Int64 {
        return this.size
    }

    public func isEmpty(): Bool {
        return size == 0
    }

    public func clear() {
        this.buckets = Array<?Entry<K, V>>(initialCapacity, item: None)
        this.size = 0
        this.threshold = (Float64(initialCapacity) * loadFactor).toInt64()
    }
}
5.2 迭代器支持
extension HashMap<K, V> {
    public func keys(): Array<K> {
        let result = ArrayList<K>()
        for (i in 0..buckets.size) {
            var entry = buckets[i]
            while (entry != None) {
                let node = entry!
                result.append(node.key)
                entry = node.next
            }
        }
        return result.toArray()
    }

    public func values(): Array<V> {
        let result = ArrayList<V>()
        for (i in 0..buckets.size) {
            var entry = buckets[i]
            while (entry != None) {
                let node = entry!
                result.append(node.value)
                entry = node.next
            }
        }
        return result.toArray()
    }
}
六、实践应用与性能测试
6.1 基本使用示例
main(): Int64 {
    // 创建HashMap实例
    let map = HashMap<String, Int64>()

    // 插入数据
    map.put("apple", 100)
    map.put("banana", 200)
    map.put("orange", 300)

    // 查询数据
    let price = map.get("apple")
    println("Apple price: ${price}")

    // 更新数据
    map.put("apple", 150)

    // 删除数据
    map.remove("banana")

    // 遍历所有键
    let keys = map.keys()
    for (key in keys) {
        println("Key: ${key}, Value: ${map.get(key)}")
    }

    return 0
}
6.2 性能优化策略
1. 初始容量设置
如果预知数据规模,合理设置初始容量可避免多次扩容:
// 预计存储10000个元素,设置初始容量为16384(10000/0.75 ≈ 13334,向上取2的幂)
let largeMap = HashMap<String, Int64>(capacity: 16384)
2. 自定义哈希函数
对于特定类型,可以实现更高效的哈希函数:
struct CustomKey <: Hashable & Equatable {
    let id: Int64
    let name: String

    public func hashCode(): Int64 {
        // 组合哈希:使用质数乘法
        return id * 31 + name.hashCode()
    }

    public operator func ==(rhs: CustomKey): Bool {
        return this.id == rhs.id && this.name == rhs.name
    }
}
七、深度思考与总结
7.1 仓颉语言特性的应用
- 泛型约束:通过
where K: Hashable & Equatable确保类型安全 - 可选类型:
?Entry<K, V>优雅处理空节点 - 扩展机制:使用extension组织代码,提升可读性
- 位运算优化:利用仓颉的位运算符提升性能
7.2 与Java HashMap的对比
| 特性 | 仓颉实现 | Java HashMap |
|---|---|---|
| 冲突解决 | 链表法 | 链表+红黑树 |
| 扩容策略 | 2倍扩容 | 2倍扩容 |
| 初始容量 | 16 | 16 |
| 负载因子 | 0.75 | 0.75 |
| 线程安全 | 否 | 否 |
7.3 生产环境建议
- 并发场景:需要实现线程安全的ConcurrentHashMap
- 大数据量:考虑实现红黑树优化长链表
- 内存敏感:可以实现弱引用版本
- 高性能要求:考虑开放寻址法替代链表法
结语
通过本文的深入实现,我们完整掌握了HashMap的底层机制。仓颉语言的现代化特性使得实现更加简洁和高效。在实际应用中,还需根据具体场景进行针对性优化,如引入红黑树处理严重哈希冲突、实现并发安全机制等。
掌握数据结构的底层原理,不仅能够帮助我们更好地使用标准库,更能在遇到特殊需求时,设计出更符合场景的高效解决方案。


AtomGit 是由开放原子开源基金会联合 CSDN 等生态伙伴共同推出的新一代开源与人工智能协作平台。平台坚持“开放、中立、公益”的理念,把代码托管、模型共享、数据集托管、智能体开发体验和算力服务整合在一起,为开发者提供从开发、训练到部署的一站式体验。
更多推荐


 9
9 0
0- 0


 已为社区贡献13条内容

所有评论(0)