
linux环境下IDS相机的开发
上一篇文章中对IDS相机在windows下的开发做了基本介绍,本文介绍一下linux环境下IDS相机的二次开发。
首先,同样的在IDS官网下载相机的开发包https://en.ids-imaging.com/download-ueye-win64.html (需要注册后才可以下载)
在线手册:https://en.ids-imaging.com/manuals/uEye_SDK/ZH/uEye_Manual/index.html
当前版本为:

1.下载后得到文件:uEye-Linux-4.72-32-bit.tgz
解压该压缩包后得到3个文件:

2.选择对应相机的开发包进行安装,我用的是USB相机,故选择第3个文件。
(在安装之前,需要先配置环境,具体环境要求在第一个ReadMe文件中有说明)
安装命令:
sudo chmod +x ueyesdk-setup-4.72-usb-i686.gz.run
sudo ueyesdk-setup-4.72-usb-i686.gz.run
执行该命令后开始安装sdk
sudo /etc/init.d/ueyeusbdrc start
若正确安装,输入上述命令后相机指示灯变绿
3.打开相机
使用使用sdk中提供的管理工具打开相机,在终端输入命令:
sudo '/usr/local/share/ueye/bin/idscameramanager'
得到如下画面:列表框中显示了当前所连接的相机,双击或右键选择打开相机。

得到相机画面如下。
( sdk提供了该程序的源码,放在/usr/src/ids 目录下,程序是用Qt写的)

好了,环境搭建成功,开始进行二次开发。
linux环境下我选用了QT作为开发工具。新建一个Qt纯C++项目,并将IDS相机封装成一个C++类,方便调用。
QT的pro文件如下:
TEMPLATE = app
CONFIG += console
CONFIG -= qt

SOURCES += main.cpp \
    idscam.cpp

HEADERS += \
    idscam.h

!win32 {
    DEFINES += __LINUX__
    LIBS += -lueye_api
}

win32 {
    ## Windows common build
    !contains(QMAKE_TARGET.arch, x86_64) {
        ## Windows x86 (32bit) specific build
    LIBS += -lueye_api
    } else {
        ## Windows x64 (64bit) specific build
    LIBS += -lueye_api_64
    }
}

INCLUDEPATH += /usr/include/opencv/OpenCV-2.3.1/include/opencv2\
              /usr/include/opencv/OpenCV-2.3.1/include/opencv\
             /usr/include/opencv/OpenCV-2.3.1/include

LIBS += /usr/include/opencv/OpenCV-2.3.1/release/lib/libopencv_highgui.so \
        /usr/include/opencv/OpenCV-2.3.1/release/lib/libopencv_core.so    \
        /usr/include/opencv/OpenCV-2.3.1/release/lib/libopencv_imgproc.so \
这里需要注意的是:
为了访问相机,必须包含如下文件:
•头文件:ueye.h
•库:libueye_api.so
相机类头文件为:
#ifndef IDSCAM_H
#define IDSCAM_H
#include <uEye.h>
#include <cv.h>
#include <highgui.h>
#include <semaphore.h>


class Idscam
{

public:
    Idscam();
    ~Idscam();
    bool Init();
    //1.初始化相机   hWnd指向显示图像窗口的指针,若用DIB模式可以令hWnd=NULL
    INT InitCamera (HIDS *hCam, HWND hWnd);
    bool OpenCamera();
    void ExitCamera();
    int  InitDisplayMode();
    void GetMaxImageSize(INT *pnSizeX, INT *pnSizeY);
    bool GetiplImgFormMem();
        // uEye varibles
    HIDS	m_hCam;				// 相机句柄
    HWND	m_hWndDisplay;		// window显示句柄
    INT		m_nColorMode;		// Y8/RGB16/RGB24/REG32
    INT		m_nBitsPerPixel;	// 图像位深
    INT		m_nSizeX;			// width of image
    INT		m_nSizeY;			// height of image
    IplImage *iplImg;
    char *m_pLastBuffer;
    int getImage(IplImage *image);
    void cam_stop();
    bool stop;

protected:
    int camIndex;
    int resWidth;
    int resHeight;
    int blackLevel, gain, exposureTime;//定义曝光时间等等
    sem_t sem;
private:
    void startthread();
    static void *video_capture_thread(void *arg);
    pthread_t m_thread;
    // 使用位图模式进行实时显示需要的内存
    INT		m_lMemoryId;		// camera memory - buffer ID
    char*	m_pcImageMemory;	// camera memory - pointer to buffer
    SENSORINFO m_sInfo;			// sensor information struct
};

#endif // IDSCAM_H
实现为:
#include "idscam.h"
#include <string>
#include <iostream>
#include <stdio.h>
using namespace std;

Idscam::Idscam(){
    //初始化相机相关参数
    m_pcImageMemory = NULL;
    m_lMemoryId = 0;
    m_hCam = 0;   //初始化相机句柄为0
    iplImg=cvCreateImageHeader( cvSize(1936,1216),8,4 );
    stop = false;
    if (!Init()){
        cerr <<  "cannot init camera!" << endl;
     }
    else{
         startthread();
    }

}
bool Idscam::Init()
{
    if(OpenCamera()){
        sem_init(&sem, 0,1);
        return true;
    }
    else
        return false;
}

bool Idscam::OpenCamera(){
    INT nRet = IS_NO_SUCCESS; //参数先赋初始值
    ExitCamera(); //
    m_hCam = (HIDS) 0;
    nRet = InitCamera(&m_hCam, m_hWndDisplay);  //  1.初始化相机
    if (nRet == IS_SUCCESS)   //  打开相机成功
    {
        // 查询相机所用传感器的类型
        is_GetSensorInfo(m_hCam, &m_sInfo);     //2.查询信息
        GetMaxImageSize(&m_nSizeX, &m_nSizeY);
         nRet = InitDisplayMode();             //3.选择显示模式(位图)
        if (nRet == IS_SUCCESS)
        {

            INT num= is_CaptureVideo( m_hCam, IS_WAIT );   //4.设定捕捉模式:自由运行模式下的实时模式

            return true;
        }
        else{
              printf("Init the camera displayMode error !\n");
              return false;
        }
    }
    else
    {
        printf("cannot find uEye camra !\n");
        return false;
    }

}
void Idscam::startthread(){

    int res=pthread_create(&m_thread, NULL, video_capture_thread,(void*)this);

}
void Idscam::cam_stop(){
    stop=true;
    ExitCamera();//释放内存;
    pthread_exit;
}
void* Idscam::video_capture_thread(void *arg){

    Idscam *came=(Idscam *)arg;
    while(!came->stop)
    {
        came->GetiplImgFormMem(); //实时获取图像
         usleep(300);   //需要加等待,不然会很耗CPU
    }
 }
Idscam::~Idscam()
{
    cam_stop();
}

int Idscam::getImage(IplImage *image){
    if(image->width==iplImg->width && image->height==iplImg->height){
        sem_wait(&sem);
        cvCopy(iplImg, image);  //从相机缓存中获取当前画面
        sem_post(&sem);
        return 0;
    }
    return -1;
}

void Idscam:: ExitCamera()
{
    if( m_hCam != 0 ) // 如果找到相机
    {
        // 在曝光未开始时停止实时模式或取消硬件触发的图像捕捉
        is_StopLiveVideo( m_hCam, IS_WAIT );

        // 释放分配的图像内存
        if( m_pcImageMemory != NULL )
            is_FreeImageMem( m_hCam, m_pcImageMemory, m_lMemoryId );

        m_pcImageMemory = NULL;

        // 关闭相机
        is_ExitCamera( m_hCam );
        m_hCam = NULL;
    }
}

//1.初始化相机
INT Idscam::InitCamera (HIDS *hCam, HWND hWnd)
{
    INT nRet = is_InitCamera (hCam, hWnd);
    /************************************************************************************************/
    /*  若相机返回 "IS_STARTER_FW_UPLOAD_NEEDED"表明相机的启动程序固件和驱动不兼容,需要更新固件版本 */
    /*	这将占用一段时间,可以用 is_GetDuration()来进行该过程的时间预估。       			         */
     /************************************************************************************************/
    if (nRet == IS_STARTER_FW_UPLOAD_NEEDED)
    {
        // Time for the firmware upload = 25 seconds by default
        INT nUploadTime = 25000;
        is_GetDuration (*hCam, IS_STARTER_FW_UPLOAD, &nUploadTime);

        printf("This camera requires a new firmware !\n");
        printf("The upload will take about %f seconds. Please wait ...\n",nUploadTime/1000);

        //再次打开相机并自动更新固件

        *hCam = (HIDS) (((INT)*hCam) | IS_ALLOW_STARTER_FW_UPLOAD);
        nRet = is_InitCamera (hCam, NULL);
    }

    return nRet;
}


int Idscam::InitDisplayMode()
{

    INT nRet = IS_NO_SUCCESS;

    if (m_hCam == NULL)
        return IS_NO_SUCCESS;

    if (m_pcImageMemory != NULL) //释放通过 is_AllocImageMem() 函数分配的图像内存
    {
        printf("m_pcImageMemory != NULL\n");
        is_FreeImageMem( m_hCam, m_pcImageMemory, m_lMemoryId );
        //如果图像内存不是通过SDK分配,则需调用 is_FreeImageMem() 函数。否则驱动会继续尝试访问该内存。
       //但是这并不能释放内存。因此,必须确保可再次释放内存。
    }
    m_pcImageMemory = NULL;

    // 设置位图模式
    nRet = is_SetDisplayMode(m_hCam, IS_SET_DM_DIB);
    if (m_sInfo.nColorMode == IS_COLORMODE_BAYER)
    {
        // setup the color depth to the current windows setting
       // is_GetColorDepth(m_hCam, &m_nBitsPerPixel, &m_nColorMode);
        m_nColorMode = IS_CM_BGRA8_PACKED;
        m_nBitsPerPixel = 32;
         printf("m_nBitsPerPixel m_nColorMode is %d,%d\n",m_nBitsPerPixel,m_nColorMode);
    }
    else if (m_sInfo.nColorMode == IS_COLORMODE_CBYCRY)
    {
        printf("for color camera models use RGB32 mode\n");
        // for color camera models use RGB32 mode
        m_nColorMode = IS_CM_BGRA8_PACKED;
        m_nBitsPerPixel = 32;
    }
    else
    {
       printf("for monochrome camera models use Y8 mode\n");
        // for monochrome camera models use Y8 mode
        m_nColorMode = IS_CM_MONO8;
        m_nBitsPerPixel = 8;
    }

    // 分配图像内存,图像尺寸有 m_nSizeX和m_nSizeY确定,色彩位深由m_nBitsPerPixel确定,m_pcImageMemory返回起始地址,m_lMemoryId 返回已分配内存的ID
    if (is_AllocImageMem(m_hCam, m_nSizeX, m_nSizeY, m_nBitsPerPixel, &m_pcImageMemory, &m_lMemoryId ) != IS_SUCCESS)
    {
            printf("相机内存分配出错!\n");
            std::cout<<"5 m_hCam is "<<m_hCam<<std::endl;
    }
    else  //激活该图像内存,图像数据(DIB模式)便存储在此内存中
        is_SetImageMem( m_hCam, m_pcImageMemory, m_lMemoryId );
    printf("分配图像内存\n");
    /*    INT is_SetImageMem (HIDS hCam, char* pcImgMem, INT id)用于将指定的图像内存变为活动内存。
            只有活动图像内存可以接收图像数据。
        在调用 is_FreezeVideo() 时,捕捉的图像会存储在 pcImgMem 和 id 指定的图像缓冲区中。
        捕捉的图像会存储在 pcImgMem 和 id 指定的图像缓冲区中。对于 pcImgMem,
        您必须传递 is_AllocImageMem() 创建的指针,传递任何其他指针均会发出错误信息。
        您可以多次传递同样的指针。     */

    if (nRet == IS_SUCCESS)
    {
        printf("设置显卡在保存或显示图像数据时所使用的色彩模\n");
        // 设置显卡在保存或显示图像数据时所使用的色彩模
        is_SetColorMode(m_hCam, m_nColorMode);

        // set the image size to capture
        IS_SIZE_2D imageSize;
        imageSize.s32Width = m_nSizeX;
        imageSize.s32Height = m_nSizeY;
       //设置图像感兴趣区域(AOI)的大小和位置
        is_AOI(m_hCam, IS_AOI_IMAGE_SET_SIZE, (void*)&imageSize, sizeof(imageSize));
    }
    std::cout<<"InitDisplayMode nRet is "<<nRet<<std::endl;
    return nRet;
}

void Idscam::GetMaxImageSize(INT *pnSizeX, INT *pnSizeY)
{
    // Check if the camera supports an arbitrary AOI
    // Only the ueye xs does not support an arbitrary AOI
    INT nAOISupported = 0;
    BOOL bAOISupported = TRUE;
    if (is_ImageFormat(m_hCam,
                       IMGFRMT_CMD_GET_ARBITRARY_AOI_SUPPORTED,
                       (void*)&nAOISupported,
                       sizeof(nAOISupported)) == IS_SUCCESS)
    {
        bAOISupported = (nAOISupported != 0);
    }

    if (bAOISupported)
    {
        // All other sensors
        // Get maximum image size
        SENSORINFO sInfo;
        is_GetSensorInfo (m_hCam, &sInfo);
        *pnSizeX = sInfo.nMaxWidth;
        *pnSizeY = sInfo.nMaxHeight;
    }
    else
    {
        // Only ueye xs
        // Get image size of the current format
        IS_SIZE_2D imageSize;
        is_AOI(m_hCam, IS_AOI_IMAGE_GET_SIZE, (void*)&imageSize, sizeof(imageSize));

        *pnSizeX = imageSize.s32Width;
        *pnSizeY = imageSize.s32Height;
    }
}
bool Idscam::GetiplImgFormMem(){  //实时获取图像时需要不断刷新此函数

 if(!m_hCam) return false;
  char *pLast = NULL, *pMem = NULL;
  INT dummy = 0;
  //确定当前用于捕捉图像的图像内存 pMem,最后一个用于捕捉图像的图像内存pLast
  is_GetActSeqBuf (m_hCam, &dummy, &pMem, &pLast);
  m_pLastBuffer = pLast;

   if (m_pLastBuffer)
    {
        iplImg->imageData = m_pLastBuffer;  //将图像首地址传给iplImg
        return true;
    }
   else
       return false;
}
主程序为:
这里使用了死循环不断调用相机,在实际运行时,程序跑一会就会被杀死。
#include "idscam.h"
#include <iostream>
#include <cv.h>
#include <highgui.h>
using namespace std;
char* window_name = "Source Video";

int main()
{
    Idscam *mycam;
    mycam = new Idscam();
    IplImage *dst;
    IplImage *pic;
    float scale = 0.4;	//缩放倍数为0.4倍 相机原画面为 1936 x 1216
    CvSize pic_cvsize;	//目标图像尺寸
    while(1){
        if(mycam->GetiplImgFormMem()){
            dst = cvCloneImage(mycam->iplImg);
            pic_cvsize.width = dst->width * scale;	//目标图像的宽为源图象宽的scale倍
            pic_cvsize.height= dst->height * scale;	//目标图像的高为源图象高的scale倍
            pic = cvCreateImage(pic_cvsize,dst->depth,dst->nChannels);	//构造目标图象
            cvResize(dst,pic,CV_INTER_LINEAR);	//缩放源图像到目标图像
            cvShowImage(window_name,pic);
            if(cvWaitKey(300)==27){
            mycam->cam_stop();
            return 0;
          }
      }
    }
    return 0;
}
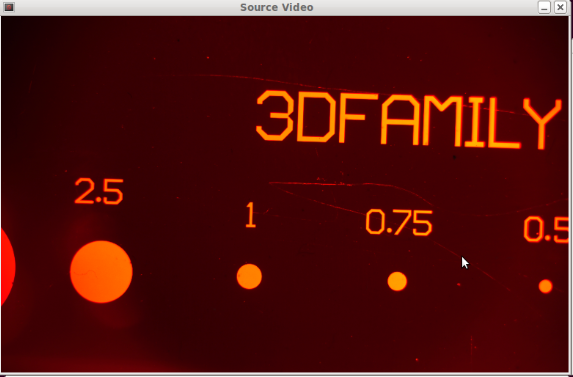
运行后得到相机实时画面:
项目源代码戳这里。

旨在为数千万中国开发者提供一个无缝且高效的云端环境,以支持学习、使用和贡献开源项目。
更多推荐
 2
2 0
0- 0


 已为社区贡献3条内容

所有评论(0)