
Centos6 安装zabbix-agent
linux-dash
A beautiful web dashboard for Linux
项目地址:https://gitcode.com/gh_mirrors/li/linux-dash
·
1、操作系统版本
- 查看操作系统版本
 cat /etc/issue
CentOS release 6.6 (Final)
Kernel \r on an \m- 关闭selinux
  sed -i "s/SELINUX=enforcing/SELINUX=disabled/" /etc/selinux/config
setenforce 0 - 防火墙设置
允许zabbix-agent的10050端口通过
iptables -A INPUT -p tcp --dport 10050 -j ACCEPT 2、安装zabbix 软件源
rpm -ivh http://repo.zabbix.com/zabbix/2.4/rhel/6/x86_64/zabbix-release-2.4-1.el6.noarch.rpm3、安装zabbix-agent
yum install zabbix-sender zabbix-agent zabbix4、配置zabbix-agent
- 如果zabbix-agent在zabbix-server上,zabbix_agentd.conf 默认即可
- 若zabbix-agent不在zabbix-server上,则修改zabbix_agentd.conf
修改server的指向和hostname
 sed -i "s/Server=127.0.0.1/Server=10.0.0.101/" /etc/zabbix/zabbix_agentd.conf
 sed -i "s/ServerActive=127.0.0.1/ServerActive=10.0.0.101/" /etc/zabbix/zabbix_agentd.conf      (主动模式)
sed -i "s/Hostname=Zabbix server/Hostname=10.0.0.105/" /etc/zabbix/zabbix_agentd.conf - 启动并设置开机自启
service zabbix-agent restart
chkconfig zabbix-agent on
5、zabbix界面添加agent主机
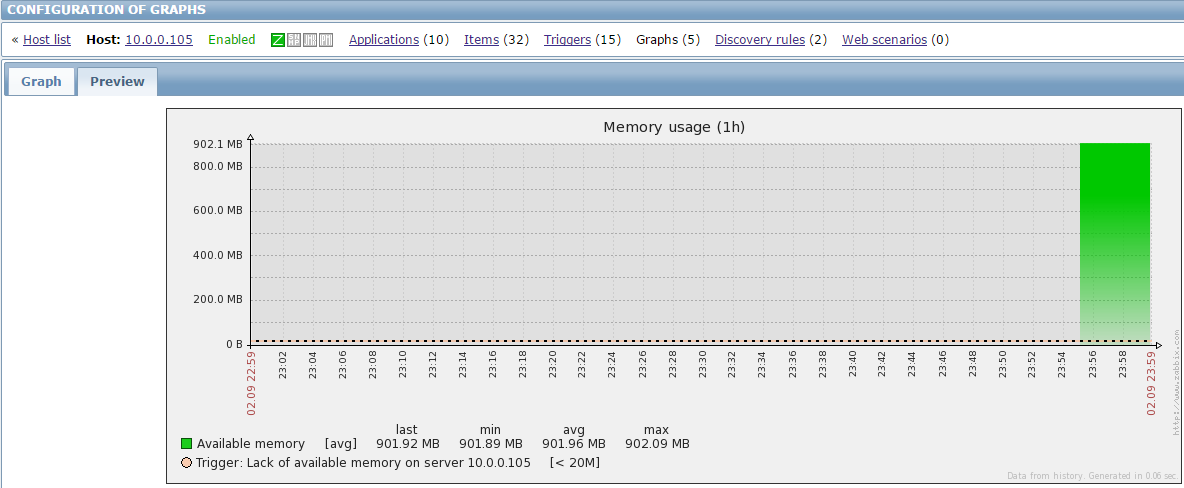
Host——create Host

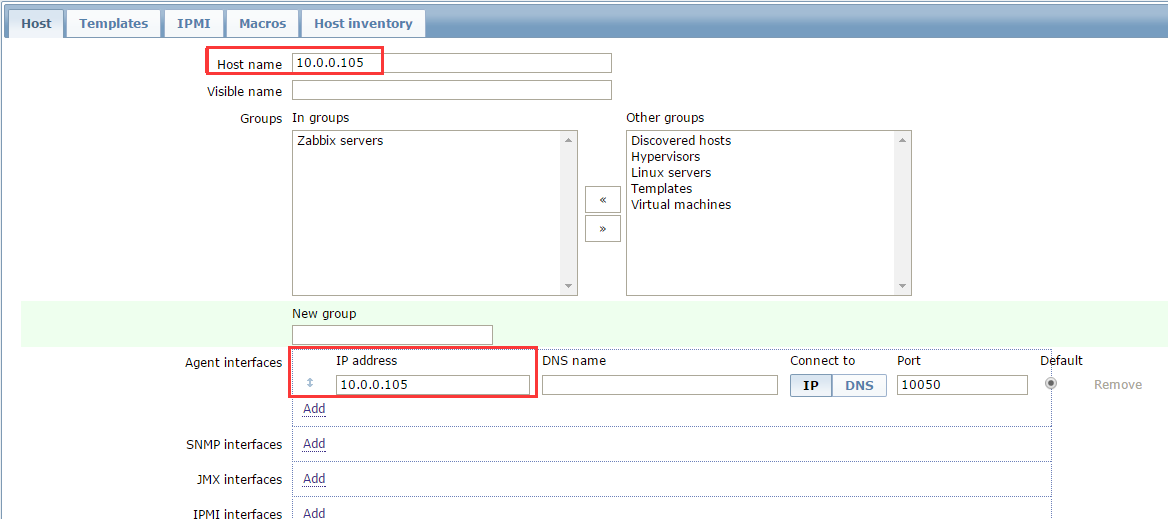
链接模板,开始监控
A beautiful web dashboard for Linux
最近提交(Master分支:5 个月前 )
186a802e
added ecosystem file for PM2 4 年前
5def40a3
Add host customization support for the NodeJS version 4 年前

旨在为数千万中国开发者提供一个无缝且高效的云端环境,以支持学习、使用和贡献开源项目。
更多推荐


 0
0 0
0- 0


 已为社区贡献1条内容

所有评论(0)