
基于Docker的TensorFlow机器学习框架搭建和实例源码解读
tensorflow
一个面向所有人的开源机器学习框架
项目地址:https://gitcode.com/gh_mirrors/te/tensorflow
·
概述:基于Docker的TensorFlow机器学习框架搭建和实例源码解读,TensorFlow作为最火热的机器学习框架之一,Docker是的容器,可以很好的结合起来,为机器学习或者科研人员提供便捷的机器学习开发环境,探索人工智能的奥秘,容器随开随用方便快捷。源码解析TensorFlow容器创建和示例程序运行,为热爱机器学者降低学习难度。
默认机器已经装好了Docker(Docker安装和使用可以看我另一篇博文:Ubuntu16.04安装Docker1.12+开发实例+hello world+web应用容器)。

1.下载TensorFlow镜像
docker pull tensorflow/tensorflow
#或者
#sudo docker pull tensorflow/tensorflow
2.创建TensorFlow容器,源码解读
docker run --name xiaolei-tensortflow -it -p 8888:8888 -v ~/tensorflow:/notebooks/data tensorflow/tensorflowdocker run运行镜像,--name为容器创建别名,-it保留命令行运行,-p 8888:8888将本地的8888端口http://localhost:8888/映射,-v ~/tensorflow:/notebooks/data将本地的~/tensorflow文件夹挂载到新建容器的/notebooks/data下(这样创建的文件可以保存到本地~/tensorflow)tensorflow/tensorflow为指定的镜像,默认标签为latest(即tensorflow/tensorflow:latest)
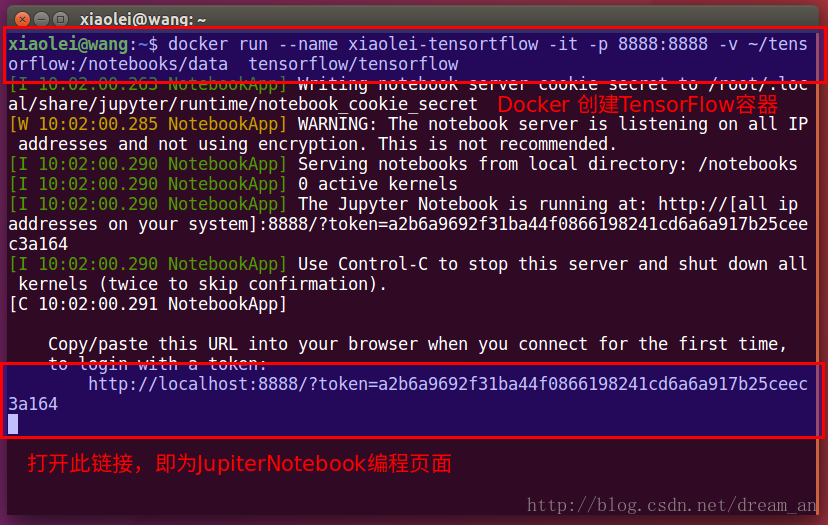
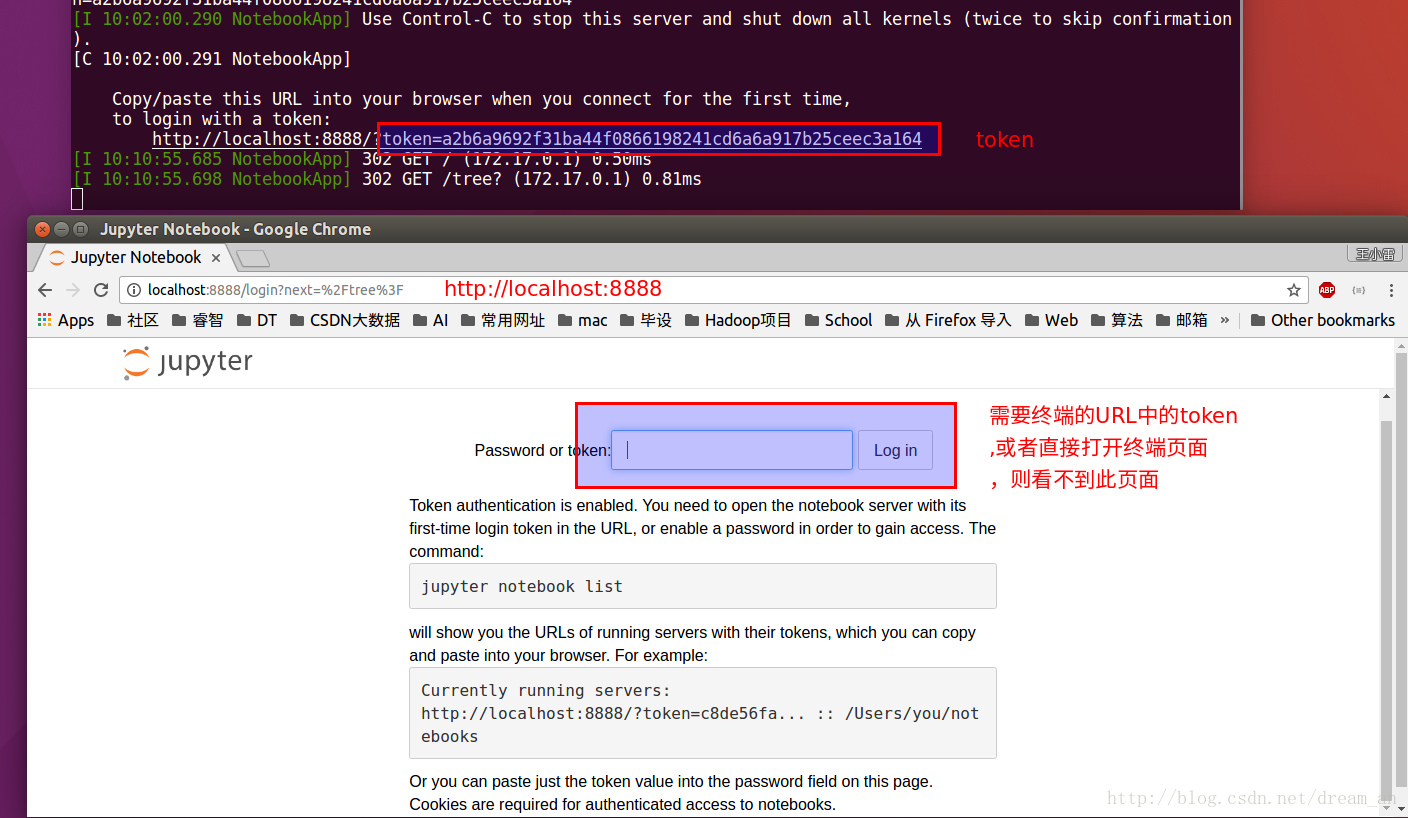
3.开启TensorFlow容器
3.1.可以直接从命令行中右键打开连接,或者在浏览器中输入localhost:8888,然后将命令行中的token粘贴上去。
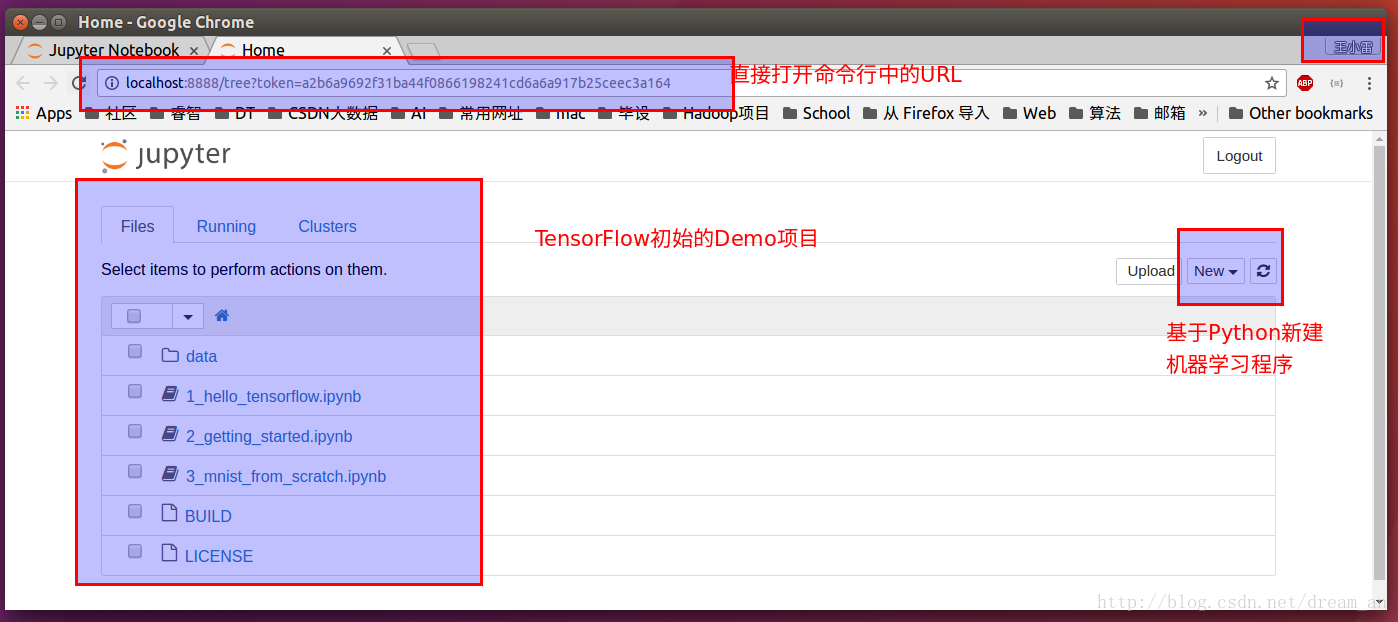
4.开始TensorFlow编程(Python语言)
4.1.在首页可以New一个Python项目
4.2.tensorflow示例源码解读
from __future__ import print_function
#导入tensorflow
import tensorflow as tf
#输入两个数组,input1和input2然后相加,输出结果
with tf.Session():
    input1 = tf.constant([1.0, 1.0, 1.0, 1.0])
    input2 = tf.constant([2.0, 2.0, 2.0, 2.0])
    output = tf.add(input1, input2)
    result = output.eval()
    print("result: ", result)
4.3.运行程序,输出的结果为(运行成功)
result: [ 3. 3. 3. 3.]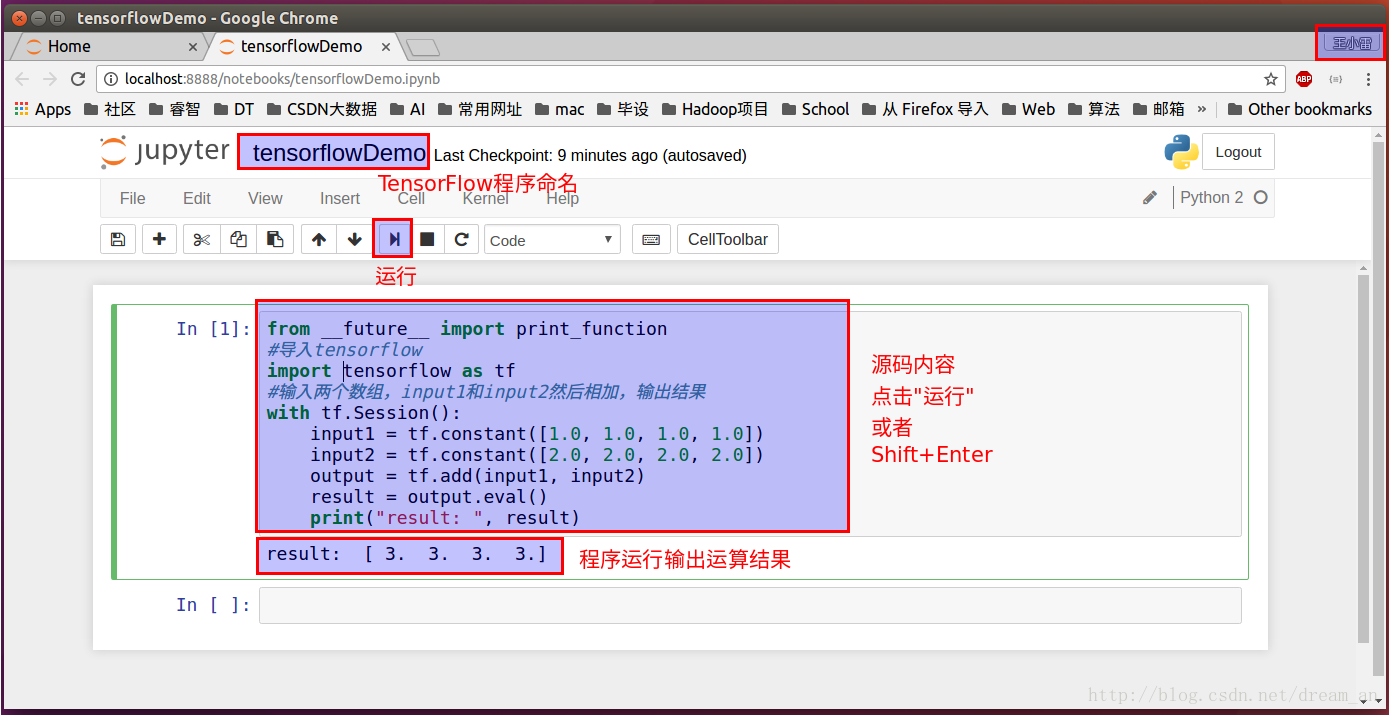
5.其他 linux,TensorFlow,Docker相关操作
5.1.关闭TensorFlow和开启TensorFlow环境
#关闭tensorflow容器
docker stop xiaolei-tensortflow

#开启TensorFlow容器
docker start xiaolei-tensortflow
#浏览器中输入 http://localhost:8888/
5.2.解决文件的读写权限
#查看读写权限
ls -l
#将tensorflow 变为属于xiaolei(系统默认)用户
sudo chown -R xiaolei tensorflow/
#将tensorflow 变为属于xiaolei(系统默认)用户组
sudo chgrp -R xiaolei tensorflow/
一个面向所有人的开源机器学习框架
最近提交(Master分支:20 天前 )
4f64a3d5
Instead, check for this case in `ResolveUsers` and `ResolveOperand`, by querying whether the `fused_expression_root` is part of the `HloFusionAdaptor`.
This prevents us from stepping into nested fusions.
PiperOrigin-RevId: 724311958
20 天前
aa7e952e
Fix a bug in handling negative strides, and add a test case that exposes it.
We can have negative strides that are not just -1, e.g. with a combining
reshape.
PiperOrigin-RevId: 724293790
20 天前

旨在为数千万中国开发者提供一个无缝且高效的云端环境,以支持学习、使用和贡献开源项目。
更多推荐


 4
4 0
0- 0


 已为社区贡献6条内容

所有评论(0)