python+opencv图像处理之边缘检测车道线识别
python+opencv图像处理之边缘检测车道线识别
1.自行安装python和opencv
2.导入我们要使用的相关库
import cv2
from matplotlib import pyplot as plt
import numpy as np
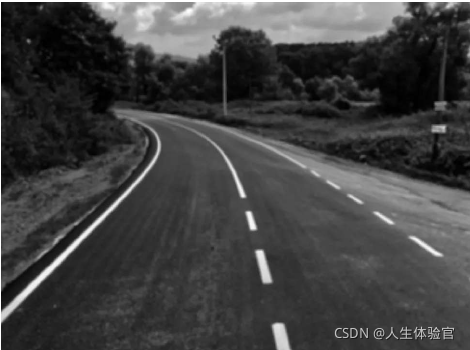
3.我们使用以下图片做本次项目原图
img = cv2.imread("lu.png")  # 读入图片
print(img.shape)  # 查看属性
#plt.imshow(gray_image)  # matplotlib中show函数
#plt.show()#显示
#print(gray_image.shape)#属性
图像的尺寸(825, 1099)。当我们在读取中要打印图像的尺寸时,我们得到的结果shi(825, 1099, 3)。在读取过程中计算机把图像按照矩阵进行像素的分配,因为图像是彩色的,所以RGB有3个维度,
如果我们想将彩色图像转为黑白图像,测使用cvtColor函数
gray_image = cv2.cvtColor(img, cv2.COLOR_BGR2GRAY) # 转黑白图像

4.阈值处理
当我们把图像转为黑白图像,我们图像的尺寸,不再是RGB3个维度,看过图像矩阵的都知道矩阵是有0-255组成,我们可能希望此矩阵仅由0-255的值组成,这种情况我们就要使用到阈值功能。
# (thresh, blackAndwhiteImage) = cv2.threshold(gray_image, 20, 255, cv2.THRESH_BINARY)
# (thresh,blackAndwhiteImage) = cv2.threshold(gray_image,80,255,cv2.THRESH_BINARY)
# (thresh,blackAndwhiteImage) = cv2.threshold(gray_image,160,255,cv2.THRESH_BINARY)
(thresh, blackAndwhiteImage) = cv2.threshold(gray_image, 200, 255, cv2.THRESH_BINARY)  # 阈值处理
# plt.show(blackAndwhiteImage)
# plt.show()
cv2.imshow("Image-New", blackAndwhiteImage)
cv2.waitKey()
cv2.destroyAllWindows()

OpenCV中阀值功能所需的第一个参数是要处理的图像。以下参数是阈值。第三个参数是我们要分配超出阈值的矩阵元素的值,可以在图3中看到四个不同阈值的影响,在第一张图像(图像1)中,该阈值确定为20.将20之上的所有值分配给255.其余值为设置为0。这仅允许黑色或非常深的颜色为黑色,而所有其他阴影直接为白色。图像2和图像3的阈值分别为80和160.最后,在图像4中将阈值确定为200.与图像1不同,白色和非常浅的颜色被指定为255,而所有在图4中将剩余值设置为0。
5.模糊处理
output2 = cv2.blur(gray_image, (10, 10)) # 图像模糊
output3 = cv2.GaussianBlur(gray_image, (9, 9), 5)#模糊函数,消除噪声
# # plt.show(output2)
# # plt.show()
cv2.imshow("Image-New", output3)
cv2.waitKey()
cv2.destroyAllWindows()

黑白图像使用指定的模糊滤镜和模糊度模糊。此过程通常用于消除图像中的噪点。此外,在某些情况下,由于图像中的线条清晰,训练也会受到严重影响。出于此原因使用它的情况下可用。
6.图像旋转
```python
(h, w) = img.shape[:2]
center = (w / 2, h / 2)
M = cv2.getRotationMatrix2D(center, 13, scale=1.1)
rotated = cv2.warpAffine(gray_image, M, (w, h)) # 图像旋转
cv2.imshow("Image-New", rottated)
cv2.waitKey()
cv2.destroyAllWindows()

首先,确定图像的中心,并以此中心进行旋转,getRotationMatrix2D函数的第一个参数是计算出的中心值,第二个参数是角度值,最后,第三个参数是旋转后要应用的缩放比例值。如果将此值设置为1,它将仅根据给定的角度旋转同一图像,而不会进行任何缩放。
7.边缘检测
假设我们要训练车辆的自动驾驶飞行员。当检查图中的图像以解决此问题时,我们的自动驾驶仪应该能够理解路径和车道,我们可以使用OpenCV解决此问题,由于颜色在此问题中无关紧要,因此图像将转换为黑白,矩阵元素通过确定的阈值设置值0和255。如上面在阈值功能的解释中提到的,阈值的选择对于该功能至关重要。该问题的阈值设置为200。我们可以清除其他详细信息,因为这足以专注于路边和车道。为了消除噪声,使用高斯模糊函数执行模糊处理,可以从图中到s详细检查到此为止的部分。
这些过程之后,将应用Canny边缘检测。
(thresh, output2) = cv2.threshold(gray_image, 200, 255, cv2.THRESH_BINARY)
output2 = cv2.GaussianBlur(output2, (5, 5), 3)  # 模糊图像
output2 = cv2.Canny(output2, 180, 255)  # 模糊图像边缘检测
cv2.imshow("Image-New", output2)
cv2.waitKey()
cv2.destroyAllWindows()
结果显示
 Canny函数采用的第一个参数是将对其执行操作的图像。第二参数是低阈值,第三参数是高阈值。逐像素扫描图像以进行边缘检测。一旦存在低于下阈值的值,则检测到边缘的第一侧。当找到一个比较高阈值高的值时,确定另一侧并创建边缘。因此,为每个图像和每个问题确定阈值参数值,为了更好地观察高斯模糊效果,让我们做同样的动作而又不模糊这次。
更多推荐
 已为社区贡献5条内容


所有评论(0)