VIsual Studio 配置OpenCV,两者的任意版本均可配置
0、前言
本文想介绍的是vs配置Opencv的过程,从报错到解决报错,最后成功使用OpenCV库。
示例环境为vs2022和OpenCV 4.8.0
另一文章:Visual Studio 2022 配置VTK9.3.0用的相同思想去解决问题。
1. 下载OpenCV库
下载地址:https://opencv.org/releases/。我下载了 目前最新的版本4.8.0 做为示例介绍。
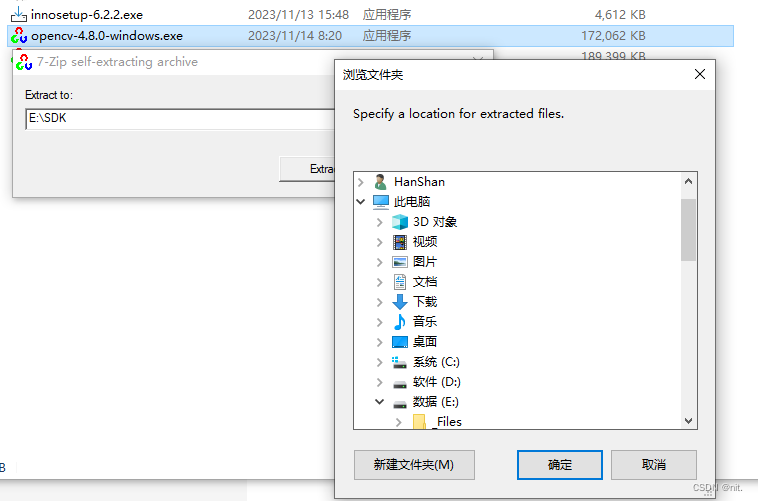
下载自己需要的版本后,运行exe,选择文件放置的位置。
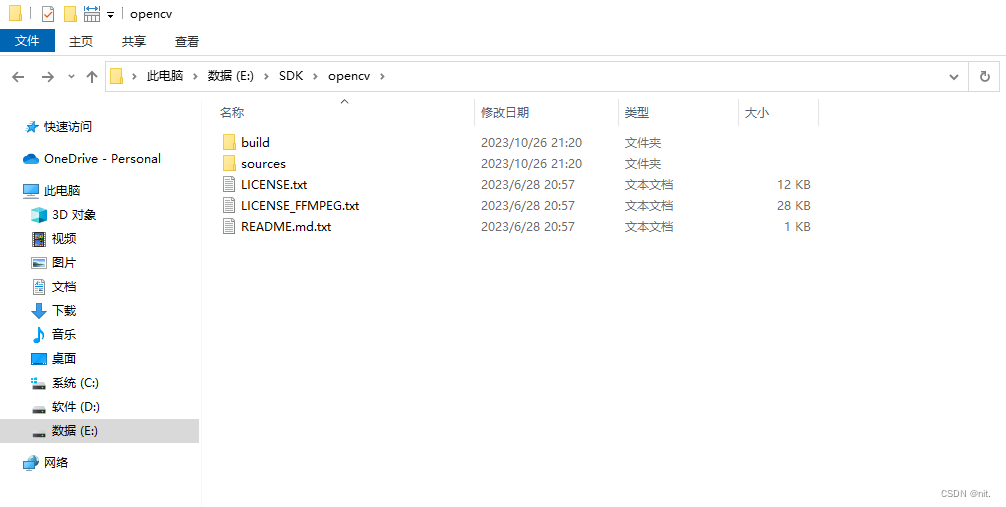
- 文件提取出来后是这样
2. vs2022使用OpenCV库
OpenCV已下载完毕,现在创建一个示例工程去使用。这里会逐步介绍在配置过程的报错情况,再介绍怎么解决报错。
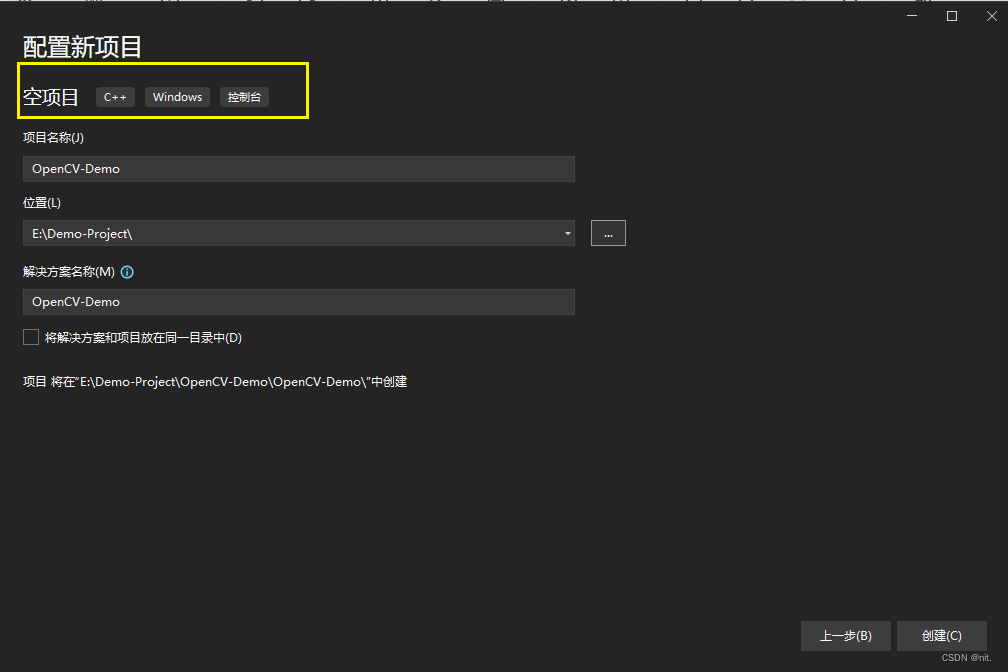
2.1 用vs新建一个空项目
vs创建一个空项目,从E:\SDK\opencv\sources\samples\cpp里面随意找一个代码示例作为运行参考。
随意选择的代码如下:E:\SDK\opencv\sources\samples\cpp\application_trace.cpp
/* OpenCV Application Tracing support demo. */
#include <iostream>

#include <opencv2/core.hpp>
#include <opencv2/imgproc.hpp>
#include <opencv2/highgui.hpp>
#include <opencv2/videoio.hpp>
#include <opencv2/core/utils/trace.hpp>

using namespace cv;
using namespace std;

static void process_frame(const cv::UMat& frame)
{
    CV_TRACE_FUNCTION(); // OpenCV Trace macro for function

    imshow("Live", frame);

    UMat gray, processed;
    cv::cvtColor(frame, gray, COLOR_BGR2GRAY);
    Canny(gray, processed, 32, 64, 3);
    imshow("Processed", processed);
}

int main(int argc, char** argv)
{
    CV_TRACE_FUNCTION();

    cv::CommandLineParser parser(argc, argv,
        "{help h ? |     | help message}"
        "{n        | 100 | number of frames to process }"
        "{@video   | 0   | video filename or cameraID }"
    );
    if (parser.has("help"))
    {
        parser.printMessage();
        return 0;
    }

    VideoCapture capture;
    std::string video = parser.get<string>("@video");
    if (video.size() == 1 && isdigit(video[0]))
        capture.open(parser.get<int>("@video"));
    else
        capture.open(samples::findFileOrKeep(video));  // keep GStreamer pipelines
    int nframes = 0;
    if (capture.isOpened())
    {
        nframes = (int)capture.get(CAP_PROP_FRAME_COUNT);
        cout << "Video " << video <<
            ": width=" << capture.get(CAP_PROP_FRAME_WIDTH) <<
            ", height=" << capture.get(CAP_PROP_FRAME_HEIGHT) <<
            ", nframes=" << nframes << endl;
    }
    else
    {
        cout << "Could not initialize video capturing...\n";
        return -1;
    }

    int N = parser.get<int>("n");
    if (nframes > 0 && N > nframes)
        N = nframes;

    cout << "Start processing..." << endl
        << "Press ESC key to terminate" << endl;

    UMat frame;
    for (int i = 0; N > 0 ? (i < N) : true; i++)
    {
        CV_TRACE_REGION("FRAME"); // OpenCV Trace macro for named "scope" region
        {
            CV_TRACE_REGION("read");
            capture.read(frame);

            if (frame.empty())
            {
                cerr << "Can't capture frame: " << i << std::endl;
                break;
            }

            // OpenCV Trace macro for NEXT named region in the same C++ scope
            // Previous "read" region will be marked complete on this line.
            // Use this to eliminate unnecessary curly braces.
            CV_TRACE_REGION_NEXT("process");
            process_frame(frame);

            CV_TRACE_REGION_NEXT("delay");
            if (waitKey(1) == 27/*ESC*/)
                break;
        }
    }

    return 0;
}
2.2 开始配置环境
2.2.1 引入头文件
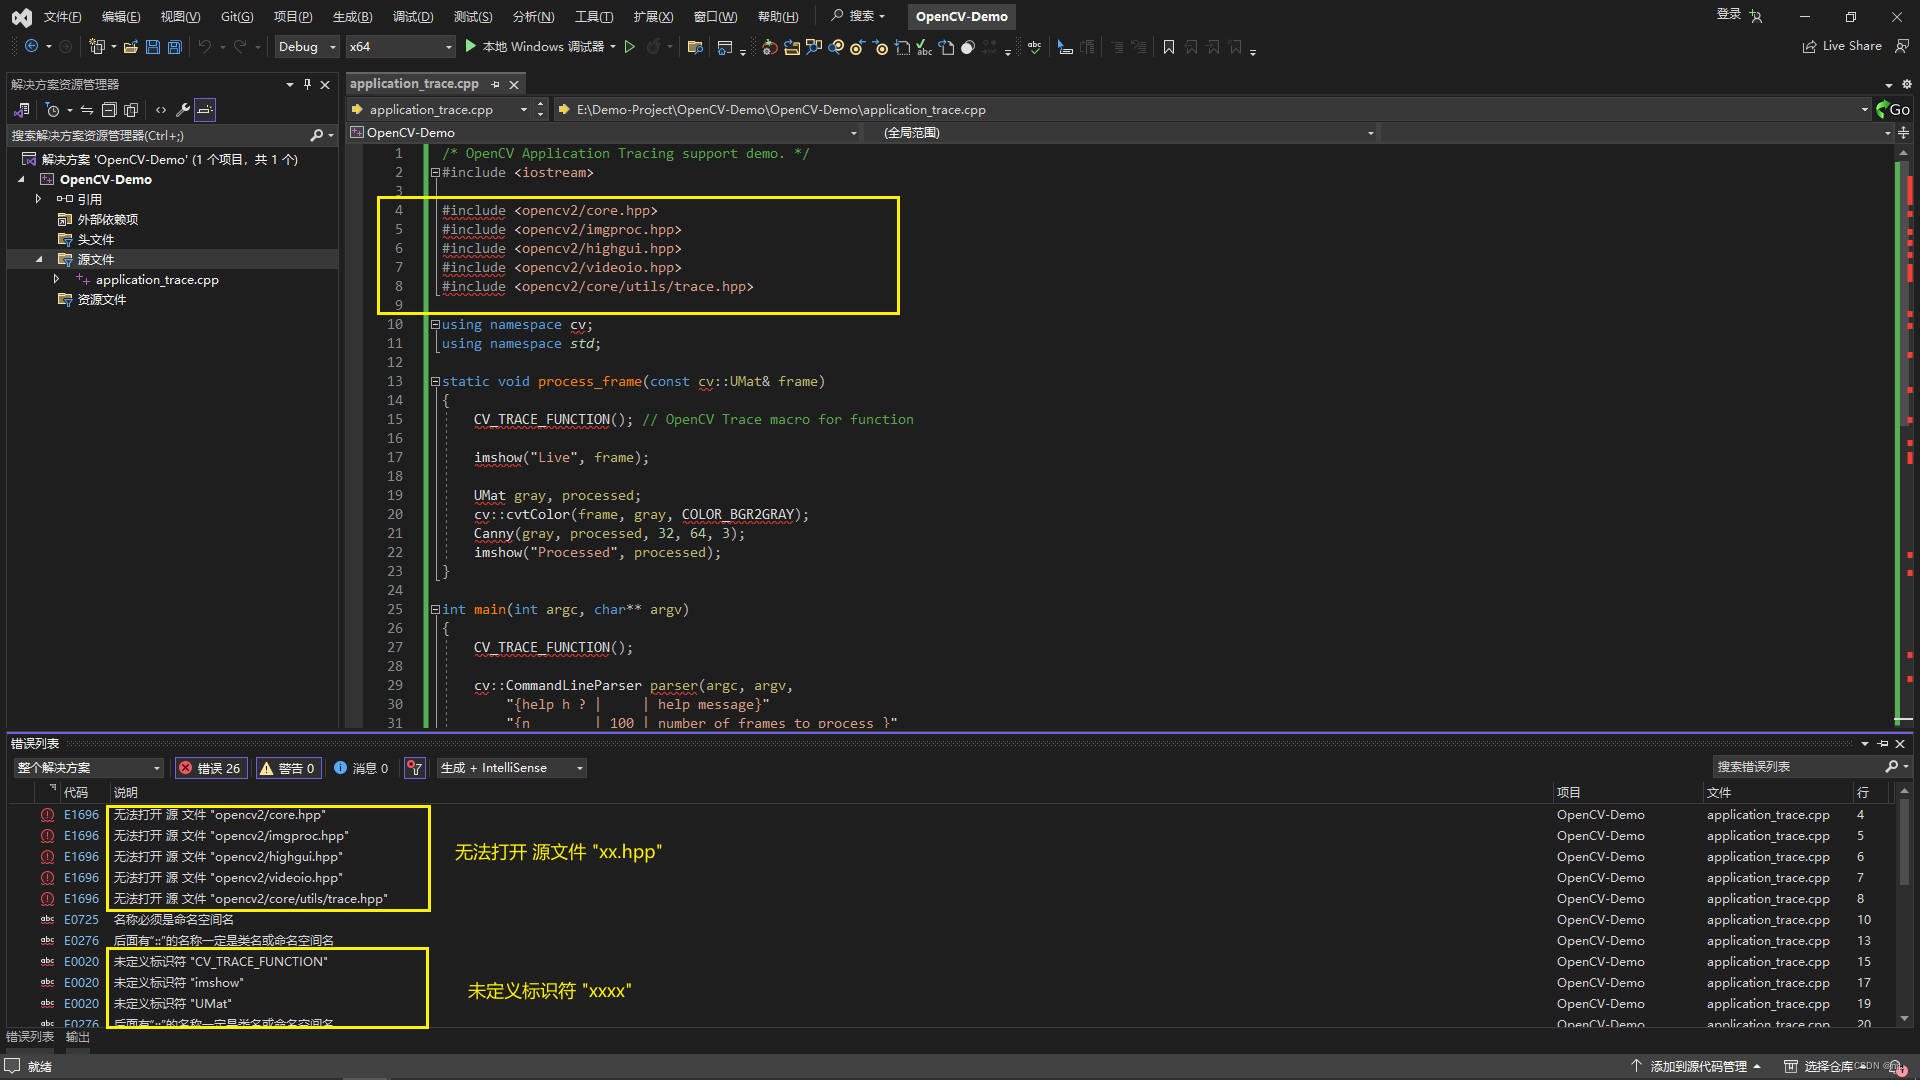
创建一个cpp文件并把上面的代码放入后,会看到一片报错信息。如:无法打开 源文件"xxx.hpp"、未定义标识符 “xxx”。
- 【报错情况 1】 无法打开 源文件"xxx.hpp"、未定义标识符 “xxx”。
-
【原因 1】 :缺少OpenCv库的相关头文件 。
-
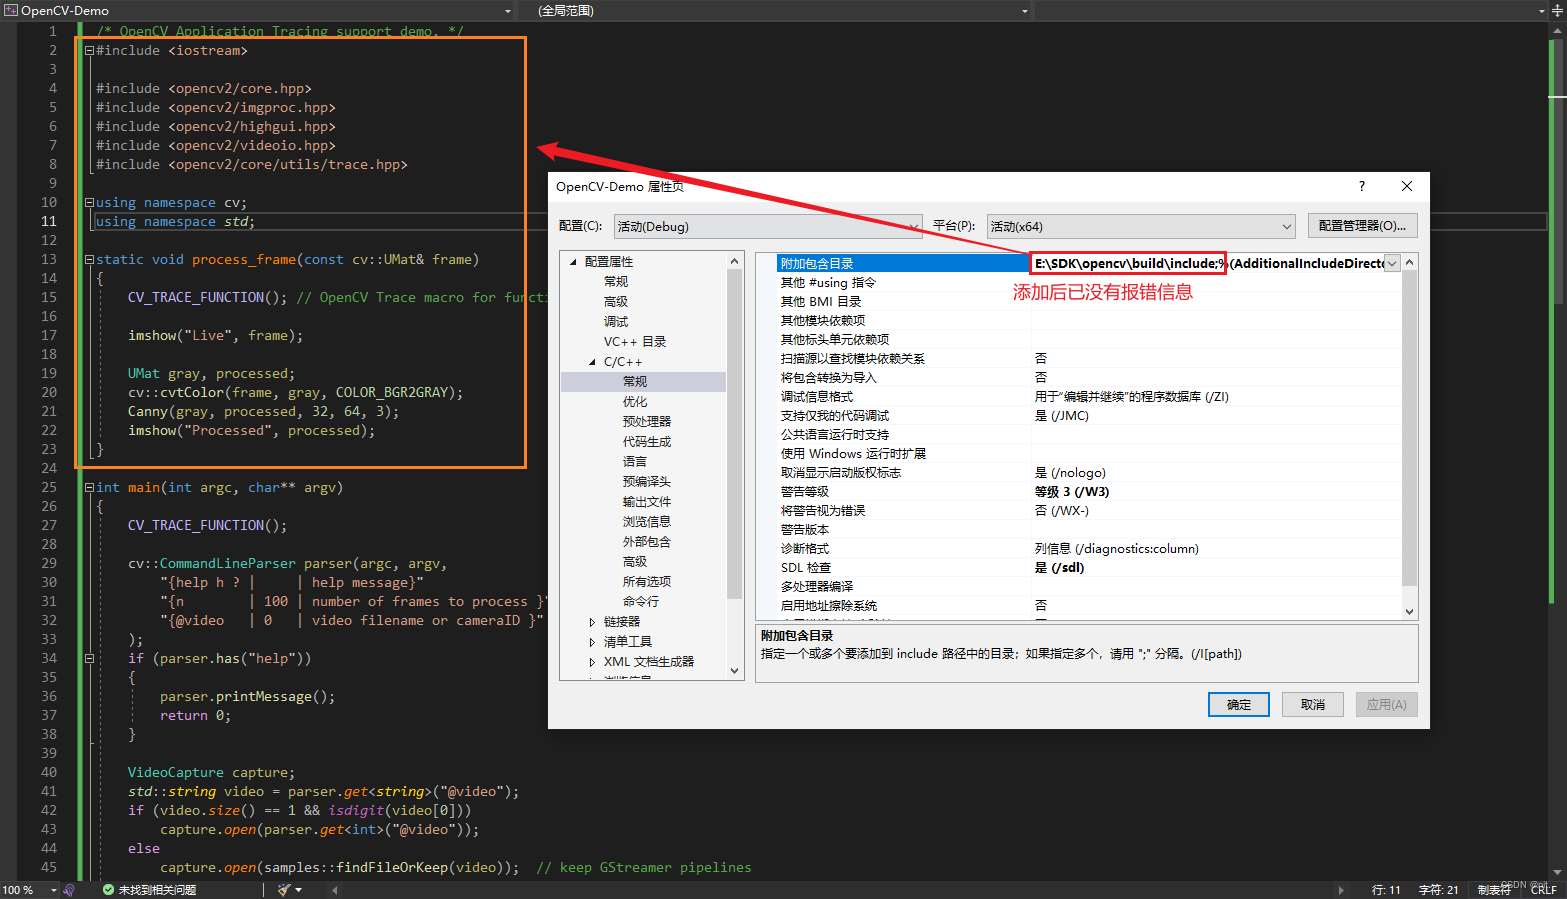
【解决办法 1】
在"配置属性" - “C/C++” - "常规“ - “附加包含目录” 中把自己OpenCV文件路径下的 build\include添加进去。

- 【解决效果 1】 可以看到,引入头文件后已经没有【报错情况 1】的报错信息。
2.2.2 引入Lib文件
引入头文件后没有报错信息,直接运行,会显示Link 2019 "
-
【报错情况 2】 LNK2019: 无法解析的外部符号 ”xxxx"

-
【原因 2】 (个人猜测,如有不对,请批评指正)个人猜测虽然已经引入了头文件,并没有具体的cpp文件去实现相应功能。 OpenCv库把相关的cpp部分封装到了Lib中去。(为什么我猜测是部分呢,因为Lib是静态库,DLL是动态库,后面还有一个问题是缺少DLL)
-
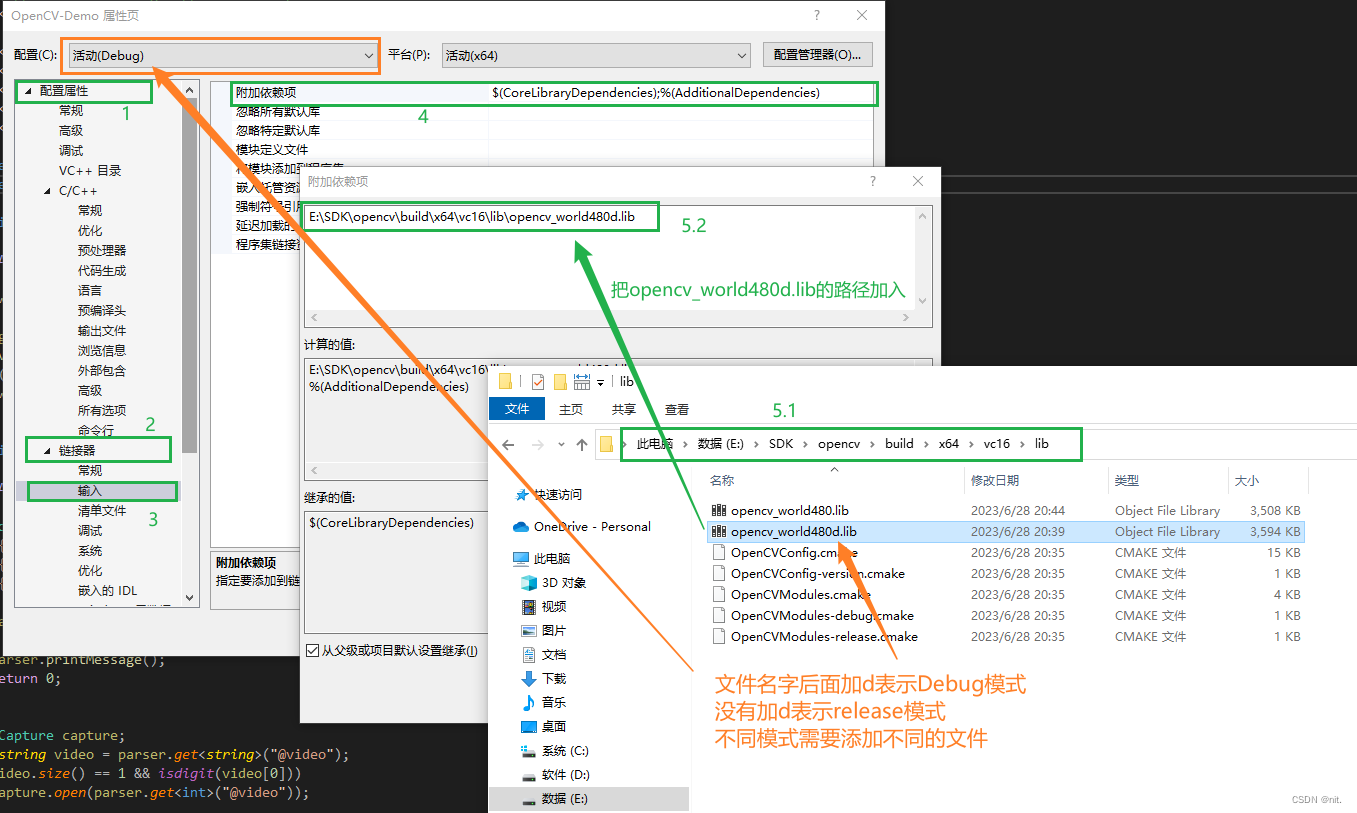
【解决方法 2】 把opencv目录下
build\x64\vc16\lib的oepncv_world480d.lib添加到 “配置属性” - “链接器” - “输入” - “附加依赖项” 中
- 【解决效果 2】 运行程序后没有【报错信息 2】的内容。但是报错 ”找不到 opencv_world480d.dll "

2.2.3 引入DLL文件
DLL是运行过程中缺少的动态库文件,要解决缺少相关DLL的问题,只需要把相关的DLL放在程序exe的执行目录下。
- 【报错情况 3】 由于找不到 “xxx.dll”,无法继续执行代码。
- 【原因 3】 (个人猜测)猜测是封装的cpp部分在Lib里面,部分在DLL里面。Lib与DLL的区别简单讲就是Lib是编译前引入,DLL是运行是引入。
- 【解决报错 3】 把opencv目录下
E:\SDK\opencv\build\x64\vc16\bin的opencv_world480d.dll文件复制到exe的目录下。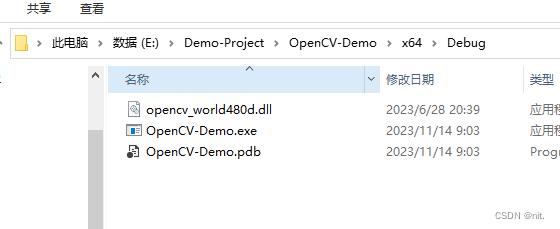
2.3 配置完成效果
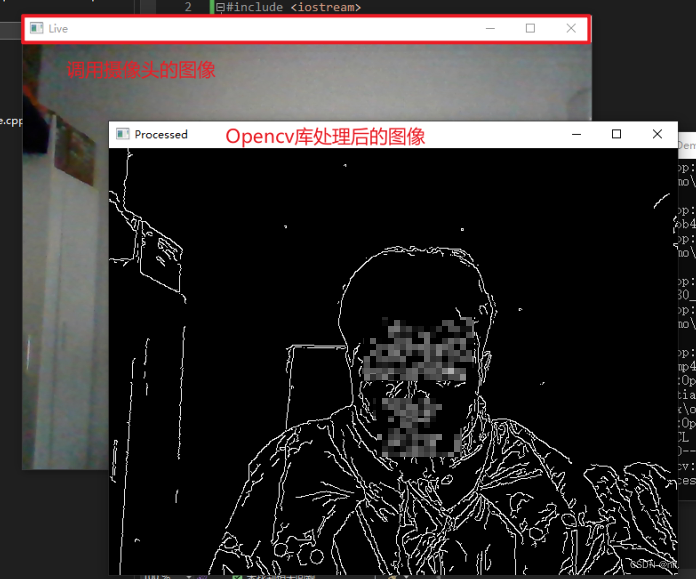
经过上面的配置过程,vs2022对opencv的配置已经完成。下面运行程序看执行效果。
效果是调用摄像头提取出轮廓吧。(我使用的笔记本电脑,如果是台式机有多个摄像头可能需要改一下里面的42行代码,具体怎么改就只有靠自己了)

AtomGit 是由开放原子开源基金会联合 CSDN 等生态伙伴共同推出的新一代开源与人工智能协作平台。平台坚持“开放、中立、公益”的理念,把代码托管、模型共享、数据集托管、智能体开发体验和算力服务整合在一起,为开发者提供从开发、训练到部署的一站式体验。
更多推荐


 10
10 0
0- 0


 已为社区贡献1条内容

所有评论(0)