OpenCV实现OCR(光学字符识别)
opencv
OpenCV: 开源计算机视觉库
项目地址:https://gitcode.com/gh_mirrors/opencv31/opencv
·
简介:
随着计算机视觉技术的不断发展,OCR(光学字符识别)技术已经越来越成熟。OCR技术可以识别图像中的文本信息,并将其转换为可编辑的文本格式,为各种应用场景提供了便利。本文将介绍如何使用OpenCV库实现摄像头OCR。
步骤:
1.安装OpenCV库
首先,需要安装OpenCV库。可以通过pip命令在Python环境中安装OpenCV库。在命令行中输入以下命令即可安装:
pip install opencv-python
2.捕获摄像头数据
使用OpenCV库可以很方便地捕获摄像头的视频流。在Python中,可以使用以下代码来打开摄像头并读取视频流:
import cv2

cap = cv2.VideoCapture(0) # 使用默认摄像头
while True:
    ret, frame = cap.read() # 读取一帧图像
    if not ret:
        break
    cv2.imshow('frame', frame)
    if cv2.waitKey(1) == ord('q'): # 按q键退出
        break
cap.release()
cv2.destroyAllWindows()
3.图像预处理
在进行OCR之前,需要对图像进行预处理,以提高OCR的准确性。常见的预处理操作包括灰度化、二值化、降噪、膨胀/腐蚀等。以下是一个示例代码,展示如何进行灰度化和二值化操作:
gray = cv2.cvtColor(frame, cv2.COLOR_BGR2GRAY) # 灰度化
_, binary = cv2.threshold(gray, 150, 255, cv2.THRESH_BINARY_INV) # 二值化
4.文本定位
在进行OCR之前,需要定位图像中的文本区域。可以使用OpenCV的一些算法来实现文本定位。例如,使用MSER算法可以检测图像中的文本区域。以下是一个示例代码,展示如何使用MSER算法定位文本:
import cv2
import pytesseract
from PIL import Image

# 设置Tesseract的路径
pytesseract.pytesseract.tesseract_cmd = r'C:\Program Files\Tesseract-OCR\tesseract.exe' # 根据你的Tesseract安装路径进行修改

# 读取图像
img = cv2.imread('test.jpg')

# 转换为灰度图像
gray = cv2.cvtColor(img, cv2.COLOR_BGR2GRAY)

# 使用MSER算法检测文本区域
mser = cv2.ximgproc.segmentation.createMSER().detectRegions(gray)

# 遍历所有检测到的区域
for i in range(len(mser)):
    # 获取区域的边界框
    x, y, w, h = mser[i].boundingRect()
    # 在原图上绘制边界框
    cv2.rectangle(img, (x, y), (x+w, y+h), (0, 255, 0), 1)

# 显示图像
cv2.imshow('img', img)
cv2.waitKey(0)
cv2.destroyAllWindows()
5.OCR识别
最后,使用OCR库对定位到的文本区域进行字符识别。可以使用Tesseract OCR引擎进行识别。以下是一个示例代码,展示如何使用Tesseract进行OCR识别:
# 对定位到的文本区域进行OCR识别
text = pytesseract.image_to_string(binary, lang='eng')
print(text)
总结:
使用OpenCV实现摄像头OCR需要进行图像预处理、文本定位和OCR识别等操作。通过合理的预处理和参数调整,可以提高OCR的准确性。
完整代码展示
下面我们用自定义的函数来完成这个步骤:
# -*- coding: utf-8 -*-
# @Time : 2023/10/23 10:27
# @Author :Muzi
# @File : 摄像头OCR.py
# @Software: PyCharm
# 导入工具包
import numpy as np
import cv2


def cv_show(name, img):
    cv2.imshow(name, img)
    cv2.waitKey(120)


def order_points(pts):
    # 一共4个坐标点
    rect = np.zeros((4, 2), dtype="float32")

    # 按顺序找到对应坐标0123分别是 左上,右上,右下,左下
    # 计算左上,右下
    s = pts.sum(axis=1)
    rect[0] = pts[np.argmin(s)]
    rect[2] = pts[np.argmax(s)]

    # 计算右上和左下
    diff = np.diff(pts, axis=1)
    rect[1] = pts[np.argmin(diff)]
    rect[3] = pts[np.argmax(diff)]

    return rect


def four_point_transform(image, pts):
    # 获取输入坐标点
    rect = order_points(pts)
    (tl, tr, br, bl) = rect

    # 计算输入的w和h值
    widthA = np.sqrt(((br[0] - bl[0]) ** 2) + ((br[1] - bl[1]) ** 2))
    widthB = np.sqrt(((tr[0] - tl[0]) ** 2) + ((tr[1] - tl[1]) ** 2))
    maxWidth = max(int(widthA), int(widthB))

    heightA = np.sqrt(((tr[0] - br[0]) ** 2) + ((tr[1] - br[1]) ** 2))
    heightB = np.sqrt(((tl[0] - bl[0]) ** 2) + ((tl[1] - bl[1]) ** 2))
    maxHeight = max(int(heightA), int(heightB))

    # 变换后对应坐标位置
    dst = np.array([
        [0, 0],
        [maxWidth - 1, 0],
        [maxWidth - 1, maxHeight - 1],
        [0, maxHeight - 1]], dtype="float32")

    # 计算变换矩阵
    M = cv2.getPerspectiveTransform(rect, dst)
    warped = cv2.warpPerspective(image, M, (maxWidth, maxHeight))

    # 返回变换后结果
    return warped


def resize(image, width=None, height=None, inter=cv2.INTER_AREA):
    dim = None
    (h, w) = image.shape[:2]
    if width is None and height is None:
        return image
    if width is None:
        r = height / float(h)
        dim = (int(w * r), height)
    else:
        r = width / float(w)
        dim = (width, int(h * r))
    resized = cv2.resize(image, dim, interpolation=inter)
    return resized


# 读取输入

import cv2

cap = cv2.VideoCapture(0)  # 确保摄像头是可以启动的状态。
if not cap.isOpened():  # 打开失败
    print("Cannot open camera")
    exit()

while True:
    flag = 0  # 用于标识 当前是否检测到文档
    ret, image = cap.read()  # 如果正确读取帧,ret为True
    orig = image.copy()
    if not ret:  # 读取失败,则退出循环
        print("不能读取摄像头")
        break  #
    cv_show("image", image)

    gray = cv2.cvtColor(image, cv2.COLOR_BGR2GRAY)  # 图像处理-转换为灰度图
    # 预处理
    gray = cv2.GaussianBlur(gray, (5, 5), 0)  # 高斯滤波
    edged = cv2.Canny(gray, 75, 200)

    # 轮廓检测
    cnts = cv2.findContours(edged.copy(), cv2.RETR_EXTERNAL, cv2.CHAIN_APPROX_SIMPLE)[0]

    cnts = sorted(cnts, key=cv2.contourArea, reverse=True)[:3]
    image_contours = cv2.drawContours(image, cnts, -1, (0, 255, 0), 2)
    cv_show("image_contours", image_contours)

    # 遍历轮廓
    for c in cnts:
        # 计算轮廓近似
        peri = cv2.arcLength(c, True)
        # C表示输入的点集
        # epsilon表示从原始轮廓到近似轮廓的最大距离,它是一个准确度参数
        # True表示封闭的
        approx = cv2.approxPolyDP(c, 0.05 * peri, True)  # 轮廓近似
        area = cv2.contourArea(approx)
        # 4个点的时候就拿出来
        if area > 20000 and len(approx) == 4:
            screenCnt = approx
            flag = 1
            print(peri, area)
            print('检测到文档')
            break

    if flag == 1:
        # 展示结果
        # print("STEP 2: 获取轮廓")
        image_contours = cv2.drawContours(image, [screenCnt], 0, (0, 255, 0), 2)
        cv_show("image", image_contours)

        # 透视变换
        warped = four_point_transform(orig, screenCnt.reshape(4, 2))
        cv_show("warped", warped)

        # 二值处理
        warped = cv2.cvtColor(warped, cv2.COLOR_BGR2GRAY)
        ref = cv2.threshold(warped, 220, 255, cv2.THRESH_BINARY)[1]
        cv_show("ref", ref)
    key_pressed = cv2.waitKey(100)
    if key_pressed == 27:#如果按下esc键,就退出循环
        break

cap.release()  # 释放捕获器
cv2.destroyAllWindows()  # 关闭图像窗口
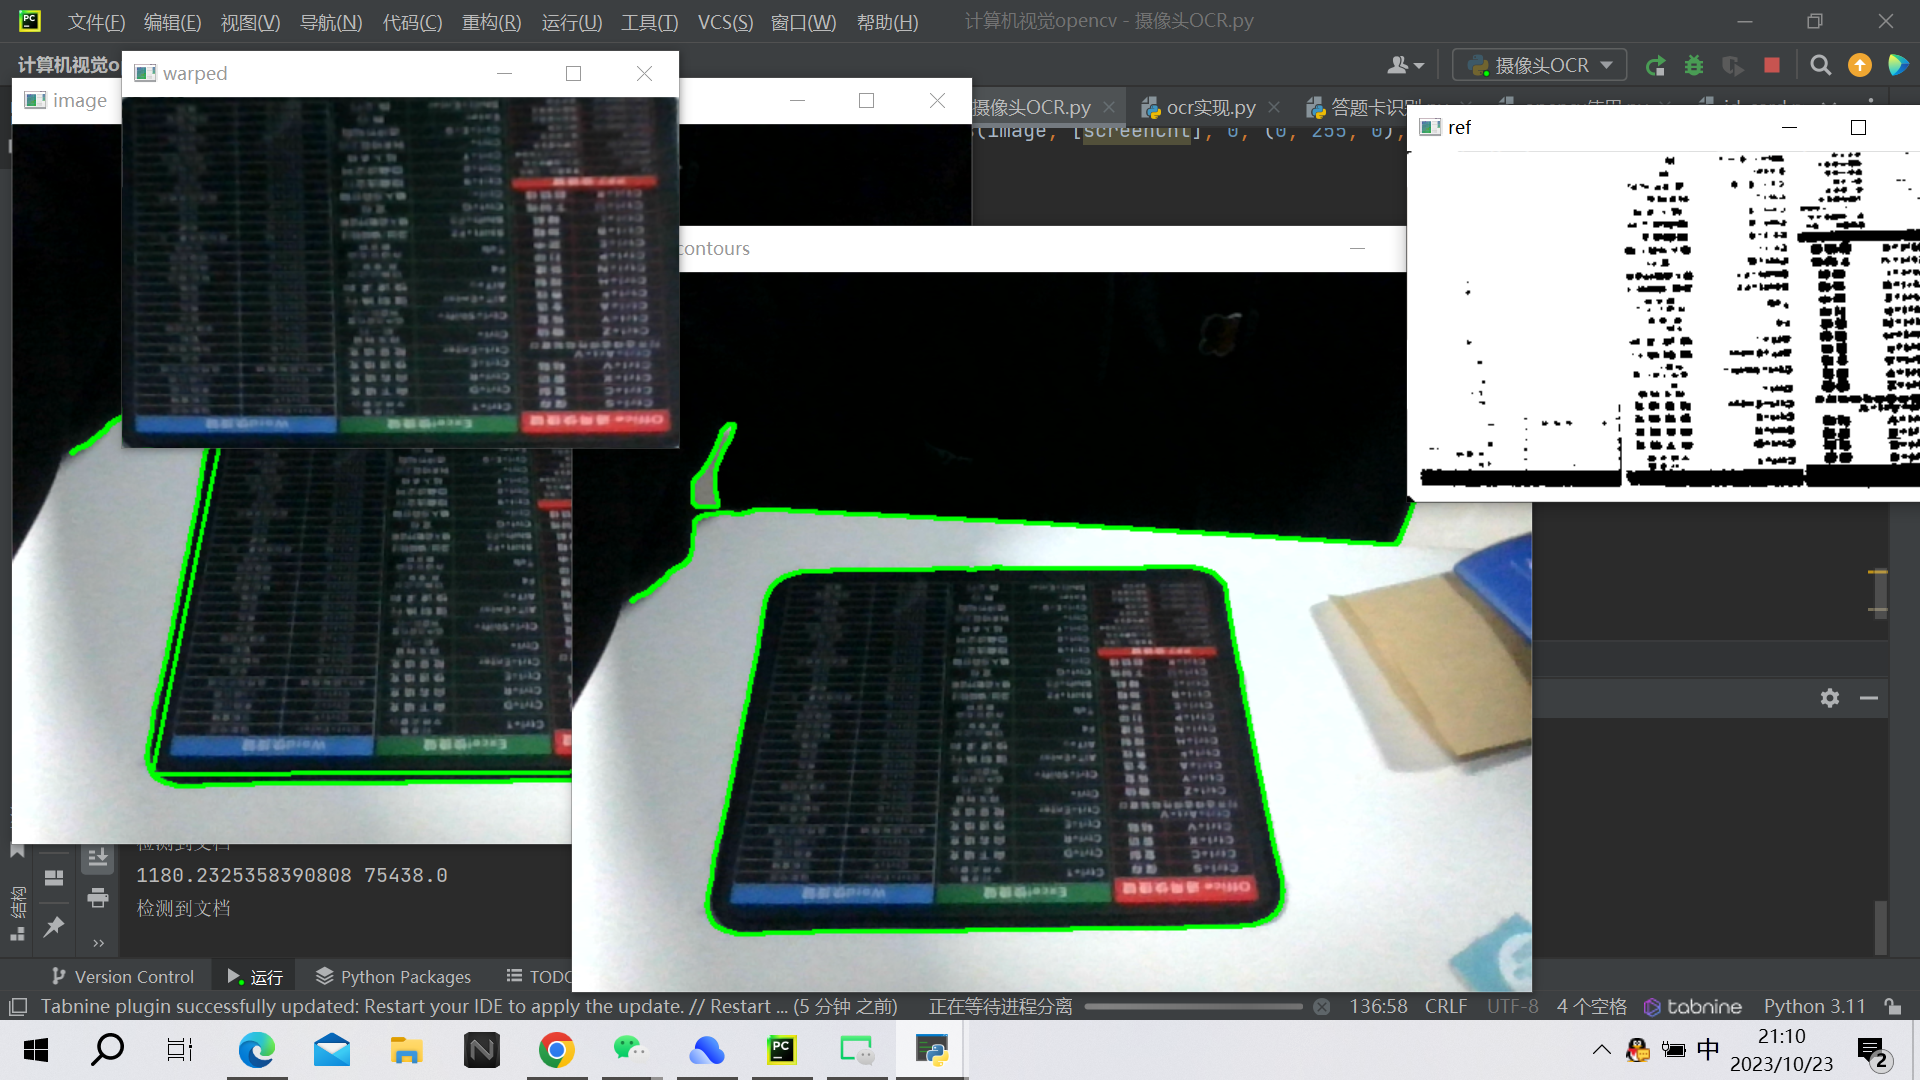
结果展示:

OpenCV: 开源计算机视觉库
最近提交(Master分支:6 个月前 )
60924999
replace tostring() with tobytes() 9 天前
b5c3b706
Removed Android test as it's broken for now 9 天前
更多推荐
 已为社区贡献36条内容


所有评论(0)