VUE使用Three.js实现小车模型沿固定路线行驶(含模型导入格式如glb、gltf和obj,含源码)
·
目录
九、源码地址(代码很多地方写的比较丑陋,可自行更改和封装,请嘴下留情谢谢)
一、模板和样式
<template>
  <div class="container">
    <div id="model"></div>
  </div>
</template>

<style scoped>
.container {
  width: 1920px;
  height: 1080px;
  position: relative;
  background-color: rgb(83, 83, 83);
}
</style>
二、引入three.js库和组件
import * as THREE from "three";
import { OBJLoader } from "three/examples/jsm/loaders/OBJLoader.js";
import { GLTFLoader } from "three/examples/jsm/loaders/GLTFLoader";
三、定义单文件名称和定义全局变量
这里的publicPath在加载模型时要用到
name: "ThreeModel",
  data() {
    return {
      publicPath: process.env.BASE_URL,
      mesh: null,
      camera: null,
      scene: null,
      renderer: null,
      carMovePath: null,
      shperePathIndex: [1001, 666, 333],
      meshArr: [],
    };
  },
四、创建场景、光源、相机、相机和根据浏览器窗口自适应
是否需要根据浏览器窗口自适应取决于个人
// 创建场景
createScene() {
    this.scene = new THREE.Scene();
},

// 创建光源
createLight() {
    // 环境光
    const ambientLight = new THREE.AmbientLight(0x111111); // 创建环境光
    this.scene.add(ambientLight); // 将环境光添加到场景
    const directionLight = new THREE.DirectionalLight(0xffffff);
    directionLight.position.set(-20, 30, 40);
    directionLight.intensity = 1.5;
    this.scene.add(directionLight);
},

// 创建相机
createCamera() {
    this.camera = new THREE.PerspectiveCamera(
        45,
        window.innerWidth / window.innerHeight,
        0.1,
        50000
    );
    this.camera.position.set(0, 700, 1000); // 设置相机位置
    this.camera.lookAt(new THREE.Vector3(0, 0, 0)); // 设置相机方向
    this.scene.add(this.camera);
},

//根据浏览器窗口自适应
onWindowResize() {
    this.cssRender.setSize(window.innerWidth, window.innerHeight);
    this.renderer.setSize(window.innerWidth, window.innerHeight);
    this.camera.aspect = window.innerWidth / window.innerHeight;
    this.camera.updateProjectionMatrix();
},

// 创建渲染器
createRender() {
    this.renderer = new THREE.WebGLRenderer({ antialias: true, alpha: true });
    this.renderer.setSize(window.innerWidth, window.innerHeight); // 设置渲染区域尺寸
    this.renderer.setClearColor(0x000000, 0); // 设置背景颜色
    document.getElementById("model").appendChild(this.renderer.domElement);
}
五、创建模型
首先生成一条环形的平滑曲线(根据个人修改),因为我是三个小车,所以我截取曲线的1000个点,并将小车均匀分布即(i*333)。
这里需要注意的是,我们的模型必须放在public文件夹下,我这里在public下创建了一个models。
然后就是载入模型的方式,glb相较于gltf跟obj,体积更小更快渲染,而且二者使用的loder组件也不同,gltf和glb使用GLTFLoader,而obj使用OBJLoader,同时在配置上也有所不同,具体请看代码。
// 创建模型
createModels() {
    //   let axes = new THREE.AxesHelper(6000);
    //   this.scene.add(axes);
    //使用指定的点创建一条平滑的三维样条曲线当做小车运动路径
    this.carMovePath = new THREE.CatmullRomCurve3(
        [
            new THREE.Vector3(-300, 40, 200),
            new THREE.Vector3(300, 40, 200),
            new THREE.Vector3(300, 40, -200),
        ],
        true
    );
    //参考路径上取1000个点,可以将模型安置在某个点位上
    const pathPoints = this.carMovePath.getPoints(1000);
    const THIS = this;

    // 引入三维模型(glb或者gltf格式)
    const loader = new GLTFLoader();
    for (let i = 0; i < 3; i++) {
        loader.load(`${THIS.publicPath}models/car.glb`, (glb) => {
            this.meshArr[i] = glb.scene.children[0].children[0];
            //这里就是将模型安置在i*333这个点位上
            this.meshArr[i].position.set(
                pathPoints[i * 333].x,
                pathPoints[i * 333].y,
                pathPoints[i * 333].z
            );
            //设置模型大小
            this.meshArr[i].scale.set(0.06, 0.06, 0.06);
            this.scene.add(this.meshArr[i]);
            this.renderer.render(this.scene, this.camera);
        });
    }
    // //引入三维模型(obj格式)
    // const loader = new OBJLoader();
    // for (let i = 0; i < 3; i++) {
    //   loader.load(`${THIS.publicPath}models/robot.obj`, (loadedMesh) => {
    //     // 创建材质
    //     const material = new THREE.MeshLambertMaterial({
    //       color: 0x6699ff,
    //     });
    //     // 给几何体成员赋该材质
    //     loadedMesh.children.forEach((child) => {
    //       child.material = material;
    //       child.geometry.computeVertexNormals();
    //     });
    //     //设置模型大小
    //     loadedMesh.scale.set(35, 35, 35);
    //     this.meshArr[i] = loadedMesh;
    //     //这里就是将模型安置在i*333这个点位上
    //     this.meshArr[i].position.set(
    //         pathPoints[i * 140].x,
    //         pathPoints[i * 140].y,
    //         pathPoints[i * 140].z
    //      );
    //      this.scene.add(this.meshArr[i]);
    //   });
    // }

    //绘制一条路径参考线(根据个人需求,可以注释或删除不显示)
    const geometry = new THREE.BufferGeometry().setFromPoints(pathPoints);
    const material = new THREE.LineBasicMaterial({
        color: 0xf00,
        linewidth: 1,
    });
    const curveObject = new THREE.Line(geometry, material);
    this.scene.add(curveObject);
}六、渲染效果(配置)
渲染效果主要要解决模型做曲线运动时,模型的朝向是与弧线相切的,这样看起来模型才是围绕着曲线运动
//渲染效果(配置)
render() {
    //参考路径的索引由每个汽车的位置逐渐向0减少,然后又设为1001使其做往复运动
    if (this.shperePathIndex[0] === 0) {
        this.shperePathIndex[0] = 1001;
    }
    if (this.shperePathIndex[1] === 0) {
        this.shperePathIndex[1] = 1001;
    }
    if (this.shperePathIndex[2] === 0) {
        this.shperePathIndex[2] = 1001;
    }
    this.shperePathIndex[1] -= 1;
    this.shperePathIndex[0] -= 1;
    this.shperePathIndex[2] -= 1;
    // 设置小车的位置为参考路径上当前点的位置
    if (this.meshArr[0]) {
        //取相参考径上当前点的坐标
        const sphereCurveIndex = this.shperePathIndex[0] / 1000; //取值0~1
        const tmpSpherePosition = this.carMovePath.getPointAt(sphereCurveIndex);
        this.meshArr[0].position.set(
            tmpSpherePosition.x,
            tmpSpherePosition.y,
            tmpSpherePosition.z
        );
        //这个部分是处理小车的模型始终与切线相切,这样就能让小车始终围绕曲线中心运动
        // 当前点在线条上的位置
        this.meshArr[0].position.copy(tmpSpherePosition);
        // 返回一个点t在曲线上位置向量的法线向量
        const tangent = this.carMovePath.getTangentAt(sphereCurveIndex);
        // 位置向量和切线向量相加即为所需朝向的点向量
        const lookAtVec = tangent.add(tmpSpherePosition);
        this.meshArr[0].lookAt(lookAtVec);
    }
    if (this.meshArr[1]) {
        //取相参考径上当前点的坐标
        const sphereCurveIndex = this.shperePathIndex[1] / 1000; //取值0~1
        const tmpSpherePosition = this.carMovePath.getPointAt(sphereCurveIndex);
        this.meshArr[1].position.set(
            tmpSpherePosition.x,
            tmpSpherePosition.y,
            tmpSpherePosition.z
        );
        //这个部分是处理小车的模型始终与切线相切,这样就能让小车始终围绕曲线中心运动
        // 当前点在线条上的位置
        this.meshArr[1].position.copy(tmpSpherePosition);
        // 返回一个点t在曲线上位置向量的法线向量
        const tangent = this.carMovePath.getTangentAt(sphereCurveIndex);
        // 位置向量和切线向量相加即为所需朝向的点向量
        const lookAtVec = tangent.add(tmpSpherePosition);
        this.meshArr[1].lookAt(lookAtVec);
    }
    if (this.meshArr[2]) {
        //取相参考径上当前点的坐标
        const sphereCurveIndex = this.shperePathIndex[2] / 1000; //取值0~1
        const tmpSpherePosition = this.carMovePath.getPointAt(sphereCurveIndex);
        this.meshArr[2].position.set(
            tmpSpherePosition.x,
            tmpSpherePosition.y,
            tmpSpherePosition.z
        );
        //这个部分是处理小车的模型始终与切线相切,这样就能让小车始终围绕曲线中心运动
        // 当前点在线条上的位置
        this.meshArr[2].position.copy(tmpSpherePosition);
        // 返回一个点t在曲线上位置向量的法线向量
        const tangent = this.carMovePath.getTangentAt(sphereCurveIndex);
        // 位置向量和切线向量相加即为所需朝向的点向量
        const lookAtVec = tangent.add(tmpSpherePosition);
        this.meshArr[2].lookAt(lookAtVec);
    }
    //统一改变模型车头车尾的方向,使车头朝前(可以注释掉看一下)
    this.meshArr.forEach((item) => {
        item.rotateY(Math.PI);
    });
    this.renderer.render(this.scene, this.camera);
    requestAnimationFrame(this.render);
}
七、mounted渲染页面
init() {
      this.createScene(); // 创建场景
      this.createModels(); // 创建模型
      this.createLight(); // 创建光源
      this.createCamera(); // 创建相机
      this.createRender(); // 创建渲染器
      this.render(); // 渲染
      window.onresize = this.onWindowResize;
    },
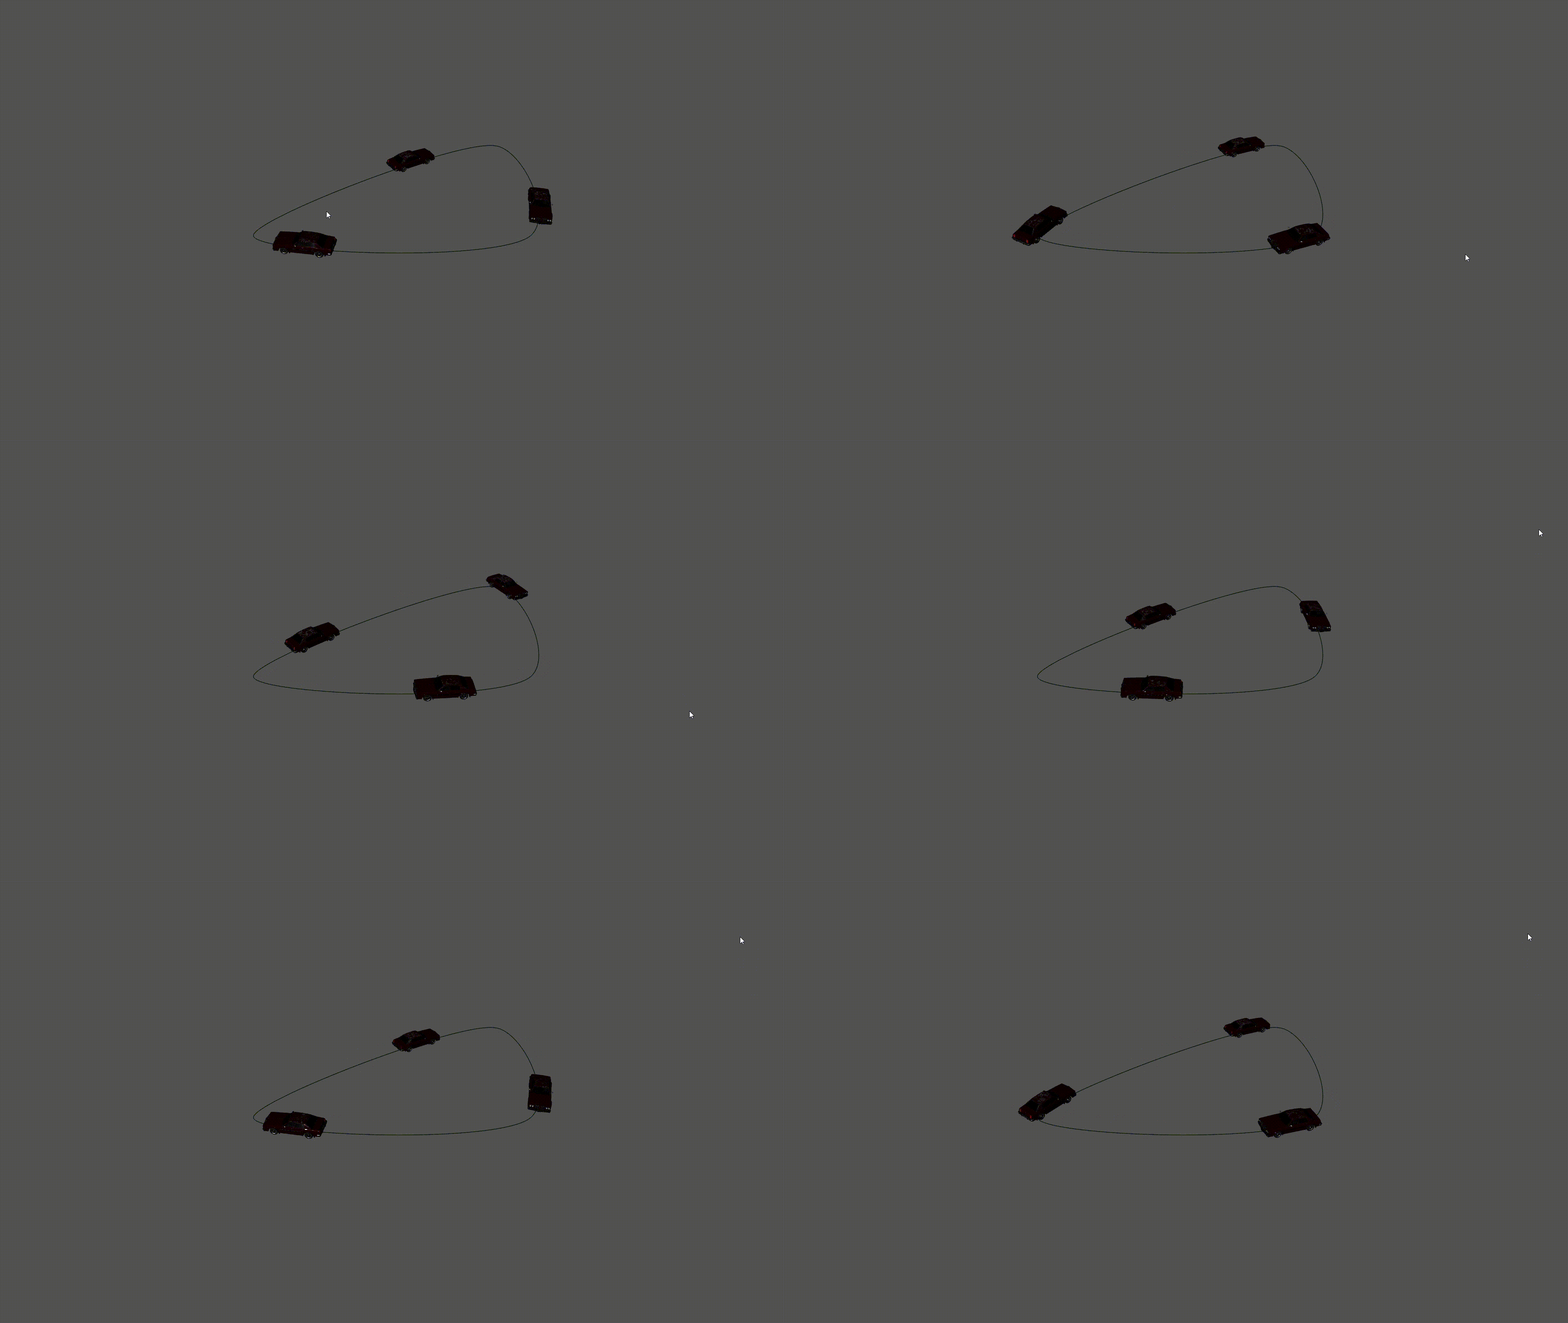
八、效果展示

九、源码地址(代码很多地方写的比较丑陋,可自行更改和封装,请嘴下留情谢谢)
三维模型小车移动: 使用Three.js实现小车模型沿固定路线行驶(含模型导入格式如glb、gltf和obj) https://gitee.com/halsixsixsix/car-move.git
更多推荐
 已为社区贡献3条内容


所有评论(0)