VScode 结合Global构建linux源代码阅读环境
1、背景介绍
上一篇文章:VScode ssh远程登陆到服务器阅读代码 ,介绍了在VSCode工具中使用SSH远程登陆服务器加载Linux源代码,本文向大家介绍使用Global构建linux源代码阅读环境,对linux kernel代码进行解析,实现全局搜索、自动跳转、代码补全等功能。
2、加载代码
VS Code中使用SSH登陆到服务器后,点击“打开文件夹”打开linux kernel源代码:

打开源代码后效果如下:

3、过滤文件
打开源代码胡,从左侧的资源管理器中可以查看相关的文件,包含了kernel源代码所有的文件,其中部分文件比如:*.o文件、.*文件等跟代码不相关的,可以配置过滤掉跟源代码不相关的文件,使其不显示出来。
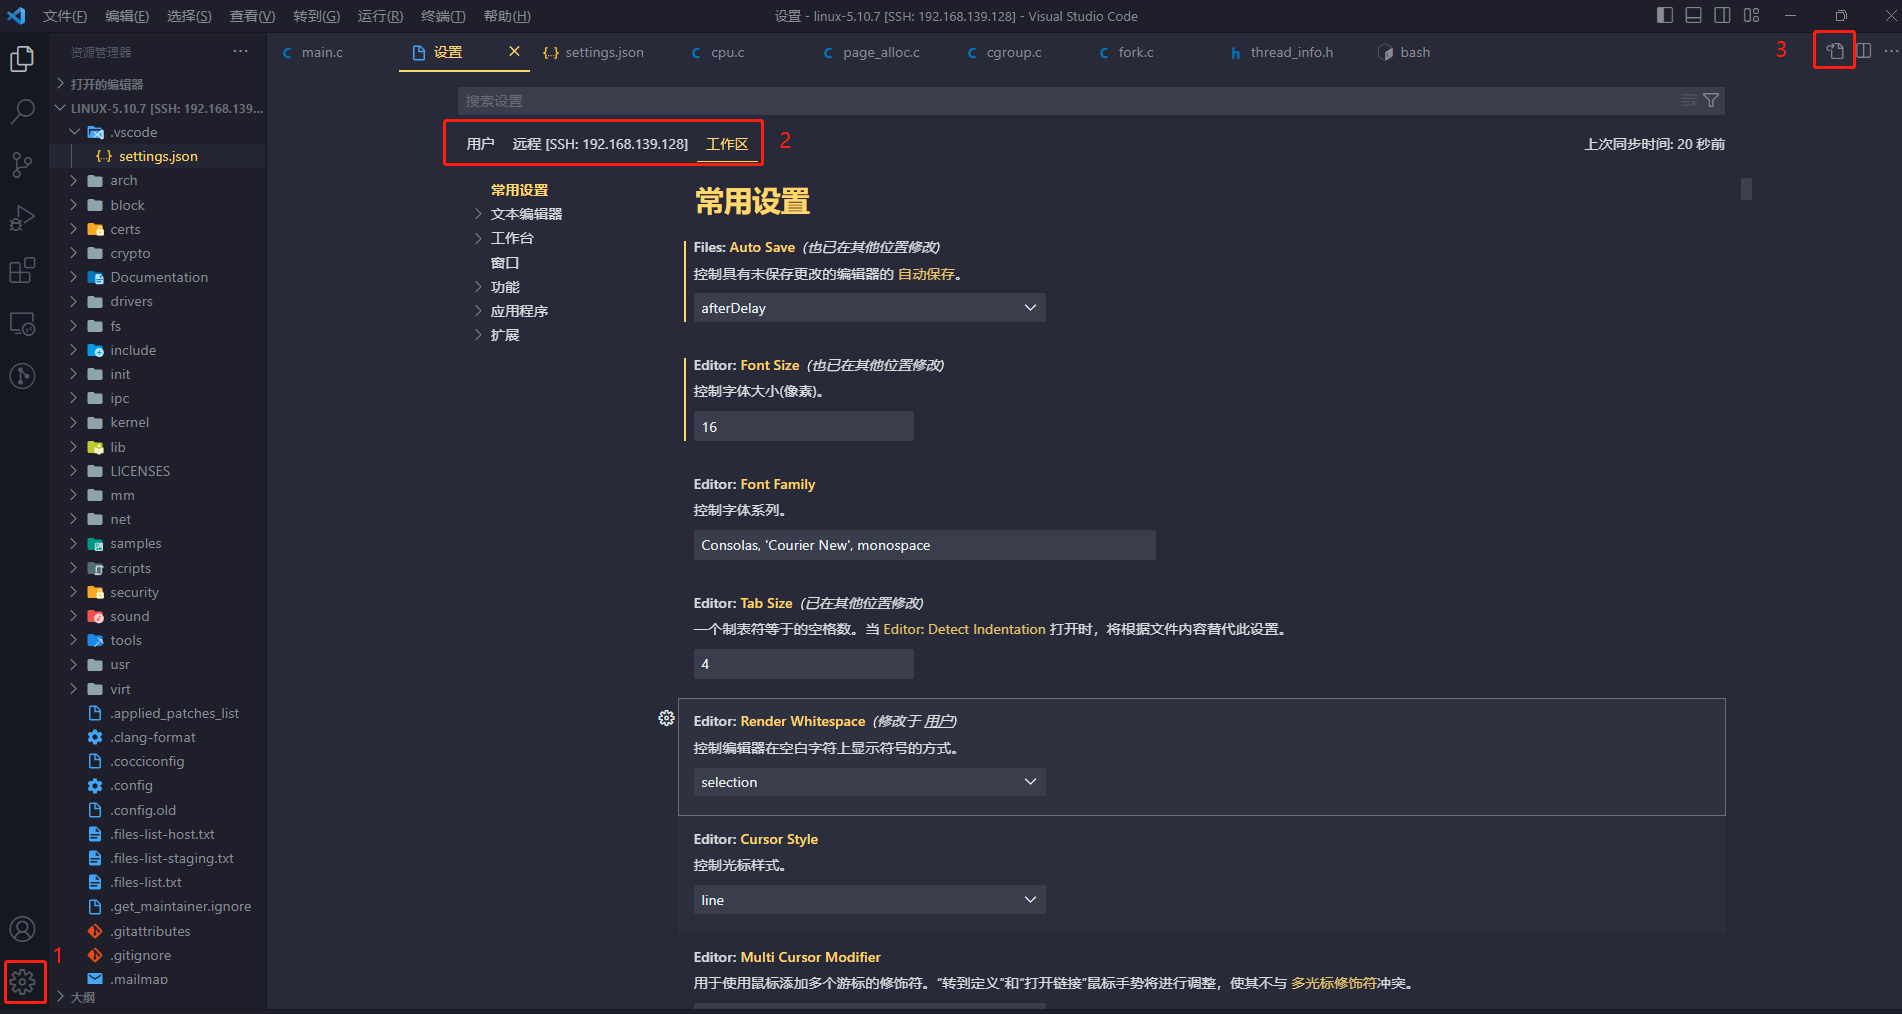
如上图所示,点击左下角的配置按钮->设置,进入设置界面,VS Code的设置分为三个层级:用户、SSH远程、工作区,层级会依次进行配置覆盖,代码过滤是跟代码工程相关,所有这里配置到工作区配置里面;图示是可视化的配置界面,也可以通过点击上图右上角标注的数字“3”所示区域图标打开文本配置,如下图所示:

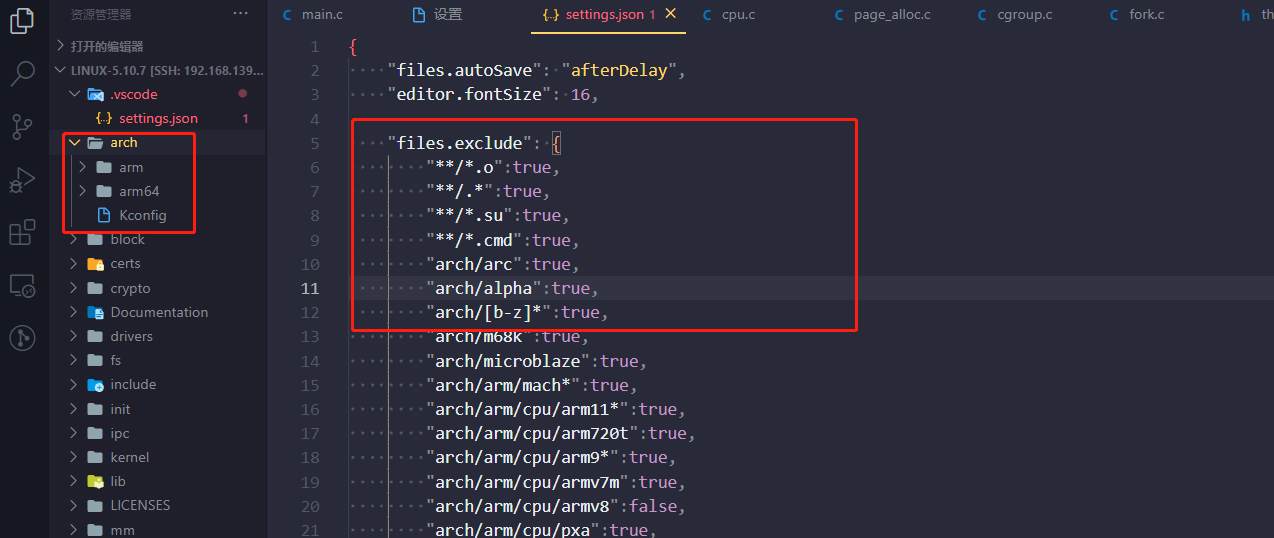
配置文件过滤使其不显示出来,在工作区的 setting.json 中添加如下配置:
/* files.exclude 表明不包含在工作区中,在vscode中不显示出来*/
    "files.exclude": {
        /*true:不显示出来;false:显示出来*/
        "**/*.o":true,
        "**/.*":true,
        "**/*.su":true,
        "**/*.cmd":true,
        /* 屏蔽不用的架构相关的文件 */
        "arch/arc":true,
        "arch/alpha":true,
        "arch/[b-z]*":true,

        "board/[a-e]*":true,
        "board/[g-z]*":true,
        "board/[0-9]*":true,
        "board/[A-Z]*":true,
        "board/fir*":true,
        "board/freescale/b*":true,
        "board/freescale/l*":true,
        "board/freescale/m5*":true,
        "board/freescale/mp*":true,
        "board/freescale/c29*":true,
        "board/freescale/cor*":true,
        "board/freescale/mx7*":true,
        "board/freescale/mx2*":true,
        "board/freescale/mx3*":true,
        "board/freescale/mx5*":true,
        "board/freescale/p*":true,
        "board/freescale/q*":true,
        "board/freescale/t*":true,
        "board/freescale/v*":true,
        "configs/[a-l]*":true,
        "configs/[n-z]*":true,
        "configs/[A-Z]*":true,
        "configs/M[a-z]*":true,
        "configs/M[A-Z]*":true,
        "configs/M[0-9]*":true,
        "configs/m[a-w]*":true,
        "configs/m[0-9]*":true,
        "configs/[0-9]*":true,
        "include/configs/[a-l]*":true,
        "include/configs/[n-z]*":true,
        "include/configs/[A-Z]*":true,
        "include/configs/m[a-w]*":true,
    },
    /* search.exclude 表明不搜索的文件*/
    "search.exclude": {
        "**/node_modules": true,
        "**/bower_components": true,
        "**/*.o":true,
        "**/.*":true,
        "**/*.su":true,
        "**/*.cmd":true,
        "Documentation":true,

        /* 屏蔽不用的架构相关的文件 */
        "arch/arc":true,
        "arch/alpha":true,
        "arch/[b-z]*":true,
    },
效果如下所示,配置后Linux kernel 源代码arch目录下只显示arm\arm64 两个目录:
4、代码检索
接下来介绍使用Global工具实现对linux kernel的搜索、自动跳转功能。
4.1、安装Global
首先在VS code 安装 global插件:C/C++ GNU Global
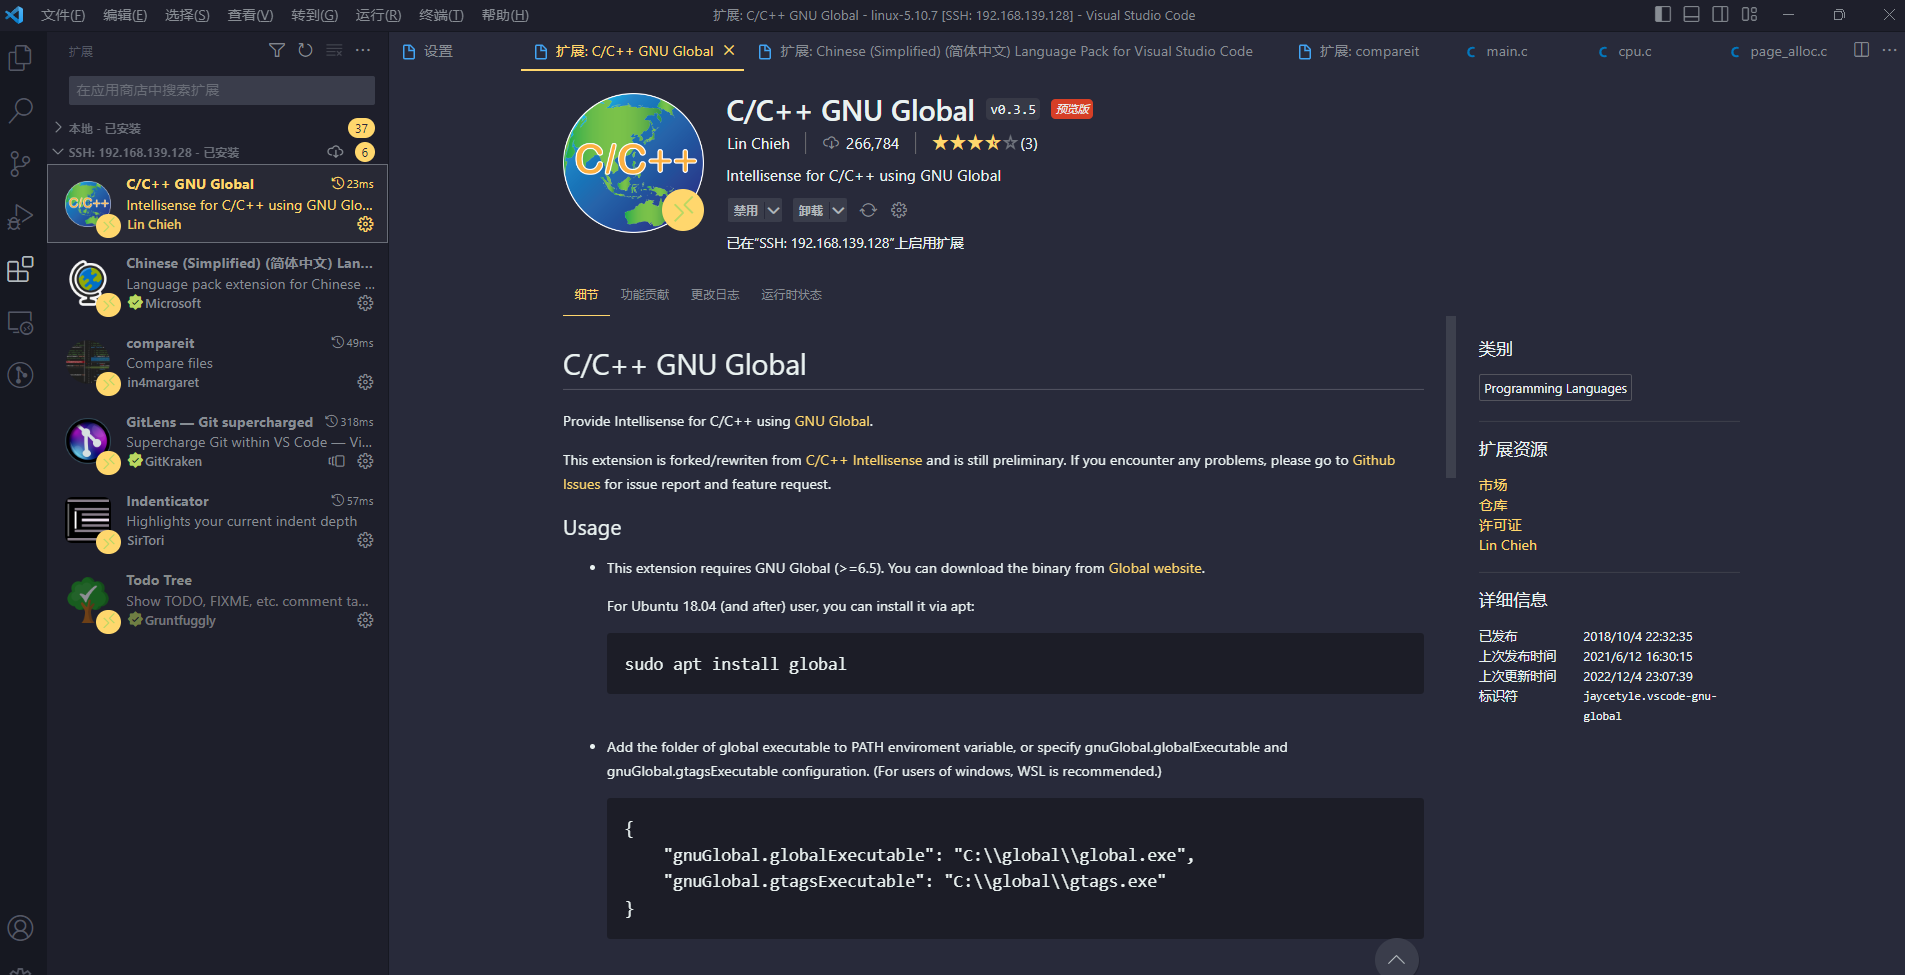
然后在服务器上安装global工具(ubuntu服务器举例):sudo apt install global
安装完成后在linux服务器上使用命令查找安装路径:which is global、which is gtags
$ which is global
/usr/bin/global
$ which is gtags
/usr/bin/gtags
4.2、配置Global
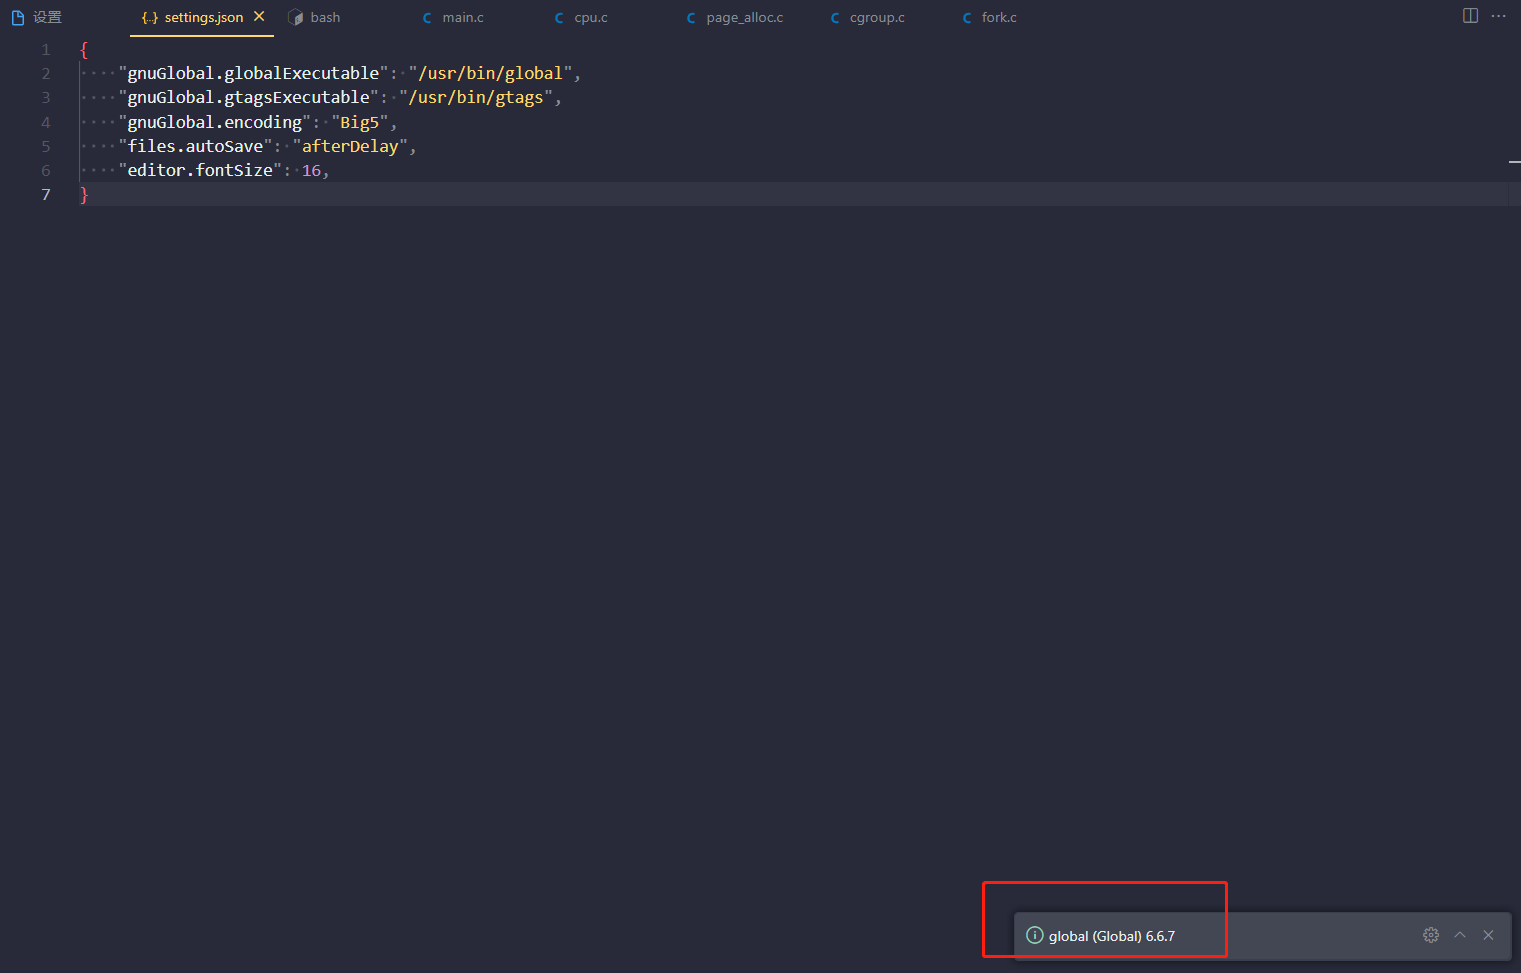
在VS code 中需要对Global进行配置,上文提到VS code 的配置文件分级情况,由于global跟服务器绑定所以配置到SSH 远程 setting.json 配置文件中:
    "gnuGlobal.globalExecutable": "/usr/bin/global",
    "gnuGlobal.gtagsExecutable": "/usr/bin/gtags",
    "gnuGlobal.encoding": "Big5",
PS:VS code 在配置成中文语言时,需要配置 "gnuGlobal.encoding": "Big5",不然会报错:Failed to get GNU Global version。
配置完成后,在VS code 中按 “F1”键,输入global,选择 Show GNU Global Version,右下角如果右消息提示 global 的版本信息,那么global则安装成功:

4.3、使用Global
VS code 中按 “F1”键,输入global,选择 Global: Rebuild Gtags Database,稍等片刻消息提示:Build tag files successfull,那么global解析linux kernel源代码完成,在文件目录下会生成:GPATH、GRTAGS 、GTAGS 3个文件。
打开任意代码文件,选择相关函数或者变量,使用快捷键: CTRL+鼠标左键(或者F12),实现函数定义的跳转查询,跳转以后使用快捷键:ALT+左键头 返回;
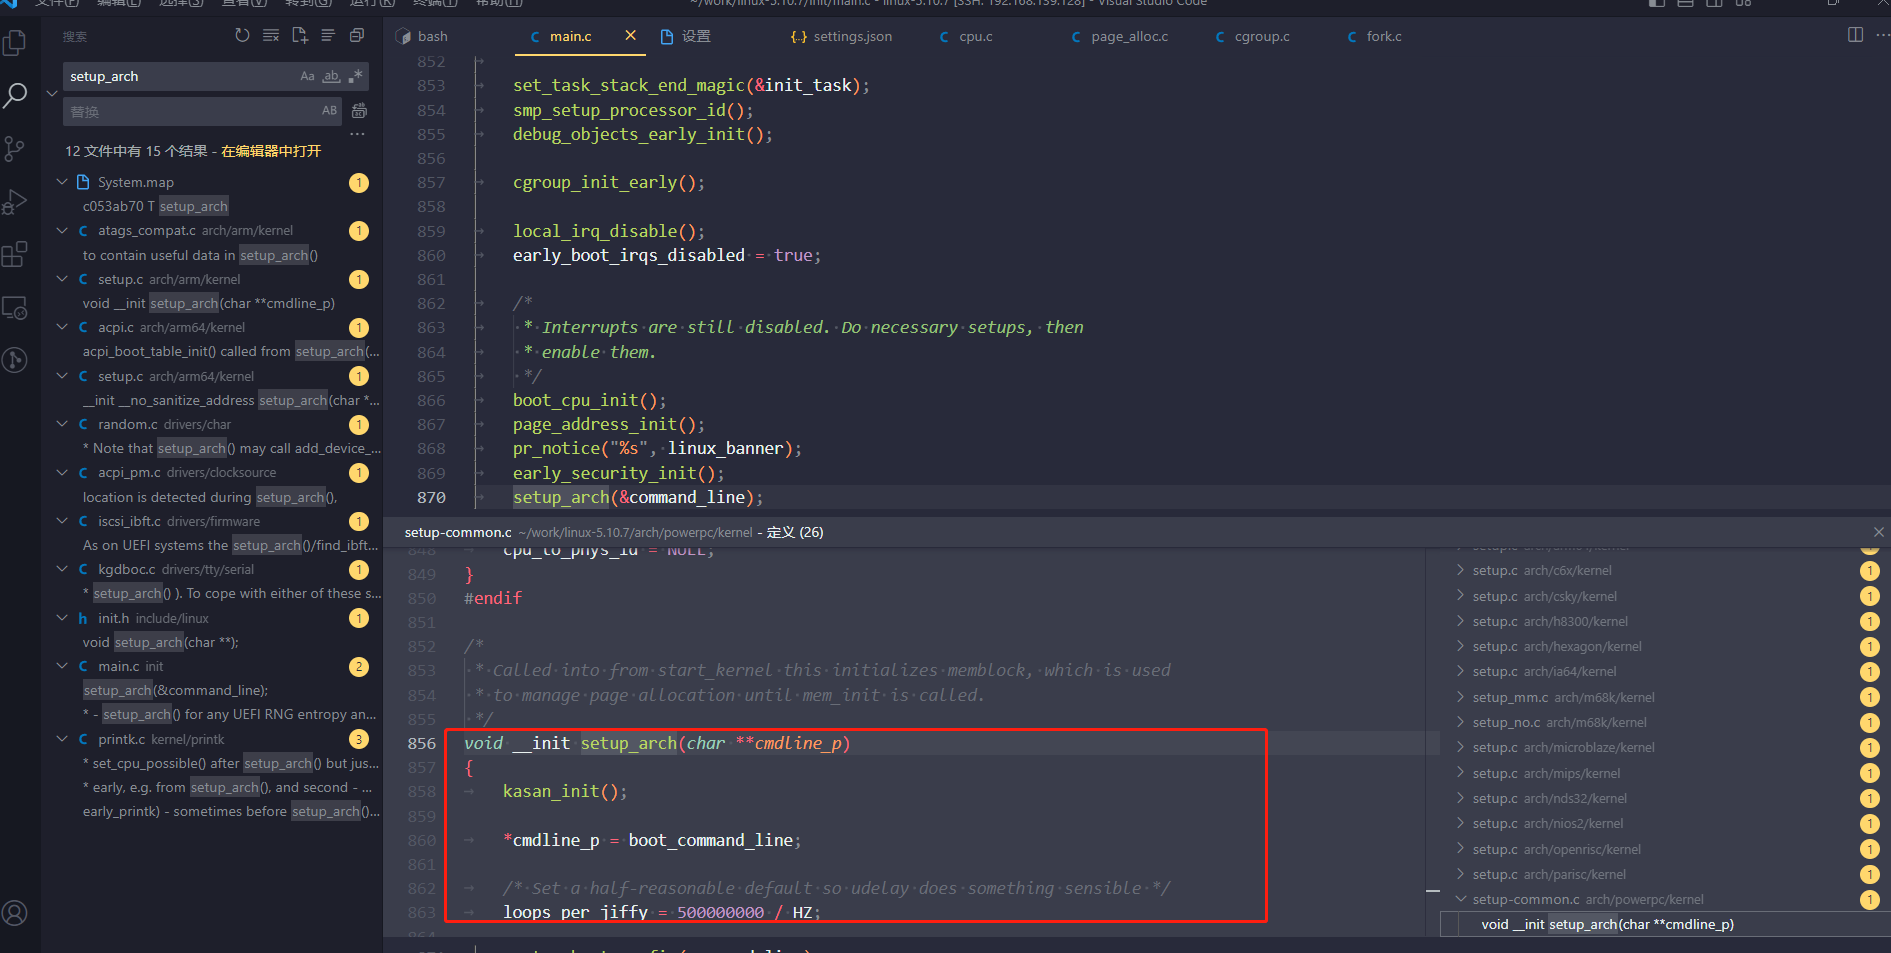
这样就可以对linux kernel 代码进行愉快的探索了................
5、后记
使用VS Code + global工具对Linux kernel代码建立索引,实现全局搜索、自动跳转、代码补全等功能,能够愉快的阅读Linux kernel源代码了。但是Global工具在建立代码索引数据时,将整个Linux源代码都进行了数据检索分析,这样会有很多重复的定义和声明,不够智能,不够方便,下一步将介绍使用VS code +clangd 中实现根据编译文件来建立索引数据解决此问题:
更多推荐
 已为社区贡献4条内容


所有评论(0)