
Elasticsearch:使用 Streamlit、语义搜索和命名实体提取开发 Elastic Search 应用程序
一切都是一个搜索问题。我在 Elastic 工作的第一周就听到有人说过这句话,从那时起,这句话就永久地印在了我的脑海中。这篇博客的目的并不是我出色的同事对我所做的相关陈述进行分析,但我首先想花点时间剖析一下这个陈述。自成立以来,Elasticsearch 一直处于技术前沿 - 打破软件领域的模式,为世界各地家喻户晓的公司的技术支柱提供动力。我们倾向于将 Elastic 的产品分为几个 “OTB”
介绍
一切都是一个搜索问题。 我在 Elastic 工作的第一周就听到有人说过这句话,从那时起,这句话就永久地印在了我的脑海中。 这篇博客的目的并不是我出色的同事对我所做的相关陈述进行分析,但我首先想花点时间剖析一下这个陈述。
自成立以来,Elasticsearch 一直处于技术前沿 - 打破软件领域的模式,为世界各地家喻户晓的公司的技术支柱提供动力。 我们倾向于将 Elastic 的产品分为几个 “OTB” 解决方案 - 安全性、可观察性等,但剥离这些,我们正在解决的问题基本上是面向搜索的。 它是关于能够询问你的数据问题并返回有意义且相关的结果,无论横幅如何,正是这一点使 Elastic 成为一项如此强大的技术。
作为对搜索的颂歌和 Elastic 的一些功能的展示,本博客将带你完成搜索应用程序的端到端开发,使用机器学习模型进行命名实体提取 (NER) 和语义搜索; 将 Elastic 和非 Elastic 组件结合起来,并通过简单的 UI 对它们进行分层,以展示搜索的强大功能。
该指南专为与 Elastic Cloud 一起使用而设计,但是,相同的方法也可以应用于本地托管的实例,只需更改身份验证方法和其他特定于云的概念。 完整的 git 存储库位于:Kibana Search Project
涵盖的主题
- Logstash
- 摄取管道
- ELSER
- 自定义机器学习模型
- Streamlit
注意:为了演示方便,在今天的展示中,我将使用本地资管理的 Elasticsearch 来进行演示。在下面的展示中,我们将使用 Elastic Stack 8.12 来进行展示。
第 1 步:从 Kaggle 下载 BBC 新闻数据集
我们将使用的数据集是 BBC 新闻数据集,可从 BBC 新闻数据集以 CSV 形式获取。 这是一个自动更新的数据集,收集来自 BBC 新闻的 RSS 源。 该数据集包括已发表文章的标题、描述、日期、url 和各种其他属性。 我们将使用 Logstash 来提取数据,但是,其他方法(即 Python 客户端或标准上传)同样有效(将数据添加到 Elasticsearch | Elasticsearch 服务文档 | Elastic)。
原始数据模式有点问题,因此,如果使用 Logstash,需要对文件结构进行细微调整。 解压缩下载的文件并运行脚本,修改输入/输出以反映本地计算机上保存的文件的位置和名称。 该脚本将对列重新排序,使文章的 “Publish Date” 排在第一位,以方便对日期字段的解释。
convert.py
import csv

input_csv = 'path/bbc_news.csv'
output_csv = 'path/new-bbc_news.csv'

# Read in the old bbc_news CSV file
with open(input_csv, 'r') as infile:
    reader = csv.DictReader(infile)
    data = [row for row in reader]

# Write the file in the desired format
with open(output_csv, 'w', newline='') as outfile:
    fieldnames = ['pubDate', 'title', 'guid', 'link', 'description']
    writer = csv.DictWriter(outfile, fieldnames=fieldnames)

    writer.writeheader()

    # Write data in new format
    for row in data:
        writer.writerow({
            'pubDate': row['pubDate'],
            'title': row['title'],
            'guid': row['guid'],
            'link': row['link'],
            'description': row['description']
        })

print(f'Success. Output saved to {output_csv}')
$ pwd
/Users/liuxg/data/bbs
$ ls
bbc_news.csv bbs.zip convert.py
$ python convert.py
Success. Output saved to ./new-bbc_news.csv
$ cat new-bbc_news.csv
pubDate,title,guid,link,description
"Mon, 07 Mar 2022 08:01:56 GMT",Ukraine: Angry Zelensky vows to punish Russian atrocities,https://www.bbc.co.uk/news/world-europe-60638042,https://www.bbc.co.uk/news/world-europe-60638042?at_medium=RSS&at_campaign=KARANGA,The Ukrainian president says the country will not forgive or forget those who murder its civilians.步骤 2:使用 Docker 上传并启动自定义 NER ML 模型
接下来,我们将为 NER 任务导入自定义 ML 模型,详细文档可以在此处找到:如何部署命名实体识别 | Elastic Stack 中的机器学习 [8.11]。 本教程使用 docker 上传自定义模型,但是,有关其他安装方法,请参阅:自定义机器学习模型和地图简介 | Elastic 博客。你也可以参考文章 “Elasticsearch:如何部署 NLP:命名实体识别 (NER) 示例”。
虽然我们可以使用许多模型来进行 NER,但我们将使用来自 distilbert-base-uncased · Hugging Face 的 “distilbert-base-uncased”。 该模型针对小写文本进行了优化,事实证明有利于从非结构化数据中精确提取实体,在我们的例子中 - 在命名实体识别的帮助下,我们可以从新闻文章中提取人物、地点、组织等,以供下游使用。
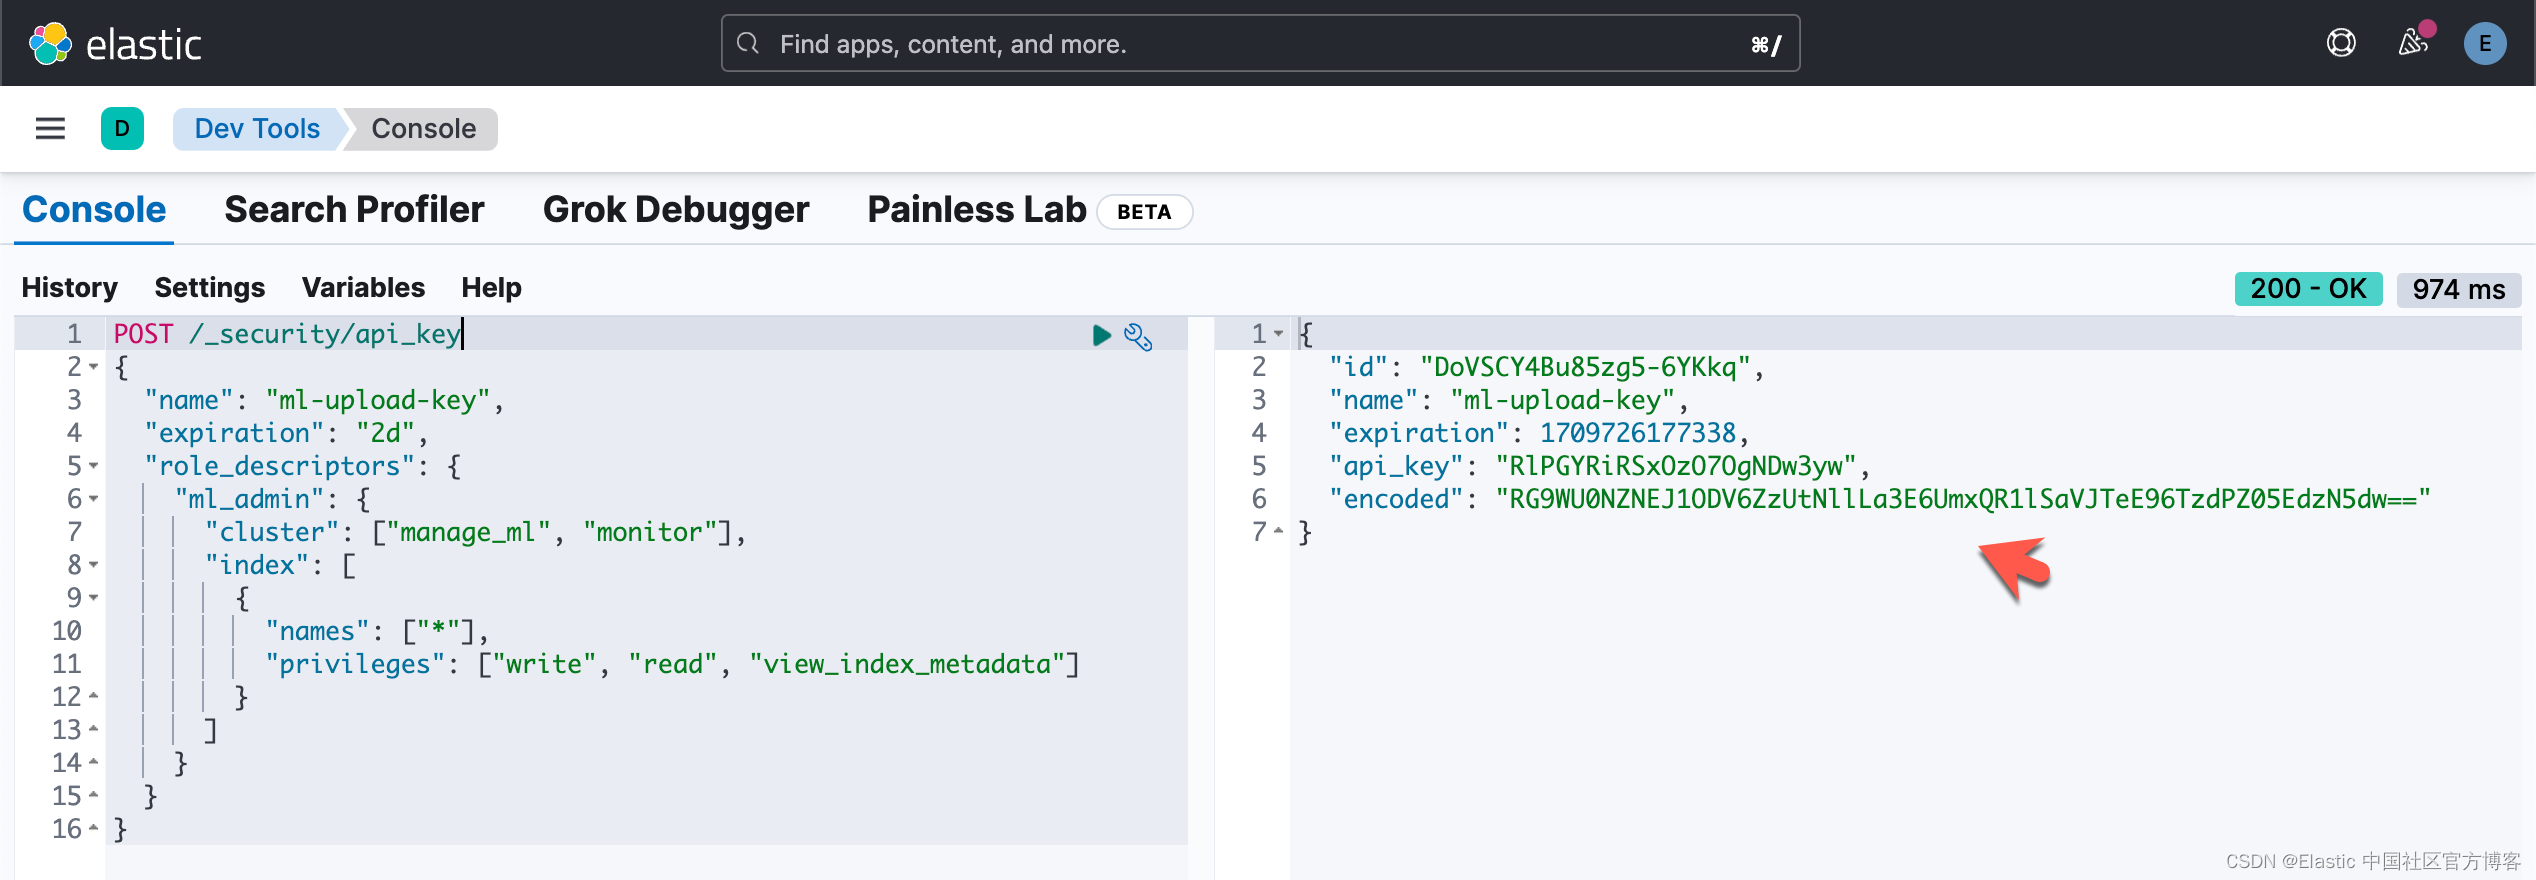
要为此任务创建一次性 API 密钥,我们可以调用 _security 端点,指定我们的密钥要求 API 密钥生成。 确保复制请求生成的编码值,因为以后无法检索该值。 我们创建的 API 密钥将仅用于此上传,因此我们可以分配有限的权限和到期日期:
POST /_security/api_key
{
  "name": "ml-upload-key",
  "expiration": "2d",
  "role_descriptors": {
    "ml_admin": {
      "cluster": ["manage_ml", "monitor"],
      "index": [
        {
          "names": ["*"],
          "privileges": ["write", "read", "view_index_metadata"]
        }
      ]
    }
  }
}
要将模型导入集群,请确保 Docker Desktop 已启动并正在运行,并在终端中运行以下命令; 设置 “CLOUD_ID” 和 “API_KEY” 的值以反映与你的云集群关联的值。
docker run -it --rm docker.elastic.co/eland/eland:latest \
    eland_import_hub_model \
      --cloud-id $CLOUD_ID \
      --es-api-key $API_KEY \
      --hub-model-id "elastic/distilbert-base-uncased-finetuned-conll03-english" \
      --task-type ner \
      --start
如果遇到错误,请确保您的 Cloud ID 和身份验证凭据正确,并且 Docker 按预期运行。
针对我们的自签名的 Elasticsearch 集群,我们可以使用如下的命令来进行:
docker run -it --rm docker.elastic.co/eland/eland:latest \
    eland_import_hub_model \
      --url https://192.168.0.3:9200/ \
      --es-api-key RG9WU0NZNEJ1ODV6ZzUtNllLa3E6UmxQR1lSaVJTeE96TzdPZ05EdzN5dw== \
      --hub-model-id "elastic/distilbert-base-uncased-finetuned-conll03-english" \
      --task-type ner \
      --insecure \
      --start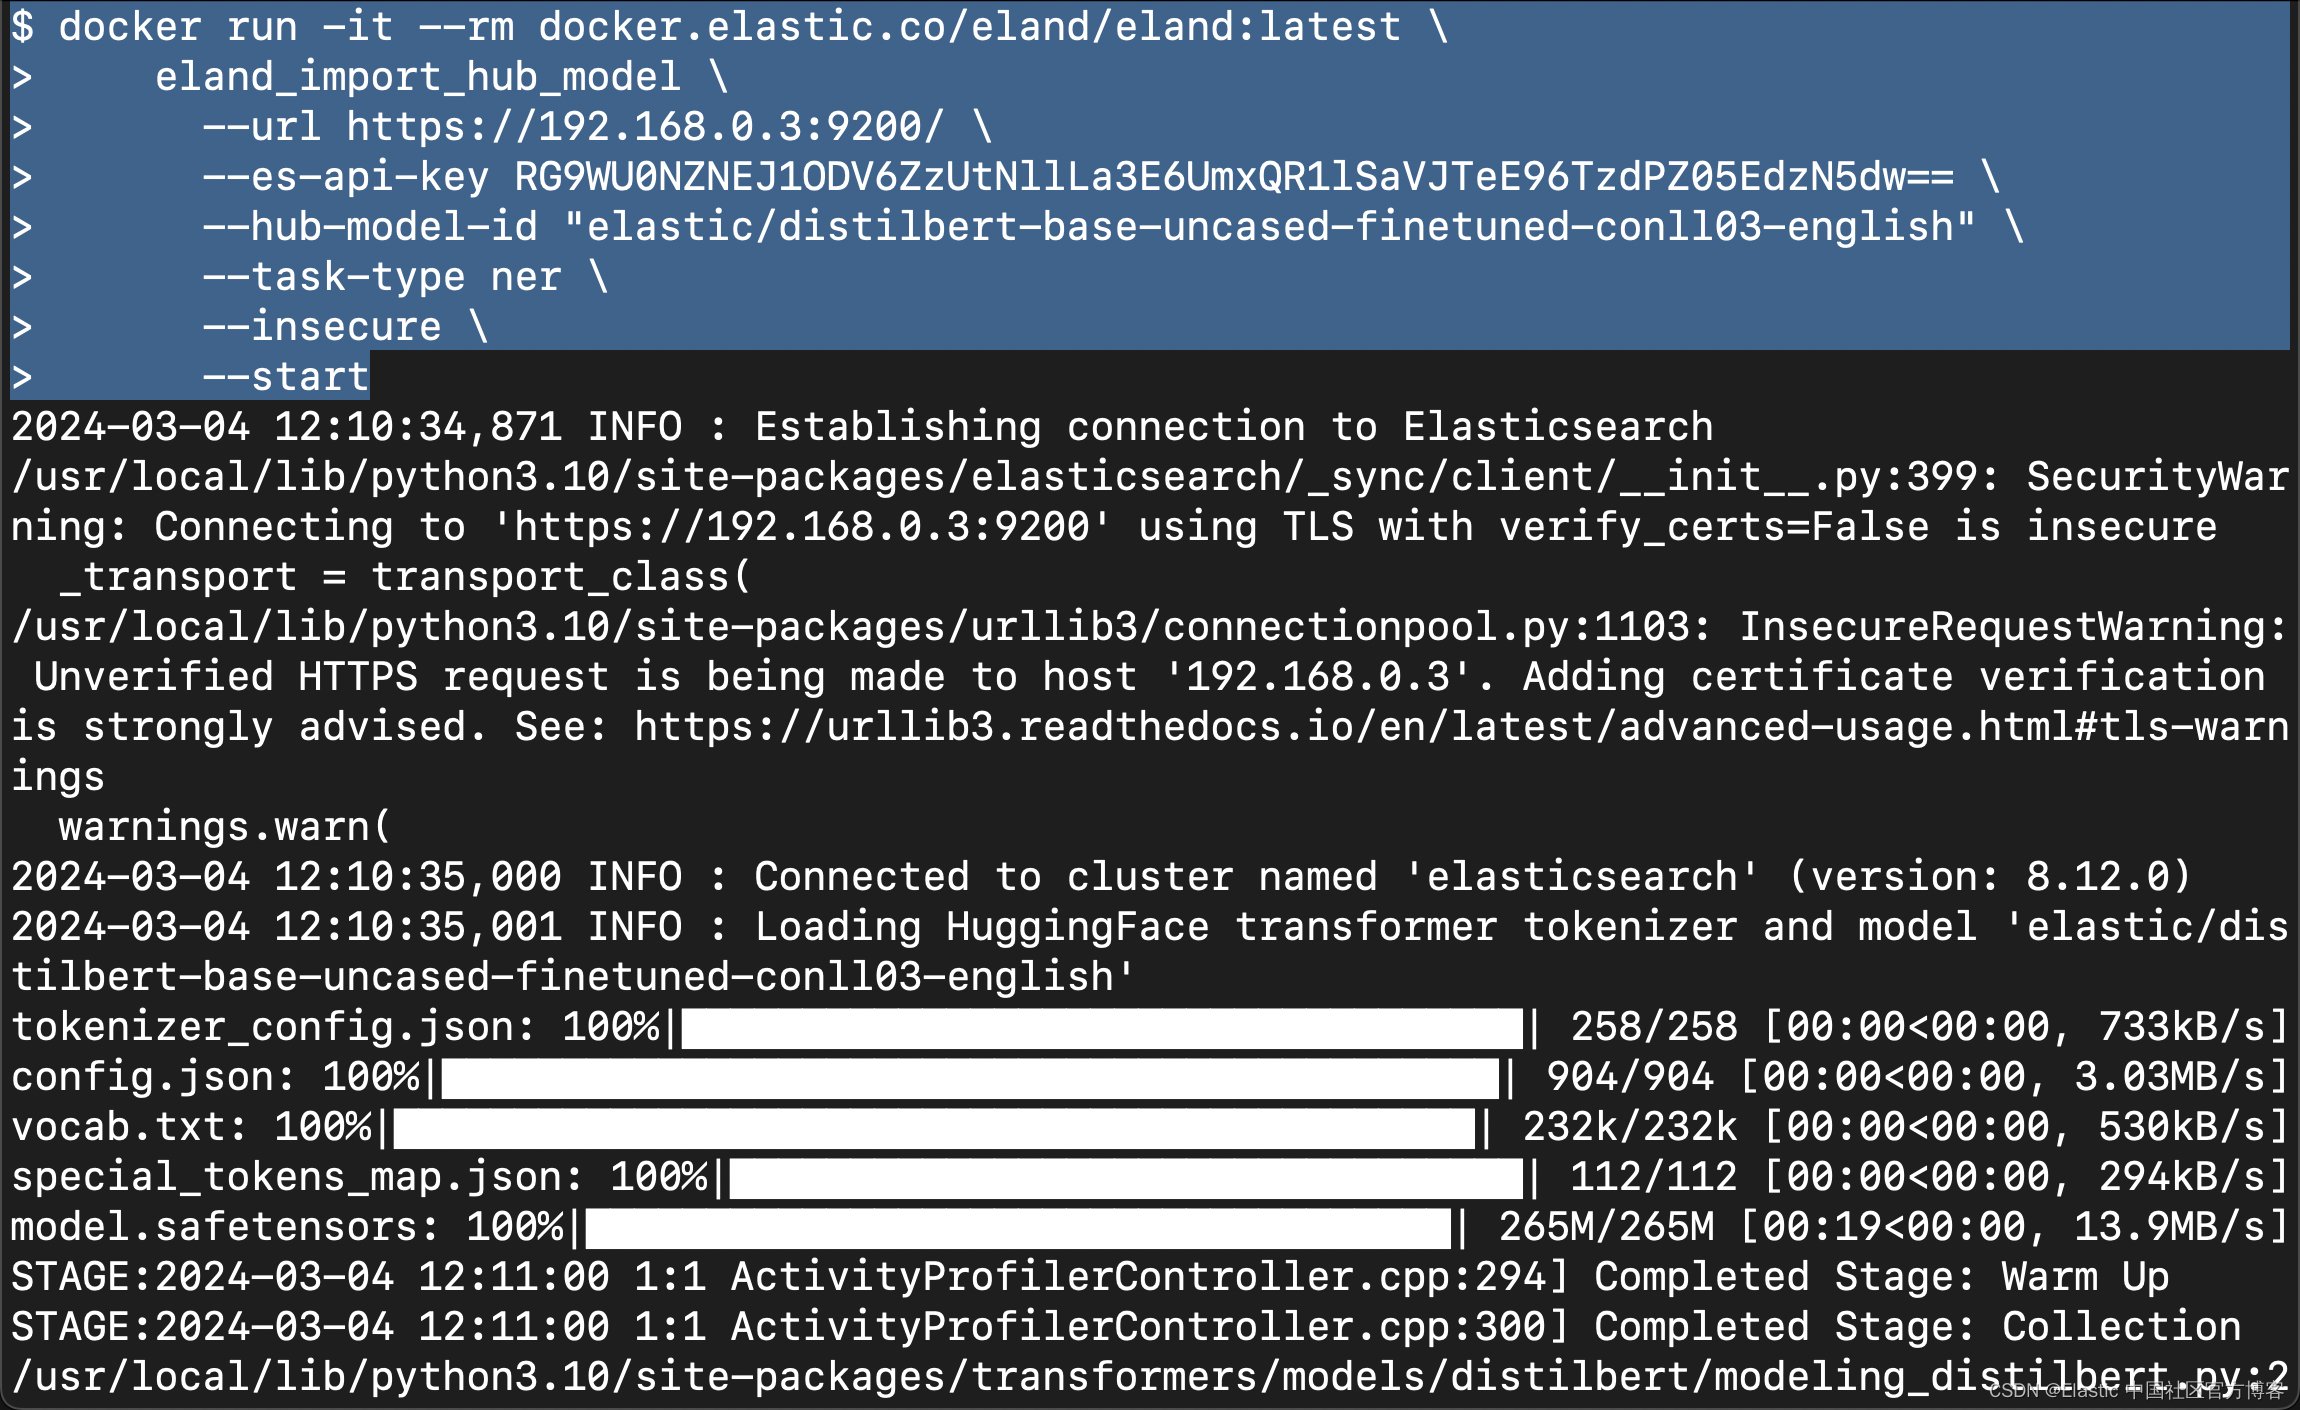
我们可以在 Kibana 中进行查看:


从上面,我们可以看出来上传的模型已经成功地被部署了。
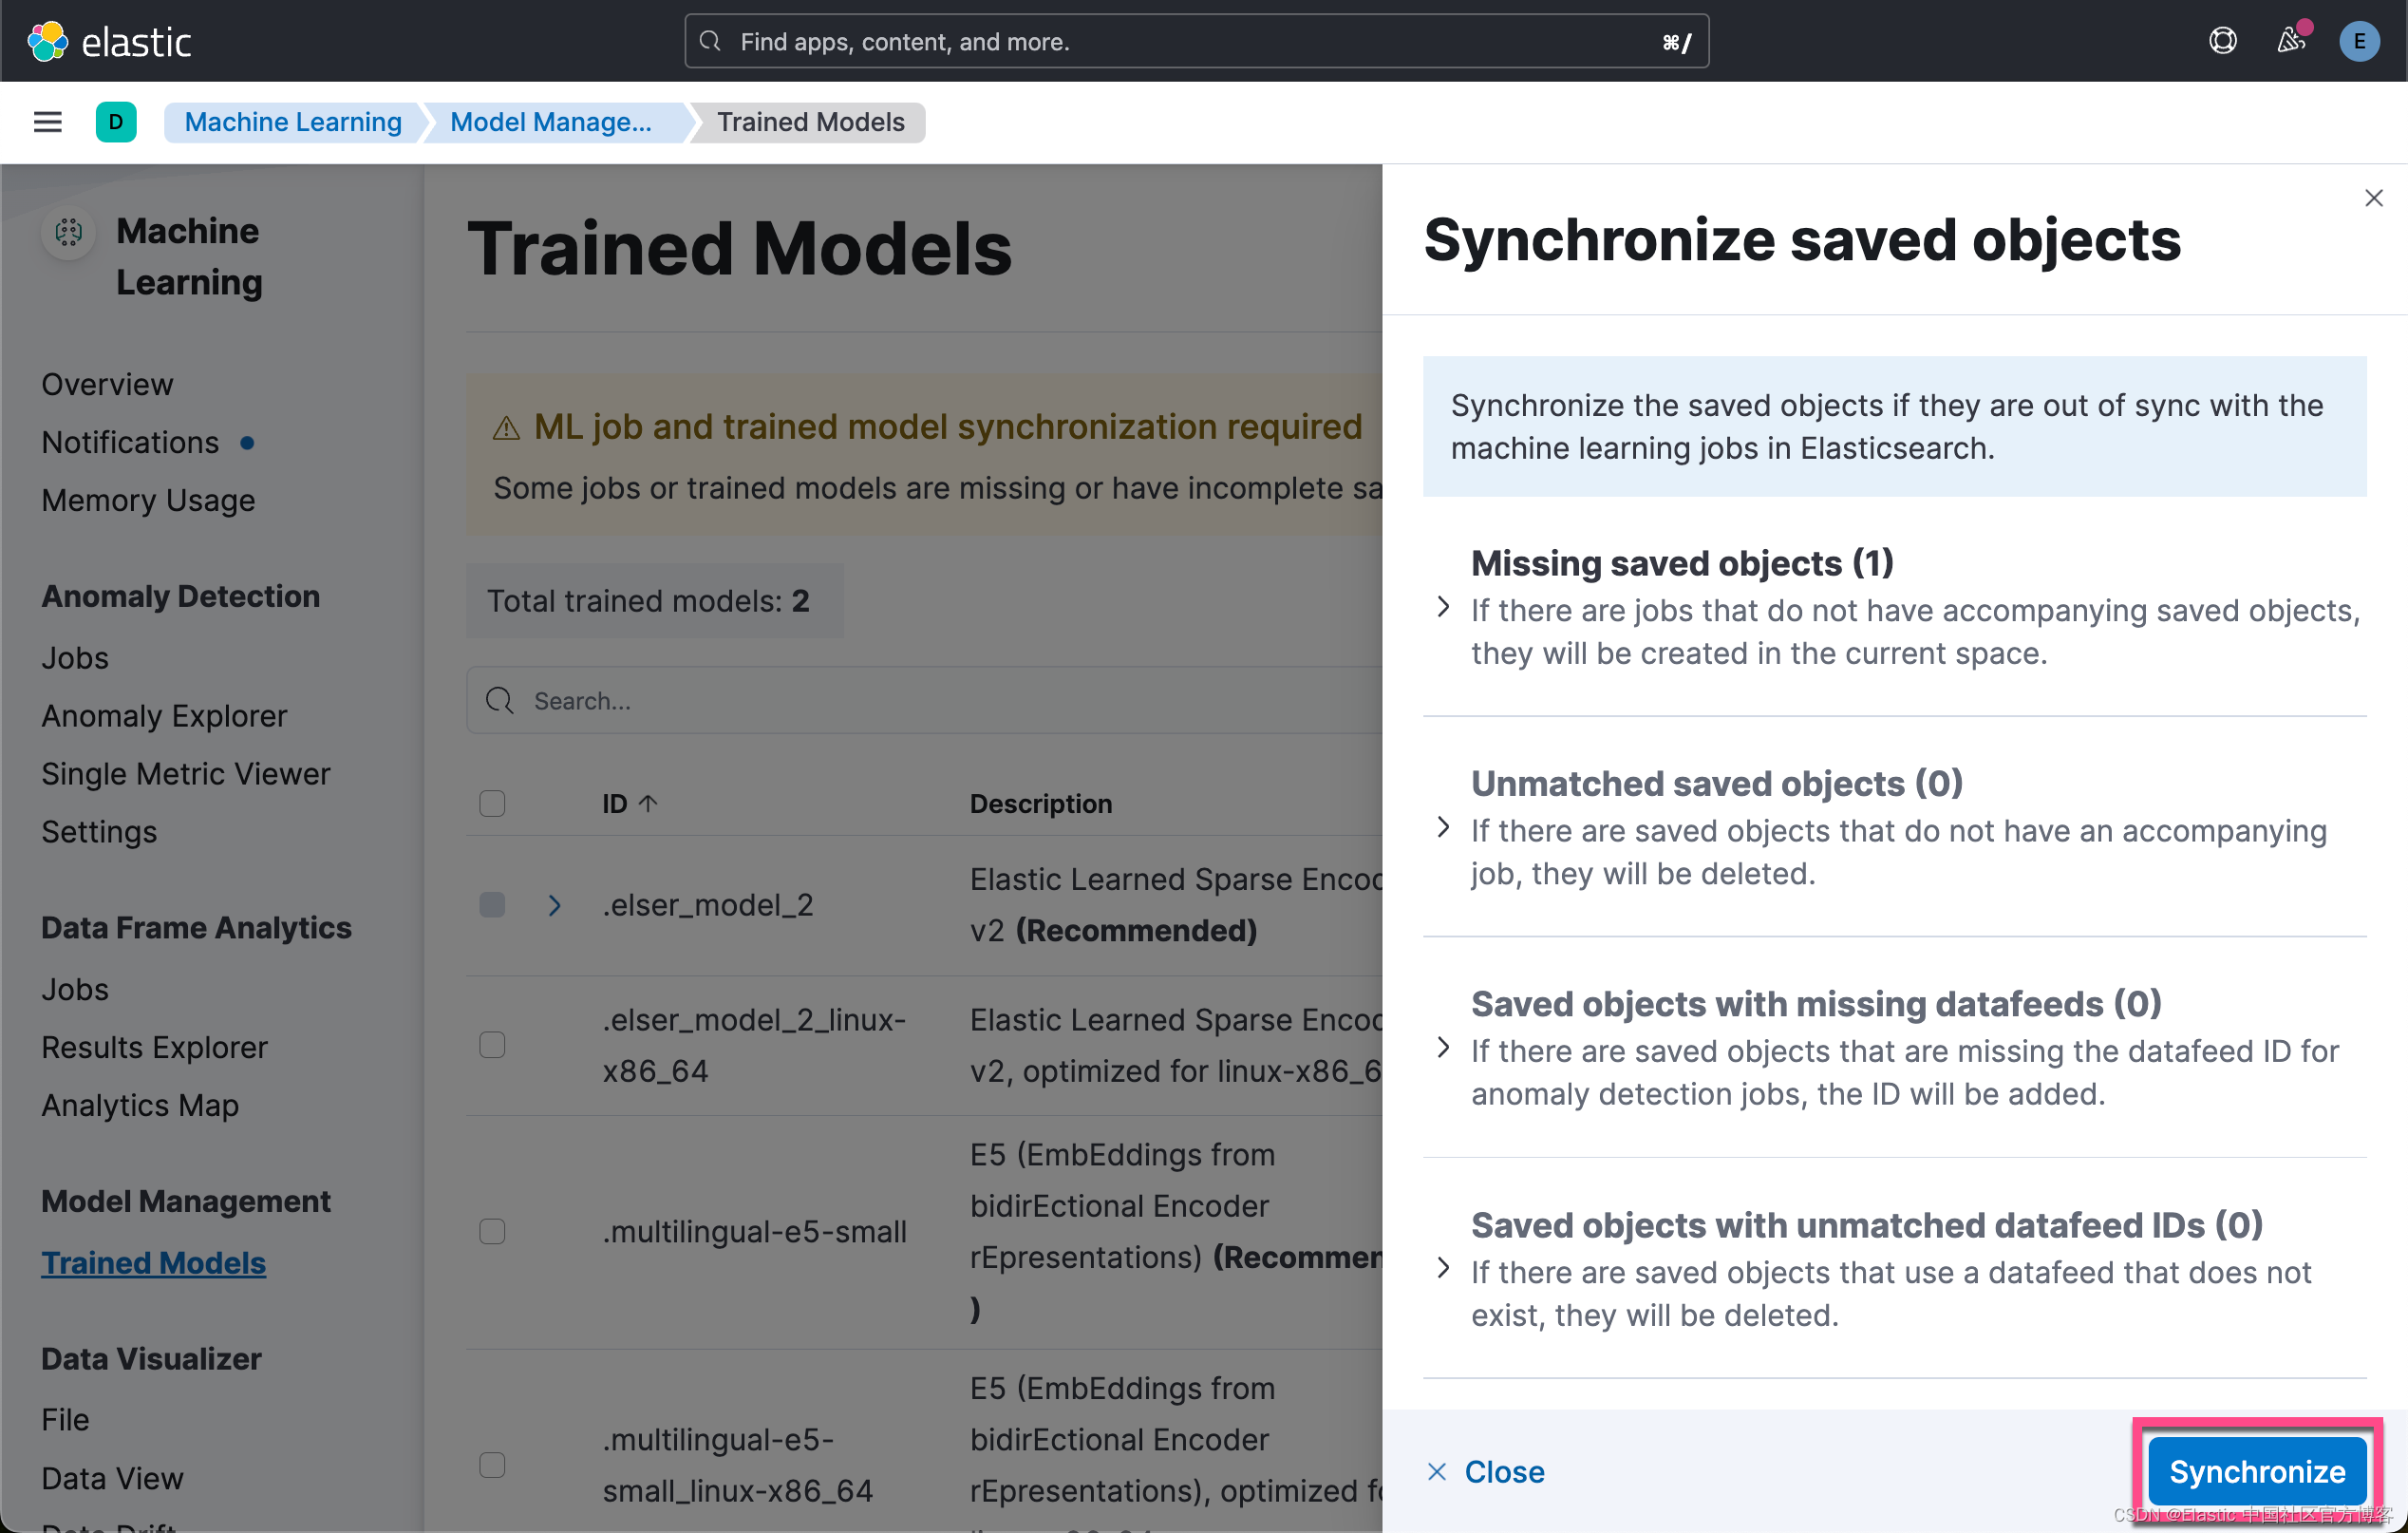
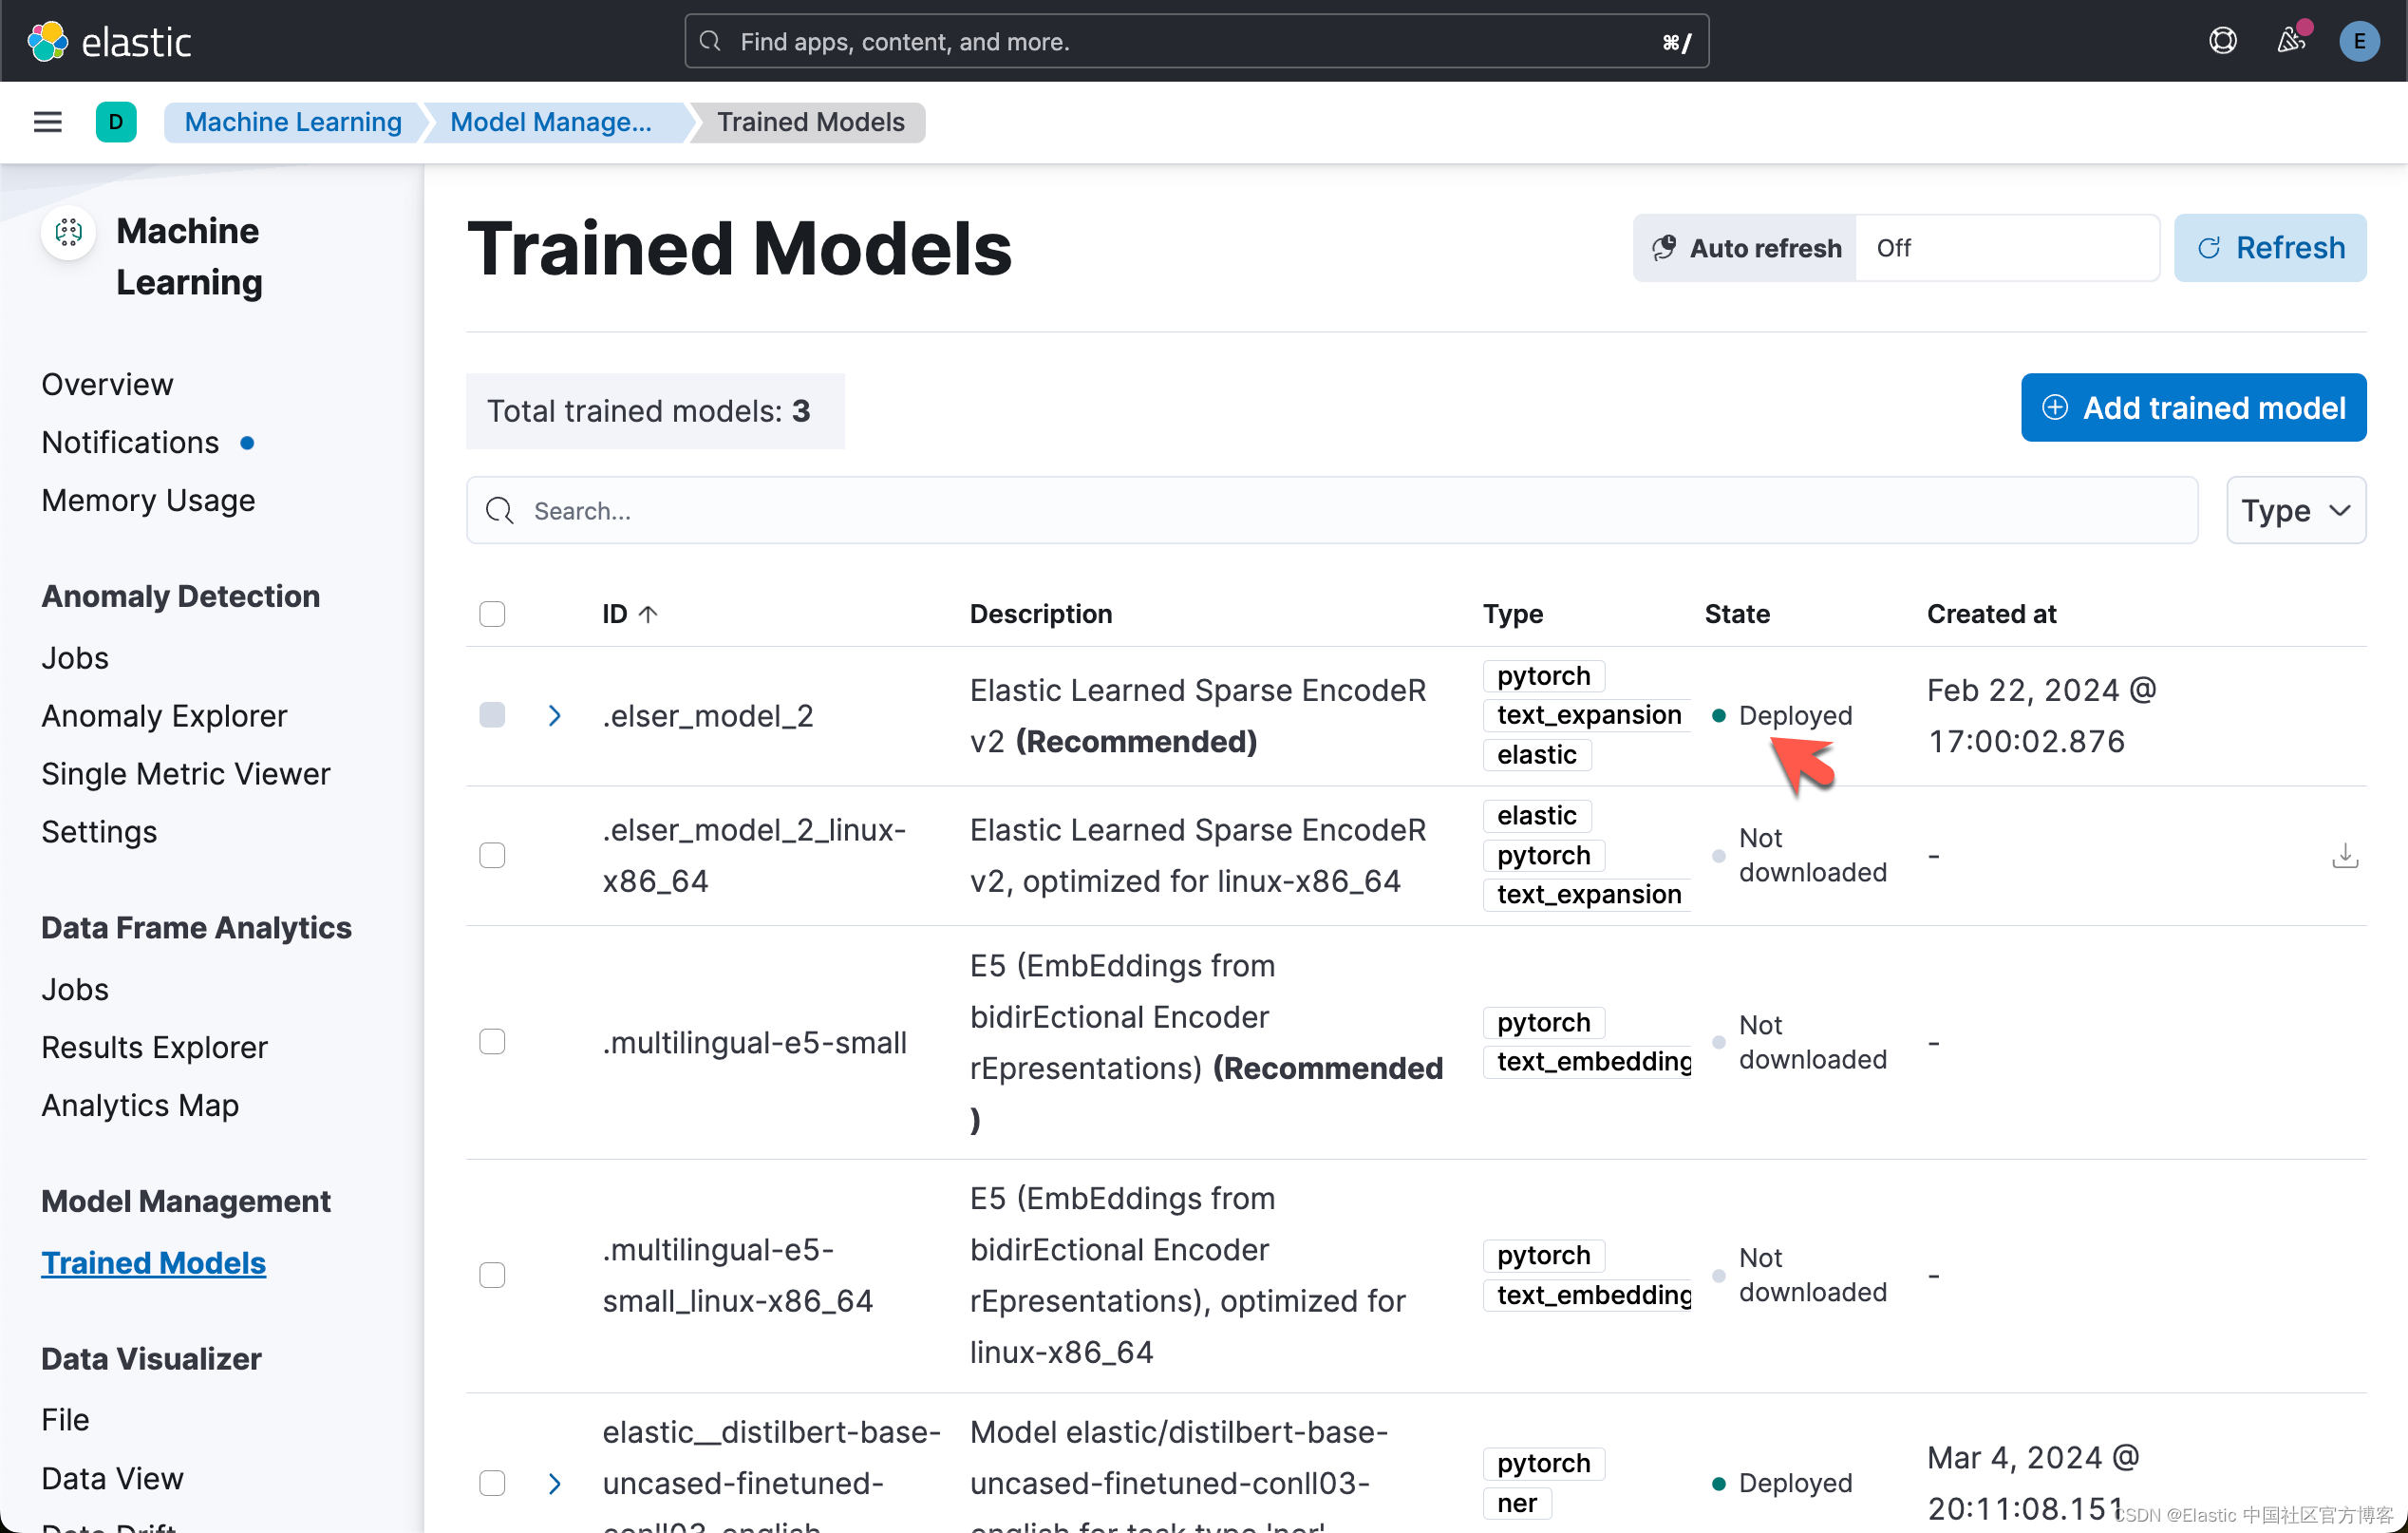
第 3 步:下载 ELSER
在此步骤中,我们将把 Elastic 的 “域外模型” ELSER 下载到堆栈中。 导航到 Machine Learning -> Model Management -> Trained Models 并选择 elser_model_2 上的下载。 有关在非云环境中安装 ELSER 的更多信息,请访问:ELSER – Elastic Learned Sparse EncodeR | Elastic Stack 中的机器学习 [8.12]。
针对本地部署的 Elasticsearch,你可以参考文章 “Elasticsearch:部署 ELSER - Elastic Learned Sparse EncoderR”。你也可以参考文章 “Elastic Search:构建语义搜索体验”。
最终,我们可以看到如下的画面:
第 4 步:在 Elastic 中添加映射和管道
Elastic 中的映射定义了数据的 schema。 我们需要为 BBC 新闻索引添加正式映射,以确保数据按预期键入,并且当我们将数据发送到集群时,Elastic 能够理解其结构。 作为此映射的一部分,我们排除了 ELSER 模型生成的标记以防止映射爆炸,并定义了 NER 模型生成的许多标签。 导航到开发工具并创建映射:
PUT bbc-news-elser
{
    "mappings": {
      "_source": {
        "excludes": [
          "ml-elser-title.tokens",
          "ml-elser-description.tokens"
        ]
      },
      "properties": {
        "@timestamp": {
          "type": "date"
        },
        "@version": {
          "type": "text",
          "fields": {
            "keyword": {
              "type": "keyword",
              "ignore_above": 256
            }
          }
        },
        "description": {
          "type": "text",
          "fields": {
            "keyword": {
              "type": "keyword",
              "ignore_above": 256
            }
          }
        },
        "event": {
          "properties": {
            "original": {
              "type": "text",
              "fields": {
                "keyword": {
                  "type": "keyword",
                  "ignore_above": 256
                }
              }
            }
          }
        },
        "ml": {
          "properties": {
            "ner": {
              "properties": {
                "entities": {
                  "properties": {
                    "class_name": {
                      "type": "text",
                      "fields": {
                        "keyword": {
                          "type": "keyword",
                          "ignore_above": 256
                        }
                      }
                    },
                    "class_probability": {
                      "type": "float"
                    },
                    "end_pos": {
                      "type": "long"
                    },
                    "entity": {
                      "type": "text",
                      "fields": {
                        "keyword": {
                          "type": "keyword",
                          "ignore_above": 256
                        }
                      }
                    },
                    "start_pos": {
                      "type": "long"
                    }
                  }
                },
                "model_id": {
                  "type": "text",
                  "fields": {
                    "keyword": {
                      "type": "keyword",
                      "ignore_above": 256
                    }
                  }
                },
                "predicted_value": {
                  "type": "text",
                  "fields": {
                    "keyword": {
                      "type": "keyword",
                      "ignore_above": 256
                    }
                  }
                }
              }
            }
          }
        },
        "ml-elser-description": {
          "properties": {
            "model_id": {
              "type": "text",
              "fields": {
                "keyword": {
                  "type": "keyword",
                  "ignore_above": 256
                }
              }
            },
            "tokens": {
              "type": "rank_features"
            }
          }
        },
        "ml-elser-title": {
          "properties": {
            "model_id": {
              "type": "text",
              "fields": {
                "keyword": {
                  "type": "keyword",
                  "ignore_above": 256
                }
              }
            },
            "tokens": {
              "type": "rank_features"
            }
          }
        },
        "pubDate": {
          "type": "date",
          "format": "EEE, dd MMM yyyy HH:mm:ss 'GMT'",
          "ignore_malformed": true
        },
        "tags": {
          "properties": {
            "LOC": {
              "type": "text",
              "fields": {
                "keyword": {
                  "type": "keyword",
                  "ignore_above": 256
                }
              }
            },
            "MISC": {
              "type": "text",
              "fields": {
                "keyword": {
                  "type": "keyword",
                  "ignore_above": 256
                }
              }
            },
            "ORG": {
              "type": "text",
              "fields": {
                "keyword": {
                  "type": "keyword",
                  "ignore_above": 256
                }
              }
            },
            "PER": {
              "type": "text",
              "fields": {
                "keyword": {
                  "type": "keyword",
                  "ignore_above": 256
                }
              }
            }
          }
        },
        "title": {
          "type": "text",
          "fields": {
            "keyword": {
              "type": "keyword",
              "ignore_above": 256
            }
          }
        },
        "url": {
          "type": "text",
          "fields": {
            "keyword": {
              "type": "keyword",
              "ignore_above": 256
            }
          }
        }
      }
    }
  }
Pipelines 在索引之前定义了一系列数据处理步骤。 我们的摄取管道包括字段删除、ELSER 和自定义 NER 模型的模型推理,以及将 NER 模型运行的输出值添加到标签字段的脚本。
PUT _ingest/pipeline/news-pipeline
{
    "processors": [
      {
        "remove": {
          "field": [
            "host",
            "message",
            "log",
            "@version"
          ],
          "ignore_missing": true
        }
      },
      {
        "inference": {
          "model_id": "elastic__distilbert-base-uncased-finetuned-conll03-english",
          "target_field": "ml.ner",
          "field_map": {
            "title": "text_field"
          }
        }
      },
      {
        "script": {
          "lang": "painless",
          "if": "return ctx['ml']['ner'].containsKey('entities')",
          "source": "Map tags = new HashMap(); for (item in ctx['ml']['ner']['entities']) { if (!tags.containsKey(item.class_name)) tags[item.class_name] = new HashSet(); tags[item.class_name].add(item.entity);} ctx['tags'] = tags;"
        }
      },
      {
        "inference": {
          "model_id": ".elser_model_2",
          "target_field": "ml-elser-title",
          "field_map": {
            "title": "text_field"
          },
          "inference_config": {
            "text_expansion": {
              "results_field": "tokens"
            }
          }
        }
      },
      {
        "inference": {
          "model_id": ".elser_model_2",
          "target_field": "ml-elser-description",
          "field_map": {
            "description": "text_field"
          },
          "inference_config": {
            "text_expansion": {
              "results_field": "tokens"
            }
          }
        }
      }
    ]
  }
第 5 步:使用 Logstash 提取数据
我们现在需要配置 Logstash 将数据发送到 Elastic。 下载 Logstash(如果尚未下载),然后按照此处记录的步骤进行安装:Logstash 入门。
$ pwd
/Users/liuxg/elastic
$ ls
elasticsearch-8.12.0                       kibana-8.12.0
elasticsearch-8.12.0-darwin-aarch64.tar.gz kibana-8.12.0-darwin-aarch64.tar.gz
enterprise-search-8.12.1                   logstash-8.12.0-darwin-aarch64.tar.gz
enterprise-search-8.12.1.tar.gz            metricbeat-8.12.0-darwin-aarch64.tar.gz
filebeat-8.12.0-darwin-aarch64.tar.gz
$ tar xzf logstash-8.12.0-darwin-aarch64.tar.gz
$ cd logstash-8.12.0
$ touch logstash.conf
$ ls logstash.conf
logstash.conf
我们将编辑文件 logstash.conf 作为 Logstash 的配置文件。
我们的配置文件包含三个元素:输入块、过滤器块和输出块。 让我们花一点时间来浏览一下每个内容。
Input:我们的输入将 Logstash 配置为从位于指定路径的 CSV 文件中读取数据。 它从文件的开头开始读取,禁用sincedb 功能,并假设文件是纯文本形式。
input {
  file {
    path => "/path_to_file/new-bbc_news.csv"
    start_position => "beginning"
    sincedb_path => "/dev/null"
    codec => "plain"
  }
}filter:此部分对传入数据应用过滤器。 它使用 CSV 过滤器来解析 CSV 数据,指定逗号作为分隔符并定义列名称。 为了解决 BBC 新闻数据集中存在重复条目的问题,我们应用指纹过滤器根据 “title” 和 “link” 字段的串联来计算唯一指纹,并将其存储在 [@metadata][fingerprint] 中。 mutate 过滤器将 “link” 字段重命名为 “url” 并删除 “guid” 字段。
filter {
  csv {
    separator => ","
    columns => ["pubDate", "title", "guid", "link", "description"]
    skip_header => true
    quote_char => '"'

  }

  fingerprint {
    source => ["title", "link"]
    target => "[@metadata][fingerprint]"
}

  mutate { rename => { "link" => "url" } }
}ouput:最后一部分配置处理后数据的输出目的地。 它将数据发送到由 Cloud ID 和凭证指定的 Elasticsearch Cloud 实例。 数据存储在 “bbc-news-elser” 索引中(在第 2 节中映射),并且应用了名为 “news-pipeline” 的摄取管道。 document_id 设置为我们的指纹过滤器生成的唯一指纹。 此外,使用 rubydebug 编解码器将数据的副本打印到控制台以进行调试。
output {
  elasticsearch {
    cloud_id => "${CLOUD_ID}"
    api_key => ${API_KEY}"
    index => "bbc-news-elser"
    pipeline => "news-pipeline"
    document_id => "%{[@metadata][fingerprint]}"

  }
  stdout { codec => rubydebug }
}
请记住将 CLOUD_ID 和 API_KEY 设置为环境变量 - 或存储在密钥存储中,Logstash Keystore Guide - 并确保 CSV 文件的路径准确。 注意 - 你需要为 Logstash 创建一个具有相关权限的新 API 密钥。 你可以使用 “-f” 标志直接从命令行运行 Logstash 来指定配置位置,也可以使用管道文件指向配置。 如果选择管道方法,请将以下行添加到 pipelines.yml 文件中:
- pipeline.id: bbc-news
  path.config: "path-to-config"
针对我们的情况,我们使用本地部署的 Elasticsearch。我们可以详细参考文章 “Logstash:如何连接到带有 HTTPS 访问的集群”。
$ ./bin/elasticsearch-keystore list
keystore.seed
xpack.security.http.ssl.keystore.secure_password
xpack.security.transport.ssl.keystore.secure_password
xpack.security.transport.ssl.truststore.secure_password
$ ./bin/elasticsearch-keystore show xpack.security.http.ssl.keystore.secure_password
Yx33RxJsQmakbbZR4bjlew
$ cd config/certs/
$ ls
http.p12      http_ca.crt   transport.p12
$ keytool -import -file http_ca.crt -keystore truststore.p12 -storepass password -noprompt -storetype pkcs12
Certificate was added to keystore
$ ls
http.p12       http_ca.crt    transport.p12  truststore.p12
$ keytool -keystore truststore.p12 -list
Enter keystore password:
Keystore type: PKCS12
Keystore provider: SUN

Your keystore contains 1 entry

mykey, Mar 4, 2024, trustedCertEntry,
Certificate fingerprint (SHA-256): BC:E6:6E:D5:50:97:F2:55:FC:8E:44:20:BD:AD:AF:C8:D6:09:CC:80:27:03:8C:2D:D0:9D:80:56:68:F3:45:9E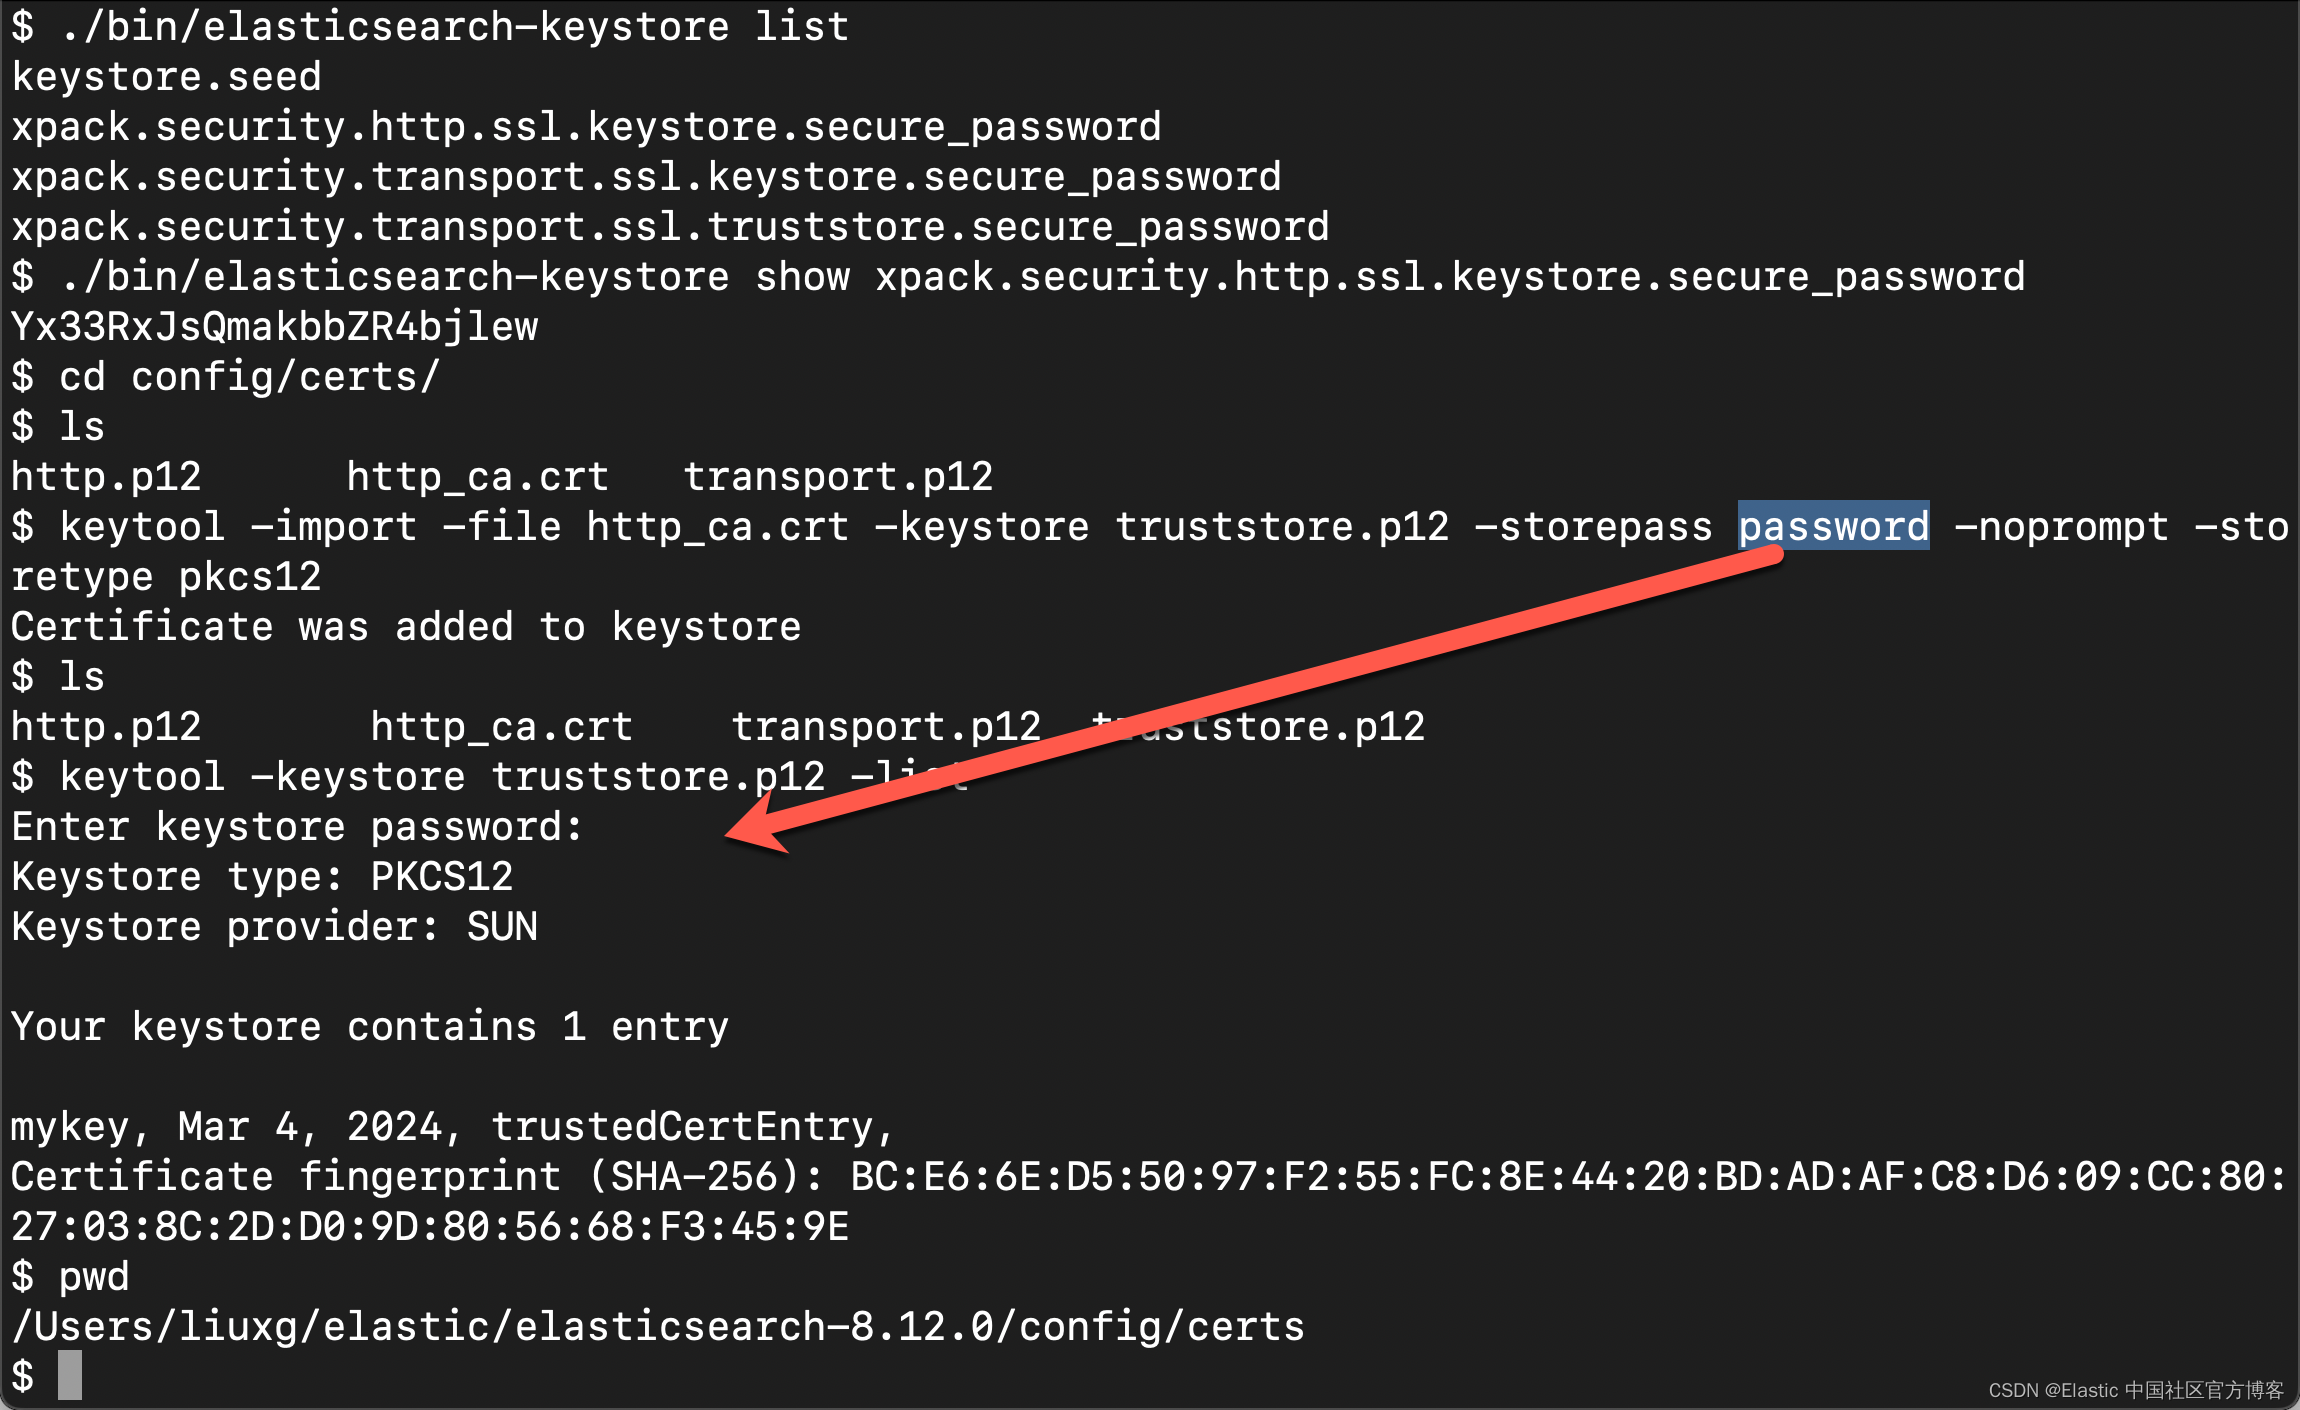
我们为 logstash 的摄取获得一个 api-key:


我们完整的 logstash.conf 文件为:
logstash.conf
input {
  file {
    path => "/Users/liuxg/data/bbs/new-bbc_news.csv"
    start_position => "beginning"
    sincedb_path => "/dev/null"
    codec => "plain"
  }
}

filter {
  csv {
    separator => ","
    columns => ["pubDate", "title", "guid", "link", "description"]
    skip_header => true
    quote_char => '"'

  }

  fingerprint {
    source => ["title", "link"]
    target => "[@metadata][fingerprint]"
}

  mutate { rename => { "link" => "url" } }
}

output {
    elasticsearch {
    	hosts => ["https://192.168.0.3:9200"]
    	index => "bbc-news-elser"
    	api_key => "G4WdCY4Bu85zg5-6pKne:RIj_XbEbREuDySzRxYbkQA"
		ssl_verification_mode => "full"
		ssl_truststore_path => "/Users/liuxg/elastic/elasticsearch-8.12.0/config/certs/truststore.p12"
		ssl_truststore_password => "password"
        pipeline => "news-pipeline"
        document_id => "%{[@metadata][fingerprint]}"
  	}

    stdout { codec => rubydebug }
}
我在 Logstash 的安装目录中,使用如下的命令:
./bin/logstash -f logstash.conf
第 6 步:验证数据摄取
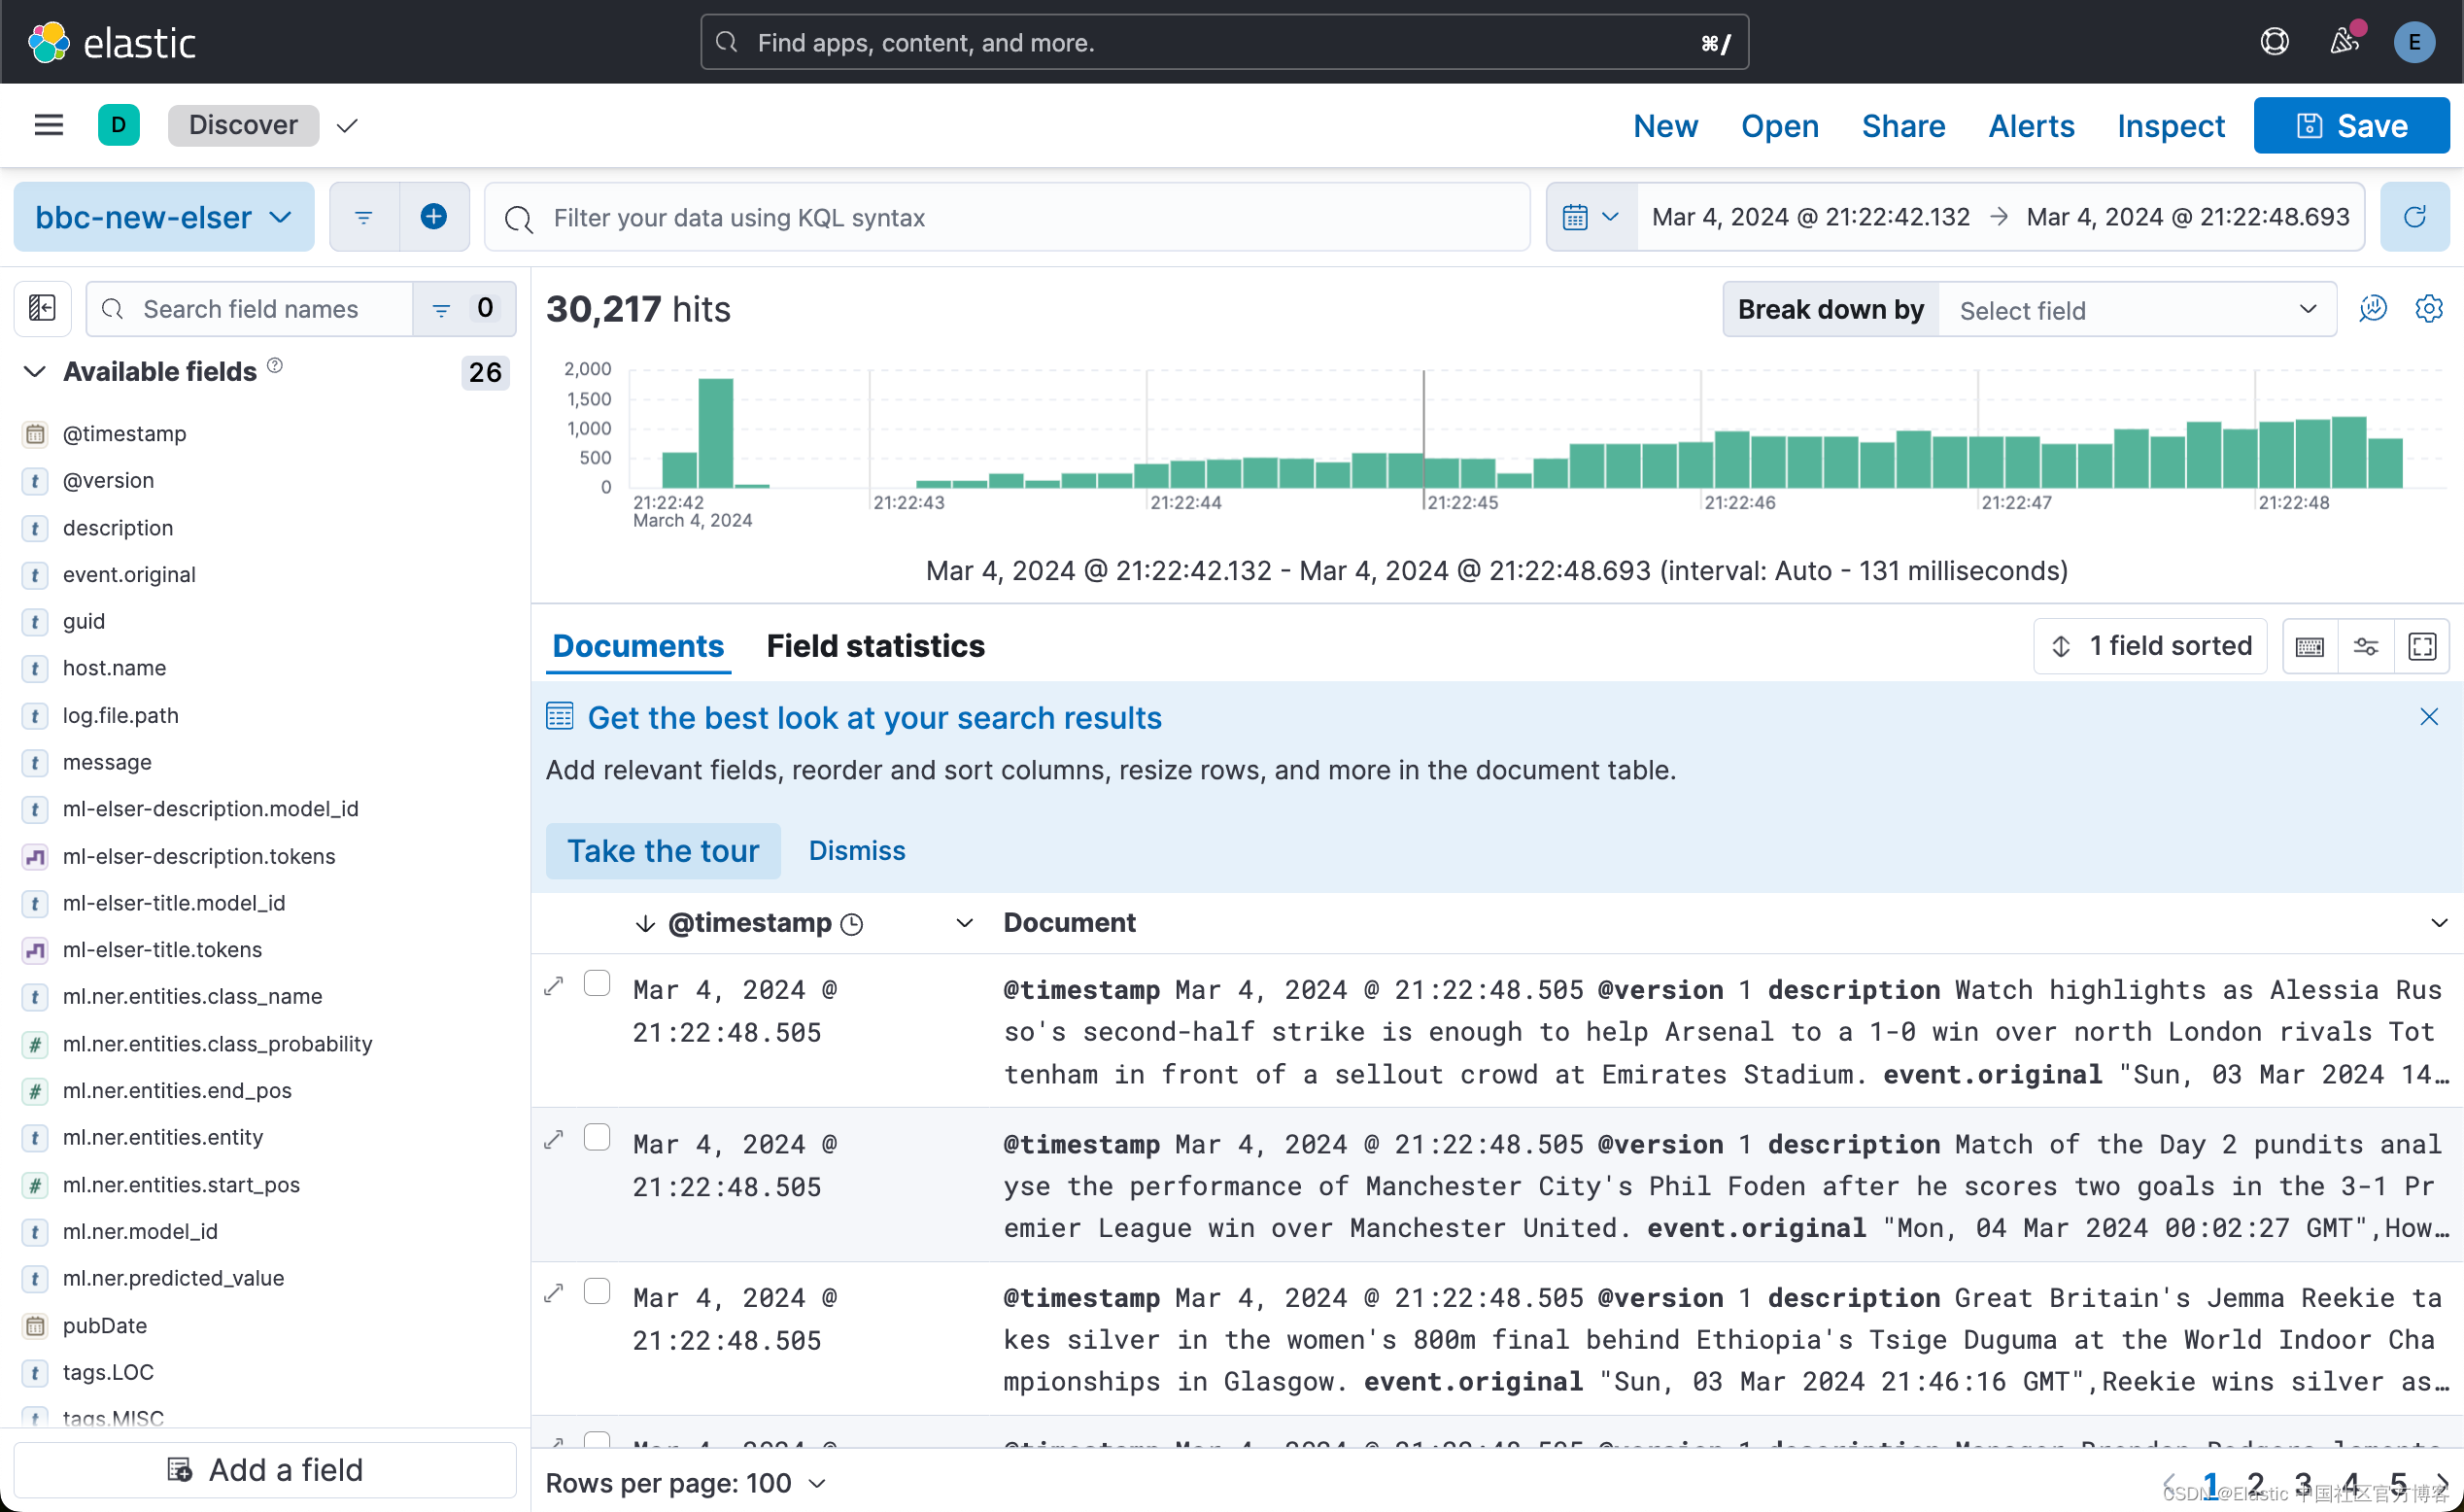
如果一切顺利,我们现在应该能够在集群中探索 BBC 新闻数据。
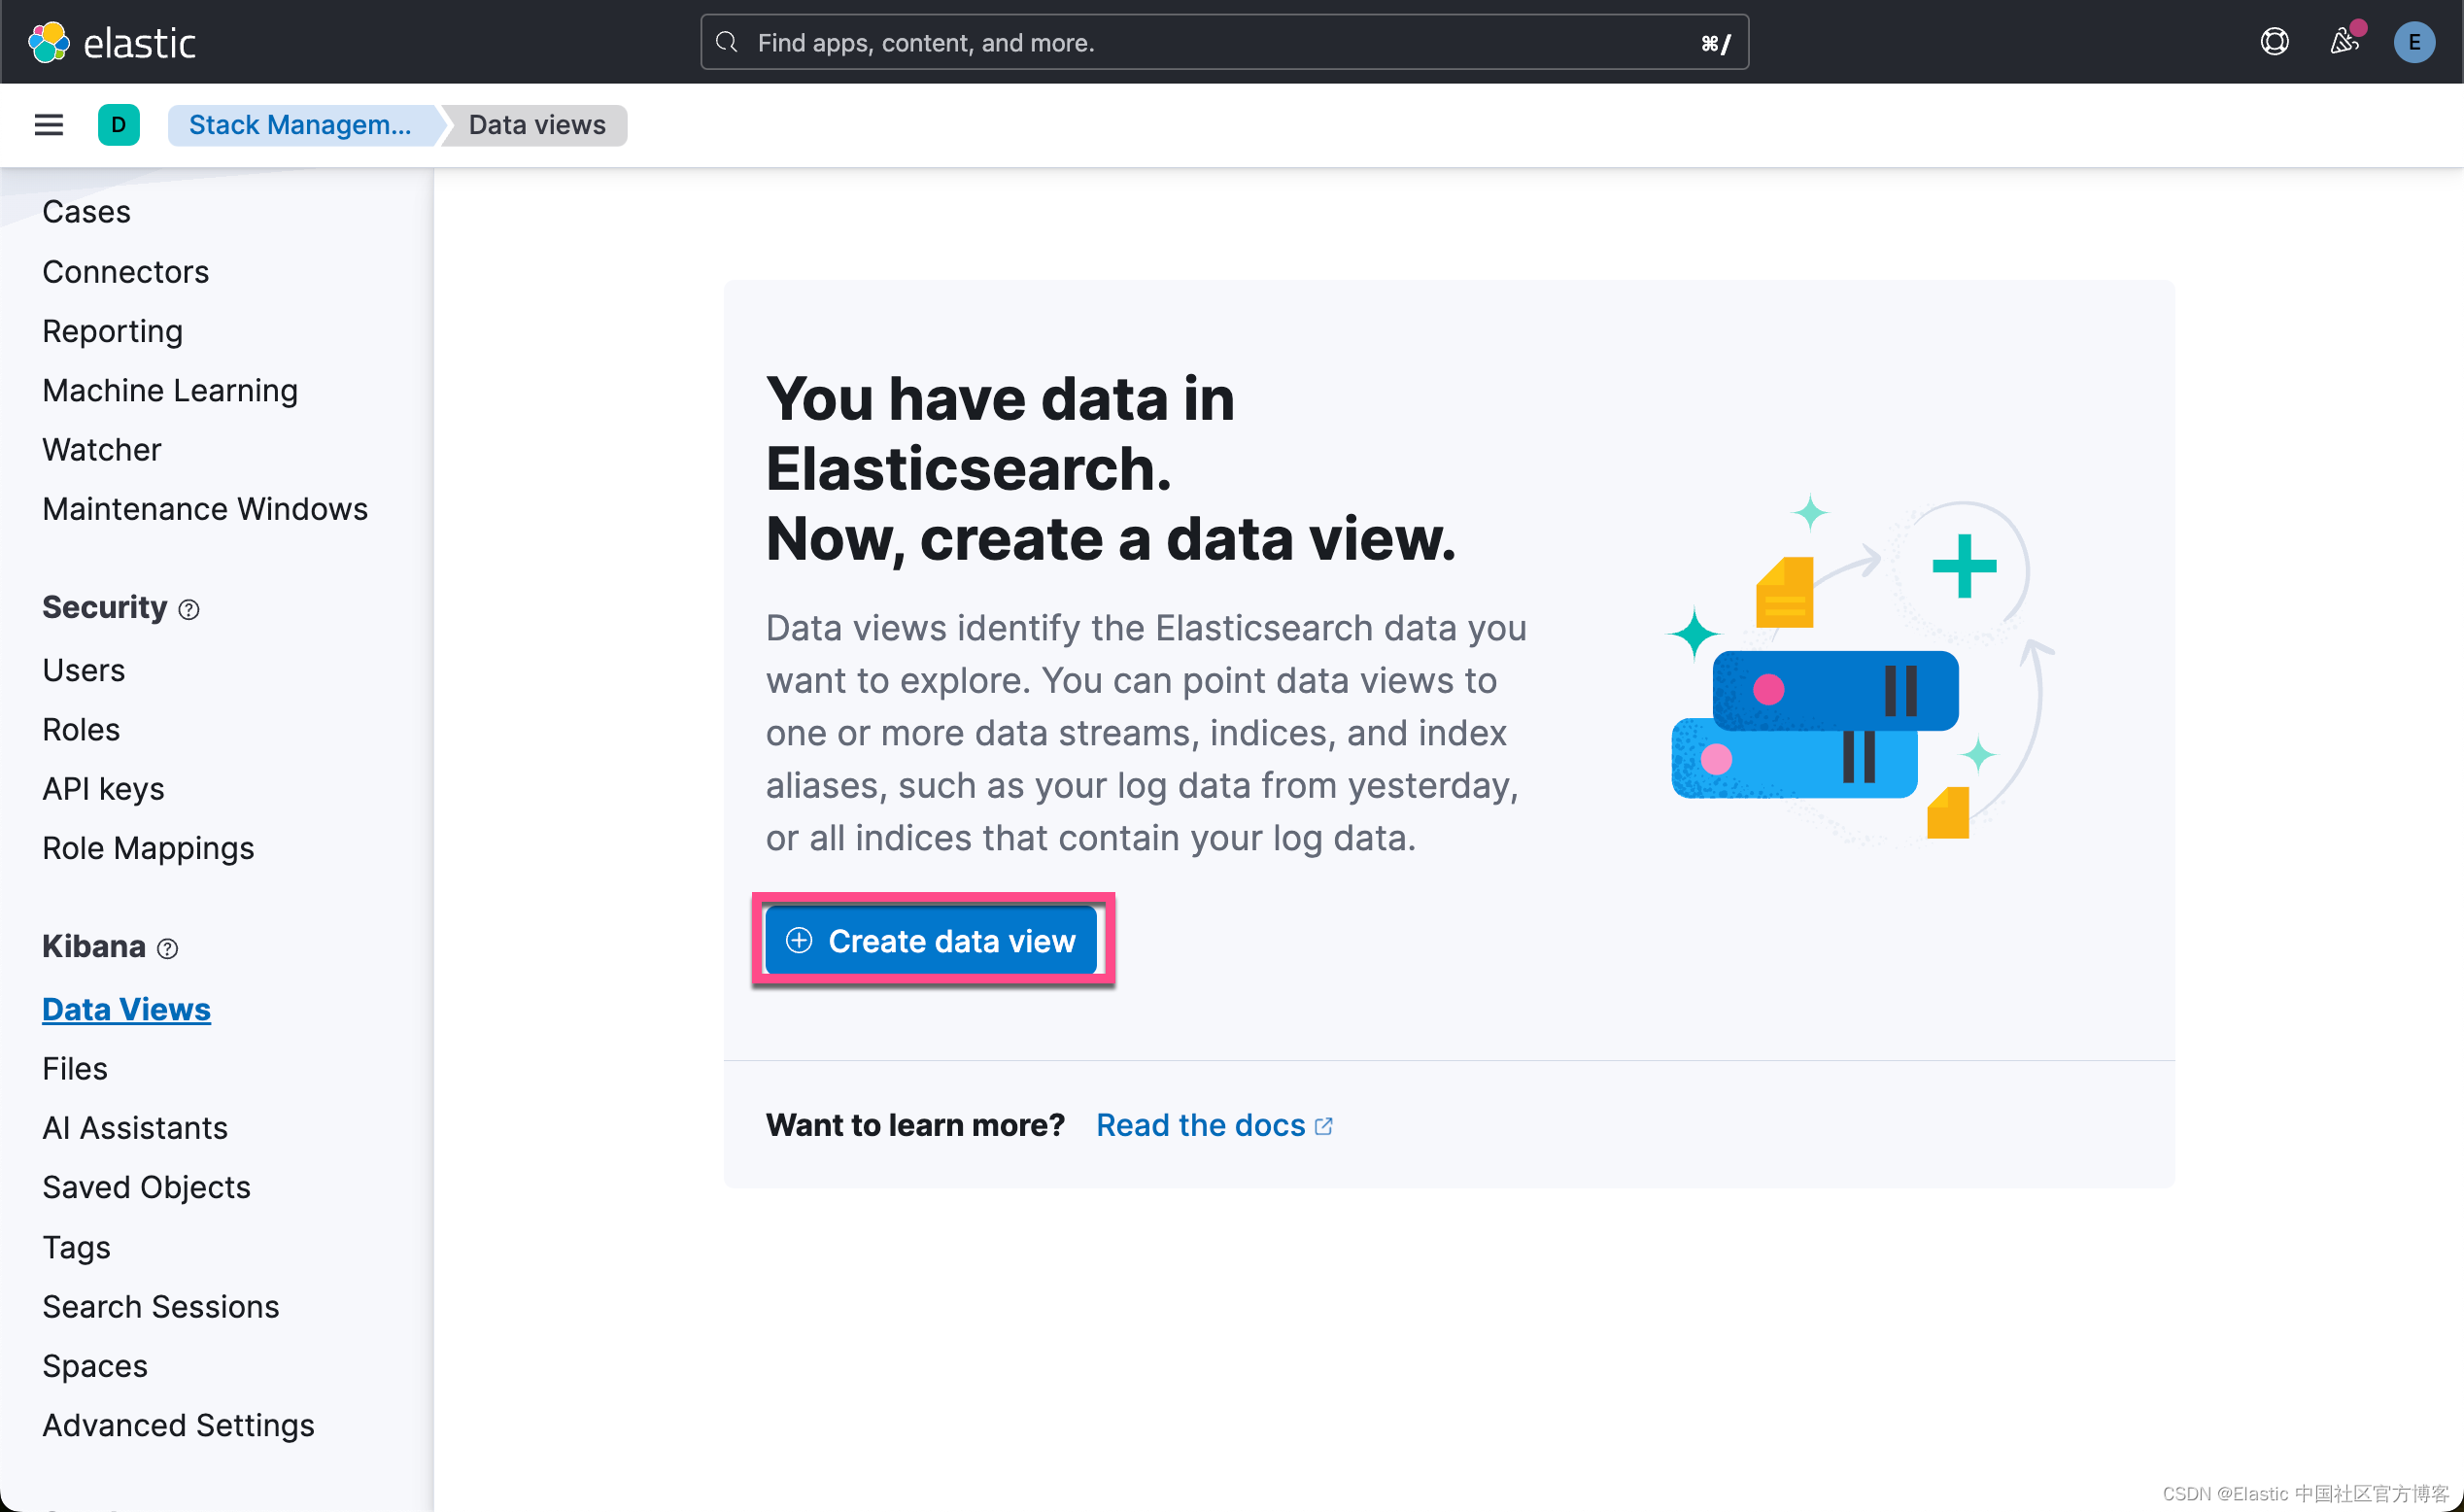
使用 pubDate 字段作为 “Timestamp field” 在 Discover 或 Stack Management 中创建数据视图。


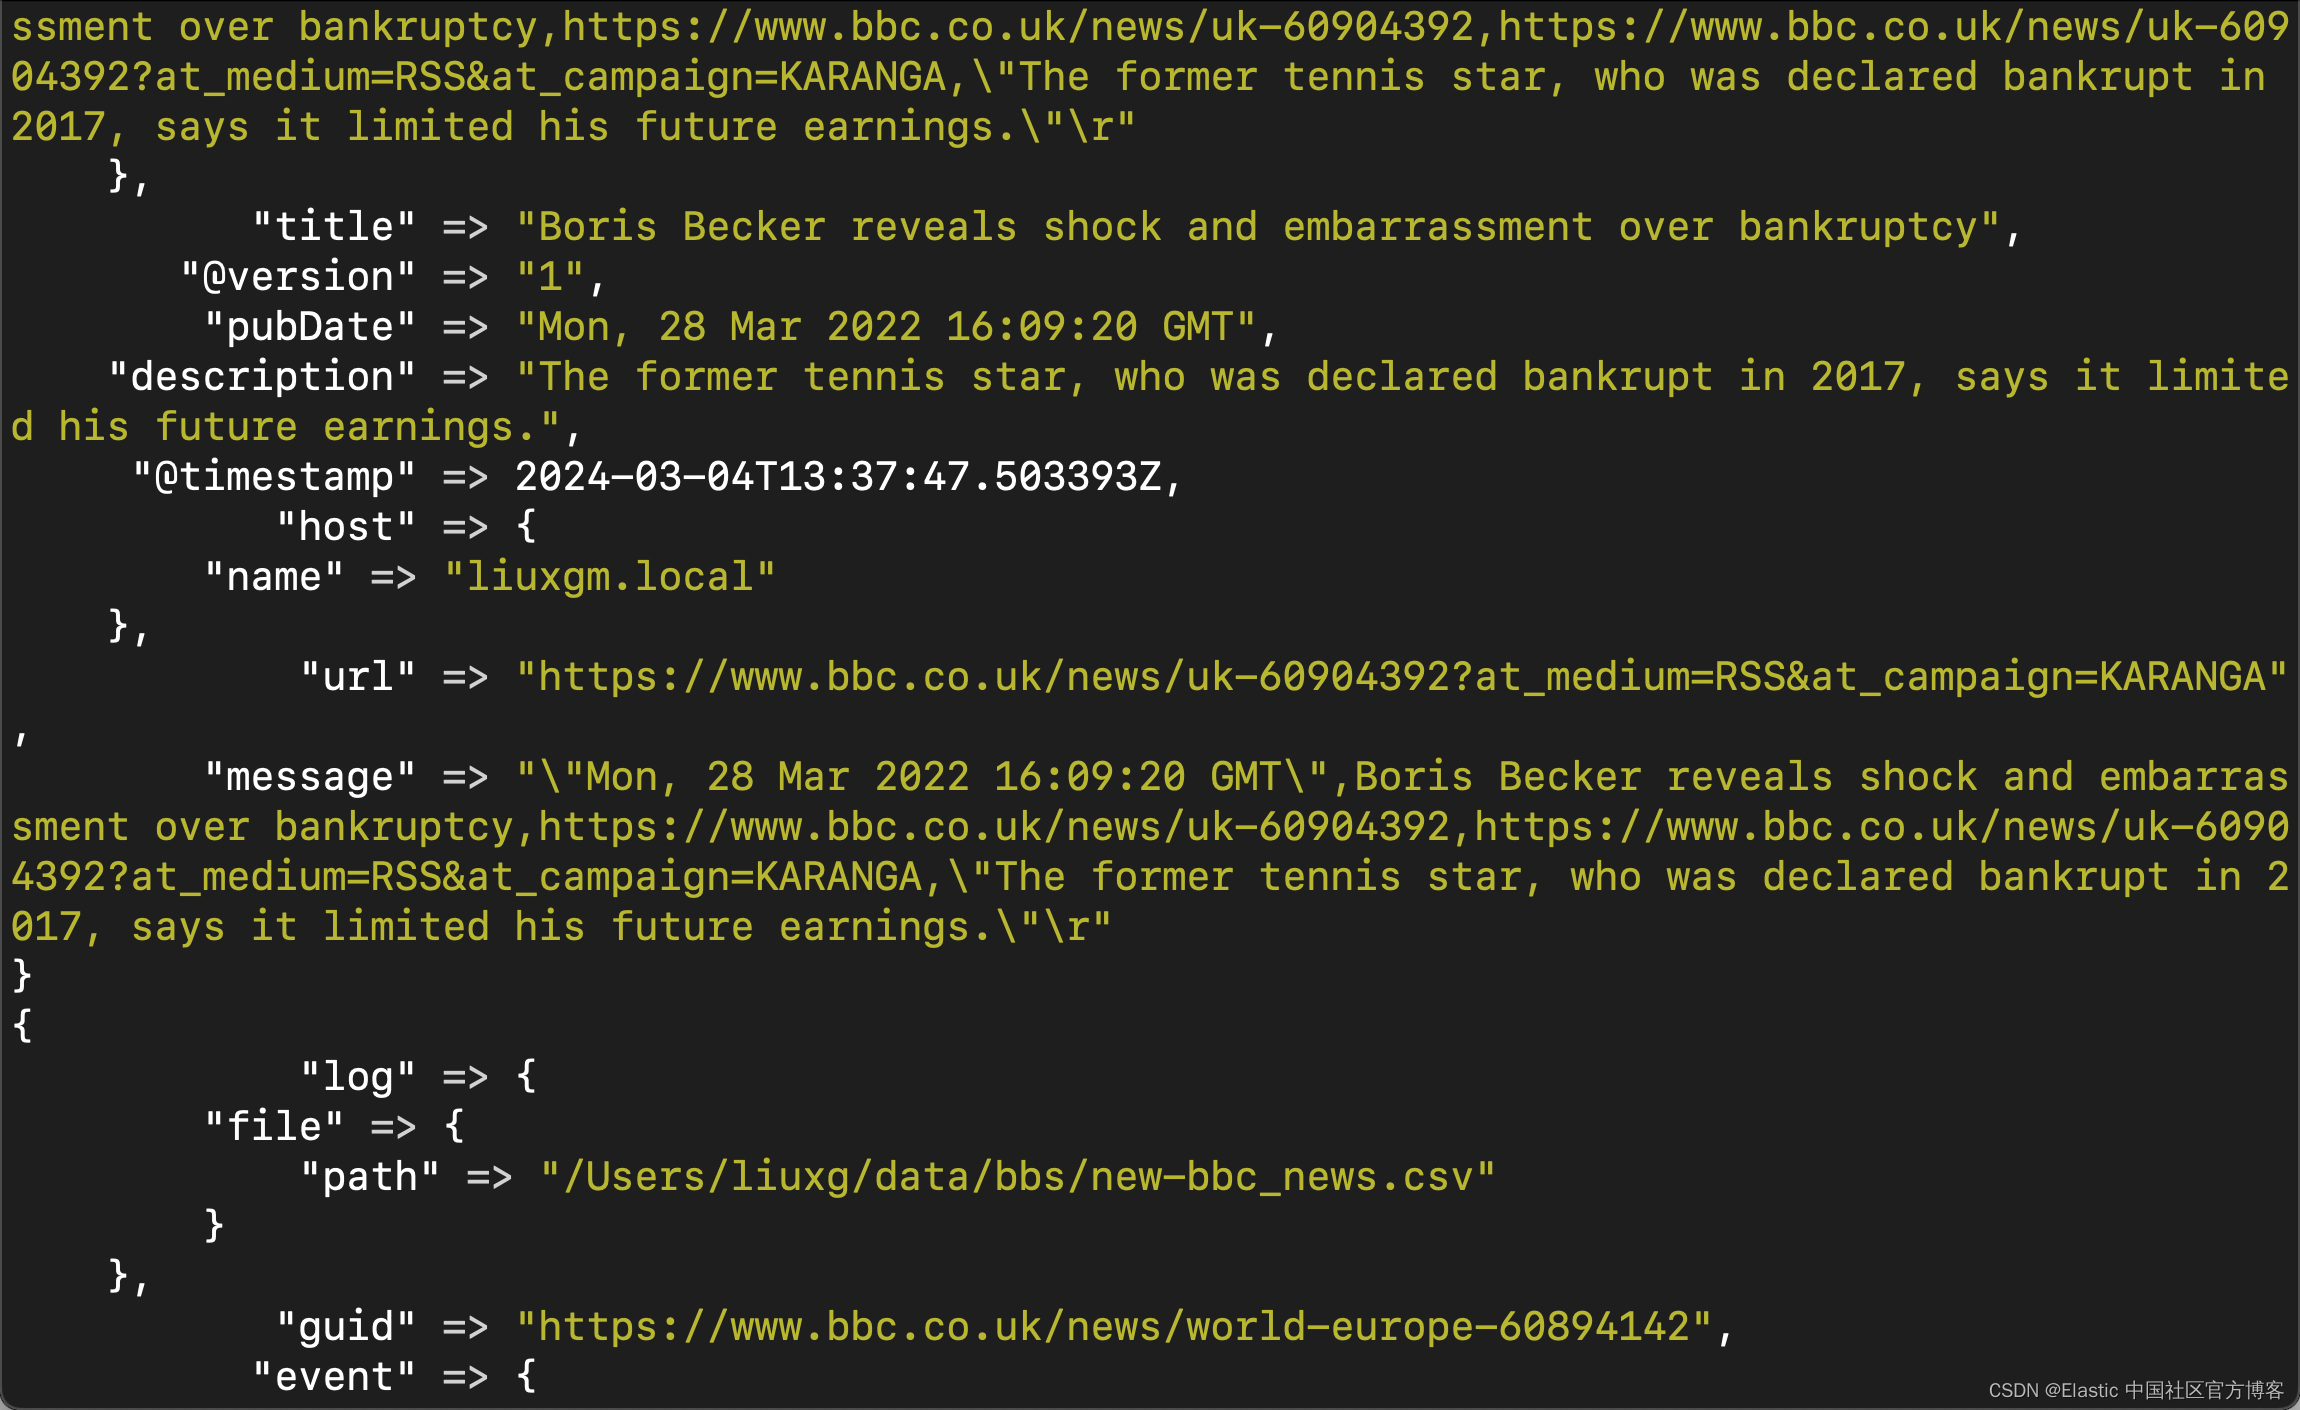
我们可以通过如下的命令来查看是否已经完全写入:
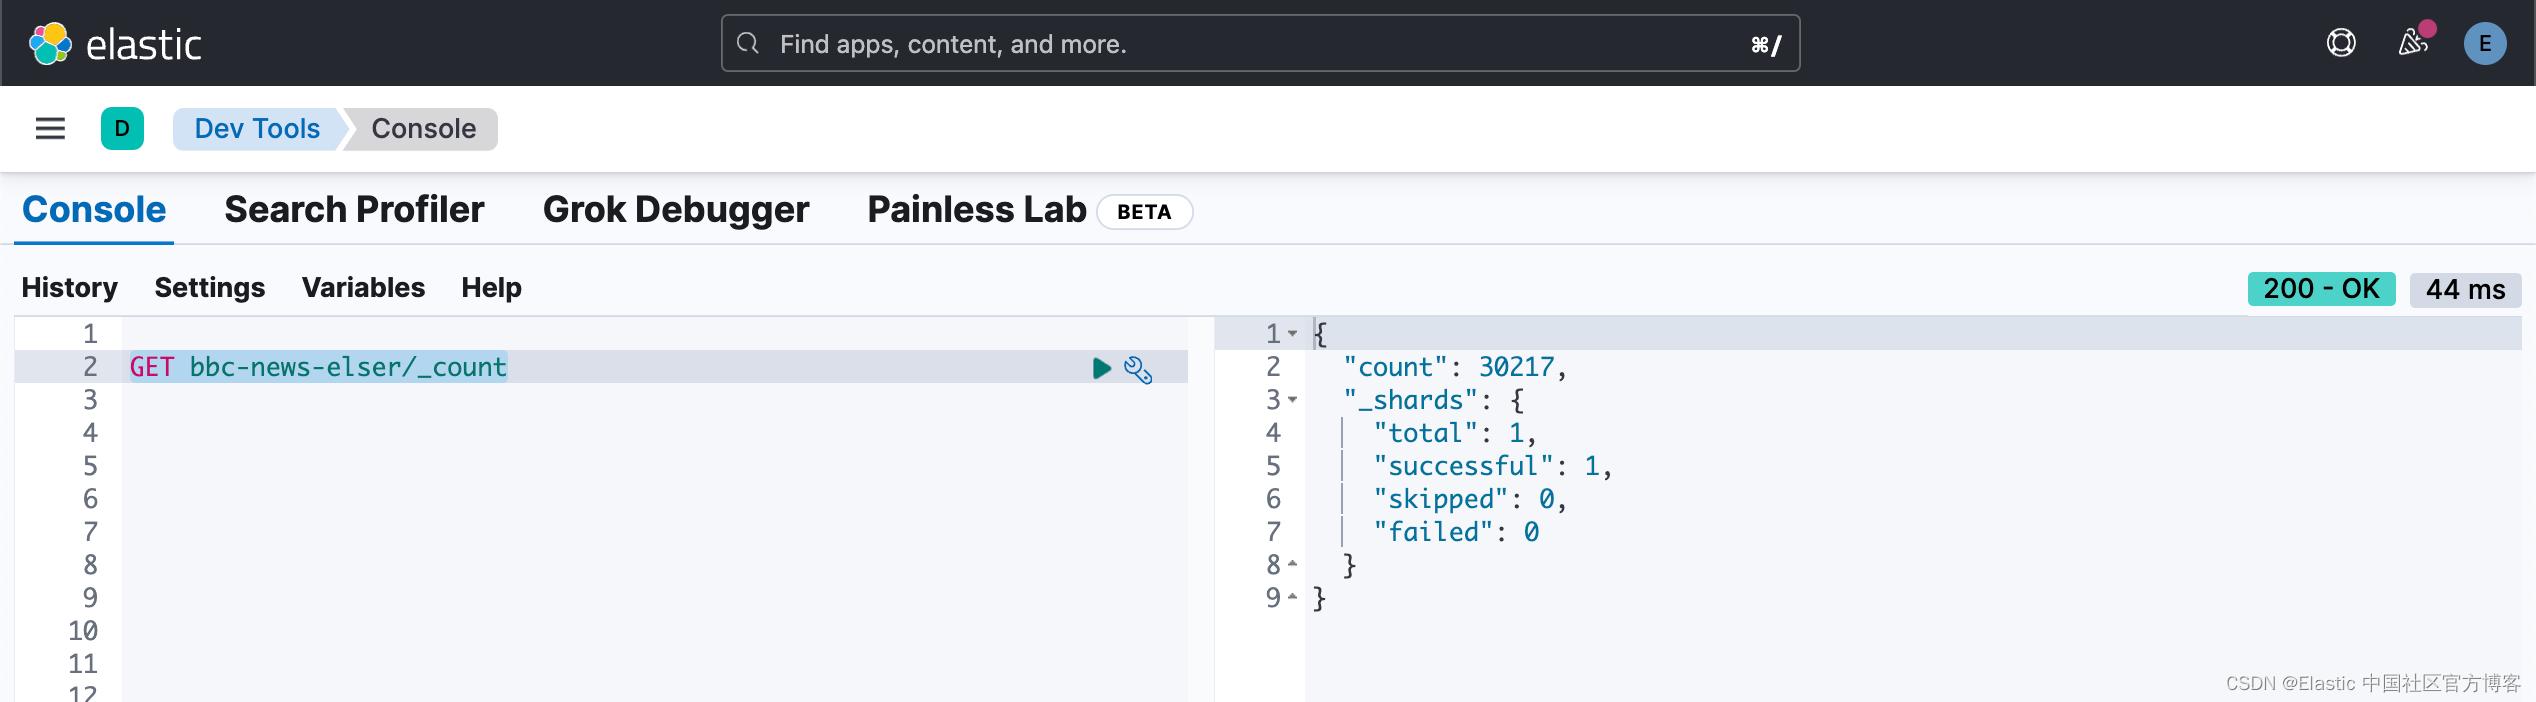
如果完全写入,Logstash 的 termninal 将不再滚动。我们可以在 Kibana 中进行查看:
为了更好地了解 NER 模型的内部情况,我们可以在开发工具中查询数据,定制响应以返回感兴趣的字段:
GET bbc-news-elser/_search?size=1
{
  "_source": ["ml.ner", "title"],
  "fields": [
    "ml.ner", "title"
  ]
}
分解这个片段,我们可以看到原始的 “title” 值,以及 NER 模型产生的结果。 “predicted_value:” 字段显示带有注释的识别实体的文本。 在本案中,“putin” 和 “tucker carlson” 已被识别为人员 (PER),而 “fox” 被识别为一个组织。 “entities” 对象包含一个对象,每个对象代表在原始 “title” 字段中识别的命名实体,并包括:
- “entity” - 文本中识别的命名实体的字符串。
- “class_naAme” - 分配给实体的分类,即 PER、LOC、ORG。
- “class_probability” - 表示模型对实体分类的置信度的十进制值。 上述响应中两个实体的值都接近 1,表明置信度较高。
- “start_pos” 和 “end_pos” - 预测值文本中实体的开始和结束位置(零索引),这对于需要突出显示或进一步处理文本中特定实体的应用程序非常有用。
第 7 步:部署搜索 UI
在最后一步中,我们引入了 Streamlit 应用程序,该应用程序利用 BBC 新闻数据集进行语义和标准文本搜索。
首先,按照此处所述的步骤安装 Streamlit:Streamlit Git Repo,或使用位于 git 存储库中的 requirements.text 文件。 安装后,创建一个名为 elasticapp.py 的文件并添加 Python 代码块。 如上,当我们需要对云集群进行身份验证时,需要在运行之前设置 “CLOUD_ID”、“API_KEY” 变量(或者,可以使用用户和密码来验证对集群的访问)。这可以通过以下方式实现 创建 dotenv 文件,或者通过导出变量。对于后一种方法,请运行以下命令:
export CLOUD_ID={{cloud_id}}
export API_KEY={{api_key}}
我们正在实现的用户界面有助于输入语义和标准查询、选择 Elasticsearch 索引以及随后启动对我们的文章数据集的搜索。 Elasticsearch 连接是使用从环境变量加载的云凭据建立的。 后端逻辑包括根据用户查询获取数据以及使用搜索结果更新 Streamlit 应用程序显示的功能。
elasticapp.py
import streamlit as st
from elasticsearch import Elasticsearch
import os
from datetime import datetime

cloud_id = os.getenv("CLOUD_ID")
api_key = os.getenv("API_KEY")

es = Elasticsearch(
    cloud_id=cloud_id,
    api_key=api_key
)

def main():
    st.title("Elasticsearch News App")

    selected_index = st.sidebar.selectbox("Elasticsearch Index", ["bbc-news-elser"], key="selected_index")

    if 'selected_tags' not in st.session_state:
        st.session_state['selected_tags'] = {"LOC": set(), "PER": set(), "MISC": set()}

    if 'search_results' not in st.session_state:
        st.session_state['search_results'] = fetch_recent_data(selected_index, size=20)

    semantic_query = st.text_input("Semantic Query:", key="semantic_query")
    regular_query = st.text_input("Standard Query:", key="regular_query")

    min_date, max_date = get_date_range(selected_index)
    start_date = st.date_input("Start Date", min_date, key="start_date")
    end_date = st.date_input("End Date", max_date, key="end_date")

    if st.button("Search"):
        st.session_state['search_results'] = fetch_data(selected_index, semantic_query, regular_query, start_date, end_date)
        st.session_state['selected_tags'] = {tag_type: set() for tag_type in ["LOC", "PER", "MISC"]}  # Reset filters on new search

    for tag_type in ["LOC", "PER", "MISC"]:
        current_tags = get_unique_tags(tag_type, st.session_state['search_results'])
        st.session_state['selected_tags'][tag_type] = st.sidebar.multiselect(f"Filter by {tag_type}", current_tags, key=f"filter_{tag_type}")

    filtered_results = filter_results_by_tags(st.session_state['search_results'], st.session_state['selected_tags'])
    update_results(filtered_results)

def fetch_recent_data(index_name, size=100):
    try:
        query_body = {
            "size": size,
            "sort": [
                {"pubDate": {"order": "desc"}},  # Primary sort by date
            ]
        }
        response = es.search(index=index_name, body=query_body)
        return [hit['_source'] for hit in response['hits']['hits']]
    except Exception as e:
        st.error(f"Error fetching recent data from Elasticsearch: {e}")
        return []

# Helper function to calculate the earliest and latest dates in the index
def get_date_range(index_name):
    max_date_aggregation = {
        "max_date": {
            "max": {
                "field": "pubDate"
            }
        }
    }

    min_date_aggregation = {
        "min_date": {
            "min": {
                "field": "pubDate"
            }
        }
    }

    max_date_result = es.search(index=index_name, body={"aggs": max_date_aggregation})
    min_date_result = es.search(index=index_name, body={"aggs": min_date_aggregation})

    max_date_bucket = max_date_result['aggregations']['max_date']
    min_date_bucket = min_date_result['aggregations']['min_date']

    max_date = max_date_bucket['value_as_string']
    min_date = min_date_bucket['value_as_string']

    if max_date:
        max_date = datetime.strptime(max_date, "%a, %d %b %Y %H:%M:%S GMT")
    else:
        max_date = datetime.today().date()

    if min_date:
        min_date = datetime.strptime(min_date, "%a, %d %b %Y %H:%M:%S GMT")
    else:
        min_date = datetime.today().date()

    return min_date, max_date

# Updates results based on search
def update_results(results):
    try:
        for result_item in results:
            # Display document titles as links
            title_with_link = f"[{result_item['title']}]({result_item['url']})"
            st.markdown(f"### {title_with_link}")

            st.write(result_item['description'])

            # Display timestamp with results
            timestamp = result_item.get('pubDate', '')
            if timestamp:
                st.write(f"Published: {timestamp}")

            # Adds tags for entities
            tags = result_item.get('tags', {})
            if tags:
                for tag_type, tag_values in tags.items():
                    for tag_value in tag_values:
                        # Define colors for extracted entity tags
                        tag_color = {
                            "LOC": "#3498db",
                            "PER": "#2ecc71",
                            "MISC": "#e74c3c"
                        }.get(tag_type, "#555555")

                        st.markdown(
                            f"<span style='background-color: {tag_color}; color: white; padding: 5px; margin: 2px; border-radius: 5px;'>{tag_type}: {tag_value}</span>",
                            unsafe_allow_html=True)

            st.write("---")

    except Exception as e:
        st.error(f"Error performing search in Elasticsearch: {e}")

# Fetch data from ES based on index + queries. Specify size - can be modified.
def fetch_data(index_name, semantic_query, regular_query, start_date=None, end_date=None, size=100):
    try:
        query_body = {
            "size": size,
            "query": {
                "bool": {
                    "should": []
                }
            }
        }

        # Add semantic query if provided by the user
        if semantic_query:
            query_body["query"]["bool"]["should"].append(
                {"bool": {
                    "should": {
                        "text_expansion": {
                            "ml-elser-title.tokens": {
                                "model_text": semantic_query,
                                "model_id": ".elser_model_2",
                                "boost": 9
                            }
                        },

                        "text_expansion": {
                            "ml-elser-description.tokens": {
                                "model_text": semantic_query,
                                "model_id": ".elser_model_2",
                                "boost": 9
                            }
                        }
                    }
                }}
            )

        # Add regular query if provided by the user
        if regular_query:
            query_body["query"]["bool"]["should"].append({
                "query_string": {
                    "query": regular_query,
                    "boost": 8
                }
            })

        # Add date range if provided
        if start_date or end_date:
            date_range_query = {
                "range": {
                    "pubDate": {}
                }
            }

            if start_date:
                date_range_query["range"]["pubDate"]["gte"] = start_date.strftime("%a, %d %b %Y %H:%M:%S GMT")

            if end_date:
                date_range_query["range"]["pubDate"]["lte"] = end_date.strftime("%a, %d %b %Y %H:%M:%S GMT")

            query_body["query"]["bool"]["must"] = date_range_query

        result = es.search(
            index=index_name,
            body=query_body
        )

        hits = result['hits']['hits']
        data = [{'_id': hit['_id'], 'title': hit['_source'].get('title', ''),
                 'description': hit['_source'].get('description', ''),
                 'tags': hit['_source'].get('tags', {}), 'pubDate': hit['_source'].get('pubDate', ''),
                 'url': hit['_source'].get('url', '')} for hit in hits]
        return data
    except Exception as e:
        st.error(f"Error fetching data from Elasticsearch: {e}")
        return []

# Function to get unique tags of a specific type
def get_unique_tags(tag_type, results):
    unique_tags = set()
    for result_item in results:
        tags = result_item.get('tags', {}).get(tag_type, [])
        unique_tags.update(tags)
    return sorted(unique_tags)

# Function to filter results based on selected tags
def filter_results_by_tags(results, selected_tags):
    filtered_results = []
    for result_item in results:
        tags = result_item.get('tags', {})
        add_result = True
        for tag_type, selected_values in selected_tags.items():
            if selected_values:
                result_values = tags.get(tag_type, [])
                if not any(value in selected_values for value in result_values):
                    add_result = False
                    break
        if add_result:
            filtered_results.append(result_item)
    return filtered_results

if __name__ == "__main__":
    main()
针对我们的本地部署来说,我们需要做如下的修改。我们可以参照之前的文章 “Elasticsearch:与多个 PDF 聊天 | LangChain Python 应用教程(免费 LLMs 和嵌入)”。在运行之前,我们先配置如下的环境变量:
export ES_SERVER="localhost"
export ES_USER="elastic"
export ES_PASSWORD="q2rqAIphl-fx9ndQ36CO"
export ES_FINGERPRINT="bce66ed55097f255fc8e4420bdadafc8d609cc8027038c2dd09d805668f3459e"
$ export ES_SERVER="localhost"
$ export ES_USER="elastic"
$ export ES_PASSWORD="q2rqAIphl-fx9ndQ36CO"
$ export ES_FINGERPRINT="bce66ed55097f255fc8e4420bdadafc8d609cc8027038c2dd09d805668f3459e"elasticapp.py
import streamlit as st
from elasticsearch import Elasticsearch
import os
from datetime import datetime

endpoint = os.getenv("ES_SERVER")
username = os.getenv("ES_USER")
password = os.getenv("ES_PASSWORD")
fingerprint = os.getenv("ES_FINGERPRINT")

url = f"https://{endpoint}:9200"

es = Elasticsearch( url ,
    basic_auth = (username, password),
    ssl_assert_fingerprint = fingerprint,
    http_compress = True )

# print(es.info())

def main():
    st.title("Elasticsearch News App")

    selected_index = st.sidebar.selectbox("Elasticsearch Index", ["bbc-news-elser"], key="selected_index")

    if 'selected_tags' not in st.session_state:
        st.session_state['selected_tags'] = {"LOC": set(), "PER": set(), "MISC": set()}

    if 'search_results' not in st.session_state:
        st.session_state['search_results'] = fetch_recent_data(selected_index, size=20)

    semantic_query = st.text_input("Semantic Query:", key="semantic_query")
    regular_query = st.text_input("Standard Query:", key="regular_query")

    min_date, max_date = get_date_range(selected_index)
    start_date = st.date_input("Start Date", min_date, key="start_date")
    end_date = st.date_input("End Date", max_date, key="end_date")

    if st.button("Search"):
        st.session_state['search_results'] = fetch_data(selected_index, semantic_query, regular_query, start_date, end_date)
        st.session_state['selected_tags'] = {tag_type: set() for tag_type in ["LOC", "PER", "MISC"]}  # Reset filters on new search

    for tag_type in ["LOC", "PER", "MISC"]:
        current_tags = get_unique_tags(tag_type, st.session_state['search_results'])
        st.session_state['selected_tags'][tag_type] = st.sidebar.multiselect(f"Filter by {tag_type}", current_tags, key=f"filter_{tag_type}")

    filtered_results = filter_results_by_tags(st.session_state['search_results'], st.session_state['selected_tags'])
    update_results(filtered_results)

def fetch_recent_data(index_name, size=100):
    try:
        query_body = {
            "size": size,
            "sort": [
                {"pubDate": {"order": "desc"}},  # Primary sort by date
            ]
        }
        response = es.search(index=index_name, body=query_body)
        return [hit['_source'] for hit in response['hits']['hits']]
    except Exception as e:
        st.error(f"Error fetching recent data from Elasticsearch: {e}")
        return []

# Helper function to calculate the earliest and latest dates in the index
def get_date_range(index_name):
    max_date_aggregation = {
        "max_date": {
            "max": {
                "field": "pubDate"
            }
        }
    }

    min_date_aggregation = {
        "min_date": {
            "min": {
                "field": "pubDate"
            }
        }
    }

    max_date_result = es.search(index=index_name, body={"aggs": max_date_aggregation})
    min_date_result = es.search(index=index_name, body={"aggs": min_date_aggregation})

    max_date_bucket = max_date_result['aggregations']['max_date']
    min_date_bucket = min_date_result['aggregations']['min_date']

    max_date = max_date_bucket['value_as_string']
    min_date = min_date_bucket['value_as_string']

    if max_date:
        max_date = datetime.strptime(max_date, "%a, %d %b %Y %H:%M:%S GMT")
    else:
        max_date = datetime.today().date()

    if min_date:
        min_date = datetime.strptime(min_date, "%a, %d %b %Y %H:%M:%S GMT")
    else:
        min_date = datetime.today().date()

    return min_date, max_date

# Updates results based on search
def update_results(results):
    try:
        for result_item in results:
            # Display document titles as links
            title_with_link = f"[{result_item['title']}]({result_item['url']})"
            st.markdown(f"### {title_with_link}")

            st.write(result_item['description'])

            # Display timestamp with results
            timestamp = result_item.get('pubDate', '')
            if timestamp:
                st.write(f"Published: {timestamp}")

            # Adds tags for entities
            tags = result_item.get('tags', {})
            if tags:
                for tag_type, tag_values in tags.items():
                    for tag_value in tag_values:
                        # Define colors for extracted entity tags
                        tag_color = {
                            "LOC": "#3498db",
                            "PER": "#2ecc71",
                            "MISC": "#e74c3c"
                        }.get(tag_type, "#555555")

                        st.markdown(
                            f"<span style='background-color: {tag_color}; color: white; padding: 5px; margin: 2px; border-radius: 5px;'>{tag_type}: {tag_value}</span>",
                            unsafe_allow_html=True)

            st.write("---")

    except Exception as e:
        st.error(f"Error performing search in Elasticsearch: {e}")

# Fetch data from ES based on index + queries. Specify size - can be modified.
def fetch_data(index_name, semantic_query, regular_query, start_date=None, end_date=None, size=100):
    try:
        query_body = {
            "size": size,
            "query": {
                "bool": {
                    "should": []
                }
            }
        }

        # Add semantic query if provided by the user
        if semantic_query:
            query_body["query"]["bool"]["should"].append(
                {"bool": {
                    "should": {
                        "text_expansion": {
                            "ml-elser-title.tokens": {
                                "model_text": semantic_query,
                                "model_id": ".elser_model_2",
                                "boost": 9
                            }
                        },

                        "text_expansion": {
                            "ml-elser-description.tokens": {
                                "model_text": semantic_query,
                                "model_id": ".elser_model_2",
                                "boost": 9
                            }
                        }
                    }
                }}
            )

        # Add regular query if provided by the user
        if regular_query:
            query_body["query"]["bool"]["should"].append({
                "query_string": {
                    "query": regular_query,
                    "boost": 8
                }
            })

        # Add date range if provided
        if start_date or end_date:
            date_range_query = {
                "range": {
                    "pubDate": {}
                }
            }

            if start_date:
                date_range_query["range"]["pubDate"]["gte"] = start_date.strftime("%a, %d %b %Y %H:%M:%S GMT")

            if end_date:
                date_range_query["range"]["pubDate"]["lte"] = end_date.strftime("%a, %d %b %Y %H:%M:%S GMT")

            query_body["query"]["bool"]["must"] = date_range_query

        result = es.search(
            index=index_name,
            body=query_body
        )

        hits = result['hits']['hits']
        data = [{'_id': hit['_id'], 'title': hit['_source'].get('title', ''),
                 'description': hit['_source'].get('description', ''),
                 'tags': hit['_source'].get('tags', {}), 'pubDate': hit['_source'].get('pubDate', ''),
                 'url': hit['_source'].get('url', '')} for hit in hits]
        return data
    except Exception as e:
        st.error(f"Error fetching data from Elasticsearch: {e}")
        return []

# Function to get unique tags of a specific type
def get_unique_tags(tag_type, results):
    unique_tags = set()
    for result_item in results:
        tags = result_item.get('tags', {}).get(tag_type, [])
        unique_tags.update(tags)
    return sorted(unique_tags)

# Function to filter results based on selected tags
def filter_results_by_tags(results, selected_tags):
    filtered_results = []
    for result_item in results:
        tags = result_item.get('tags', {})
        add_result = True
        for tag_type, selected_values in selected_tags.items():
            if selected_values:
                result_values = tags.get(tag_type, [])
                if not any(value in selected_values for value in result_values):
                    add_result = False
                    break
        if add_result:
            filtered_results.append(result_item)
    return filtered_results

if __name__ == "__main__":
    main()
我们使用如下的命令来进行运行:
streamlit run elasticapp.py

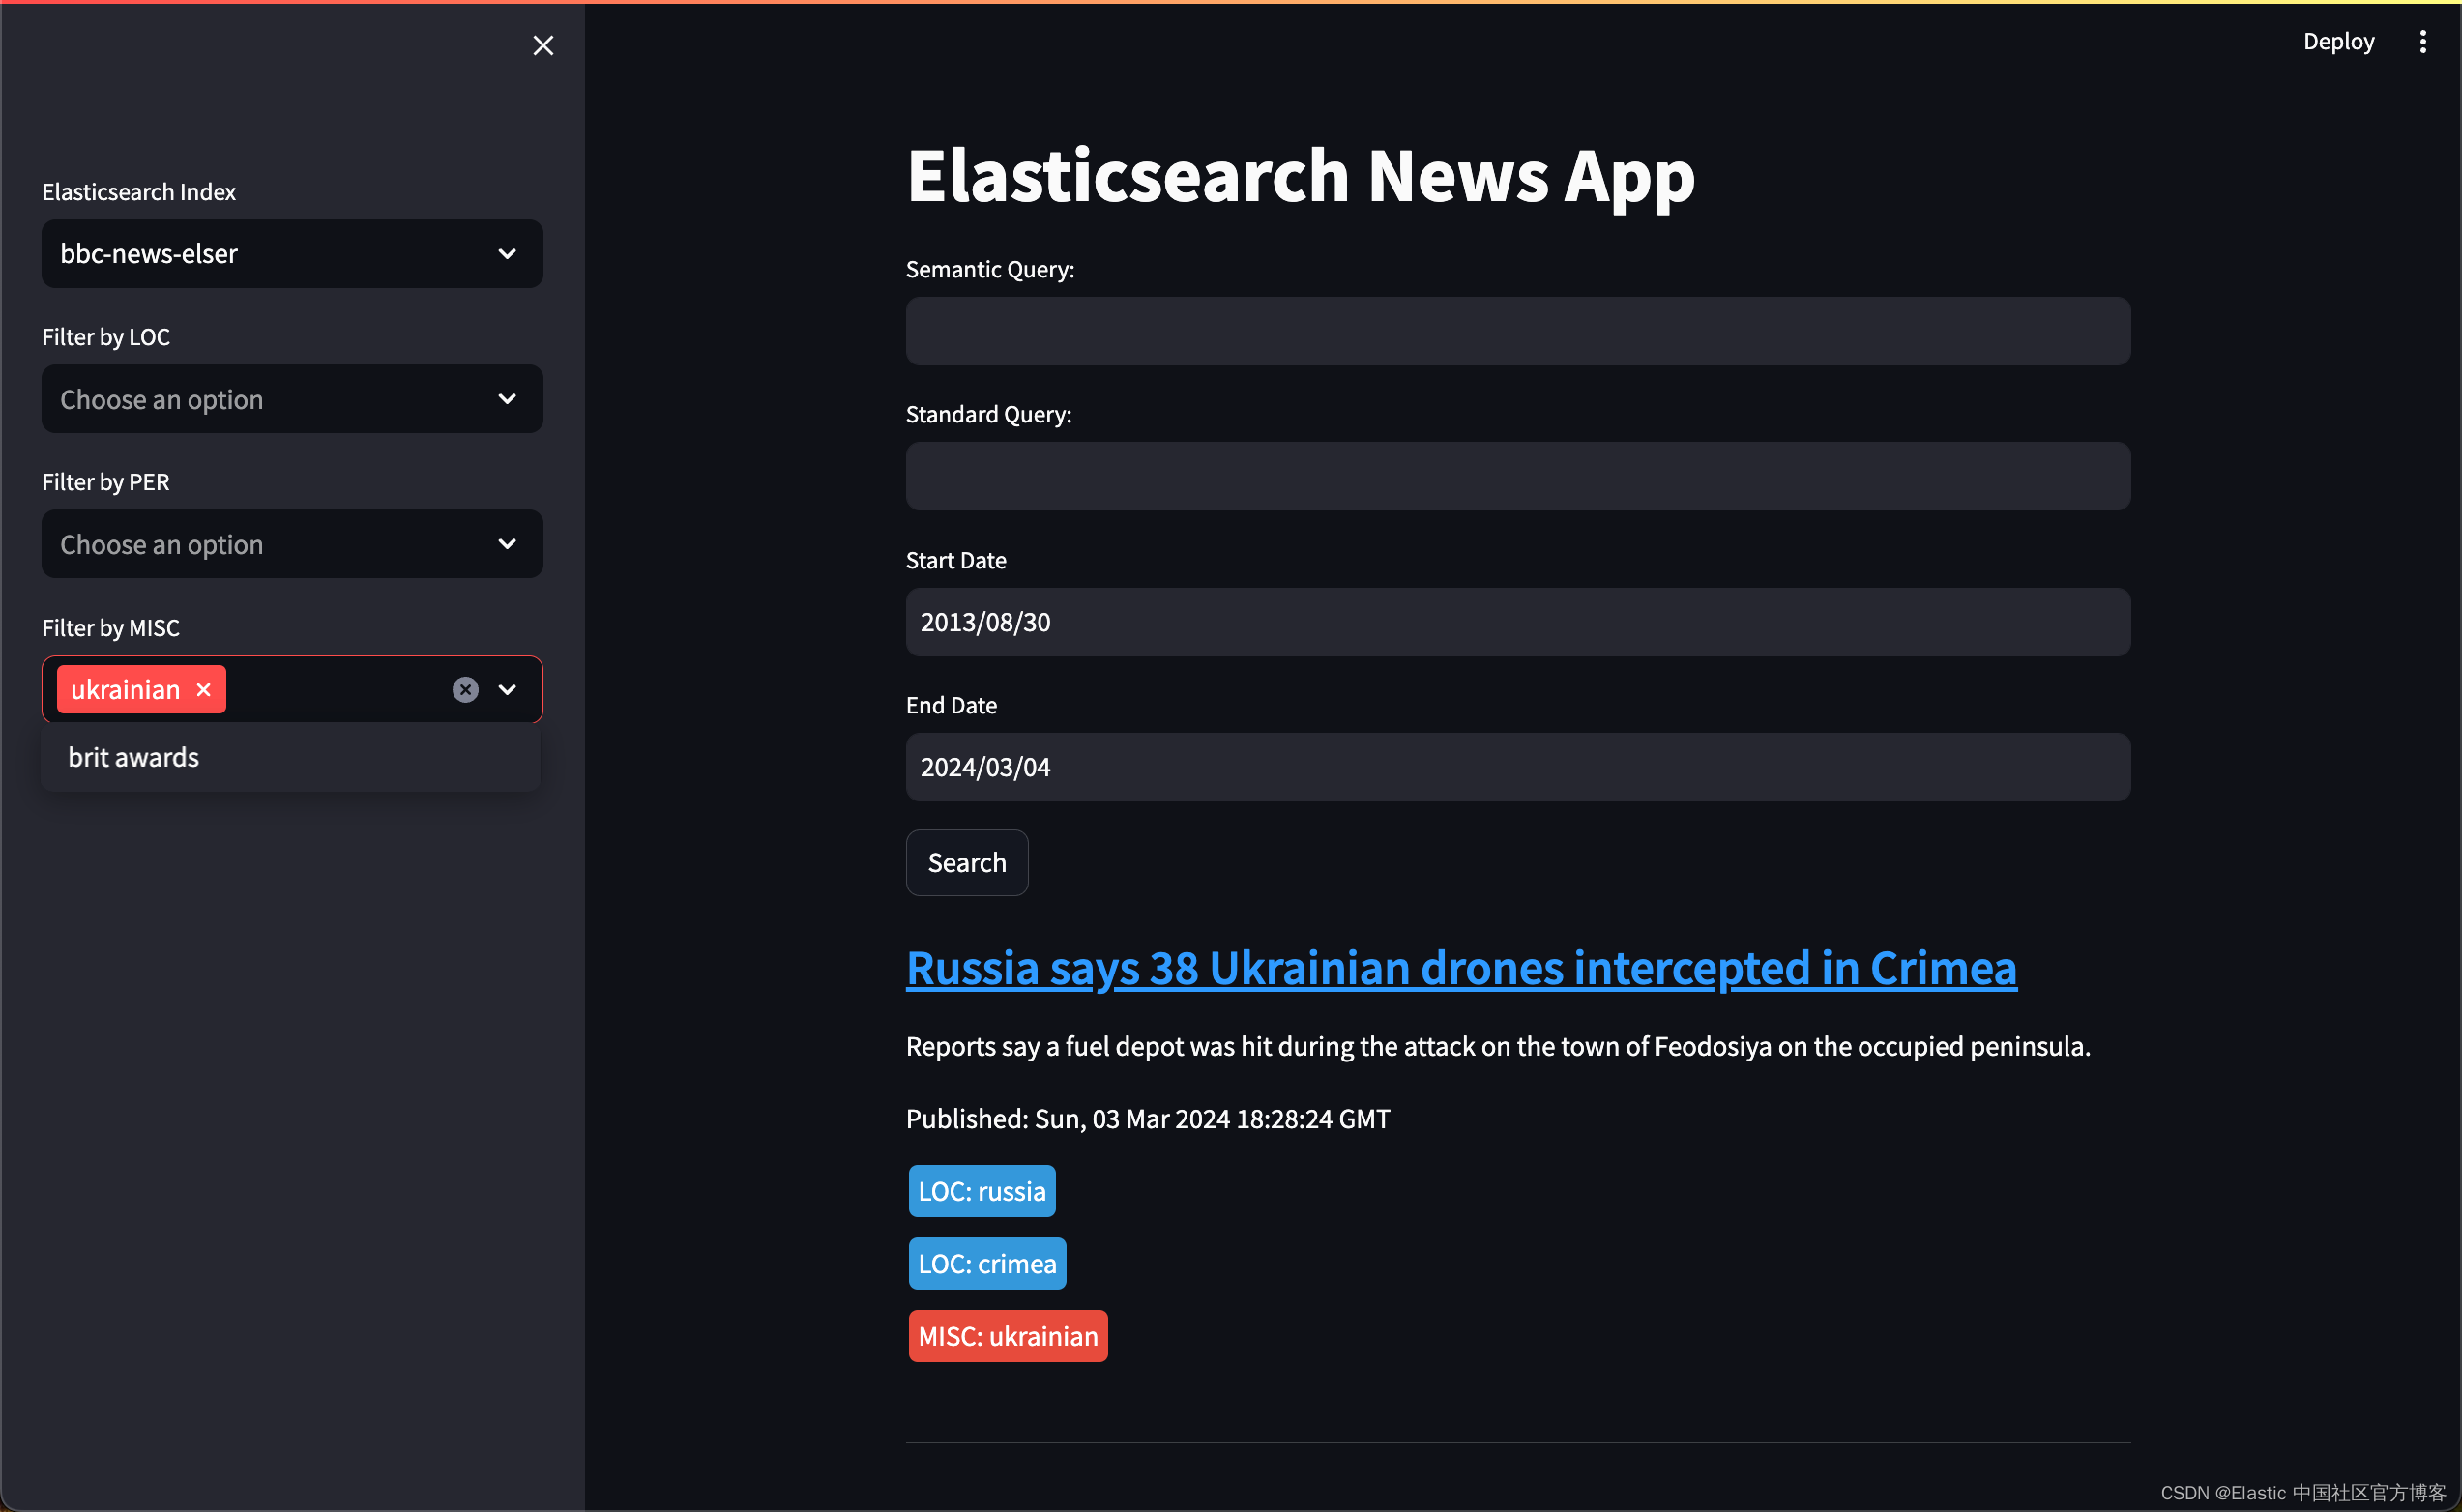
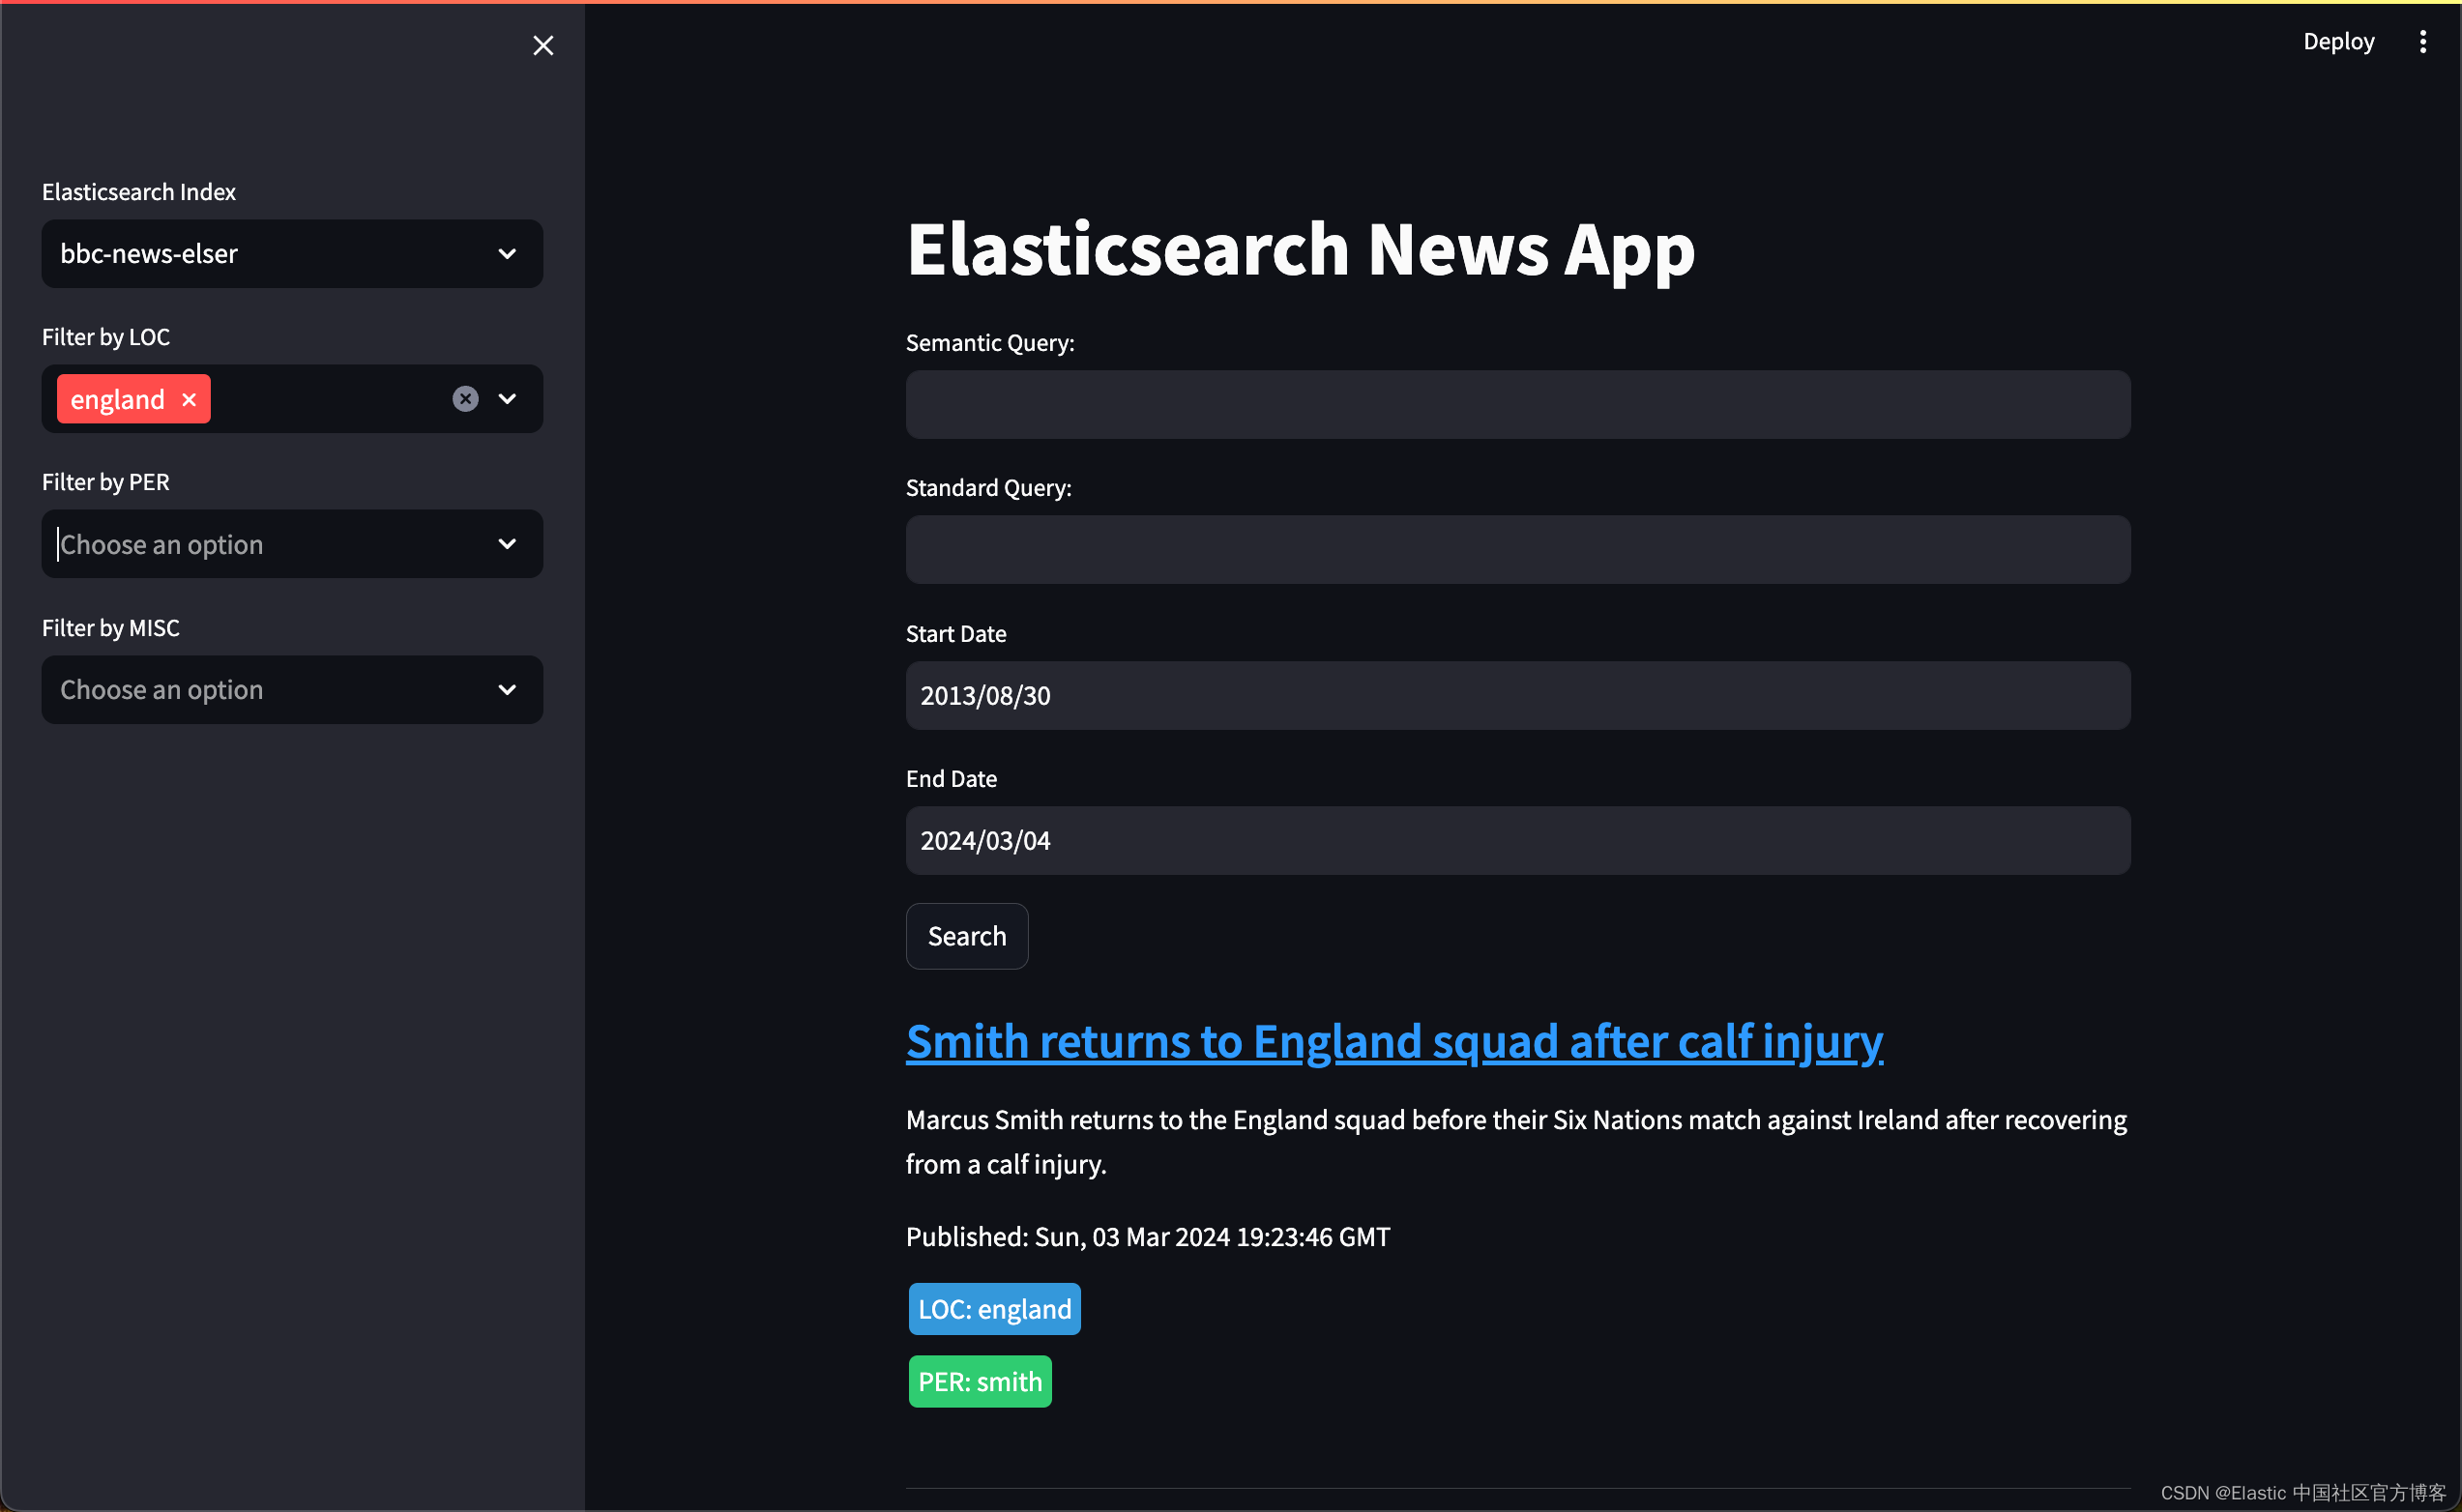
在上面,我们可以通过地名,人名或 MISC 来进行筛选。
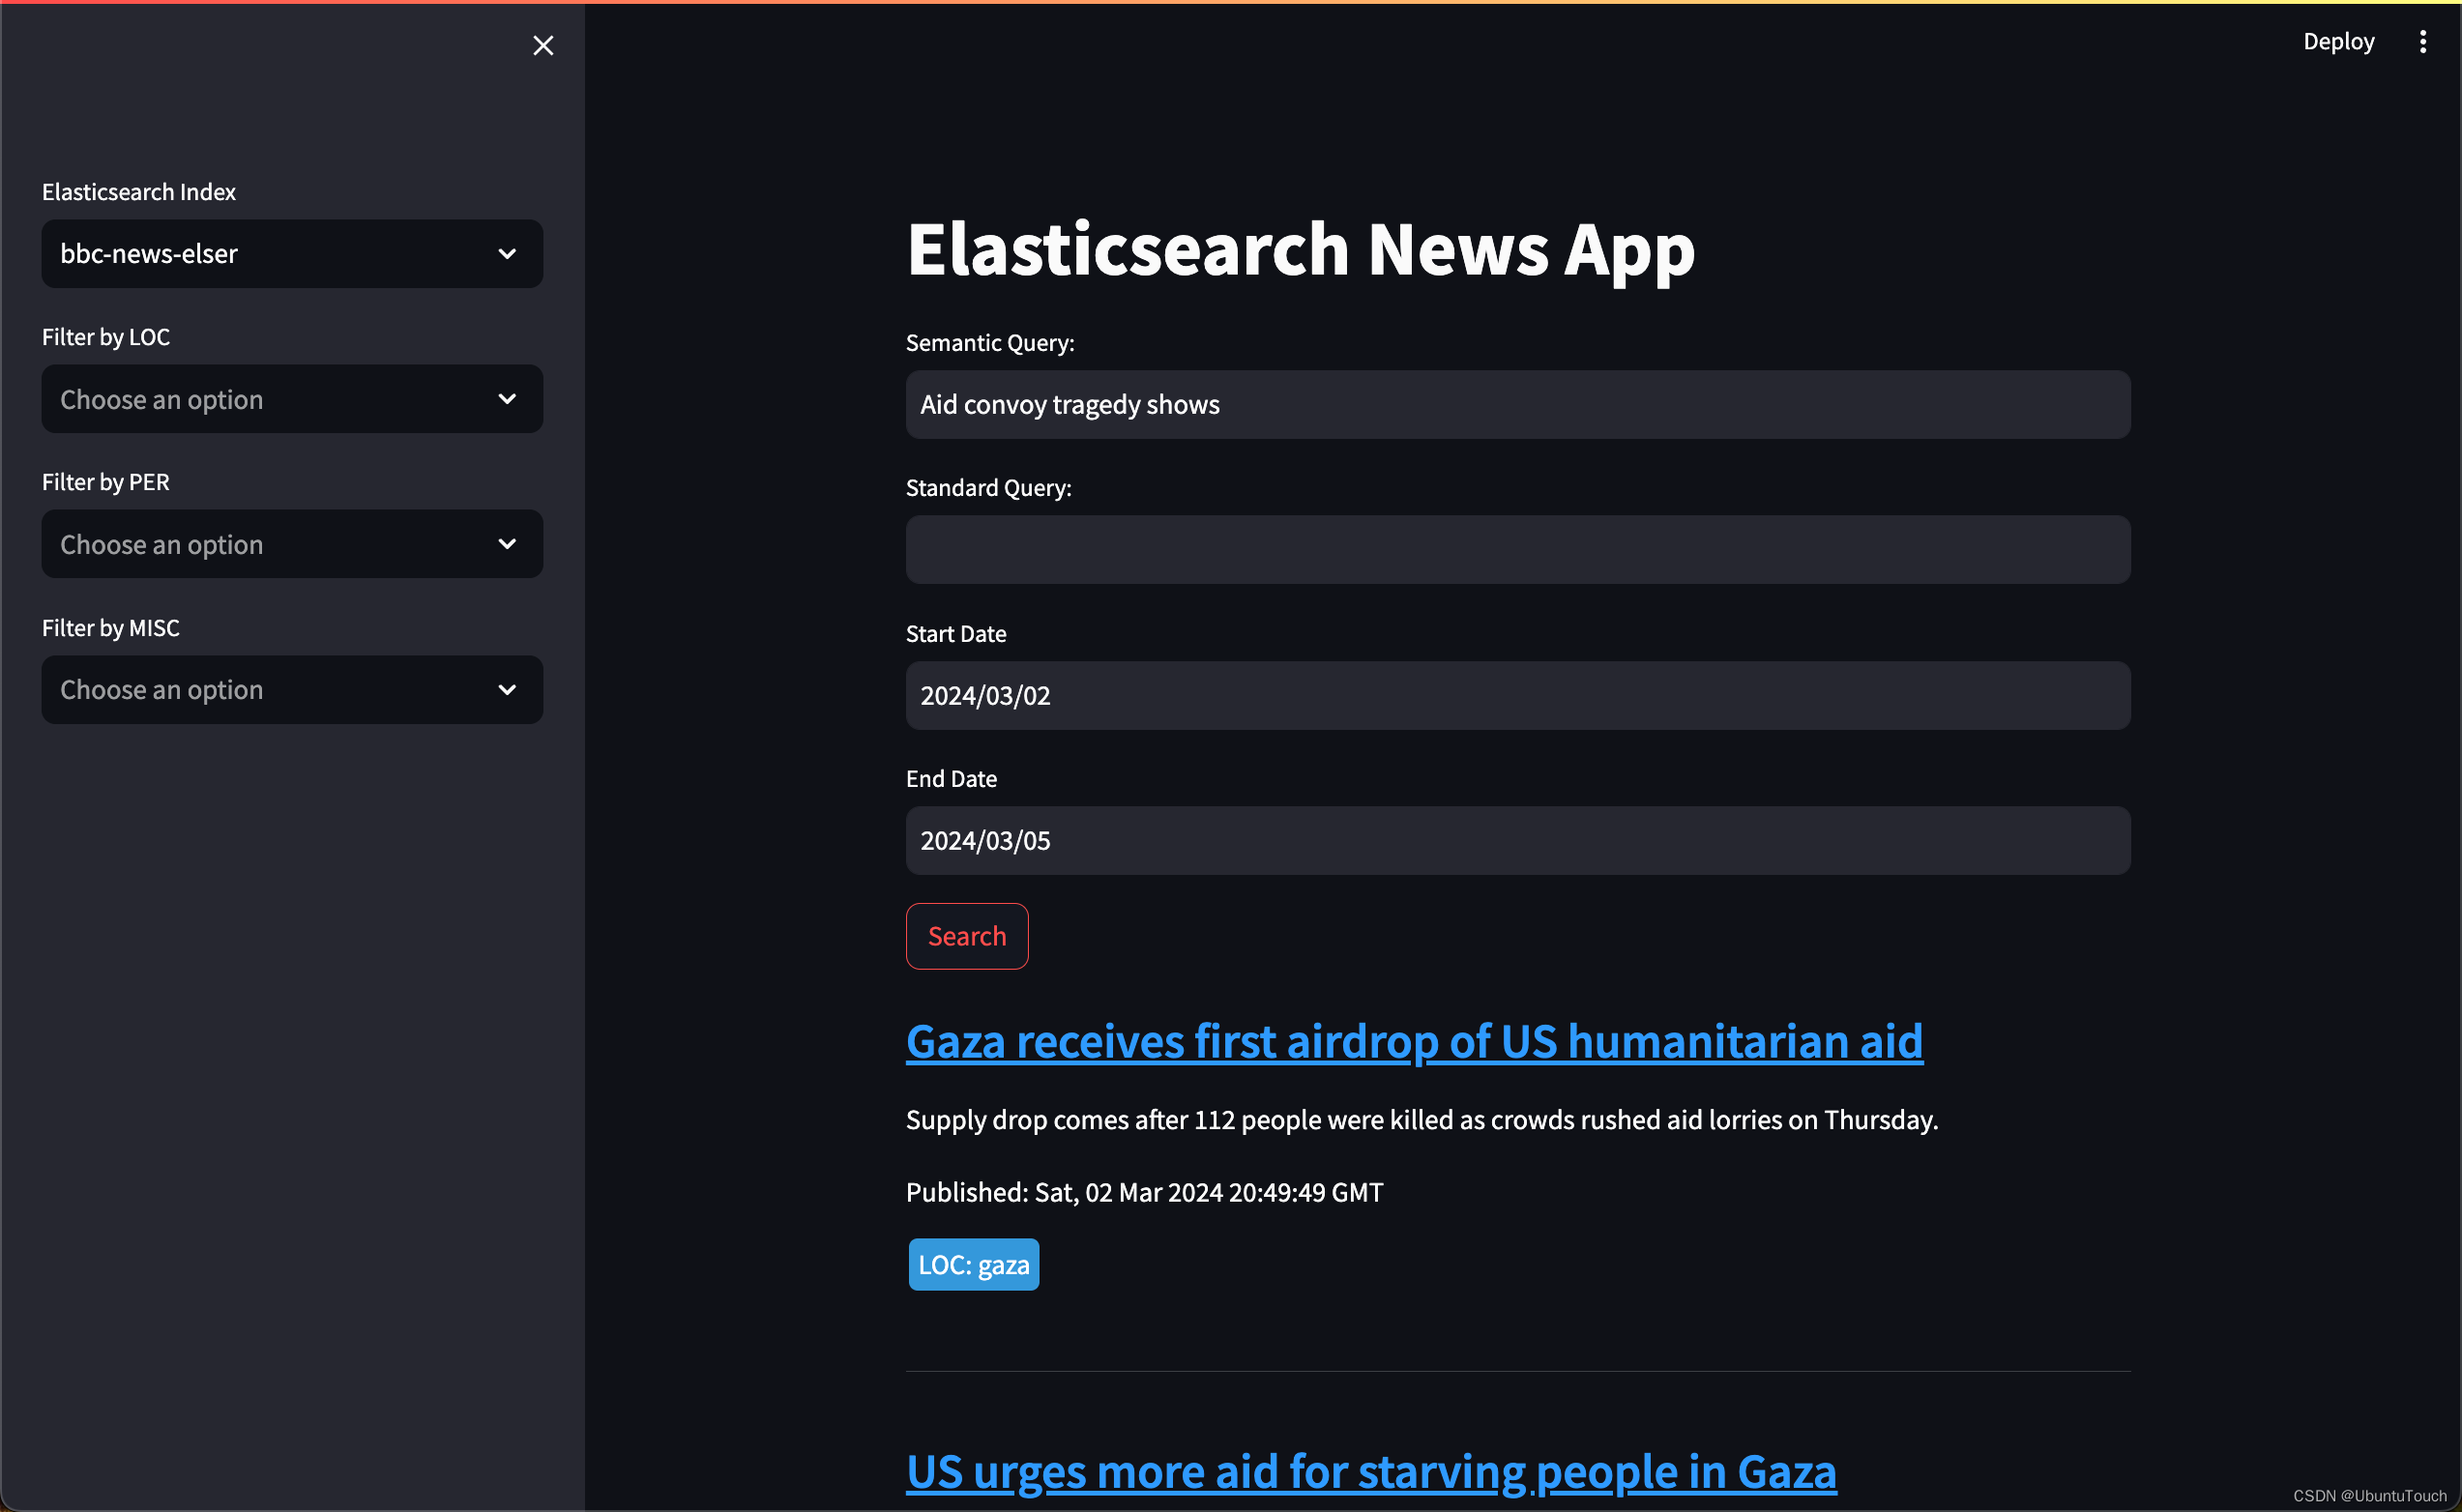
我们可以针对一些查询来进行语义搜索,比如如:

旨在为数千万中国开发者提供一个无缝且高效的云端环境,以支持学习、使用和贡献开源项目。
更多推荐


 35
35 0
0- 0


 已为社区贡献21条内容

所有评论(0)