
springboot实现多环境配置spring.profiles.active
spring.profiles.active=@spring.profiles.active@
一、spring.profiles.active介绍:
springboot项目中,我们经常把一些变量参数写在application.properties文件中,但是不同的环境参数可能不一样,spring.profiles.active可以区分环境。多环境配置的文件名需要满足application-{profile}.properties的格式,其中{profile}对应环境标志,如
application-dev.properties开发环境配置文件
application-test.properties测试环境配置文件
application-prod.properties生产环境配置文件
然后在默认配置文件中通过spring.profiles.active来指定,指定也有两种方式:
1、手动指定:这种方法切换环境需要修改配置文件,不够方便
spring.profiles.active = {profile}
#如spring.profiles.active = prod
2、打包自动指定:
二、demo:
1、启动类:
package com;

import org.springframework.boot.SpringApplication;
import org.springframework.boot.autoconfigure.SpringBootApplication;

@SpringBootApplication
public class ProfilesApplication {

    public static void main(String args[]){
        SpringApplication.run(ProfilesApplication.class,args);
    }
}
2、多环境配置文件:
开发环境application-dev.properties:
zt.profiles = this is dev测试环境application-test.properties
zt.profiles = this is test生产环境application-prod.properties
zt.profiles = this is prod3、接口:
package com.controller;
import org.springframework.beans.factory.annotation.Value;
import org.springframework.web.bind.annotation.RequestMapping;
import org.springframework.web.bind.annotation.RestController;
@RestController
public class TestController {
@Value("${zt.common}")
private String common;
@Value("${zt.profiles}")
private String profilesStr;
@RequestMapping("/test")
public String getStr(){
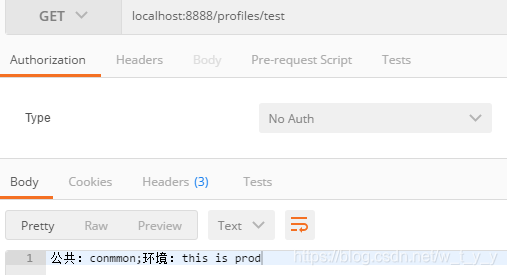
return "公共:"+common+";环境:"+profilesStr;
}
}
4、下面分别列下手动、自动方法的区别写法:
(1) 手动方法:
pom:
<?xml version="1.0" encoding="UTF-8"?>
<project xmlns="http://maven.apache.org/POM/4.0.0"
         xmlns:xsi="http://www.w3.org/2001/XMLSchema-instance"
         xsi:schemaLocation="http://maven.apache.org/POM/4.0.0 http://maven.apache.org/xsd/maven-4.0.0.xsd">
    <modelVersion>4.0.0</modelVersion>

    <groupId>com.profiles</groupId>
    <artifactId>profiles-demo</artifactId>
    <version>1.0-SNAPSHOT</version>

    <parent>
        <groupId>org.springframework.boot</groupId>
        <artifactId>spring-boot-starter-parent</artifactId>
        <version>1.4.1.RELEASE</version>
    </parent>

    <dependencies>
        <dependency>
            <groupId>org.springframework.boot</groupId>
            <artifactId>spring-boot-starter-web</artifactId>
        </dependency>
    </dependencies>
</project>
默认配置文件:
server.port= 8888
server.context-path=/profiles
spring.profiles.active=prod

zt.common = conmmon
mvn clean package打包测试一下:

这时候我们打包带参数,如mvn clean package -Ptest、mvn clean package -Pdev、mvn clean package -Pprod,打包后的仍然是prod,就是说必须手动修改application.properties中的环境。
(2)自动方法:
在pom中添加以下配置:
<profiles>
        <!-- 测试环境 -->
        <profile>
            <id>test</id>
            <activation>
                <activeByDefault>true</activeByDefault>
            </activation>
            <properties>
                <spring.profiles.active>test</spring.profiles.active>
            </properties>
        </profile>
        <!-- 开发环境 -->
        <profile>
            <id>dev</id>
            <activation>
                <activeByDefault>false</activeByDefault>
            </activation>
            <properties>
                <spring.profiles.active>dev</spring.profiles.active>
            </properties>
        </profile>
        <!-- 生产环境 -->
        <profile>
            <id>prod</id>
            <activation>
                <activeByDefault>false</activeByDefault>
            </activation>
            <properties>
                <spring.profiles.active>prod</spring.profiles.active>
            </properties>
        </profile>
    </profiles>
并把application.properties中的profiles指定改为
spring.profiles.active=@spring.profiles.active@这时候打包使用mvn clean package -Ptest、mvn clean package -Pdev、mvn clean package -Pprod,打出来的就是指定环境的包了。pom文件中test一项默认是true,所以如果不指定环境直接使用mvn clean package打包就是test环境。
idea启动则可以点击右侧的maven,选择环境勾上,再启动服务即可:

如我勾上prod:

启动服务访问的为prod环境:

再去掉prod,勾上test:

重启服务访问的为test:


旨在为数千万中国开发者提供一个无缝且高效的云端环境,以支持学习、使用和贡献开源项目。
更多推荐


 2
2 0
0- 0


 已为社区贡献9条内容

所有评论(0)