从Spring3.0,@Configuration 用于定义配置类,可替换xml配置文件,被注解的类内部包含有一个或多个被@Bean注解的方法,这些方法将会被AnnotationConfigApplicationContext或AnnotationConfigWebApplicationContext类进行扫描,并用于构建bean定义,初始化Spring容器。
注意 :@Configuration注解的配置类有如下要求:
@Configuration不可以是final类型; @Configuration不可以是匿名类; 嵌套的configuration必须是静态类。 一、用@Configuration加载spring使用 AnnotationConfigApplicationContext 注册 AppContext 类的两种方法 1.5、配置Web应用程序(web.xml中配置AnnotationConfigApplicationContext)
二、组合多个配置类xml 配置文件
一、@Configuation加载Spring方法
1.1、@Configuration配置spring并启动spring容器
@Configuration标注在类上,相当于把该类作为spring的xml配置文件中的<beans>,作用为:配置spring容器(应用上下文)
package com.dxz.demo.configuration;
import org.springframework.context.annotation.Configuration;
@Configuration
相当于:
<?xml version="1.0" encoding="UTF-8"?>
<beans xmlns="http://www.springframework.org/schema/beans" xmlns:xsi="http://www.w3.org/2001/XMLSchema-instance"
    xmlns:context="http://www.springframework.org/schema/context" xmlns:jdbc="http://www.springframework.org/schema/jdbc"
    xmlns:jee="http://www.springframework.org/schema/jee" xmlns:tx="http://www.springframework.org/schema/tx"
    xmlns:util="http://www.springframework.org/schema/util" xmlns:task="http://www.springframework.org/schema/task" xsi:schemaLocation="
        http://www.springframework.org/schema/beans http://www.springframework.org/schema/beans/spring-beans-4.0.xsd
        http://www.springframework.org/schema/context http://www.springframework.org/schema/context/spring-context-4.0.xsd
        http://www.springframework.org/schema/jdbc http://www.springframework.org/schema/jdbc/spring-jdbc-4.0.xsd
        http://www.springframework.org/schema/jee http://www.springframework.org/schema/jee/spring-jee-4.0.xsd
        http://www.springframework.org/schema/tx http://www.springframework.org/schema/tx/spring-tx-4.0.xsd
        http://www.springframework.org/schema/util http://www.springframework.org/schema/util/spring-util-4.0.xsd
        http://www.springframework.org/schema/task http://www.springframework.org/schema/task/spring-task-4.0.xsd" default-lazy-init="false">
</beans>
主方法进行测试:
package com.dxz.demo.configuration;
import org.springframework.context.ApplicationContext;
public class TestMain {
    // @Configuration注解的spring容器加载方式,用AnnotationConfigApplicationContext替换ClassPathXmlApplicationContext
    ApplicationContext context = new AnnotationConfigApplicationContext(TestConfiguration.class);

    // 如果加载spring-context.xml文件:
    // ApplicationContext context = new
    // ClassPathXmlApplicationContext("spring-context.xml");
}
}
从运行主方法结果可以看出,spring容器已经启动了:
1.2、@Configuration启动容器+@Bean注册Bean,@Bean下管理bean的生命周期
@Bean标注在方法上(返回某个实例的方法),等价于spring的xml配置文件中的<bean>,作用为:注册bean对象
bean类:
package com.dxz.demo.configuration;
public class TestBean {
private String username;
private String url;
private String password;

public void sayHello() {
    System.out.println("TestBean sayHello...");
}

public String toString() {
    return "username:" + this.username + ",url:" + this.url + ",password:" + this.password;
}

public void start() {
    System.out.println("TestBean 初始化。。。");
}

public void cleanUp() {
    System.out.println("TestBean 销毁。。。");
}
}
配置类:
package com.dxz.demo.configuration;
import org.springframework.context.annotation.Bean;
@Configuration
// @Bean注解注册bean,同时可以指定初始化和销毁方法
// @Bean(name="testBean",initMethod="start",destroyMethod="cleanUp")
@Bean
@Scope("prototype")
public TestBean testBean() {
    return new TestBean();
}
}
主方法测试类:
package com.dxz.demo.configuration;
import org.springframework.context.ApplicationContext;
public class TestMain {
    // @Configuration注解的spring容器加载方式,用AnnotationConfigApplicationContext替换ClassPathXmlApplicationContext
    ApplicationContext context = new AnnotationConfigApplicationContext(TestConfiguration.class);

    // 如果加载spring-context.xml文件:
    // ApplicationContext context = new
    // ClassPathXmlApplicationContext("spring-context.xml");

     //获取bean
    TestBean tb = (TestBean) context.getBean("testBean");
    tb.sayHello();
}
}
结果:
注:
@Bean下管理bean的生命周期 可以使用基于 Java 的配置来管理 bean 的生命周期。@Bean 支持两种属性,即 initMethod 和destroyMethod,这些属性可用于定义生命周期方法。在实例化 bean 或即将销毁它时,容器便可调用生命周期方法。生命周期方法也称为回调方法,因为它将由容器调用。使用 @Bean 注释注册的 bean 也支持 JSR-250 规定的标准 @PostConstruct 和 @PreDestroy 注释。如果您正在使用 XML 方法来定义 bean,那么就应该使用 bean 元素来定义生命周期回调方法。以下代码显示了在 XML 配置中通常使用 bean 元素定义回调的方法。
@Configuration
@ComponentScan(basePackages = "com.dxz.demo.configuration")
public class TestConfiguration {
    public TestConfiguration() {
        System.out.println("TestConfiguration容器启动初始化。。。");
    }
//@Bean注解注册bean,同时可以指定初始化和销毁方法
@Bean(name="testBean",initMethod="start",destroyMethod="cleanUp")
@Scope("prototype")
public TestBean testBean() {
    return new TestBean();
}
}
启动类:
public class TestMain {
    public static void main(String[] args) {
    ApplicationContext context = new AnnotationConfigApplicationContext(TestConfiguration.class);

    TestBean tb = (TestBean) context.getBean("testBean");
    tb.sayHello();
    System.out.println(tb);

    TestBean tb2 = (TestBean) context.getBean("testBean");
    tb2.sayHello();
    System.out.println(tb2);
}
}
结果:
分析:
结果中的1:表明initMethod生效
结果中的2:表明@Scope(“prototype”)生效
1.3、@Configuration启动容器+@Component注册Bean
bean类:
package com.dxz.demo.configuration;
import org.springframework.stereotype.Component;
//添加注册bean的注解
private String username;
private String url;
private String password;

public void sayHello() {
    System.out.println("TestBean sayHello...");
}

public String toString() {
    return "username:" + this.username + ",url:" + this.url + ",password:" + this.password;
}

public void start() {
    System.out.println("TestBean 初始化。。。");
}

public void cleanUp() {
    System.out.println("TestBean 销毁。。。");
}
}
配置类:
package com.dxz.demo.configuration;
import org.springframework.context.annotation.Bean;
@Configuration
/*// @Bean注解注册bean,同时可以指定初始化和销毁方法
// @Bean(name="testNean",initMethod="start",destroyMethod="cleanUp")
@Bean
@Scope("prototype")
public TestBean testBean() {
    return new TestBean();
}*/
}
主方法测试获取bean对象:
package com.dxz.demo.configuration;
import org.springframework.context.ApplicationContext;
public class TestMain {
    // @Configuration注解的spring容器加载方式,用AnnotationConfigApplicationContext替换ClassPathXmlApplicationContext
    ApplicationContext context = new AnnotationConfigApplicationContext(TestConfiguration.class);

    // 如果加载spring-context.xml文件:
    // ApplicationContext context = new
    // ClassPathXmlApplicationContext("spring-context.xml");

     //获取bean
    TestBean tb = (TestBean) context.getBean("testBean");
    tb.sayHello();
}
}
sayHello()方法都被正常调用。
1.4、使用 AnnotationConfigApplicationContext 注册 AppContext 类的两种方法
1.4.1、 配置类的注册方式是将其传递给 AnnotationConfigApplicationContext 构造函数
public static void main(String[] args) {
    // @Configuration注解的spring容器加载方式,用AnnotationConfigApplicationContext替换ClassPathXmlApplicationContext
    ApplicationContext context = new AnnotationConfigApplicationContext(TestConfiguration.class);

    //获取bean
    TestBean tb = (TestBean) context.getBean("testBean");
    tb.sayHello();
}</pre>
1.4.2、 AnnotationConfigApplicationContext 的register 方法传入配置类来注册配置类
public static void main(String[] args) {
  ApplicationContext ctx = new AnnotationConfigApplicationContext();
  ctx.register(AppContext.class)
}
1.5、配置Web应用程序(web.xml中配置AnnotationConfigApplicationContext)
过去,您通常要利用 XmlWebApplicationContext 上下文来配置 Spring Web 应用程序,即在 Web 部署描述符文件 web.xml 中指定外部 XML 上下文文件的路径。XMLWebApplicationContext 是 Web 应用程序使用的默认上下文类。以下代码描述了 web.xml 中指向将由 ContextLoaderListener 监听器类载入的外部 XML 上下文文件的元素。
<web-app>
    <context-param>
        <param-name>contextConfigLocation</param-name>
        <param-value>/WEB-INF/applicationContext.xml</param-value>
    </context-param>
    <listener>
        <listener-class>
            org.springframework.web.context.ContextLoaderListener
        </listener-class>
    </listener>
    <servlet>
    <servlet-name>sampleServlet</servlet-name>
    <servlet-class>
        org.springframework.web.servlet.DispatcherServlet
    </servlet-class>
    </servlet>
…
现在,您要将 web.xml 中的上述代码更改为使用 AnnotationConfigApplicationContext 类。切记,XmlWebApplicationContext 是 Spring 为 Web 应用程序使用的默认上下文实现,因此您永远不必在您的web.xml 文件中显式指定这个上下文类。现在,您将使用基于 Java 的配置,因此在配置 Web 应用程序时,需要在web.xml 文件中指定 AnnotationConfigApplicationContext 类。上述代码将修改如下:
<web-app>
    <context-param>
        <param-name>contextClass</param-name>
        <param-value>
            org.springframework.web.context.
            support.AnnotationConfigWebApplicationContext
        </param-value>
    </context-param>
    <context-param>
        <param-name>contextConfigLocation</param-name>
        <param-value>
            demo.AppContext
        </param-value>
    </context-param>
    <listener>
        <listener-class>
            org.springframework.web.context.ContextLoaderListener
        </listener-class>
    </listener>
    <servlet>
    <servlet-name>sampleServlet</servlet-name>
    <servlet-class>
        org.springframework.web.servlet.DispatcherServlet
    </servlet-class>
    <init-param>
        <param-name>contextClass</param-name>
        <param-value>
            org.springframework.web.context.
            support.AnnotationConfigWebApplicationContext
        </param-value>
    </init-param>
    </servlet>
…
以上修改后的 web.xml 现在定义了 AnnotationConfigWebApplicationContext 上下文类,并将其作为上下文参数和 servlet 元素的一部分。上下文配置位置现在指向 AppContext 配置类。这非常简单。下一节将演示 bean 的生命周期回调和范围的实现。
1.6、@Configuation总结
@Configuation等价于<Beans></Beans>
@Bean等价于<Bean></Bean>
@ComponentScan等价于<context:component-scan base-package=”com.dxz.demo”/>
二、组合多个配置类
2.1、在@configuration中引入spring的xml配置文件
package com.dxz.demo.configuration2;
import org.springframework.context.annotation.Configuration;
@Configuration
bean类:
package com.dxz.demo.configuration2;
public class TestBean2 {
public void sayHello() {
    System.out.println("TestBean2 sayHello...");
}

public String toString() {
    return "TestBean2 username:" + this.username + ",url:" + this.url + ",password:" + this.password;
}

public void start() {
    System.out.println("TestBean2 初始化。。。");
}

public void cleanUp() {
    System.out.println("TestBean2 销毁。。。");
}
}
测试类:
package com.dxz.demo.configuration2;
import org.springframework.context.ApplicationContext;
public class TestMain2 {
    // @Configuration注解的spring容器加载方式,用AnnotationConfigApplicationContext替换ClassPathXmlApplicationContext
    ApplicationContext context = new AnnotationConfigApplicationContext(WebConfig.class);

    // 如果加载spring-context.xml文件:
    // ApplicationContext context = new
    // ClassPathXmlApplicationContext("spring-context.xml");

    // 获取bean
    TestBean2 tb = (TestBean2) context.getBean("testBean2");
    tb.sayHello();
}
}
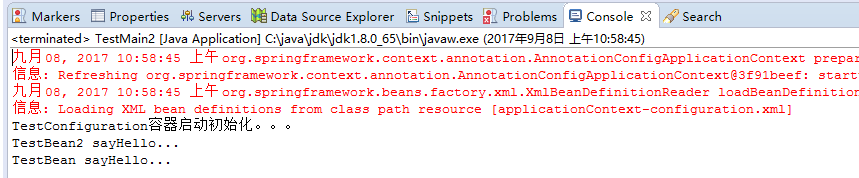
结果:
2.2、在@configuration中引入其它注解配置
package com.dxz.demo.configuration2;
import org.springframework.context.annotation.Configuration;
import com.dxz.demo.configuration.TestConfiguration;
@Configuration
测试类:
package com.dxz.demo.configuration2;
import org.springframework.context.ApplicationContext;
import com.dxz.demo.configuration.TestBean;
public class TestMain2 {
    // @Configuration注解的spring容器加载方式,用AnnotationConfigApplicationContext替换ClassPathXmlApplicationContext
    ApplicationContext context = new AnnotationConfigApplicationContext(WebConfig.class);

    // 如果加载spring-context.xml文件:
    // ApplicationContext context = new
    // ClassPathXmlApplicationContext("spring-context.xml");

    // 获取bean
    TestBean2 tb2 = (TestBean2) context.getBean("testBean2");
    tb2.sayHello();

    TestBean tb = (TestBean) context.getBean("testBean");
    tb.sayHello();
}
}
结果:
2.3、@configuration嵌套(嵌套的Configuration必须是静态类)
通过配置类嵌套的配置类,达到组合多个配置类的目的。但注意内部类必须是静态类。
上代码:
package com.dxz.demo.configuration3;
import org.springframework.stereotype.Component;
@Component
private String username;
private String url;
private String password;

public void sayHello() {
    System.out.println("TestBean sayHello...");
}

public String toString() {
    return "username:" + this.username + ",url:" + this.url + ",password:" + this.password;
}

public void start() {
    System.out.println("TestBean start");
}

public void cleanUp() {
    System.out.println("TestBean destory");
}
}
package com.dxz.demo.configuration3;
public class DataSource {
private String dbUser;
private String dbPass;
public String getDbUser() {
    return dbUser;
}
public void setDbUser(String dbUser) {
    this.dbUser = dbUser;
}
public String getDbPass() {
    return dbPass;
}
public void setDbPass(String dbPass) {
    this.dbPass = dbPass;
}
@Override
public String toString() {
    return "DataSource [dbUser=" + dbUser + ", dbPass=" + dbPass + "]";
}
}
配置类:
package com.dxz.demo.configuration3;
import org.springframework.context.annotation.Bean;
@Configuration
@Configuration
static class DatabaseConfig {
    @Bean
    DataSource dataSource() {
        return new DataSource();
    }
}
}
启动类:
package com.dxz.demo.configuration3;
import org.springframework.context.ApplicationContext;
public class TestMain {
    // @Configuration注解的spring容器加载方式,用AnnotationConfigApplicationContext替换ClassPathXmlApplicationContexts
    ApplicationContext context = new AnnotationConfigApplicationContext(TestConfiguration.class);

     //bean
    TestBean tb = (TestBean) context.getBean("testBean");
    tb.sayHello();

    DataSource ds = (DataSource) context.getBean("dataSource");
    System.out.println(ds);
}
}
结果:
TestConfiguration容器启动初始化。。。
TestBean sayHello...
DataSource [dbUser=null, dbPass=null]
3、@EnableXXX注解
配合@Configuration使用,包括 @EnableAsync, @EnableScheduling, @EnableTransactionManagement, @EnableAspectJAutoProxy, @EnableWebMvc。
@EnableAspectJAutoProxy—《spring AOP 之:@Aspect注解 》
@EnableScheduling–《Spring 3.1新特性之二:@Enable*注解的源码,spring源码分析之定时任务Scheduled注解 》
4、@Profile逻辑组配置
见《Spring的@PropertySource + Environment,@PropertySource(PropertySourcesPlaceholderConfigurer)+@Value配合使用 》
5、使用外部变量 1、@PropertySource + Environment,通过@PropertySource注解将properties配置文件中的值存储到Spring的 Environment中,Environment接口提供方法去读取配置文件中的值,参数是properties文件中定义的key值。
见《Spring的@PropertySource + Environment,@PropertySource(PropertySourcesPlaceholderConfigurer)+@Value配合使用 》


 已为社区贡献6条内容

所有评论(0)