element ui中实现upload文件、图片上传功能(el-upload)
·
文前推荐一下👉前端必备工具推荐网站(图床、API和ChatAI、智能AI简历、AI思维导图神器等实用工具):
站点入口:http://luckycola.com.cn/
图床:https://luckycola.com.cn/public/dist/#/imghub
多种API:https://luckycola.com.cn/public/dist/#/
ChatAI:https://luckycola.com.cn/public/dist/#/chatAi
AI思维导图神器:https://luckycola.com.cn/public/dist/#/aiQStore/aiMindPage
vue2结合Element实现文件上传
前言:一些信息化或后台项目开发中,避免不了上传文件的功能,这篇文章可以学会文件上传功能,这次我拿添加图片来实现此功能
- 需要准备一个oss云储存地址和element ui中upload组件
1. 第一步,先选择一个upload组件
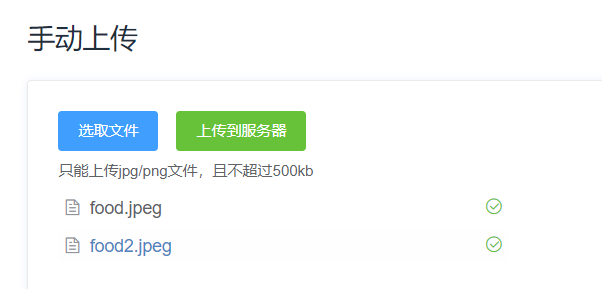
- 这里我推荐大家选择手动上传的,这样不会因为选错文件而浪费oss资源(自动上传的小弊端)

- 我们复制代码做一些自己的改造,需要用到Dialog对话框
2.第二步,对代码进行改造
- 先放上template中代码
<template>
  <div>
   <!-- 这里是添加一个出发对话框的按钮 -->
    <el-row style="margin:20px 10px">
      <el-col align="right">
        <el-button type="primary" @click="addDialogVisible = true">添加轮播图</el-button>
      </el-col>
    </el-row>
     <!-- 添加轮播图 -->
    <el-dialog title="添加轮播图" :visible.sync="addDialogVisible" width="50%">
      <p style="margin:20px 0">上传图片:</p>
       <!--
          ref:代表此上传组件的标识
          action:用于放文件存储的地址
          accept:限制可以上传/选的文件类型后缀。这里我只需要图片,所以我设置了.jpg和.png
          file-list:文件列表
          on-change:文件列表改变后触发,用于判断一些文件大小等逻辑
          on-success:文件上传服务器成功后执行
          on-error:上传服务器失败后执行
          limit:每次上传的文件个数
        -->
      <el-upload
        class="upload-demo"
        ref="fileUpload"
        action="这里就是放oss云储存地址"
        accept=".jpg, .png"
        :on-change="handleChange"
        :on-success="handleSuc"
        :on-error="handleError"
        :file-list="fileList"
        :auto-upload="false"
        :limit="1"
      >
        <el-button slot="trigger" size="small" type="primary">选取文件</el-button>
          <!-- 点击触发上传服务器  -->
        <el-button
          style="margin-left: 10px;"
          size="small"
          type="success"
          @click="submitUpload"
        >上传到服务器</el-button>
          <!-- 给出文件提示 -->
        <div slot="tip" class="el-upload__tip el-icon-warning">只能上传jpg/png文件,且不能超过10mb、文件只能选取一个</div>
        <br />
        <div slot="tip" class="el-upload__tip el-icon-warning">选取文件后应上传服务器</div>
      </el-upload>
        <!-- 上传服务器后图片回显 -->
      <img :src="addBanner.bannerUrl" alt width="200" style="margin:20px auto;display: block;" />
      <div slot="footer" class="dialog-footer">
        <!-- 点击取消后执行一些列清空操作 -->
        <el-button @click="cancel()">取 消</el-button>
          <!-- 最后执行向API添加数据 -->
        <el-button type="primary" @click="submitAdd()">点击添加</el-button>
      </div>
    </el-dialog>
      </div>
</template>
- 接下来是script中数据及方法部分
<script>
//获取添加的API,根据后端API自己写
import pggwBannerApi from "@/api/pggw/banner";
export default {
  data() {
    return {
      //控制添加图片对话框
      addDialogVisible: false,
      //需要向后端传递的对象
      addBanner: {
        bannerUrl: "",
      },
      //文件列表
      fileList: [],
    };
  },
  //这里采用监听来监听对话框的状态
   watch: {
    addDialogVisible: function () {
      if (this.addDialogVisible == false) {
      //如果为false,执行取消操作
        this.cancel();
      }
    },
  },
  //放方法的地方
  methods: {
    //文件状态改变时的钩子,判断文件大小
    handleChange(files, fileList) {
    //这些参数是组件自带的
    //控制上传文件的大小
      if (!(files.size / 1024 / 1024 < 10)) {
        this.$refs.fileUpload.clearFiles();
        this.fileLists = [];
        this.$notify.error({
          title: "文件大小错误",
          message: "上传文件大小不能超过 10MB!",
          duration: 2000,
        });
        return;
      }
    },
     //上传服务器,点击了上传服务器才会触发下面文件上传成功或失败的钩子
    submitUpload() {
    //这里是组件自带的submit()手动上传的方法,fileUpload是我们定义的ref
      this.$refs.fileUpload.submit();
    },
    //文件上传成功时的钩子
    handleSuc(response) {
    //文件上传成功后要把oss生成的文件路径给到图片的url
    //这样完成回显图片
      this.addBanner.bannerUrl = response.data.url;
      //上传成功处理
      return this.$notify.success({
        title: "成功",
        message: "文件上传成功",
        duration: 2000,
      });
    },
    // 上传失败
    handleError(err) {
      //上传失败处理
      return this.$notify.error({
        title: "上传失败",
        message: "文件上传失败",
        duration: 3000,
      });
    },

    //添加轮播图按钮
    submitAdd() {
      //开关类型布尔值
      var flag = true;
      //判断对象中的值是否为空,用来控制上传前传递参数对象有没有空值(必填项)
      for (var keys in this.addBanner) {
        if (!this.addBanner[keys].trim()) {
          flag = false;
          break;
        }
      }
      //关闭所有的消息提醒,解决无限消息弹框问题
      this.$notify.closeAll();
      this.$message.closeAll();
      if (flag) {
        this.$confirm("您确定添加此轮播图", "提示", {
          confirmButtonText: "确定",
          cancelButtonText: "取消",
          type: "warning",
        })
          .then(() => {
       //这里我们就调用写好的api,向后端传递一个对象参数
            pggwBannerApi
              .addBanner(this.addBanner)
              .then((res) => {
                //添加成功的话,提示一个添加成功
                if (res.code == 20000) {
                  return this.$message({
                    type: "success",
                    message: "添加成功!",
                  });
                }
              })
              .catch((err) => {
                console.log(err);
                this.$message({
                  type: "error",
                  message: "添加失败",
                });
              });
          })
          .catch(() => {
            this.$message({
              type: "info",
              message: "已取消添加",
            });
          });
      } else {
        return this.$notify({
          title: "警告",
          message: "请填写完整之后提交",
          type: "warning",
          duration: 1500,
        });
      }
    },
    //点击取消,把对话框重置
    cancel() {
      this.addDialogVisible = false;
       //把对象参数里的值清空
      this.addBanner.bannerUrl = "";
      //再把文件列表清空
      this.$refs.fileUpload.clearFiles();
    },
  },
}
</script>
到这代码已经完毕,学到的伙伴点个赞吧
更多推荐:wantLG的《普歌-码上鸿鹄团队:vue中使用swiper动态遍历数据时出现不轮播的情况》
- 作者:wantLG
- 本文源自:wantLG的《普歌-码上鸿鹄团队:element ui中实现upload文件、图片上传功能(el-upload)》
- 本文版权归作者和CSDN共有,欢迎转载,且在文章页面明显位置给出原文链接,未经作者同意必须保留此段声明,否则保留追究法律责任的权利。
更多推荐
 已为社区贡献8条内容


所有评论(0)