vue2 使用vue-print-nb实现打印功能
·
记录使用vue-print-nb插件实现打印功能的过程。
参考文章Vue使用插件vue-print-nb实现当前页面打印功能

- vue2安装及引入
安装
npm install vue-print-nb --save引入
// 1. 全局挂载,在main.js添加
import Print from 'vue-print-nb'
Vue.use(Print)
// or
// 2. 自定义指令,在单业务页面添加
import print from 'vue-print-nb'
directives: {
  print
}
- vue3安装及引入
安装
npm install vue3-print-nb --save
引入
// 1. 全局挂载
import { createApp } from 'vue'
import App from './App.vue'
import print from 'vue3-print-nb'
const app = createApp(App)
app.use(print)
app.mount('#app')
// or
// 2. 自定义指令
import print from 'vue3-print-nb'
directives: {
    print
}
- 使用
给打印的区域设置id值
<template>
  <div class="vuePrintNb-container" id="NbAllPage">
    <div class="button-container">
      <el-button type="primary" class="common-button" v-print="'#NbImgPrint'">打印图片</el-button>
      <el-button type="primary" class="common-button" v-print="'#NbJsonPrint'">打印表格</el-button>
      <el-button type="primary" class="common-button" v-print="'#NbAllPage'">打印html</el-button>
    </div>
    <div class="img-container wrap-style" id="NbImgPrint">
      <div v-for="item in 4">
        <img :src="Logo" alt="" class="logo-img">
      </div>
    </div>
    <div class="json-container wrap-style" id="NbJsonPrint">
      <el-table
        :data="tableData"
        border
        :header-cell-style="{background: variables.tableHeaderBackGroundColor, color: variables.tableHeaderColor}"
      >
        <el-table-column label="活动" prop="title"></el-table-column>
        <el-table-column label="描述" prop="decs"></el-table-column>
        <el-table-column label="状态" prop="state"></el-table-column>
        <el-table-column label="活动时间" prop="created_at"></el-table-column>
      </el-table>
    </div>
  </div>
</template>
打印的指令值可以是 具体的id值
<el-button type="primary" class="common-button" v-print="'#NbAllPage'">打印html</el-button>也可以是对象
<el-button type="primary" class="common-button" v-print="'printObject'">打印html</el-button>export default {
name: 'index',
data(){
let that = this
return {
printObject: {
id: 'NBAllPage',
popTitle: '配置页眉标题', // 打印配置页上方的标题
extraHead: '打印', // 最上方的头部文字,附加在head标签上的额外标签,使用逗号分割
preview: true, // 是否启动预览模式,默认是false
previewTitle: '预览的标题', // 打印预览的标题
previewPrintBtnLabel: '预览结束,开始打印', // 打印预览的标题下方的按钮文本,点击可进入打印
zIndex: 20002, // 预览窗口的z-index,默认是20002,最好比默认值更高
previewBeforeOpenCallback () {
console.log('正在加载预览窗口!');
console.log(that.msg, this)
}, // 预览窗口打开之前的callback
previewOpenCallback () {
console.log('已经加载完预览窗口,预览打开了!')
}, // 预览窗口打开时的callback
beforeOpenCallback () {
console.log('开始打印之前!')
}, // 开始打印之前的callback
openCallback () {
console.log('执行打印了!')
}, // 调用打印时的callback
closeCallback () {
console.log('关闭了打印工具!')
}, // 关闭打印的callback(无法区分确认or取消)
clickMounted () {
console.log('点击v-print绑定的按钮了!')
},
// url: 'http://localhost:8080/', // 打印指定的URL,确保同源策略相同
// asyncUrl (reslove) {
// setTimeout(() => {
// reslove('http://localhost:8080/')
// }, 2000)
// },
}
}
},
}打印对象的回调函数内,this指向当前printObject object对象,that返回Vue对象;
若想实现分页,给要分页的元素加上page-break-after: always;
<style lang="scss" scoped>
.wrap-style{
  page-break-after: always;
}
</style>
打印时发现,打印的效果不是想要的,或者表格边框线显示不全,使用媒体查询设置打印的样式
<style media="print" lang="scss">
// 修改页边距
@page {
  //size: auto;
  //margin: 3mm;
}
// 媒体查询, 打印时修改样式
@media print {
  #NbAllPage{
    width: 1200px;
    zoom: 0.8;
    margin: 0 auto;
  }
  .el-table{
    border: 3px solid #606060;
  }
  .el-table__header-wrapper {
    border-bottom: 3px solid #606060;
  }
  .el-table > .el-table__header-wrapper > .el-table__header > thead > tr > th{
    border-right: 3px solid #606060 !important;
  }
  .el-table > .el-table__body-wrapper > .el-table__body > tbody > .el-table__row > td{
    border-bottom: 3px solid #606060 !important;
    border-right: 3px solid #606060 !important;
  }
}
</style>- 效果图
I. 只打印图片

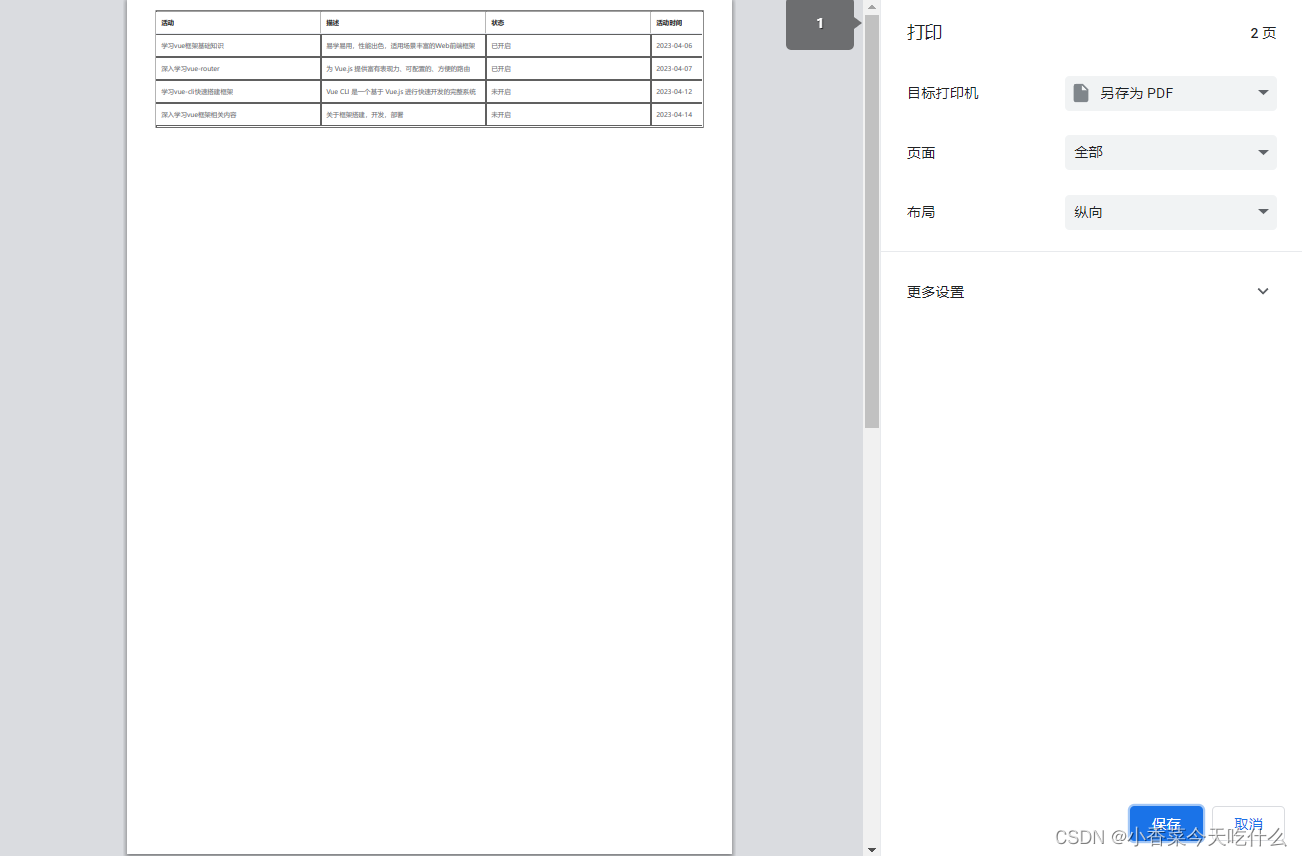
II. 只打印表格

III. 打印整个页面

- 配置参数


更多推荐
 已为社区贡献7条内容


所有评论(0)